Introduction
Welcome to this guide on how to add the Merkury Smart Video Doorbell to your home! With the rise of smart home technology, video doorbells have become a popular addition to many households. The Merkury Smart Video Doorbell is a reliable and feature-packed option that provides enhanced security and convenience.
The Merkury Smart Video Doorbell allows you to see and speak to visitors at your front door from your smartphone or tablet, even when you’re not at home. It offers advanced features such as motion detection, night vision, and two-way audio communication. Not only does this provide peace of mind, but it also adds an extra layer of security to your home.
In this guide, we will take you through the step-by-step process of unboxing, installing, and setting up your Merkury Smart Video Doorbell. Whether you’re a tech-savvy individual or a beginner, don’t worry – this guide is designed to be clear and easy to follow.
We’ll start by unboxing the Merkury Smart Video Doorbell and familiarizing ourselves with the contents. Then, we’ll guide you through installing the Merkury Smart Video Doorbell app on your device, connecting the doorbell to your Wi-Fi network, and mounting it on your front door or entrance. You’ll also learn how to adjust the doorbell’s settings to personalize it according to your preferences.
Finally, we’ll conclude by guiding you on how to test your newly installed Merkury Smart Video Doorbell to ensure that everything is working perfectly.
Now, let’s dive into the exciting world of smart home technology and learn how to add the Merkury Smart Video Doorbell to your home!
Step 1: Unboxing the Merkury Smart Video Doorbell
Before we start the installation process, let’s unbox the Merkury Smart Video Doorbell and familiarize ourselves with its components. By doing so, you’ll have a better understanding of what you’ll be working with.
When you open the Merkury Smart Video Doorbell package, you’ll find the following items:
- The Merkury Smart Video Doorbell
- A mounting bracket
- Screws and anchors
- A charging cable
- A user manual

Take a moment to inspect each item and ensure that everything is in good condition. Check for any signs of damage or missing components. If you notice any issues, reach out to the manufacturer for assistance.
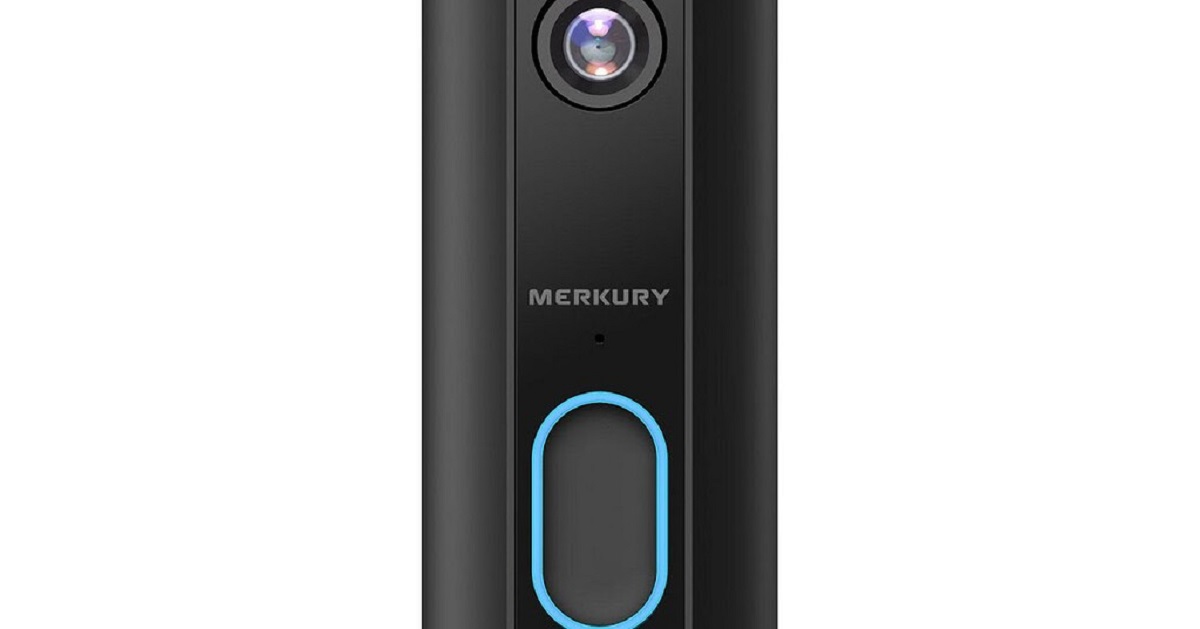
The Merkury Smart Video Doorbell itself has a sleek and modern design, featuring a camera lens, built-in microphone and speaker, as well as a LED indicator light. It’s important to handle the doorbell with care, especially the camera lens, to avoid any scratches or damage.
Next, take a look at the mounting bracket and screws. The mounting bracket is used to attach the doorbell to your front door or entrance. Make sure the bracket is sturdy and in good condition. The screws and anchors provided will be used for securing the bracket to your door or wall.
The included charging cable is used to power up the Merkury Smart Video Doorbell. It can be plugged into a standard USB port or a power adapter. Ensure that the cable is undamaged and functioning properly.
Lastly, take a moment to review the user manual. It provides detailed instructions on how to install and set up the Merkury Smart Video Doorbell. Familiarize yourself with the manual, as it will be a valuable resource throughout the installation process.
With the Merkury Smart Video Doorbell unboxed and all the components examined, you’re now ready to move on to the next step: installing the Merkury Smart Video Doorbell app on your device.
Step 2: Installing the Merkury Smart Video Doorbell App
Now that you have unboxed the Merkury Smart Video Doorbell, it’s time to install the dedicated app on your smartphone or tablet. The app will serve as your gateway to accessing and managing the features of your video doorbell.
Follow these steps to install the Merkury Smart Video Doorbell app:
- Unlock your device and open the app store. If you’re using an iPhone or iPad, open the App Store, and if you’re using an Android device, open the Google Play Store.
- Once you’re in the app store, search for the “Merkury Smart” app in the search bar.
- Locate the official Merkury Smart app developed by Merkury Innovations and tap on it to open the app page.
- Tap on the “Install” or “Get” button to download and install the app on your device. Wait for the installation process to complete.
- Once the app is installed, you’ll see the app icon on your home screen or in your app drawer. Tap on the icon to open the Merkury Smart app.
The Merkury Smart app may require certain permissions, such as access to your device’s camera, microphone, and location. Grant the necessary permissions to ensure that the app functions correctly.
After opening the app for the first time, you’ll need to create an account or log in if you already have one. Follow the on-screen prompts to complete the account creation process.
Once you have logged in, navigate to the settings or device section of the app. Look for the option to add a new device or connect a video doorbell. Select this option to begin the pairing process.
The app will guide you through the steps to connect the doorbell to your Wi-Fi network. Make sure you have your Wi-Fi credentials handy as you’ll need to enter them during the setup process.
Follow the in-app instructions to complete the pairing and setup procedure. The app will prompt you to scan a QR code or enter a unique identification number to locate and connect to your Merkury Smart Video Doorbell.
Once the pairing process is complete, you’ll be able to access the live feed from your video doorbell, customize motion detection settings, and review recorded footage, among other features, directly from the app.
Congratulations! You have successfully installed the Merkury Smart Video Doorbell app on your device and connected your doorbell to your network. Now, it’s time to move on to the next step: connecting the Merkury Smart Video Doorbell to Wi-Fi.
Step 3: Connecting the Merkury Smart Video Doorbell to Wi-Fi
After installing the Merkury Smart Video Doorbell app, the next step is to connect your video doorbell to your Wi-Fi network. This will allow you to remotely access and control your doorbell from anywhere using your smartphone or tablet.
Here’s how you can connect the Merkury Smart Video Doorbell to your Wi-Fi network:
- Open the Merkury Smart app on your device and navigate to the device settings or Wi-Fi configuration section.
- Look for the option to “Add New Device” or “Connect to Wi-Fi” and select it.
- Choose your Wi-Fi network from the list of available networks. If your network is hidden, you may need to manually enter the SSID (network name) and password.
- Enter your Wi-Fi network password when prompted. Make sure to double-check for any typos or errors.
- Wait for the Merkury Smart Video Doorbell to connect to your Wi-Fi network. This may take a minute or two. Once connected, you should see a confirmation message in the app.
It’s important to note that during this process, your smartphone or tablet needs to be connected to the same Wi-Fi network that you want to connect the Merkury Smart Video Doorbell to. This enables the app to communicate with the doorbell and facilitate the connection.
If the connection process fails, make sure you have entered the correct Wi-Fi credentials and that your Wi-Fi network is functioning properly. You may need to move your device closer to the router or check if there are any network connectivity issues.
Once the Merkury Smart Video Doorbell is successfully connected to your Wi-Fi network, it will have the ability to send real-time notifications to your device when someone rings the doorbell or triggers the motion detection feature. You’ll also be able to access the live video feed and communicate with visitors using the two-way audio function.
Now that your Merkury Smart Video Doorbell is connected to Wi-Fi, it’s time to move on to the next step: mounting the doorbell on your front door or entrance.
Step 4: Mounting the Merkury Smart Video Doorbell
With the Merkury Smart Video Doorbell connected to your Wi-Fi network, it’s time to mount the doorbell on your front door or entrance. Proper installation ensures that the doorbell will work effectively and provide clear video footage and audio communication.
Follow these steps to mount the Merkury Smart Video Doorbell:
- Select the ideal location on your front door or entrance to mount the doorbell. Make sure the chosen spot provides a clear view of the area you want to monitor.
- If necessary, use a pencil to mark the spots where you will be drilling holes for the mounting bracket. Ensure that the markings are straight and aligned.
- Use a drill to create the necessary holes for the screws and anchors. The size of the drill bit should match the size of the provided screws and anchors.
- Insert the anchors into the drilled holes. This will provide additional support and stability for the mounting bracket.
- Attach the mounting bracket to your front door or entrance using the provided screws. Tighten them securely but avoid overtightening.
- Carefully align the Merkury Smart Video Doorbell with the mounting bracket and slide it into place. Make sure it sits securely and is level.

Once the doorbell is mounted, give it a gentle pull or wiggle to confirm that it’s securely attached. It’s important to ensure that the doorbell is firmly in place to prevent it from being accidentally knocked off or tampered with.
Take a moment to step back and check the positioning of the Merkury Smart Video Doorbell. Make sure it’s aligned properly and offers the desired view of the area. Adjust the angle if necessary.
Remember to consider factors such as the height of the doorbell and the visibility of the camera lens to capture the best possible footage.
Now that the Merkury Smart Video Doorbell is securely mounted on your front door, it’s time to move on to the next step: adjusting the doorbell’s settings to customize its functionality to your preference.
Step 5: Adjusting the Merkury Smart Video Doorbell’s Settings
After successfully mounting the Merkury Smart Video Doorbell, it’s important to adjust its settings to personalize its functionality according to your preferences. Customizing the settings will enable you to optimize the doorbell’s performance and ensure it meets your specific needs.
Follow these steps to adjust the Merkury Smart Video Doorbell’s settings:
- Open the Merkury Smart app on your device and navigate to the device settings or preferences section.
- Explore the available options to customize the doorbell’s functionality. These options may include:
- Motion Detection: Adjust the sensitivity, range, or specific zones for detecting motion. This allows you to fine-tune the camera’s response to movement.
- Notifications: Configure the notification settings to receive alerts for doorbell rings, motion detection, or other events. You can choose to receive push notifications, emails, or both.
- Video Quality: Select the desired video resolution based on your network speed and preferences. Higher resolutions offer clearer footage but may require more bandwidth.
- Two-Way Audio: Enable or adjust the volume and microphone sensitivity for the two-way audio communication feature. This allows you to speak to visitors from your device when they ring the doorbell.
- Night Vision: If your Merkury Smart Video Doorbell has night vision capabilities, adjust the settings for optimal viewing in low-light conditions.
- Make the desired adjustments to each setting based on your preferences. Take your time to experiment with different configurations to find the optimal setup.
- Once you have customized the settings, make sure to save your changes by selecting the “Save” or “Apply” button.
Remember that the available settings may vary depending on the model of your Merkury Smart Video Doorbell. Refer to the user manual or the app’s documentation for specific instructions based on your device.
It’s recommended to periodically review and adjust the settings as needed to adapt to changing conditions or any specific requirements you may have.
With the Merkury Smart Video Doorbell’s settings adjusted to your liking, you’re now ready to enjoy the enhanced security and convenience it offers. But before you do, there’s one final step: testing the functionality of your newly installed video doorbell.
Step 6: Testing the Merkury Smart Video Doorbell
Now that you have completed the installation and configuration process of the Merkury Smart Video Doorbell, it’s time to put it to the test. By conducting a thorough test, you can ensure that the doorbell is functioning properly and enjoy the full benefits of its features.
Follow these steps to test the Merkury Smart Video Doorbell:
- Ensure that your smartphone or tablet is connected to the same Wi-Fi network as the Merkury Smart Video Doorbell.
- Open the Merkury Smart app and navigate to the live view section or the area where you can access the video feed from your doorbell.
- Ring the doorbell or ask a friend or family member to stand in front of the door and trigger the motion detection feature.
- Observe if the doorbell sends you a real-time notification on your device when the doorbell rings or detects motion. Check if you receive a push notification and/or an alert via email, depending on your settings.
- Open the app and confirm if you can access the live video feed from the doorbell. Check for clarity and make sure you can see and hear the visitor clearly.
- Engage in a two-way audio conversation by speaking through the app and verifying if the audio quality is satisfactory.
- If your Merkury Smart Video Doorbell has night vision capabilities, test it by checking if the camera switches to night vision mode when the surrounding light is dim or dark.
During the testing phase, pay attention to any unusual behavior or issues that arise. If you encounter any problems, refer to the user manual or consult the manufacturer’s support channels for troubleshooting assistance.
Once you have completed the test and are satisfied with the performance of the Merkury Smart Video Doorbell, you can rest assured knowing that you have successfully installed and configured a reliable and feature-packed device to enhance the security and convenience of your home.
Congratulations on completing the installation, setup, and testing process of the Merkury Smart Video Doorbell. You can now enjoy the peace of mind and control that it brings. Welcome to the world of smart home technology!
Conclusion
Adding the Merkury Smart Video Doorbell to your home is a straightforward process that can greatly enhance your security and convenience. Throughout this guide, we have walked you through the step-by-step process of unboxing, installing, connecting, mounting, adjusting settings, and testing the Merkury Smart Video Doorbell.
By following these steps, you have successfully installed a reliable and feature-packed video doorbell that allows you to see and speak to visitors at your front door from anywhere using your smartphone or tablet. The Merkury Smart Video Doorbell provides advanced features such as motion detection, night vision, and two-way audio communication, giving you peace of mind and an extra layer of security.
Remember to take the time to unbox the Merkury Smart Video Doorbell, ensuring that all the components are intact and in good condition. Install the dedicated Merkury Smart app on your device to gain full access to the doorbell’s features and functionalities. Connect the doorbell to your Wi-Fi network for seamless communication and control.
Properly mount the Merkury Smart Video Doorbell on your front door or entrance, ensuring that it is securely attached and offers a clear view of the area you want to monitor. Adjust the settings according to your preferences, fine-tuning features such as motion detection sensitivity, notifications, video quality, two-way audio, and night vision.
Finally, conduct a thorough test of your Merkury Smart Video Doorbell to ensure that it is functioning properly and that you’re satisfied with its performance. Address any issues or concerns that arise during the testing phase.
With the Merkury Smart Video Doorbell installed and tested, you can now enjoy the peace of mind and convenience it brings to your home. Stay connected and in control, knowing that you can monitor and interact with visitors at your front door even when you’re away.
Thank you for choosing the Merkury Smart Video Doorbell and following this guide. We hope you find it helpful and that the doorbell proves to be a valuable addition to your home security setup. If you have any further questions or require assistance, consult the user manual or reach out to the Merkury Smart support team.
Enjoy the benefits of a smart and secure home with the Merkury Smart Video Doorbell!