Introduction
Are you looking to unlock the full potential of your Redmi 2 smartphone? One of the most effective ways to do so is by installing a custom recovery. This comprehensive guide will walk you through the process of installing a custom recovery on your Redmi 2, allowing you to take control of your device and customize it to your heart's content.
Custom recoveries offer a gateway to a world of possibilities for Android users. By replacing the stock recovery that comes pre-installed on your device, a custom recovery provides advanced features and functionalities that are not available with the standard recovery. Whether you're a tech enthusiast, a developer, or simply someone who wants to explore the endless customization options available for your Redmi 2, installing a custom recovery is a crucial step in unleashing the full potential of your device.
In this guide, we will delve into the concept of custom recoveries, explore the benefits of installing one on your Redmi 2, and provide a detailed walkthrough on how to prepare your device for custom recovery installation. By the end of this guide, you will have the knowledge and confidence to embark on this exciting journey of enhancing your Redmi 2's capabilities through the installation of a custom recovery. So, let's dive in and unlock the true power of your Redmi 2!
What is a Custom Recovery?
A custom recovery is a third-party recovery environment that offers advanced features and functionalities beyond what the stock recovery provides on Android devices. It serves as a vital tool for modifying, customizing, and troubleshooting your device, making it an essential component for tech-savvy users and developers.
One of the primary functions of a custom recovery is to facilitate the installation of custom ROMs, which are customized versions of the Android operating system. Unlike the stock recovery, a custom recovery allows users to flash custom ROMs, enabling them to personalize their device's interface, features, and performance according to their preferences. This capability opens up a world of customization options, empowering users to tailor their Android experience to suit their unique needs and style.
Additionally, a custom recovery enables users to perform full system backups and restores, providing a safeguard against data loss and allowing for seamless device migration or recovery in the event of software issues. This feature is particularly valuable for users who frequently experiment with custom ROMs, kernels, or modifications, as it offers a reliable method for preserving their device's state and data.
Moreover, custom recoveries offer advanced options for clearing device caches, performing factory resets, and managing partitions, giving users greater control over their device's storage and performance. These capabilities are instrumental in troubleshooting software issues, optimizing device performance, and maintaining the overall health of the device.
Furthermore, custom recoveries often include additional tools and utilities for advanced users and developers, such as ADB sideload, terminal access, and file management functionalities. These tools empower users to interact with their device at a deeper level, enabling tasks such as flashing individual components, executing commands, and managing files directly from the recovery environment.
In essence, a custom recovery serves as a gateway to a realm of customization, optimization, and innovation for Android devices. By providing a feature-rich and flexible environment outside of the standard operating system, custom recoveries empower users to push the boundaries of what their devices can achieve, making them an indispensable asset for those seeking to unlock the full potential of their Android device.
Benefits of Installing a Custom Recovery
Installing a custom recovery on your Redmi 2 offers a myriad of benefits that elevate your Android experience to new heights. Here are the compelling advantages of embracing a custom recovery:
-
Custom ROM Installation: With a custom recovery, you gain the ability to install custom ROMs, which are personalized versions of the Android operating system. This opens the door to a diverse array of customizations, themes, and features that are not available in the stock ROM. Whether you seek enhanced performance, unique visual styles, or exclusive functionalities, custom ROMs empower you to tailor your device to reflect your individual preferences and needs.
-
Full System Backups and Restores: Custom recoveries enable you to create complete backups of your device's system, including the operating system, applications, and data. This feature provides a safety net for your device, allowing you to restore to a previous state in the event of software issues, failed modifications, or data loss. By preserving your device's entire system configuration, custom recoveries offer peace of mind and reassurance, especially for users who frequently experiment with customizations and modifications.
-
Advanced System Maintenance: Custom recoveries provide advanced tools for managing your device's system, including options for clearing caches, performing factory resets, and managing partitions. These functionalities are invaluable for optimizing device performance, resolving software issues, and maintaining the overall health of your Redmi 2. By offering granular control over system maintenance tasks, custom recoveries empower you to keep your device running smoothly and efficiently.
-
Custom Kernel and Modification Support: Custom recoveries facilitate the installation of custom kernels and modifications, allowing you to fine-tune your device's performance, battery life, and hardware capabilities. Whether you seek to overclock your device for enhanced performance or implement specific tweaks to optimize battery usage, custom kernels and modifications offer a level of customization and control that goes beyond the standard capabilities of the stock ROM.
-
Developer and Power User Tools: Custom recoveries often include advanced utilities and tools that cater to developers and power users. Features such as ADB sideload, terminal access, and file management functionalities provide a platform for executing commands, flashing individual components, and managing files directly from the recovery environment. These tools empower users to interact with their device at a deeper level, enabling advanced tasks and customizations that are not accessible through the standard operating system.
In summary, installing a custom recovery on your Redmi 2 unlocks a realm of possibilities, empowering you to personalize, optimize, and innovate with your device. From custom ROMs and system backups to advanced maintenance and developer tools, the benefits of embracing a custom recovery are instrumental in elevating your Android experience to a whole new level of customization and control.
Preparing Your Redmi 2 for Custom Recovery Installation
Before embarking on the installation of a custom recovery on your Redmi 2, it is crucial to prepare your device to ensure a smooth and successful process. The following steps will guide you through the essential preparations required to set the stage for custom recovery installation:
-
Unlocking the Bootloader: The first step in preparing your Redmi 2 for custom recovery installation is to unlock the device's bootloader. The bootloader acts as a security checkpoint that verifies and loads the operating system on your device. By unlocking the bootloader, you gain the ability to install custom recoveries and custom ROMs, granting you greater control over your device's software. It's important to note that unlocking the bootloader may void the device's warranty and erase all data, so be sure to back up any important information before proceeding.
-
Enabling USB Debugging: USB debugging is a crucial setting that allows your Redmi 2 to communicate with a computer via a USB connection. To enable USB debugging, navigate to the device's settings, select "About phone," and tap on the "Build number" multiple times until the message "You are now a developer" appears. Then, go back to the main settings menu, select "Developer options," and enable USB debugging.
-
Installing ADB and Fastboot Tools: ADB (Android Debug Bridge) and Fastboot are essential command-line tools for interacting with Android devices during the custom recovery installation process. To install these tools on your computer, you can download the Android SDK platform tools package or opt for standalone ADB and Fastboot installer packages available online. Once installed, ensure that the ADB and Fastboot tools are accessible from the command line on your computer.
-
Backing Up Your Data: Before proceeding with custom recovery installation, it is highly recommended to back up all important data on your Redmi 2. This includes personal files, photos, videos, and any other data that you wish to preserve. While the installation process itself may not necessarily erase your data, it is always prudent to have a comprehensive backup as a precautionary measure.
By diligently completing these preparatory steps, you will lay a solid foundation for the subsequent installation of a custom recovery on your Redmi 2. These preparations are essential to ensure that the installation process proceeds smoothly and that your device is ready to embrace the enhanced capabilities and customization options that a custom recovery offers.
Installing Custom Recovery on Redmi 2
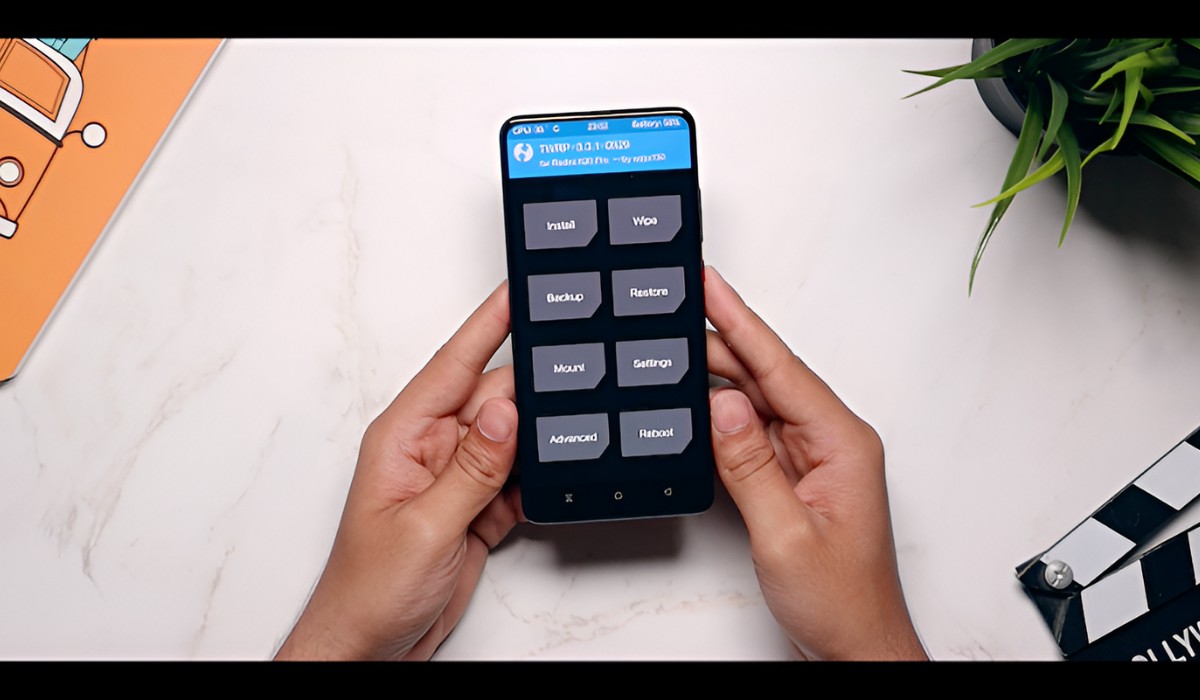
Now that you have diligently prepared your Redmi 2 for custom recovery installation, it's time to embark on the exciting process of installing a custom recovery. In this section, we will guide you through the step-by-step procedure to install TWRP (Team Win Recovery Project), one of the most popular custom recoveries, on your Redmi 2. TWRP offers a user-friendly interface and a robust set of features, making it an ideal choice for custom recovery installation.
-
Download TWRP for Redmi 2: Begin by downloading the TWRP recovery image specifically designed for the Redmi 2. Ensure that you obtain the correct TWRP version for your device model to avoid compatibility issues. You can find the official TWRP releases for the Redmi 2 on the TWRP website or reputable Android development forums.
-
Enable Developer Options and USB Debugging: On your Redmi 2, navigate to the device's settings and select "About phone." Tap on the "MIUI version" multiple times until the message "You are now a developer" appears. Then, go back to the main settings menu, select "Additional settings," followed by "Developer options," and enable USB debugging.
-
Connect Your Redmi 2 to Your Computer: Use a USB cable to connect your Redmi 2 to your computer. Ensure that USB debugging is enabled on your device to allow for seamless communication between the device and the computer.
-
Open a Command Prompt or Terminal Window: On your computer, navigate to the directory where the ADB and Fastboot tools are located. Open a command prompt or terminal window in this directory to execute ADB and Fastboot commands.
-
Boot Your Redmi 2 into Fastboot Mode: With your Redmi 2 connected to the computer, reboot the device into Fastboot mode. You can do this by issuing the following command in the command prompt or terminal window:
adb reboot bootloader. This command instructs your device to enter Fastboot mode, allowing it to communicate with the computer for the custom recovery installation. -
Flash TWRP Recovery: Once your Redmi 2 is in Fastboot mode, you can proceed to flash the TWRP recovery image onto the device. Issue the following command in the command prompt or terminal window:
fastboot flash recovery <twrp_filename.img>. Replace<twrp_filename.img>with the actual filename of the TWRP recovery image you downloaded. This command transfers the TWRP recovery image from your computer to the Redmi 2's recovery partition, effectively installing TWRP as the custom recovery. -
Reboot into TWRP Recovery: After successfully flashing TWRP, reboot your Redmi 2 into the newly installed custom recovery. Issue the command
fastboot rebootin the command prompt or terminal window to restart the device. Once the device has rebooted, use the hardware key combination specific to your device to enter the recovery mode. For most devices, this involves pressing a combination of the power and volume buttons during the boot process.
Congratulations! You have successfully installed TWRP custom recovery on your Redmi 2. With TWRP now at your disposal, you can explore a wealth of customization options, perform system backups, and unleash the full potential of your device through custom ROM installations and advanced system modifications. Embrace the newfound freedom and flexibility that TWRP brings to your Redmi 2, and embark on an exciting journey of Android customization and innovation.
Conclusion
In conclusion, the installation of a custom recovery on your Redmi 2 marks the beginning of an exhilarating journey into the realm of Android customization and innovation. By embracing a custom recovery, you have unlocked a wealth of possibilities that empower you to personalize, optimize, and elevate your device's capabilities to new heights. The benefits of installing a custom recovery, including the ability to install custom ROMs, perform full system backups, and access advanced maintenance and developer tools, are instrumental in shaping a truly unique and tailored Android experience.
With TWRP custom recovery now seamlessly integrated into your Redmi 2, you have gained the freedom to explore a diverse array of custom ROMs, each offering a distinct set of features, visual styles, and performance enhancements. Whether you seek to enhance your device's speed, battery life, or visual aesthetics, custom ROMs provide a gateway to a world of personalization and customization that transcends the limitations of the stock ROM.
Furthermore, the capability to perform full system backups and restores through TWRP offers peace of mind and reassurance, allowing you to experiment with customizations and modifications without the fear of irreversible consequences. The ability to safeguard your device's entire system configuration ensures that you can venture into the realm of Android customization with confidence, knowing that your data and device state are securely preserved.
The advanced maintenance and developer tools available within TWRP provide a platform for users to delve into the intricacies of Android customization, enabling tasks such as ADB sideload, terminal access, and file management directly from the recovery environment. This level of control and access empowers users to engage with their device at a deeper level, fostering a sense of exploration and discovery in the realm of Android development and customization.
As you embark on this exciting journey with TWRP custom recovery, remember that the possibilities are boundless. Embrace the freedom to tailor your device to reflect your unique preferences and needs, and revel in the endless opportunities for innovation and personalization that await you. With TWRP as your trusted companion, your Redmi 2 transforms into a canvas for creativity and expression, allowing you to shape your Android experience according to your vision.
In essence, the installation of a custom recovery on your Redmi 2 is not merely a technical process; it is a gateway to a world of customization, personalization, and empowerment. Embrace this newfound freedom, and let your journey with TWRP be a testament to the boundless potential of Android customization and the spirit of innovation that drives the Android community forward.