Introduction
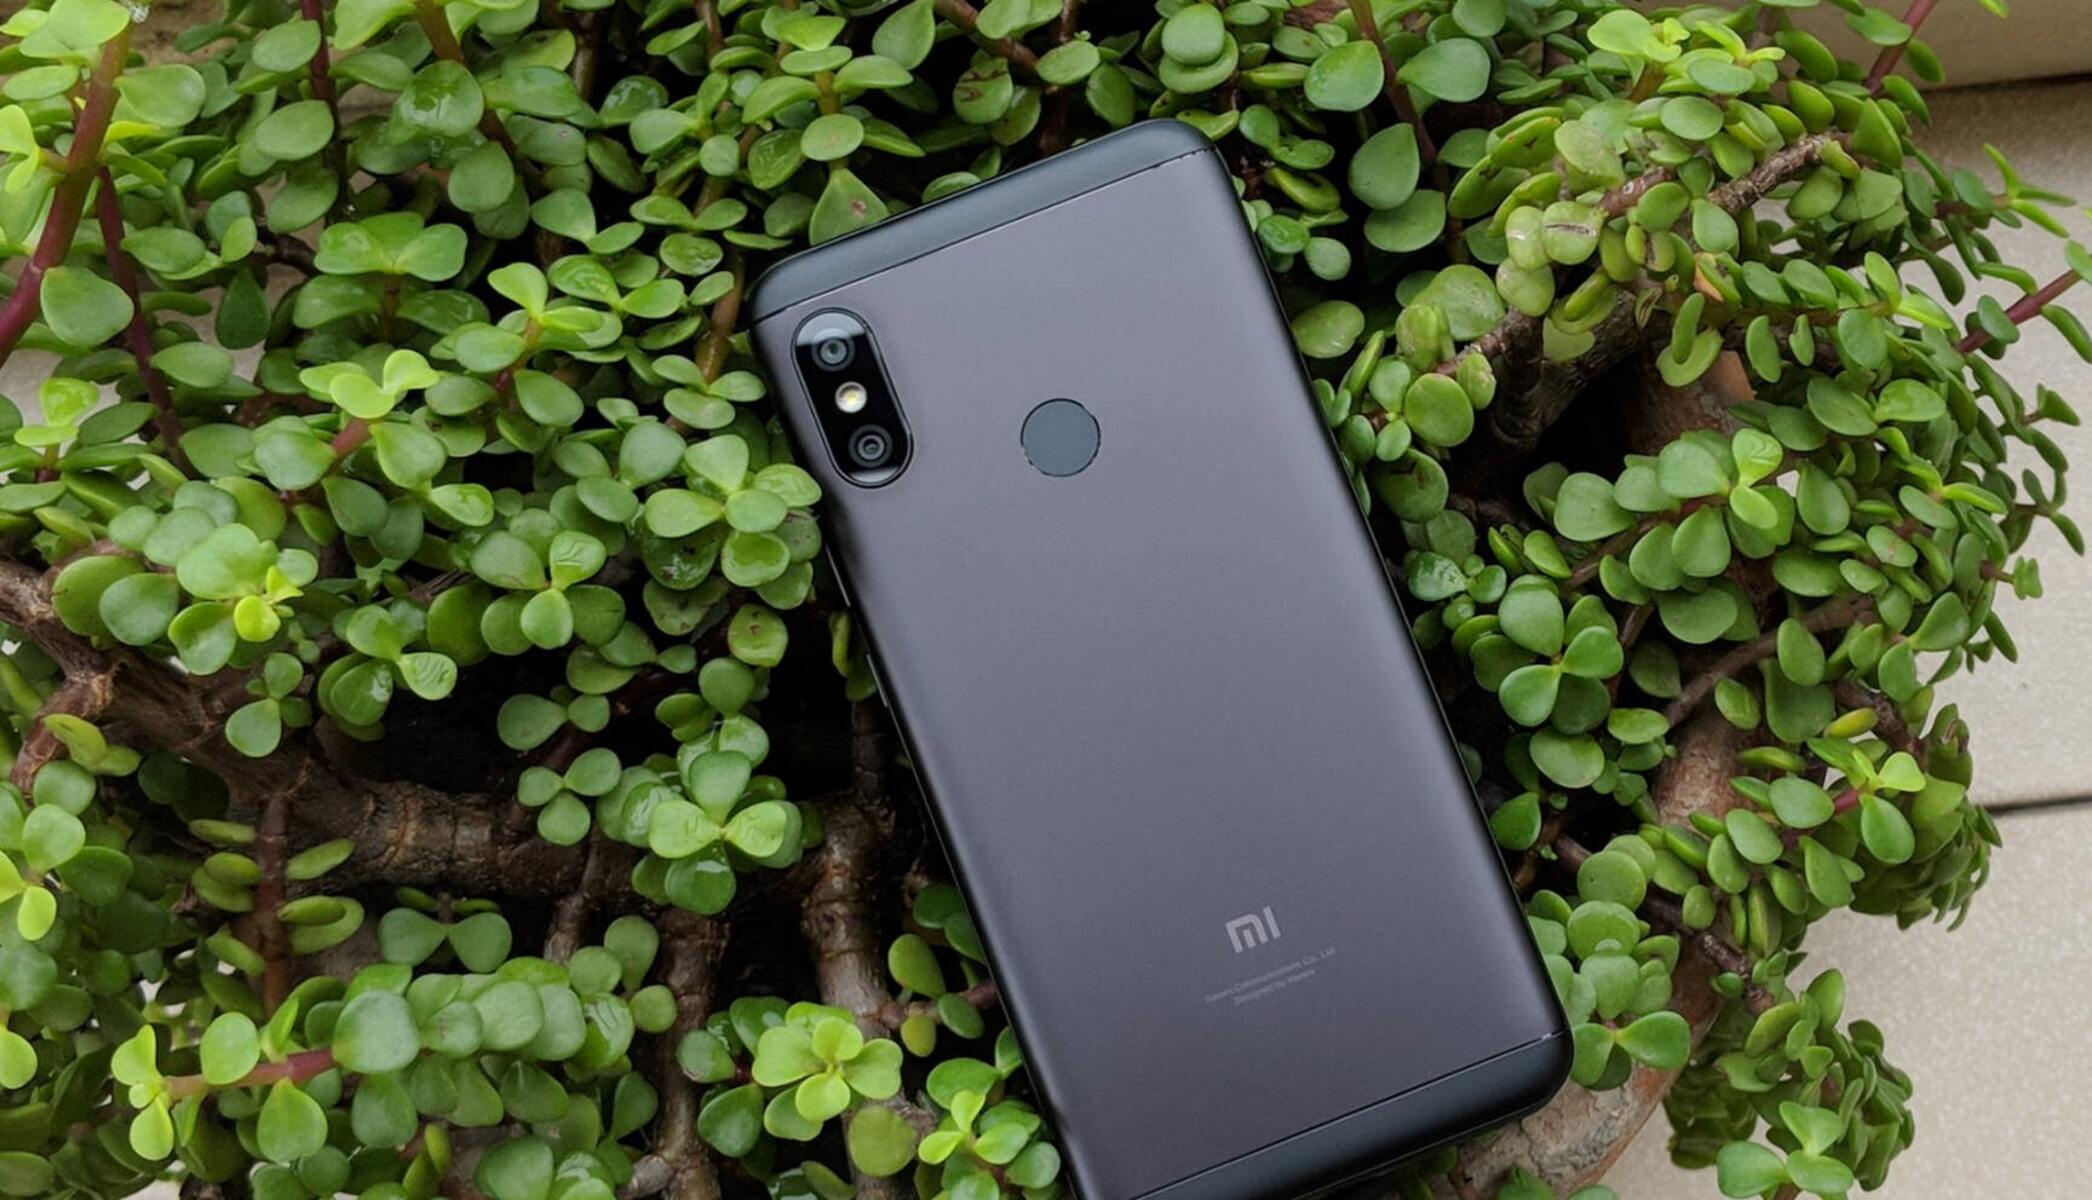
The Redmi Note 6 Pro is a popular choice among smartphone enthusiasts due to its impressive features and affordable price point. However, for users seeking to unlock the full potential of their device, rooting can provide access to a plethora of customization options and enhanced performance. Rooting allows users to attain privileged control over various aspects of the Android operating system, enabling the installation of custom ROMs, removal of bloatware, and utilization of powerful root-only apps.
In this comprehensive guide, we will walk you through the step-by-step process of rooting your Redmi Note 6 Pro. By following these instructions carefully, you can unleash the true capabilities of your device and personalize it according to your preferences. It's important to note that rooting your device involves certain risks, including voiding the warranty and potentially causing software malfunctions. Therefore, it's crucial to proceed with caution and ensure that you fully understand the implications of this process.
Throughout this guide, we will provide detailed insights and practical tips to facilitate a smooth rooting experience. Whether you're a seasoned tech enthusiast or a novice user, this guide is designed to be accessible and user-friendly, allowing you to embark on this rooting journey with confidence. So, without further ado, let's delve into the exciting world of rooting and unlock the untapped potential of your Redmi Note 6 Pro.
Step 1: Unlocking the Bootloader
Unlocking the bootloader is the initial step in the process of rooting your Redmi Note 6 Pro. The bootloader acts as a security feature that restricts the device from booting into unauthorized software. By unlocking the bootloader, you gain the ability to install custom recovery and root your device. It's important to note that unlocking the bootloader will erase all data on your device, so it's crucial to back up any important information before proceeding.
Preparing Your Device
Before initiating the bootloader unlocking process, ensure that your Redmi Note 6 Pro is adequately charged to prevent any interruptions during the procedure. Additionally, enable USB debugging on your device by navigating to "Settings," "About Phone," and tapping on the "MIUI version" seven times to enable Developer Options. Then, go to "Settings," "Additional Settings," "Developer Options," and enable "USB Debugging."
Obtaining Unlock Permission
Xiaomi, the manufacturer of the Redmi Note 6 Pro, requires users to obtain official permission to unlock the bootloader. To do this, visit the official Xiaomi Mi Unlock website and apply for bootloader unlocking permission. Upon approval, you will receive a confirmation message, indicating that you are eligible to proceed with the unlocking process.
Unlocking the Bootloader
Once you have obtained permission, proceed to download the Mi Unlock Tool on your computer. Power off your Redmi Note 6 Pro and boot it into Fastboot mode by holding the "Volume Down" and "Power" buttons simultaneously. Connect your device to the computer using a USB cable, and launch the Mi Unlock Tool. Follow the on-screen instructions to log in with your Mi account and initiate the bootloader unlocking process.
Verifying the Unlock Status
After the unlocking process is complete, your Redmi Note 6 Pro's bootloader will be successfully unlocked, allowing you to proceed with the next steps in the rooting process. You can verify the unlocked status by rebooting your device into Fastboot mode and entering the command "fastboot oem device-info" in the command prompt. If the bootloader status is displayed as "unlocked," you have successfully completed this crucial step in the rooting process.
By successfully unlocking the bootloader of your Redmi Note 6 Pro, you have laid the foundation for customizing and optimizing your device to suit your preferences. This pivotal step opens the door to a world of possibilities, empowering you to explore the full potential of your smartphone and embark on the exciting journey of rooting.
Unlocking the bootloader is a significant milestone in the rooting process, setting the stage for the subsequent steps that will enable you to unleash the true power of your Redmi Note 6 Pro. With the bootloader successfully unlocked, you are now ready to proceed to the next step in this comprehensive rooting guide.
Step 2: Installing TWRP Recovery
Installing TWRP (Team Win Recovery Project) recovery is a crucial step in the process of rooting your Redmi Note 6 Pro. TWRP is a custom recovery that offers a wide array of features, including the ability to flash custom ROMs, create and restore backups, and perform system-level modifications. By installing TWRP recovery on your device, you gain a powerful tool that facilitates the seamless execution of advanced customization and optimization tasks.
Preparing for TWRP Installation
Before proceeding with the installation of TWRP recovery, it's essential to ensure that your Redmi Note 6 Pro is charged sufficiently to prevent any disruptions during the process. Additionally, make sure that you have unlocked the bootloader of your device, as this is a prerequisite for installing custom recovery.
Downloading the TWRP Image
Begin by downloading the TWRP recovery image specifically designed for the Redmi Note 6 Pro. Visit the official TWRP website or a trusted third-party source to obtain the compatible TWRP image file. It's crucial to verify the authenticity of the source to ensure that you download the correct and reliable TWRP image for your device.
Enabling USB Debugging and OEM Unlocking
To proceed with the TWRP installation, enable USB debugging on your Redmi Note 6 Pro by navigating to "Settings," "About Phone," and tapping on the "MIUI version" seven times to enable Developer Options. Then, go to "Settings," "Additional Settings," "Developer Options," and enable "USB Debugging." Additionally, ensure that the "OEM unlocking" option is enabled in the Developer Options menu.
Booting into Fastboot Mode
Power off your Redmi Note 6 Pro and boot it into Fastboot mode by holding the "Volume Down" and "Power" buttons simultaneously. Connect your device to the computer using a USB cable to proceed with the TWRP installation process.
Flashing TWRP Recovery
Launch the command prompt on your computer and navigate to the directory where the TWRP image file is located. Execute the command to flash the TWRP recovery image onto your device by entering "fastboot flash recovery <twrp_filename.img>" (replace <twrp_filename.img> with the actual name of the TWRP image file). Once the flashing process is complete, reboot your device into recovery mode to verify the successful installation of TWRP recovery.
Verifying TWRP Installation
Upon rebooting into TWRP recovery, you can confirm the successful installation by navigating the TWRP interface. If TWRP recovery is accessible and functional, you have completed this pivotal step in the rooting process, paving the way for the subsequent stages of customizing and optimizing your Redmi Note 6 Pro.
By successfully installing TWRP recovery on your Redmi Note 6 Pro, you have equipped your device with a powerful tool that empowers you to explore the full potential of Android customization and system-level modifications. TWRP recovery serves as a gateway to a myriad of advanced features and functionalities, enabling you to embark on a personalized and enriched smartphone experience.
With TWRP recovery seamlessly integrated into your device, you are now prepared to advance to the next stage of the rooting process, where you will delve into the intricacies of downloading the rooting package and executing the root procedure. This marks a significant milestone in your journey towards unlocking the true capabilities of your Redmi Note 6 Pro, setting the stage for a transformative and personalized smartphone experience.
Step 3: Downloading the Rooting Package
Downloading the rooting package is a pivotal step in the process of rooting your Redmi Note 6 Pro, as it involves obtaining the necessary files and tools to execute the root procedure effectively. The rooting package typically consists of the required root binaries, essential scripts, and supplementary files that are essential for gaining root access on your device. By acquiring the correct rooting package, you ensure that the rooting process is carried out smoothly and securely, laying the groundwork for harnessing the full potential of your smartphone.
Researching the Rooting Package
Before proceeding with the download, it's crucial to conduct thorough research to identify a reliable and reputable source for the rooting package. Trusted forums, developer communities, and official websites of renowned rooting tools are valuable resources for obtaining the correct rooting package tailored for the Redmi Note 6 Pro. It's essential to prioritize authenticity and reliability when selecting the rooting package, as this directly impacts the success and safety of the rooting process.
Verifying Compatibility
When selecting the rooting package, it's imperative to ensure that it is specifically designed for the Redmi Note 6 Pro and is compatible with the device's firmware version. Compatibility issues can lead to complications during the rooting process, potentially causing software instability or device malfunctions. Therefore, carefully verify the compatibility of the rooting package with your device to mitigate any risks and ensure a seamless rooting experience.
Obtaining Rooting Tools
In addition to the rooting package, it's essential to acquire the necessary tools for transferring the rooting files to your device. A reliable file transfer method, such as a USB cable or a trusted file management app, is crucial for seamlessly transferring the rooting package to your Redmi Note 6 Pro. Additionally, ensure that you have a backup of any important data on your device to safeguard against potential data loss during the rooting process.
Executing the Download
Once you have identified a trustworthy source and verified the compatibility of the rooting package, proceed to download the necessary files to your computer. Exercise caution and vigilance during the download process to avoid inadvertently acquiring incorrect or potentially harmful files. It's advisable to scan the downloaded files with reputable antivirus software to ensure that they are free from malware or any form of malicious content.
Ensuring File Integrity
After the download is complete, verify the integrity of the rooting package by confirming that the files have been downloaded without any errors or corruption. Check the file size and compare it with the specified size provided by the source to ensure that the rooting package is complete and undamaged. This meticulous verification process is essential for safeguarding the integrity of the rooting files and ensuring a secure rooting procedure.
By meticulously navigating through the process of downloading the rooting package, you are laying a solid foundation for the subsequent steps in the rooting process. This meticulous approach underscores the significance of attention to detail and thorough preparation, setting the stage for a successful and seamless rooting experience. With the rooting package securely in your possession, you are now poised to advance to the next stage of the rooting process, where you will embark on the transformative journey of rooting your Redmi Note 6 Pro and unlocking its full potential.
Step 4: Rooting the Redmi Note 6 Pro
Rooting the Redmi Note 6 Pro is a pivotal stage in the process of unlocking the device's full potential and gaining privileged control over its operating system. By rooting your device, you can delve into a realm of advanced customization, performance optimization, and the installation of powerful root-only apps. This transformative step empowers you to tailor your smartphone experience according to your preferences, harnessing the true capabilities of the Redmi Note 6 Pro.
Preparing for Rooting
Before initiating the rooting process, it's crucial to ensure that your Redmi Note 6 Pro is adequately charged to prevent any interruptions during the procedure. Additionally, make sure that you have unlocked the bootloader and installed TWRP recovery on your device, as these are essential prerequisites for executing the root procedure effectively.
Transferring the Rooting Package
Using a reliable file transfer method, such as a USB cable or a trusted file management app, transfer the rooting package that you downloaded in the previous step to your Redmi Note 6 Pro. It's important to exercise caution and precision during this transfer process to ensure that the rooting package is successfully transferred to your device without any errors or corruption.
Executing the Root Procedure
Boot your Redmi Note 6 Pro into TWRP recovery mode by powering off the device and then holding the appropriate key combination to access the recovery interface. Once in TWRP, navigate to the location where the rooting package is stored and select the option to install the package. Follow the on-screen prompts to initiate the root procedure, allowing TWRP to flash the necessary root binaries and scripts onto your device.
Verifying Root Access
After the root procedure is complete, reboot your Redmi Note 6 Pro and allow it to start up normally. Once the device is operational, verify root access by using a root checker app, available on the Google Play Store. The root checker app will confirm whether your device has successfully attained root privileges, validating the completion of the rooting process.
Embracing the Rooted Experience
With root access successfully attained, you have unlocked a world of possibilities for customizing and optimizing your Redmi Note 6 Pro. You can now explore the extensive array of root-only apps, customize system-level settings, and delve into the realm of custom ROMs to further enhance your smartphone experience.
By meticulously navigating through the process of rooting the Redmi Note 6 Pro, you have embarked on a transformative journey that empowers you to harness the full potential of your device. Rooting opens the door to a realm of advanced customization and optimization, allowing you to tailor your smartphone experience to align with your unique preferences and requirements. With root access secured, you are now poised to embark on a personalized and enriched smartphone journey, leveraging the power of rooting to elevate your Redmi Note 6 Pro experience.
Step 5: Verifying Root Access
After completing the root procedure on your Redmi Note 6 Pro, it is essential to verify whether the device has successfully attained root access. This verification process ensures that the root procedure was executed effectively, granting you privileged control over the device's operating system. By confirming root access, you can proceed with confidence, knowing that your Redmi Note 6 Pro is now equipped with the capabilities to explore advanced customization options and utilize root-only apps.
To verify root access, you can utilize a root checker app, readily available on the Google Play Store. These apps are designed to detect and confirm the presence of root privileges on your device. Upon installing a reputable root checker app, simply launch the application and initiate the root verification process. The app will conduct a comprehensive scan of your device's system, identifying whether root access has been successfully obtained.
Upon completion of the scan, the root checker app will provide a clear indication of the root status of your Redmi Note 6 Pro. If the app confirms that root access has been granted, you can proceed with confidence, knowing that your device is now equipped with the capabilities to delve into advanced system-level modifications and harness the full potential of rooting.
In the event that the root checker app indicates that root access has not been attained, it is crucial to revisit the root procedure and ensure that all steps were executed accurately. This may involve re-flashing the rooting package in TWRP recovery or revisiting the initial steps of the rooting process to identify any potential issues that may have hindered the successful attainment of root access.
By diligently verifying root access, you can ascertain the effectiveness of the root procedure and address any potential challenges that may have arisen during the process. This meticulous verification process serves as a crucial checkpoint, ensuring that your Redmi Note 6 Pro is fully equipped to embrace the myriad possibilities that root access offers.
With root access successfully verified, you have completed the comprehensive process of rooting your Redmi Note 6 Pro, unlocking its full potential and empowering yourself to embark on a personalized and enriched smartphone journey. Rooting opens the door to a world of advanced customization and optimization, allowing you to tailor your device to align with your unique preferences and requirements.
Conclusion
In conclusion, the journey of rooting your Redmi Note 6 Pro has been a transformative and empowering experience, unlocking the full potential of your device and paving the way for a personalized and enriched smartphone journey. Throughout this comprehensive guide, you have navigated through the intricacies of unlocking the bootloader, installing TWRP recovery, downloading the rooting package, executing the root procedure, and verifying root access. Each step in this process has been carefully crafted to equip you with the knowledge and tools necessary to embark on this rooting journey with confidence and precision.
By unlocking the bootloader, you laid the foundation for customizing and optimizing your device, while the installation of TWRP recovery empowered you with a powerful tool for executing advanced system-level modifications. The meticulous process of downloading the rooting package underscored the significance of attention to detail and thorough preparation, ensuring a secure and seamless rooting procedure. Executing the root procedure itself marked a pivotal moment, granting you privileged control over your device's operating system and unlocking a world of possibilities for customization and performance optimization.
Verifying root access served as the final confirmation of the successful completion of the rooting process, providing you with the assurance that your Redmi Note 6 Pro is now equipped with the capabilities to explore advanced customization options and utilize root-only apps. With root access secured, you have embraced a new realm of possibilities, enabling you to tailor your smartphone experience according to your unique preferences and requirements.
Rooting your Redmi Note 6 Pro represents a significant milestone in your smartphone journey, empowering you to harness the full potential of your device and embark on a personalized and enriched experience. It's important to note that rooting your device involves certain risks, including voiding the warranty and potentially causing software malfunctions. Therefore, it's crucial to proceed with caution and ensure that you fully understand the implications of this process.
As you continue to explore the myriad possibilities that root access offers, remember to prioritize safety and security, and always exercise caution when making system-level modifications. With the knowledge and insights gained from this rooting guide, you are now equipped to leverage the power of rooting to elevate your Redmi Note 6 Pro experience and embark on a journey of personalized smartphone customization and optimization.