Introduction
In today's fast-paced world, mobile devices have become an integral part of our daily lives. From staying connected with loved ones to conducting business calls, smartphones have revolutionized the way we communicate. However, there are instances when we may need to record phone calls for various reasons, such as preserving important conversations or capturing crucial details during professional discussions.
For Motorola Razr users, the ability to record phone calls can be a valuable feature. Whether it's for legal, business, or personal purposes, having the option to record calls can provide peace of mind and serve as a useful tool for referencing conversations at a later time.
In this comprehensive guide, we will walk you through the step-by-step process of recording phone calls on your Motorola Razr. From checking local laws and regulations to downloading and setting up a call recording app, we'll cover everything you need to know to effectively record and manage your phone calls.
By following the instructions outlined in this guide, you'll gain the knowledge and confidence to harness the full potential of your Motorola Razr, empowering you to capture and store important phone conversations with ease and convenience. So, let's dive into the details and unlock the capabilities of your device to record phone calls seamlessly.
Step 1: Check Local Laws and Regulations
Before delving into the process of recording phone calls on your Motorola Razr, it is crucial to first understand and adhere to the local laws and regulations governing call recording in your region. The legality of recording phone calls varies across different countries and states, with some jurisdictions requiring the consent of all parties involved in the call.
To ensure compliance with the law, begin by researching the specific regulations related to call recording in your area. This may involve consulting legal resources, contacting local authorities, or seeking guidance from legal professionals who specialize in telecommunications and privacy laws.
In the United States, for example, the laws pertaining to call recording vary from state to state. Some states operate under "one-party consent" laws, where only one party involved in the call needs to be aware of and consent to the recording. In contrast, "two-party consent" or "all-party consent" laws mandate that all parties must consent to the recording for it to be legally permissible.
Similarly, other countries have their own set of regulations governing call recording, and it is essential to familiarize yourself with the specific requirements applicable to your location.
By conducting thorough research and understanding the legal framework surrounding call recording, you can ensure that your actions comply with the relevant laws and regulations. Failing to adhere to these legal requirements can lead to serious consequences, including legal repercussions and violations of privacy rights.
Once you have a clear understanding of the legal landscape, you can proceed with confidence, knowing that you are operating within the bounds of the law while exploring the functionality of recording phone calls on your Motorola Razr. This foundational knowledge sets the stage for the subsequent steps in the call recording process, empowering you to navigate the intricacies of call recording with awareness and responsibility.
Step 2: Download a Call Recording App
To enable call recording on your Motorola Razr, the next step involves acquiring a reliable call recording app from the Google Play Store. While some smartphones offer built-in call recording features, the Motorola Razr may require a third-party app to fulfill this functionality.
-
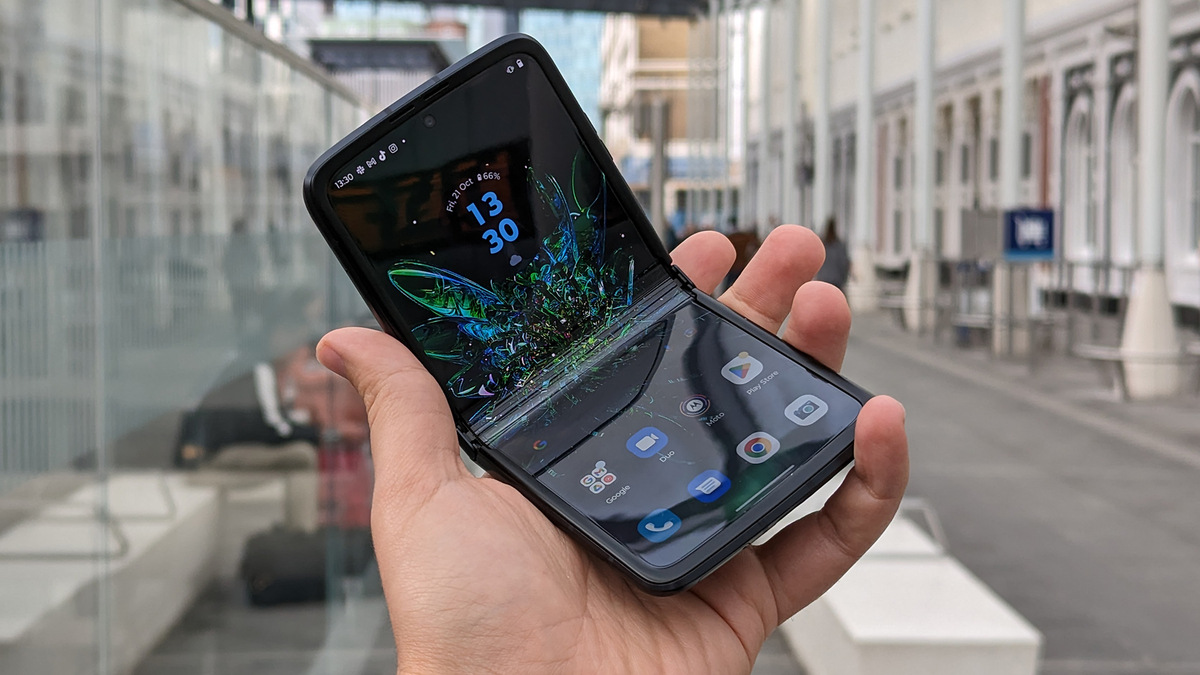
Navigate to the Google Play Store: Open the Google Play Store app on your Motorola Razr by tapping on the Play Store icon from the home screen or the app drawer.
-
Search for Call Recording Apps: Once inside the Google Play Store, use the search bar to look for call recording apps. You can enter keywords such as "call recorder," "phone call recorder," or specific app names recommended by trusted sources.
-
Evaluate User Ratings and Reviews: As you browse through the available call recording apps, pay attention to user ratings and reviews. This feedback can provide valuable insights into the performance, reliability, and user experience of each app. Look for apps with high ratings and positive reviews to ensure a satisfactory recording experience.
-
Consider App Features and Compatibility: When selecting a call recording app, consider the features it offers and its compatibility with the Motorola Razr. Look for apps that support your device model and provide essential features such as automatic call recording, customizable settings, and easy access to recorded calls.
-
Download and Install the Chosen App: Once you have identified a suitable call recording app, proceed to download and install it on your Motorola Razr. Follow the on-screen instructions to complete the installation process, and grant any necessary permissions required by the app to ensure seamless functionality.
-
Explore Additional Settings and Options: After installing the call recording app, take some time to explore its settings and customization options. Familiarize yourself with the app's interface, recording controls, and any additional features it offers to optimize your call recording experience.
By downloading a reputable call recording app from the Google Play Store, you can equip your Motorola Razr with the capability to record phone calls effectively and efficiently. This step sets the stage for the subsequent installation and setup process, empowering you to harness the full potential of your device for call recording purposes. With the right app at your disposal, you'll be ready to embark on the next phase of the call recording journey, bringing you closer to seamlessly capturing and managing your important phone conversations.
Step 3: Install and Set Up the App
After successfully downloading a call recording app from the Google Play Store, the next crucial step is to install and set up the app on your Motorola Razr. This process involves configuring the app's settings, granting necessary permissions, and ensuring that it seamlessly integrates with your device's calling functionality.
Upon completing the installation of the call recording app, locate the app icon on your home screen or in the app drawer. Tap on the icon to launch the app and initiate the setup process. Depending on the specific app you have chosen, you may be prompted to configure certain settings and grant permissions to enable call recording.
During the setup phase, the app may request permissions to access your device's microphone, storage, and phone calls. It is essential to carefully review and approve these permissions to ensure that the app can effectively record and store your phone conversations. Granting these permissions allows the app to capture audio during calls and save the recordings securely on your device.
Additionally, some call recording apps offer customization options that allow users to tailor the recording settings according to their preferences. These settings may include the choice to automatically record all calls, selectively record specific contacts, or enable recording only for incoming or outgoing calls. Take the time to explore these settings and configure them to align with your recording requirements.
Furthermore, familiarize yourself with the app's user interface and navigation to effortlessly access recorded calls and manage the recording settings. Many call recording apps provide intuitive interfaces that make it easy to initiate, pause, or stop recordings during calls, ensuring a seamless and user-friendly experience.
As you proceed with the app setup, consider exploring any additional features or functionalities offered by the app, such as the ability to add notes to recorded calls, organize recordings into categories, or share recordings via various communication channels. These supplementary features can enhance the utility of the call recording app and provide added convenience in managing recorded conversations.
By diligently installing and setting up the call recording app on your Motorola Razr, you are laying the foundation for a streamlined and efficient call recording experience. The careful configuration of app settings and permissions ensures that you are ready to seamlessly capture and manage your phone calls, empowering you to leverage the full potential of your device for call recording purposes. With the app successfully installed and configured, you are now prepared to embark on the next phase of the call recording journey, equipped with the tools and knowledge to record your phone conversations with confidence and ease.
Step 4: Start Recording Your Phone Calls
With the call recording app successfully installed and configured on your Motorola Razr, you are now ready to embark on the process of recording your phone calls with ease and precision. Whether you need to capture important business discussions, preserve valuable information shared during calls, or simply maintain a record of significant conversations, the call recording app empowers you to seamlessly initiate and manage call recordings.
When a call is in progress, the call recording app interface typically provides intuitive controls that allow you to initiate the recording with a single tap. Depending on the app's settings and preferences you have configured, you may have the option to manually start the recording at any point during the call or set the app to automatically record all incoming and outgoing calls.
Upon tapping the designated recording button, the app begins capturing the audio from the ongoing call, ensuring that every spoken word and crucial detail is accurately preserved. As the recording progresses, you may have access to visual indicators or notifications within the app interface, confirming that the call is being successfully recorded.
The ability to record phone calls seamlessly empowers you to capture important discussions, interviews, or verbal agreements without the need for manual note-taking or reliance on memory alone. This feature can be particularly valuable in professional settings, where the accurate documentation of conversations is essential for maintaining records, resolving disputes, or referencing critical information at a later time.
Furthermore, the call recording app may offer additional functionalities during the recording process, such as the ability to pause and resume recordings, add annotations or notes to specific segments of the call, or adjust the audio settings to optimize the recording quality. These features provide flexibility and control, allowing you to tailor the recording process to suit your specific needs and preferences.
As the call recording app diligently captures the audio from your phone calls, you can proceed with confidence, knowing that important conversations are being securely preserved for future reference. The seamless integration of call recording functionality into your Motorola Razr enhances the versatility and utility of your device, empowering you to leverage its capabilities to their fullest extent.
By initiating and managing call recordings with the aid of the dedicated app, you are equipped to capture and store valuable conversations, ensuring that essential information is safeguarded and readily accessible when needed. This step marks the culmination of the call recording process, enabling you to harness the power of your Motorola Razr to record phone calls with efficiency and precision.
Step 5: Access and Manage Your Recorded Calls
After successfully recording phone calls using the dedicated call recording app on your Motorola Razr, the next essential step involves accessing and managing the recorded calls with ease and efficiency. The ability to seamlessly retrieve and organize recorded conversations enhances the utility of call recording, allowing you to reference, review, and archive important discussions as needed.
Upon concluding a recorded call, the call recording app typically provides straightforward access to the saved recordings within its interface. You can navigate to the app's designated section for recorded calls, where a comprehensive list of captured conversations is displayed for easy retrieval. The app may offer sorting and filtering options, enabling you to locate specific recordings based on dates, contacts, or customized categories.
As you access the recorded calls, you have the flexibility to review the content of each recording, ensuring that the captured audio accurately reflects the details and nuances of the original conversations. This capability is particularly valuable for verifying information, revisiting key points discussed during calls, or extracting essential data from the recorded content.
Furthermore, the call recording app may provide tools for managing the recorded calls effectively. These management features can include the ability to rename recordings for easy identification, add descriptive notes or tags to categorize recordings, and organize the recordings into custom folders or playlists. By leveraging these management functionalities, you can maintain a well-structured repository of recorded calls, facilitating quick and convenient access to specific conversations when needed.
In addition to local storage, some call recording apps offer options for backing up recorded calls to cloud storage services or external storage devices. This backup functionality ensures that your recorded calls are securely preserved and can be accessed across multiple devices, providing an added layer of protection and accessibility for your valuable recordings.
Moreover, the call recording app may facilitate the seamless sharing of recorded calls via various communication channels, such as email, messaging apps, or cloud storage platforms. This sharing capability allows you to effortlessly distribute recorded content to relevant parties, collaborate on projects, or archive recordings for future reference, enhancing the versatility and utility of the recorded calls.
By effectively accessing and managing your recorded calls, you harness the full potential of call recording on your Motorola Razr, ensuring that important conversations are securely stored and readily accessible when needed. This step marks the culmination of the call recording journey, empowering you to leverage the capabilities of your device to capture, organize, and preserve valuable phone conversations with precision and convenience.
Conclusion
In conclusion, the process of recording phone calls on your Motorola Razr encompasses a series of essential steps that enable you to harness the full potential of your device for call recording purposes. By following the comprehensive guide outlined in this article, you have gained valuable insights into the intricacies of call recording, from navigating legal considerations to effectively managing recorded conversations.
The journey begins with a foundational understanding of the legal landscape surrounding call recording, emphasizing the importance of compliance with local laws and regulations. By conducting thorough research and familiarizing yourself with the specific requirements applicable to your region, you ensure that your actions align with legal standards, fostering a responsible and informed approach to call recording.
Subsequently, the process unfolds with the acquisition of a reliable call recording app from the Google Play Store, empowering you to equip your Motorola Razr with the essential functionality to capture and store phone conversations. The careful evaluation of user ratings, consideration of app features, and seamless installation process set the stage for a seamless call recording experience, ensuring that you have access to a robust tool for recording and managing your calls.
The installation and setup of the call recording app mark a pivotal phase in the journey, as you configure the app's settings, grant necessary permissions, and familiarize yourself with its interface. This step empowers you to tailor the recording process to suit your preferences, ensuring that you are ready to initiate and manage call recordings with confidence and ease.
As you embark on the process of recording your phone calls, the dedicated call recording app provides intuitive controls and functionalities that enable you to capture important conversations with precision. The seamless integration of call recording functionality into your Motorola Razr enhances the versatility and utility of your device, empowering you to leverage its capabilities to their fullest extent.
Finally, the ability to access and manage your recorded calls with ease and efficiency ensures that important conversations are securely stored and readily accessible when needed. By leveraging the management features offered by the call recording app, you maintain a well-structured repository of recorded calls, facilitating quick and convenient access to specific conversations as required.
In essence, the journey of recording phone calls on your Motorola Razr culminates in a seamless and empowered approach to capturing, organizing, and preserving valuable phone conversations. By embracing the capabilities of your device and leveraging the functionalities of a reliable call recording app, you are equipped to navigate the intricacies of call recording with confidence and precision, ensuring that essential information is safeguarded and readily accessible when needed.


