Introduction
Opening the SIM card slot on your iPhone may seem like a daunting task, especially if you're new to the world of mobile devices. However, with the right guidance and a few simple steps, you can easily access the SIM card slot and make necessary changes to your device's SIM card.
Whether you're looking to insert a new SIM card, replace an existing one, or simply inspect the SIM card slot, this step-by-step guide will walk you through the process. By following these instructions, you'll gain the confidence to manage your iPhone's SIM card slot with ease.
The SIM card slot is a crucial component of your iPhone, as it houses the SIM card that enables your device to connect to a cellular network. Understanding how to access and manage this slot is essential for anyone who wants to make changes to their mobile service provider, switch to a new SIM card when traveling, or troubleshoot connectivity issues.
In this comprehensive guide, we'll cover the necessary steps to open the SIM card slot on your iPhone, using the appropriate tools and techniques. Whether you have an iPhone 6, iPhone 7, iPhone 8, iPhone X, or any other model, the process for accessing the SIM card slot remains consistent across various iPhone versions.
So, if you're ready to take control of your iPhone's SIM card slot and gain a better understanding of this essential feature, let's dive into the step-by-step process. By the end of this guide, you'll have the knowledge and confidence to manage your iPhone's SIM card slot efficiently and effectively.
Step 1: Locate the SIM Card Slot
Locating the SIM card slot on your iPhone is the first crucial step in managing your device's connectivity. The SIM card slot is typically located on the side of your iPhone, and its precise position may vary depending on the model. To begin, examine the sides of your iPhone to identify the SIM card slot's exact location.
For most iPhone models, including the iPhone 6, 7, 8, and X, the SIM card slot is situated on the right-hand side of the device. Look for a small, recessed tray with a pinhole opening. This pinhole is where you'll insert the SIM card ejector tool to access the SIM card tray.
On some newer iPhone models, such as the iPhone 11 and 12 series, the SIM card slot has been relocated to the left-hand side of the device. In this case, you'll find the SIM card slot near the bottom of the left-hand edge, marked by the same pinhole opening for the ejector tool.
It's important to handle your iPhone with care as you locate the SIM card slot. Take a moment to familiarize yourself with the device's physical layout, and pay close attention to the edges to spot the SIM card slot's position. By doing so, you'll be well-prepared to proceed with the next steps in the process of opening the SIM card slot.
Once you've successfully located the SIM card slot, you're ready to move on to the next step in the process. With the SIM card slot identified, you can confidently proceed to the following steps, knowing that you've completed the crucial first phase of the process.
By taking the time to locate the SIM card slot, you've set the stage for a smooth and successful experience in managing your iPhone's SIM card. This foundational step ensures that you're well-positioned to proceed with confidence and precision as you navigate the remaining steps in this guide.
Now that you've successfully located the SIM card slot on your iPhone, let's proceed to the next step, where we'll delve into the process of accessing the SIM card tray using the SIM card ejector tool.
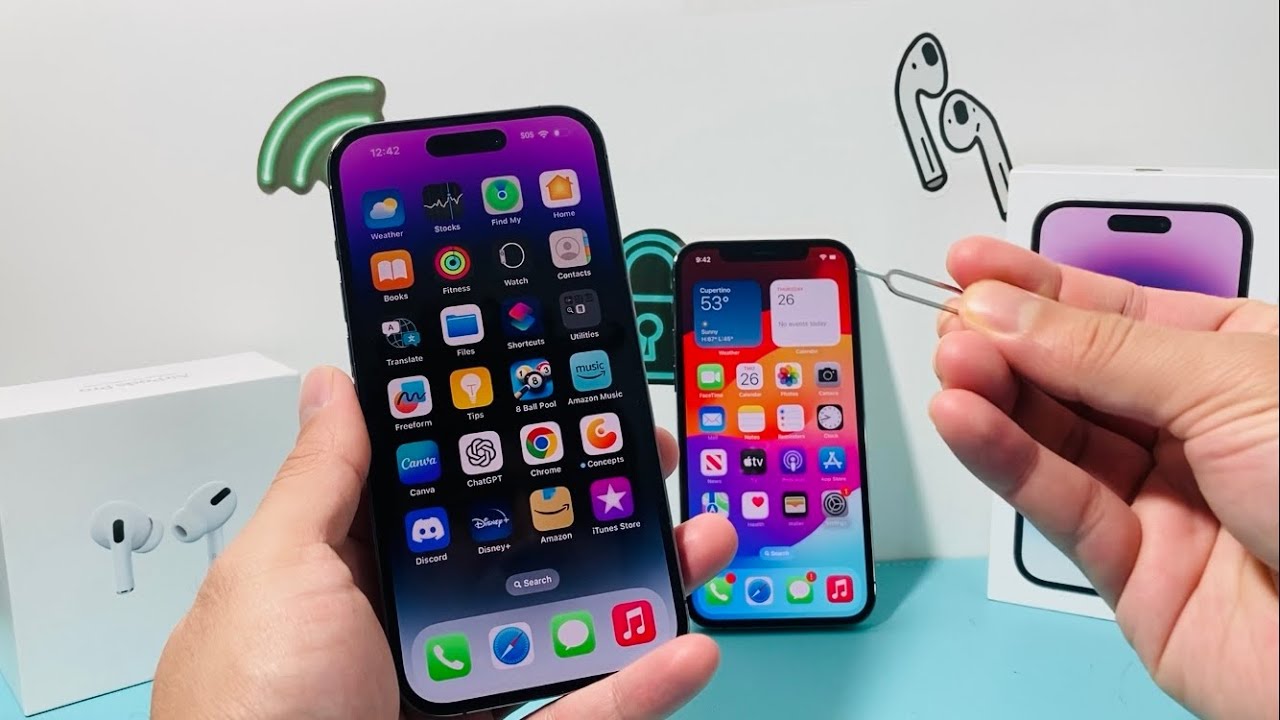
Step 2: Insert the SIM Card Ejector Tool
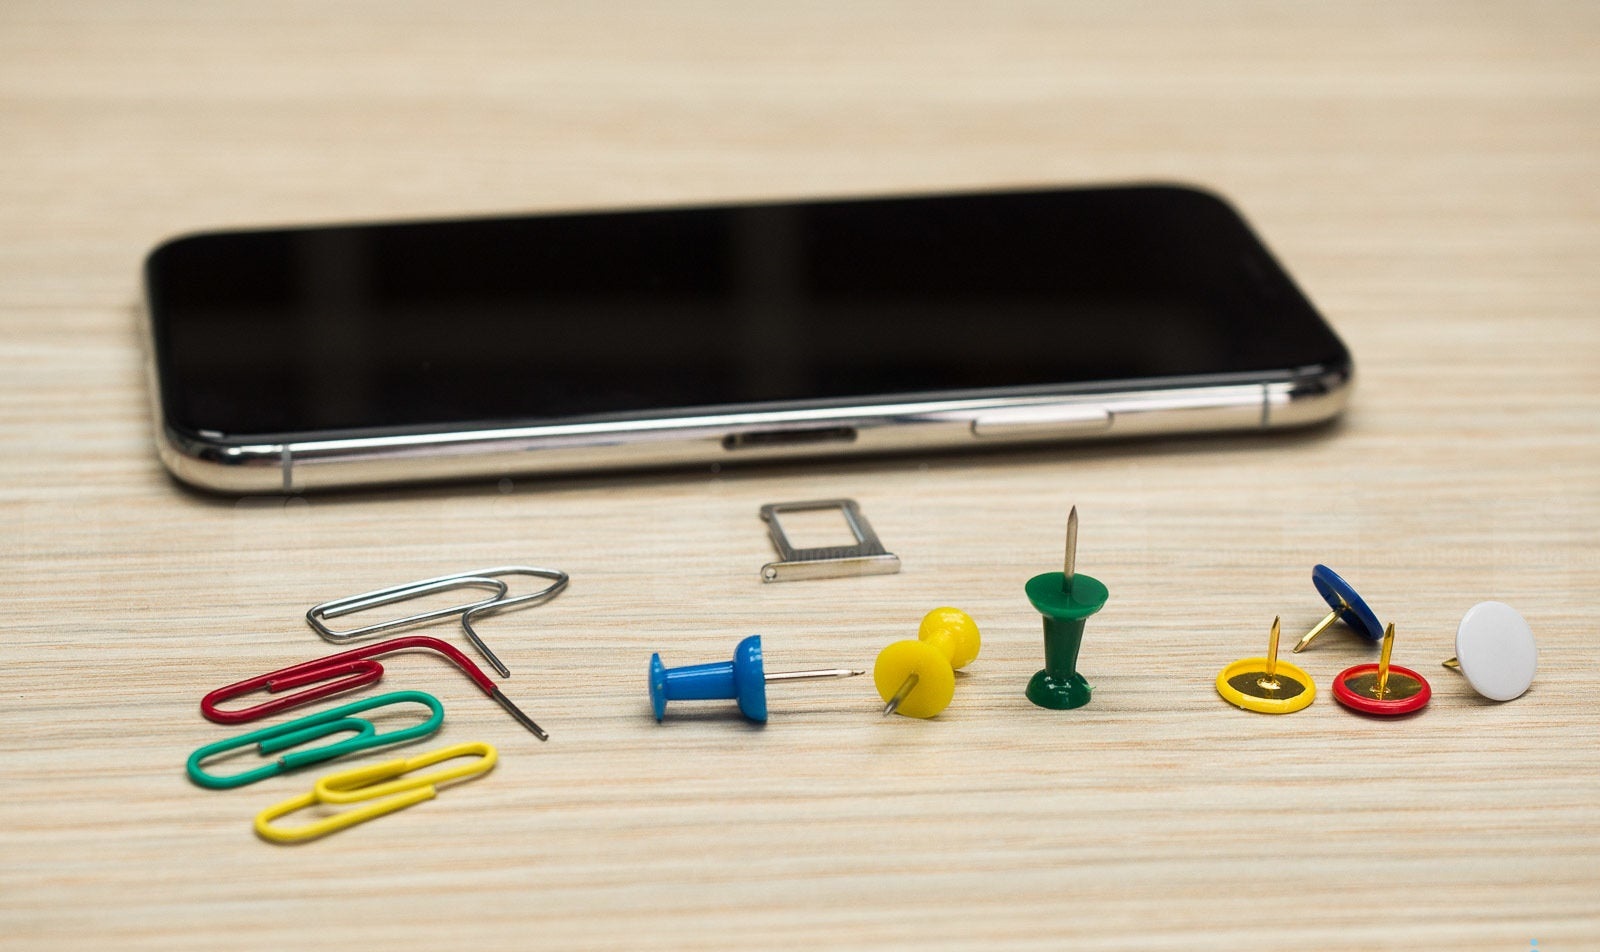
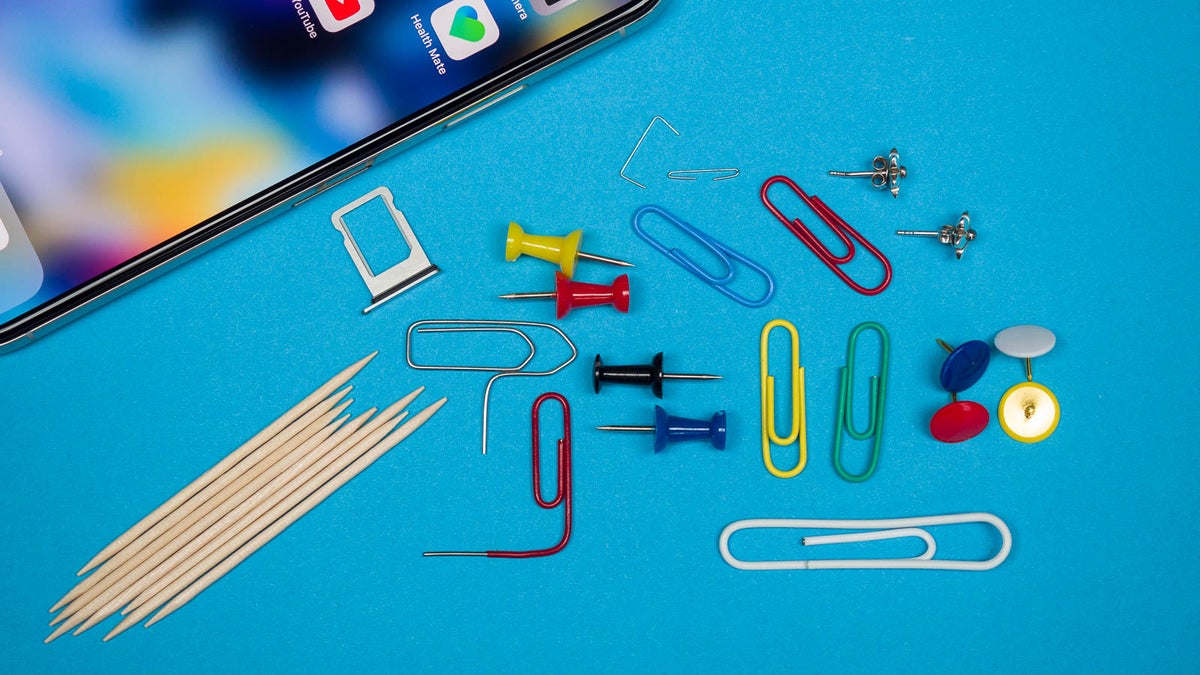
With the SIM card slot located, the next step in managing your iPhone's SIM card involves inserting the SIM card ejector tool. This small, specialized tool is designed to safely and efficiently access the SIM card tray without causing damage to your device. It's essential to use the SIM card ejector tool provided by Apple or a suitable alternative to ensure a smooth and risk-free process.
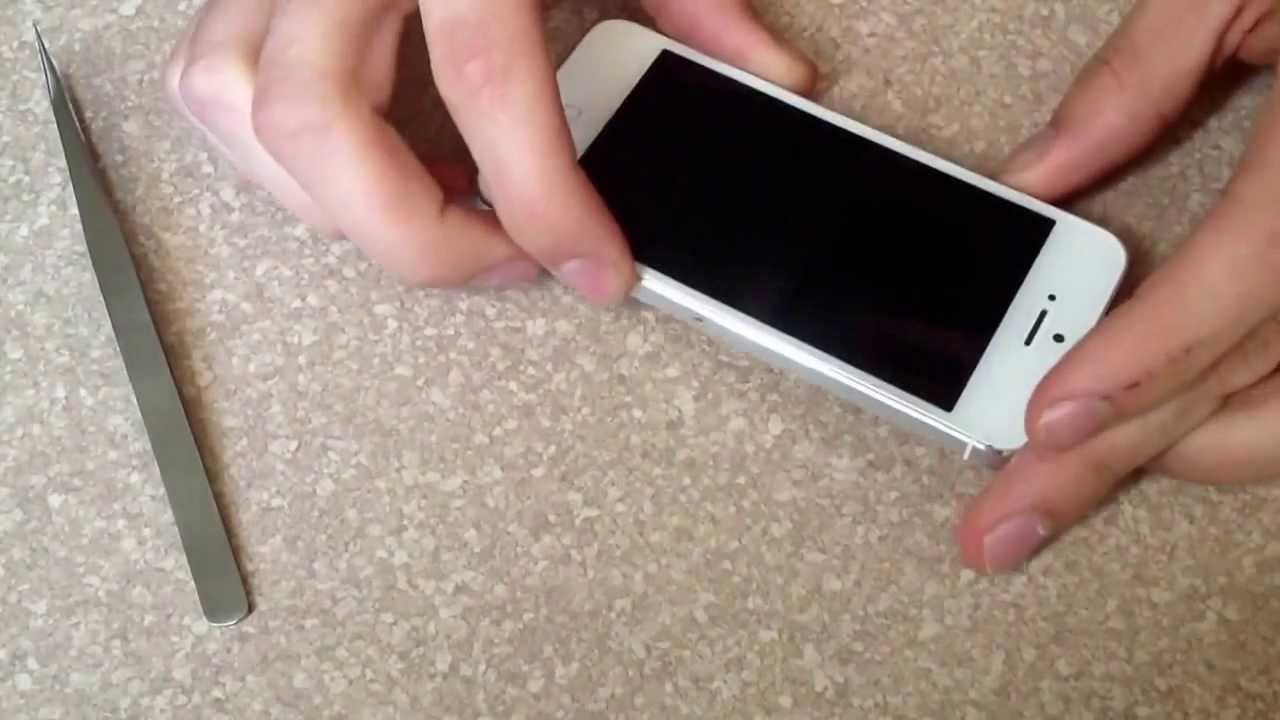
To insert the SIM card ejector tool, hold it between your thumb and index finger, ensuring a firm grip on the tool. Position the pointed end of the tool into the pinhole opening located near the SIM card slot. Apply gentle pressure while maintaining a steady hand, allowing the tool to slide smoothly into the pinhole.
As the SIM card ejector tool is inserted, you may feel a slight resistance, which is normal. Continue to apply gentle pressure until the tool is fully inserted into the pinhole, ensuring that it's securely positioned. It's important to exercise caution and precision during this step to avoid any damage to the pinhole or the surrounding area.
Once the SIM card ejector tool is in place, you're ready to proceed to the next step in the process. The successful insertion of the tool sets the stage for accessing the SIM card tray, enabling you to proceed with confidence and precision. With the tool securely positioned in the pinhole, you're well-prepared to eject the SIM card tray and proceed to the subsequent steps in this guide.
By carefully inserting the SIM card ejector tool, you've taken a crucial step toward managing your iPhone's SIM card effectively. This meticulous process ensures that you're equipped to navigate the remaining steps with ease, setting the foundation for a successful experience in accessing and managing the SIM card tray.
Now that you've securely inserted the SIM card ejector tool, let's move on to the next step, where we'll explore the process of ejecting the SIM card tray to access the SIM card within your iPhone.
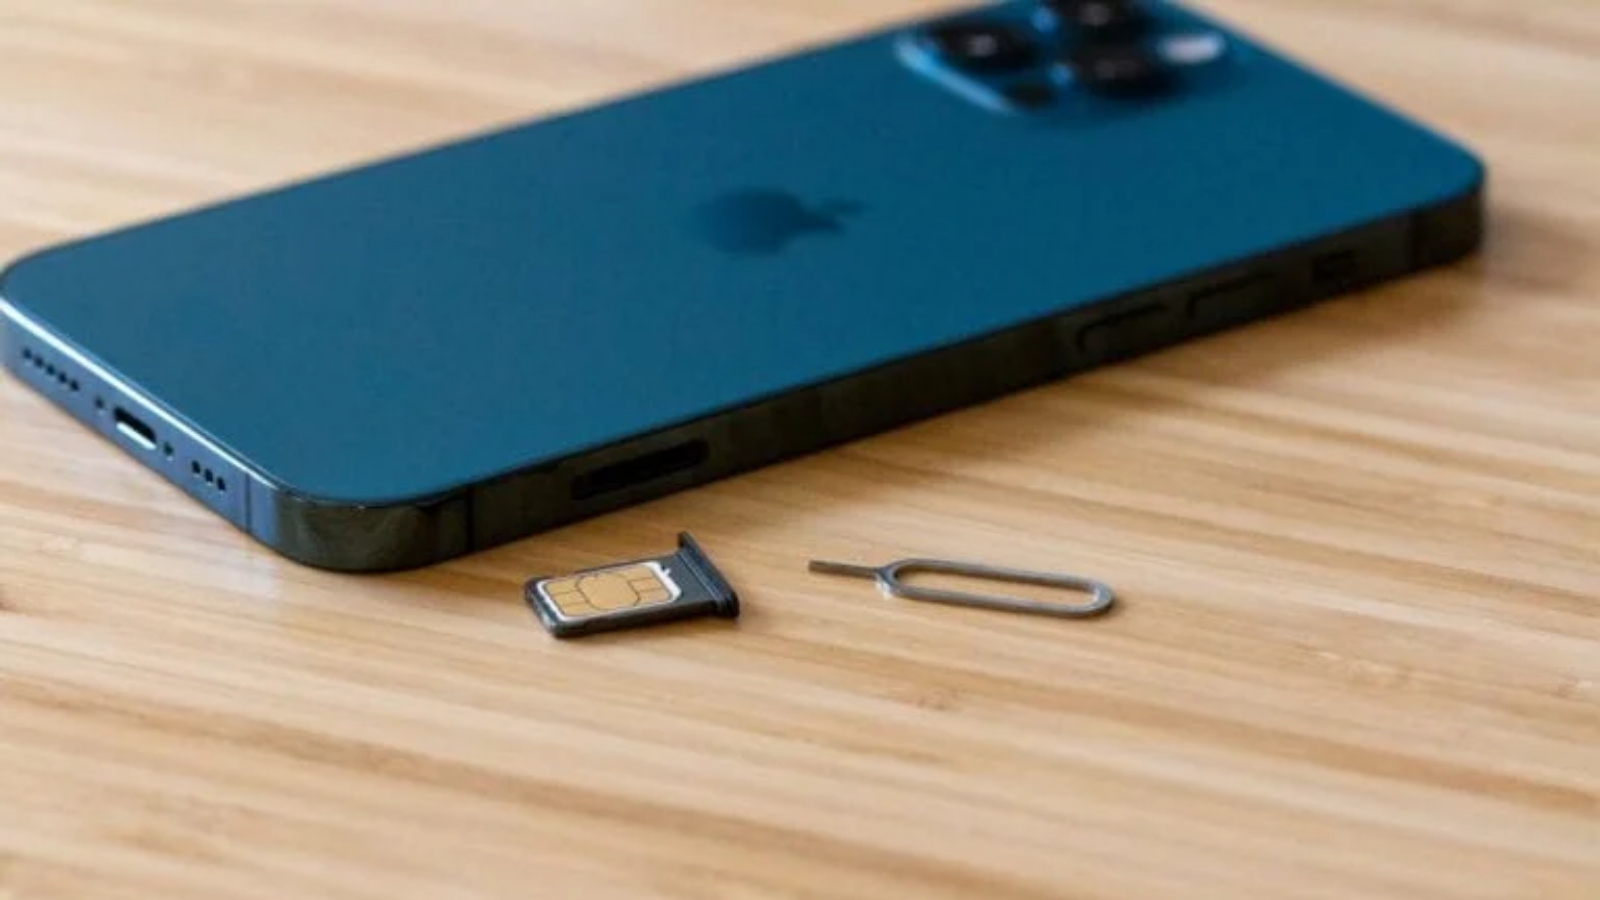
Step 3: Eject the SIM Card Tray
Ejecting the SIM card tray is a pivotal step in the process of managing your iPhone's SIM card. Once the SIM card ejector tool is securely inserted into the pinhole near the SIM card slot, you're ready to proceed with the next phase. Ejecting the SIM card tray allows you to access the SIM card and make necessary changes, such as inserting a new SIM card or replacing the existing one.
To eject the SIM card tray, apply gentle and steady pressure to the SIM card ejector tool while maintaining a firm grip on your iPhone. The pressure exerted on the tool will trigger the release mechanism within the device, causing the SIM card tray to protrude slightly from the slot. It's important to exercise caution and avoid applying excessive force to prevent any damage to the SIM card tray or the surrounding components.
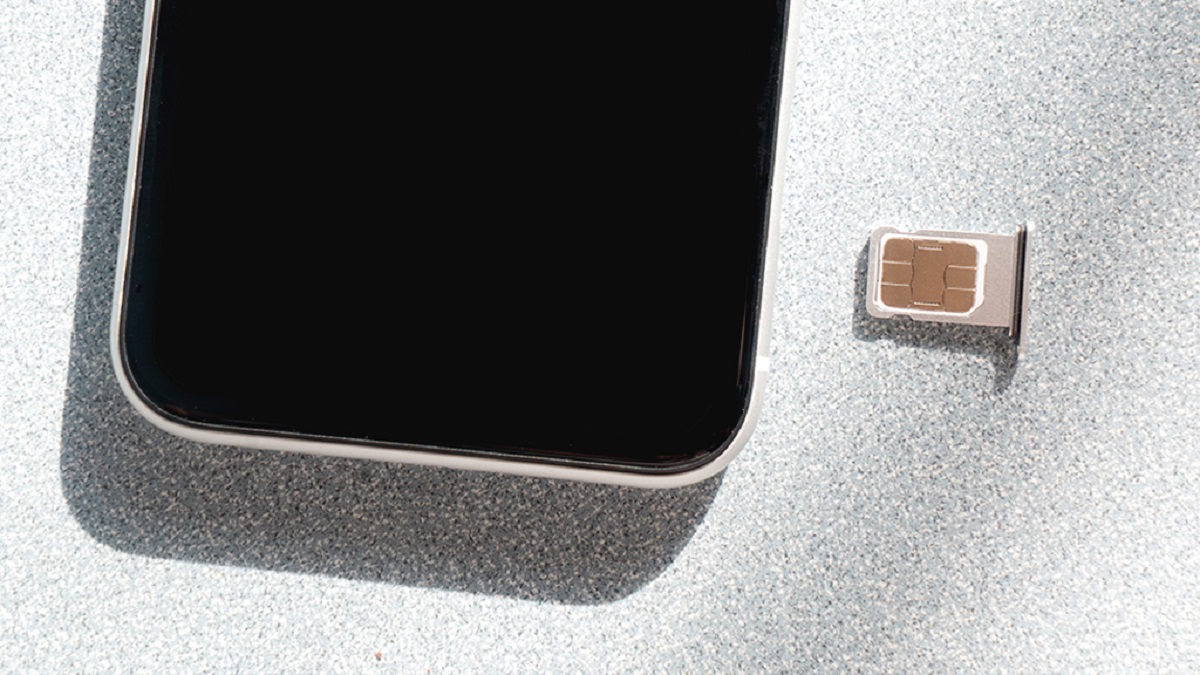
As the SIM card tray emerges from the slot, carefully grasp the exposed edge of the tray and gently pull it out of the device. Take care to handle the SIM card tray with precision and delicacy, ensuring that it remains level and stable as it is removed from the iPhone. By approaching this step with attentiveness and care, you can safeguard the integrity of the SIM card tray and the SIM card housed within it.
Once the SIM card tray is fully extended, inspect it closely to locate the SIM card nestled within the designated slot. Take note of the orientation of the SIM card within the tray, as this will guide you when inserting a new SIM card or repositioning the existing one. By familiarizing yourself with the layout of the SIM card tray and its contents, you'll be well-prepared to proceed with the subsequent steps in managing your iPhone's SIM card.
Ejecting the SIM card tray is a precise and calculated process that demands attention to detail and a steady hand. By approaching this step with patience and precision, you can ensure a seamless and successful experience in accessing the SIM card and making necessary adjustments to your iPhone's connectivity. With the SIM card tray now accessible, you're ready to proceed to the next step, where we'll delve into the process of removing the SIM card tray from your iPhone.
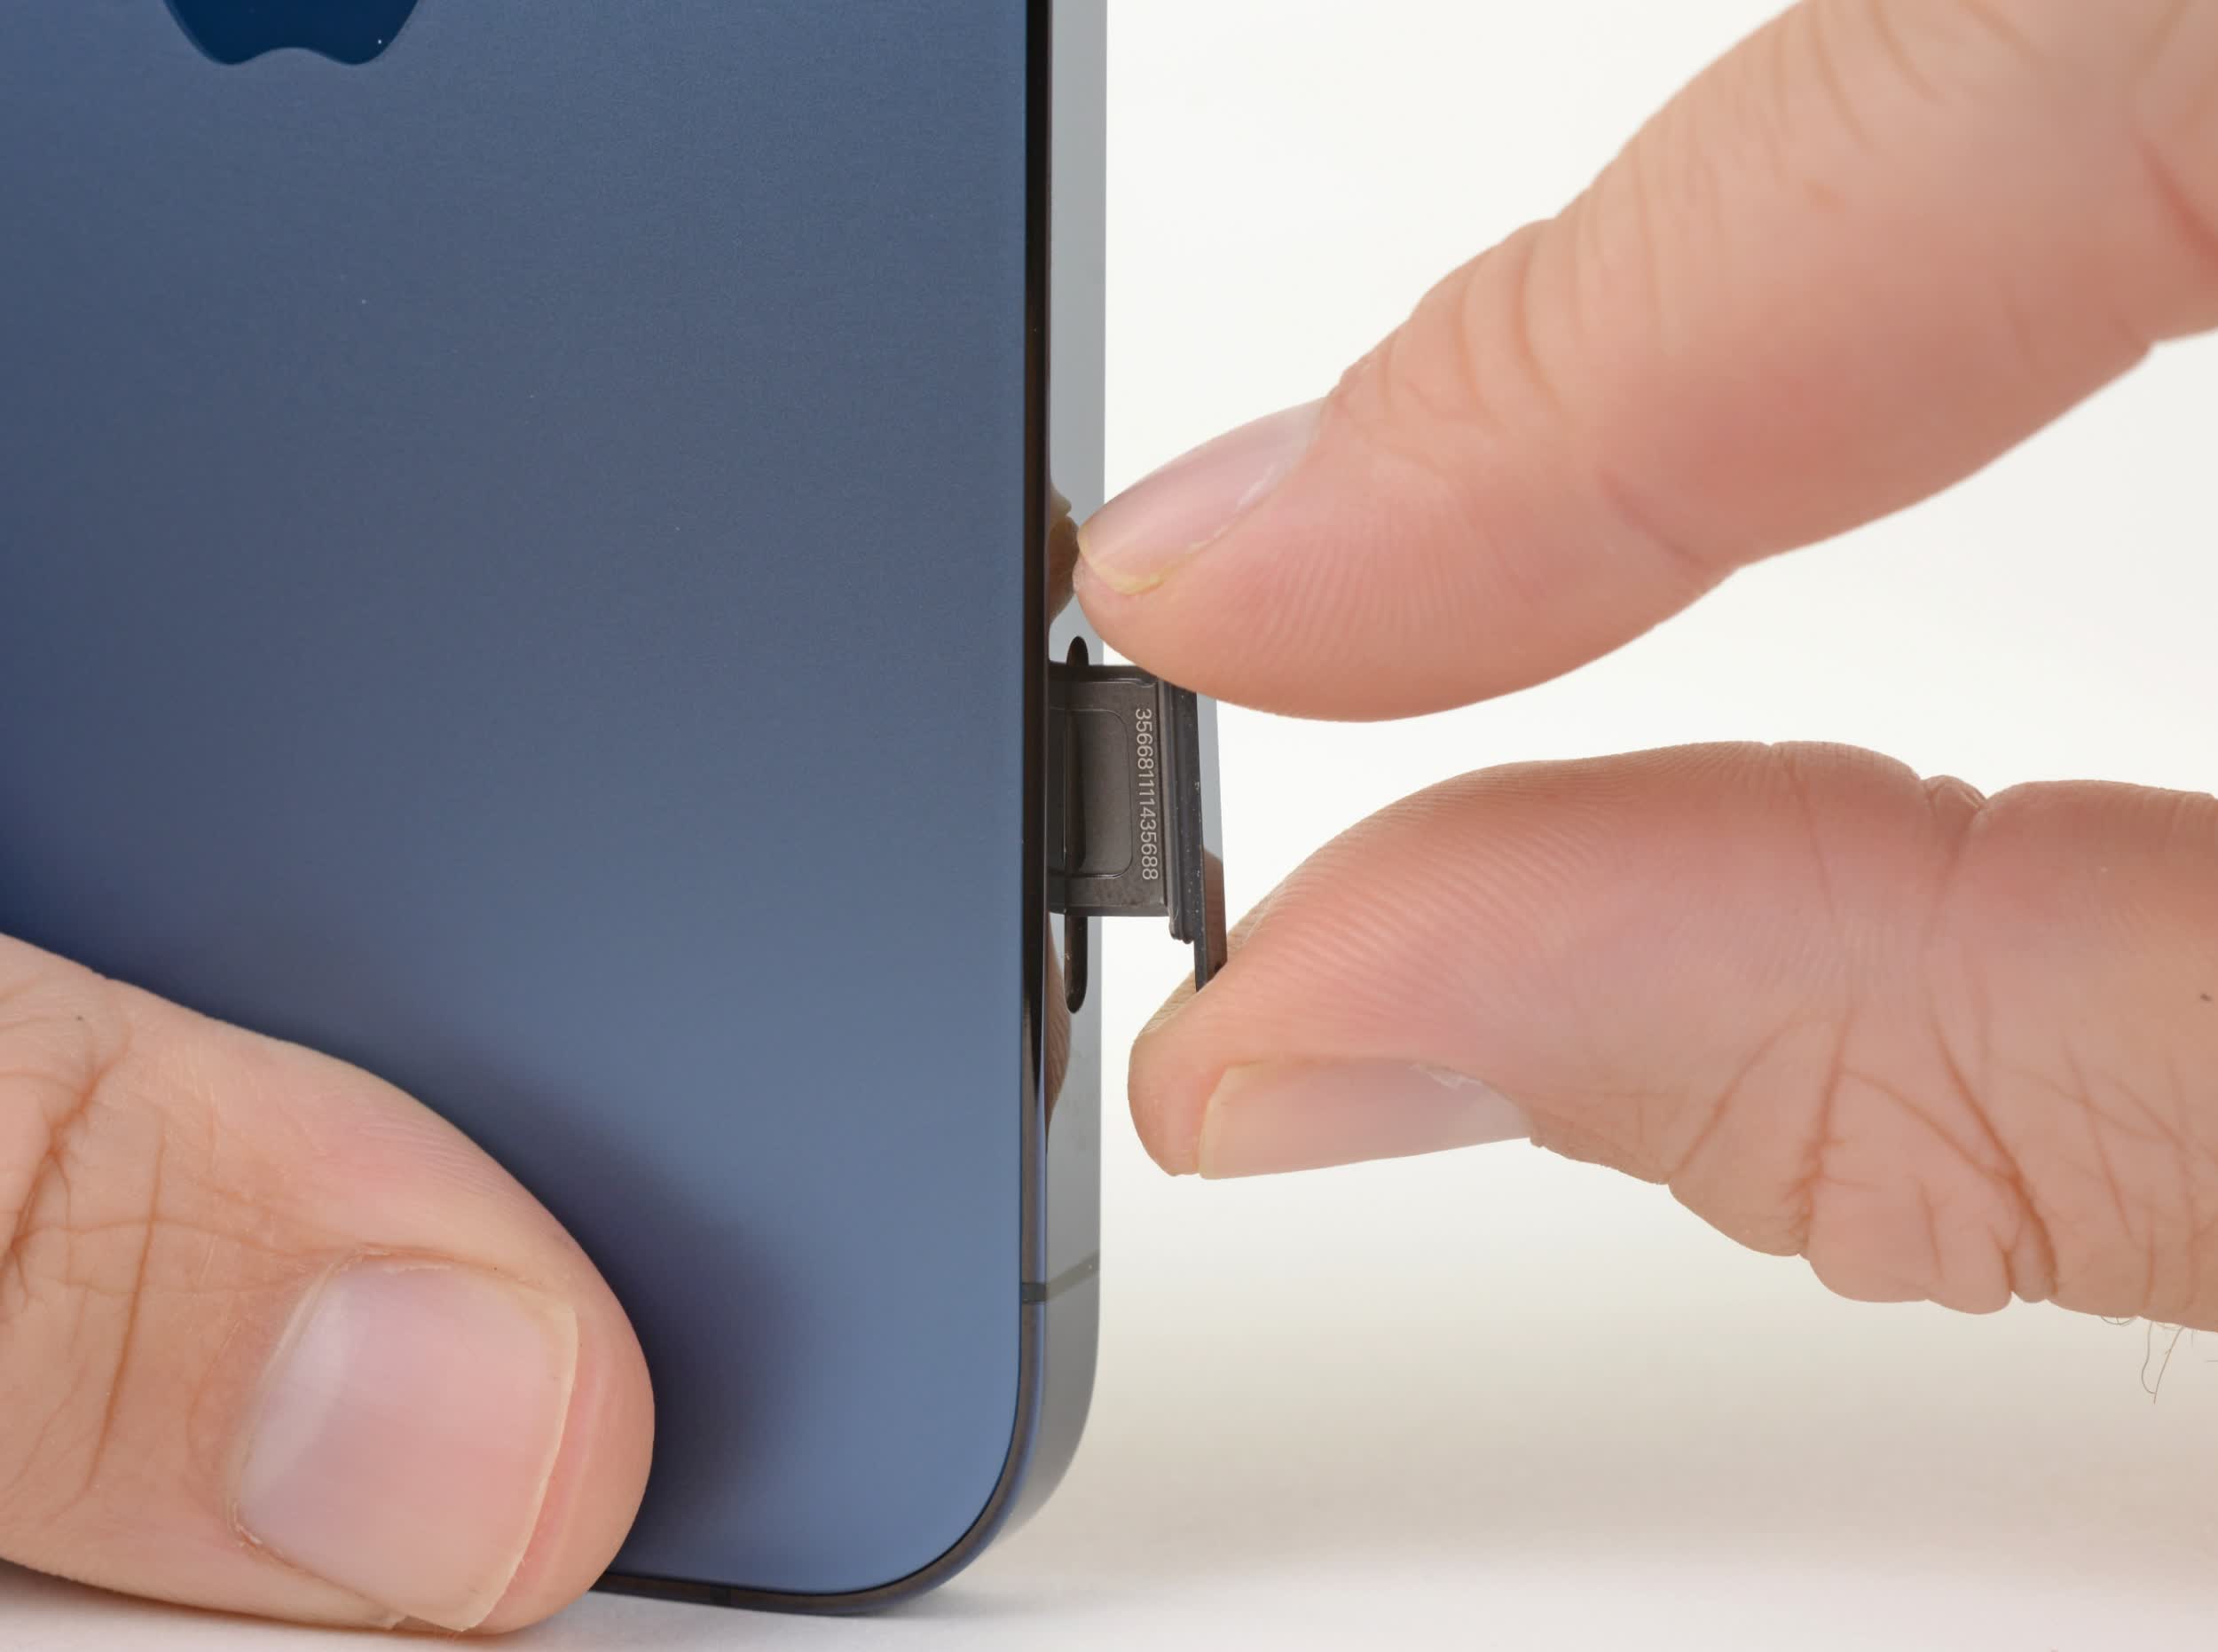
Step 4: Remove the SIM Card Tray
With the SIM card tray successfully ejected from your iPhone, the next crucial step is to remove the tray from the device. Carefully holding the protruding edge of the SIM card tray, gently pull it out of the iPhone, ensuring a smooth and controlled motion. It's essential to maintain a steady grip and handle the tray with delicacy to prevent any damage to the SIM card or the tray itself.
As you carefully remove the SIM card tray, take note of the SIM card nestled within the designated slot. The SIM card is a small, rectangular chip that facilitates your device's connection to a cellular network. By observing the orientation of the SIM card within the tray, you can ensure that it remains properly positioned when making any changes or inspections.
Inspect the SIM card closely, paying attention to its condition and ensuring that it is free from any visible damage. Additionally, take note of the metal contacts on the SIM card, which establish the connection with your device. It's important to handle the SIM card with care, avoiding any contact with the metal contacts to prevent interference with its functionality.
As the SIM card tray is removed, set it down on a flat and stable surface, ensuring that it remains level and secure. By placing the tray on a steady surface, you can avoid any accidental displacement of the SIM card or damage to the tray. This deliberate approach to handling the SIM card tray safeguards its integrity and the SIM card housed within it.
With the SIM card tray removed from your iPhone, you've successfully completed a crucial phase in managing your device's SIM card. This meticulous process sets the stage for making necessary changes to the SIM card or inspecting it for any issues. By approaching this step with attentiveness and precision, you've ensured that the SIM card and tray remain in optimal condition, setting the foundation for a seamless and successful experience in managing your iPhone's connectivity.
Now that you've removed the SIM card tray from your iPhone, you're ready to proceed to the next step, where we'll explore the process of inserting or replacing the SIM card within the tray.
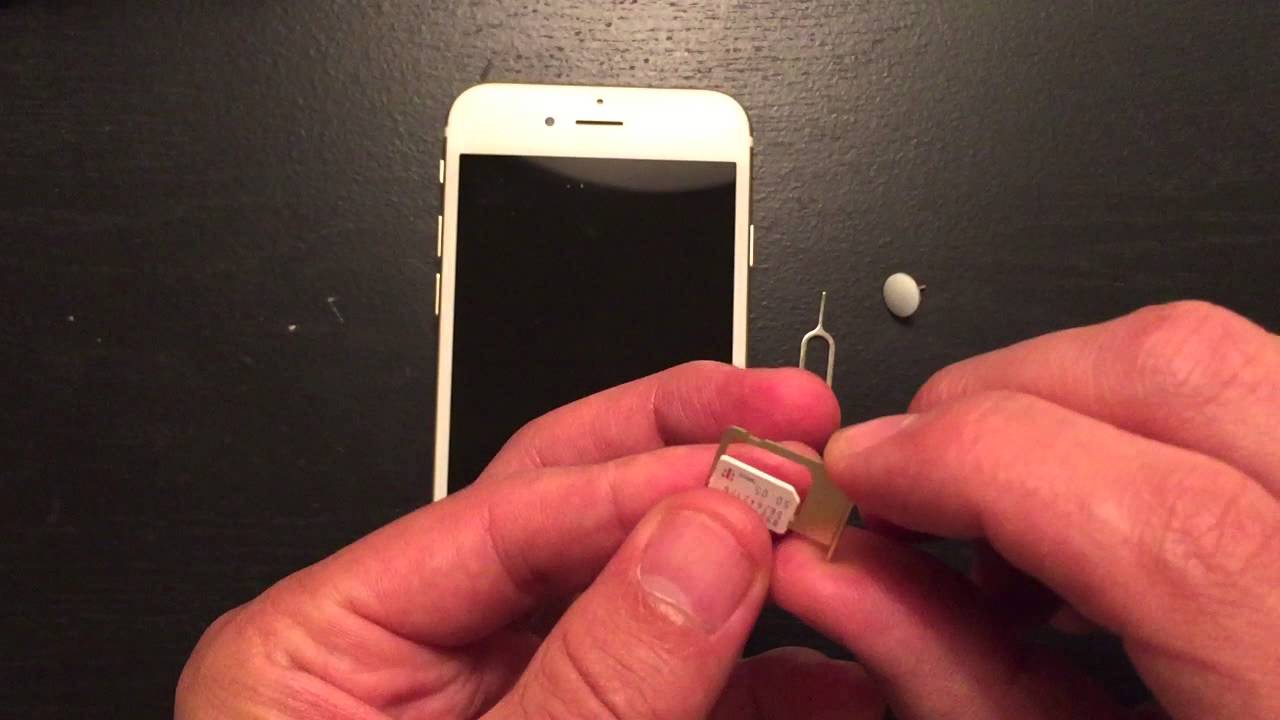
Step 5: Insert or Replace the SIM Card
Now that you have the SIM card tray in hand, you're ready to insert a new SIM card or replace the existing one. Whether you're switching to a new mobile service provider, upgrading to a different SIM card for international travel, or simply replacing a damaged card, this step allows you to customize your iPhone's connectivity to suit your needs.
When inserting or replacing the SIM card, it's crucial to handle the card with care to prevent any damage to its delicate components. Start by carefully removing the existing SIM card from the tray, if applicable, by gently sliding it out of its slot. Take note of the orientation of the SIM card within the tray, ensuring that the new card is positioned in the same manner to guarantee a proper fit.
If you're inserting a new SIM card, align it with the designated slot within the SIM card tray, ensuring that the metal contacts on the card align with the corresponding contacts within the tray. With a steady hand, gently place the SIM card into the slot, taking care to avoid applying excessive pressure that could potentially damage the card or the tray.
In the case of replacing the existing SIM card, carefully position the new card within the tray, ensuring that it sits securely and evenly. Once the new SIM card is in place, gently slide the SIM card tray back into the iPhone, aligning it with the slot and applying steady pressure to ensure a smooth reinsertion.
By approaching the process of inserting or replacing the SIM card with precision and attentiveness, you can customize your iPhone's connectivity to align with your mobile service needs. Whether you're embracing a new mobile plan, exploring international roaming options, or addressing connectivity issues, this step empowers you to tailor your device's SIM card to suit your preferences.
With the SIM card securely in place within the tray, you're ready to proceed to the final step, where we'll explore the process of reinserting the SIM card tray into your iPhone, completing the comprehensive guide to managing your device's SIM card slot.
Step 6: Reinsert the SIM Card Tray
With the SIM card securely in place within the tray, you've reached the final step in the process of managing your iPhone's SIM card. Reinserting the SIM card tray is a straightforward yet crucial task that ensures the SIM card remains securely housed within your device, enabling seamless connectivity and network access.
To reinsert the SIM card tray, align it carefully with the slot on the side of your iPhone, ensuring that it sits flush and level with the device's exterior. Take note of the orientation of the tray, as it should align precisely with the slot to facilitate a smooth reinsertion. With a steady hand, gently guide the SIM card tray back into the slot, applying even pressure to ensure a secure fit.
As the SIM card tray slides back into the iPhone, you may feel a subtle click or resistance, indicating that the tray is repositioned correctly within the slot. It's important to approach this step with care and precision, avoiding any abrupt or forceful movements that could disrupt the alignment of the tray.
Once the SIM card tray is fully reinserted, take a moment to inspect its alignment and ensure that it sits seamlessly within the slot. The tray should sit snugly against the device's exterior, maintaining a uniform and level position. By confirming the secure placement of the SIM card tray, you can rest assured that the SIM card is housed optimally within your iPhone.
With the SIM card tray successfully reinserted, you've completed the comprehensive process of managing your iPhone's SIM card slot. This meticulous journey has empowered you to access, inspect, and customize the SIM card within your device, ensuring that it aligns with your mobile service needs.
By following this step-by-step guide, you've gained the knowledge and confidence to navigate the intricacies of your iPhone's SIM card slot with ease. Whether you're switching SIM cards, troubleshooting connectivity issues, or exploring international roaming options, this guide has equipped you to manage your device's connectivity effectively.
As you proceed with your iPhone, armed with a deeper understanding of its SIM card slot, you can approach future changes and adjustments with confidence and precision. This newfound expertise empowers you to take control of your device's connectivity, ensuring that it seamlessly adapts to your evolving mobile service requirements.
Now that the SIM card tray is securely reinserted, you can enjoy uninterrupted connectivity and network access on your iPhone, knowing that you have the skills to manage its SIM card slot effectively.
Conclusion
In conclusion, mastering the process of opening the SIM card slot on your iPhone is a valuable skill that empowers you to take control of your device's connectivity with confidence and precision. By following this comprehensive step-by-step guide, you've gained the knowledge and expertise to access, inspect, and customize the SIM card within your iPhone, ensuring that it aligns seamlessly with your mobile service needs.
Throughout this journey, you've navigated the intricacies of locating the SIM card slot, inserting the SIM card ejector tool, ejecting the SIM card tray, removing the tray, and inserting or replacing the SIM card. Each step has been meticulously crafted to equip you with the skills and understanding needed to manage your iPhone's SIM card slot effectively.
By familiarizing yourself with the physical layout of your iPhone and the position of the SIM card slot, you've set the stage for a smooth and successful experience in managing the SIM card. The careful insertion of the SIM card ejector tool and the subsequent ejection of the SIM card tray have allowed you to access the SIM card with precision and delicacy, safeguarding its integrity throughout the process.
Whether you're embracing a new mobile plan, exploring international roaming options, or addressing connectivity issues, the ability to insert or replace the SIM card empowers you to tailor your device's connectivity to suit your preferences. This customization ensures that your iPhone seamlessly adapts to your evolving mobile service requirements, enhancing your overall user experience.
As you've completed the final step of reinserting the SIM card tray with care and precision, you can now enjoy uninterrupted connectivity and network access on your iPhone, knowing that you have the skills to manage its SIM card slot effectively. This newfound expertise positions you to approach future changes and adjustments with confidence, ensuring that your device remains optimally connected to a cellular network.
In essence, mastering the process of opening the SIM card slot on your iPhone is not only a practical skill but also a testament to your ability to engage with the intricate components of modern technology. By embracing this knowledge, you've elevated your understanding of your iPhone's functionality, enabling you to harness its full potential and adapt it to your individual needs.
With this guide as your companion, you're equipped to navigate the dynamic landscape of mobile connectivity, ensuring that your iPhone remains seamlessly integrated with your mobile service preferences. As you continue to explore the possibilities of your device, the knowledge and confidence gained from this guide will serve as a valuable resource, empowering you to manage your iPhone's SIM card slot with ease and proficiency.