Introduction
Capturing screenshots on your OnePlus Nord 2 is a handy feature that allows you to save and share important information, memorable moments, or interesting content with ease. Whether you want to capture a hilarious meme, save a vital piece of information, or share a stunning image, knowing how to take screenshots on your device is essential. In this guide, we will explore various methods to capture screenshots on your OnePlus Nord 2, catering to different preferences and situations.
Taking screenshots is a fundamental function that transcends the boundaries of everyday smartphone usage. It empowers users to preserve and share content that resonates with them, whether it's a heartwarming message, a funny meme, or a crucial piece of information. With the OnePlus Nord 2, you have multiple options to capture screenshots, each designed to accommodate different user preferences and scenarios.
The ability to take screenshots effortlessly is a testament to the user-centric design of the OnePlus Nord 2. Whether you're a tech-savvy individual or a casual user, the intuitive nature of the screenshot methods ensures that everyone can easily capture and share content. As we delve into the various methods, you'll discover the versatility and convenience that the OnePlus Nord 2 offers when it comes to capturing screenshots.
In the following sections, we will explore the step-by-step processes for using the physical buttons, the quick settings panel, the three-finger swipe gesture, and the Google Assistant to capture screenshots on your OnePlus Nord 2. Each method presents a unique approach, catering to different user preferences and situations. By understanding and mastering these methods, you can elevate your screenshot-capturing experience and make the most of your OnePlus Nord 2's capabilities.
Using the Physical Buttons
Capturing a screenshot using the physical buttons on your OnePlus Nord 2 is a straightforward and convenient method. This approach is particularly useful in situations where you need to capture a screenshot quickly, such as during a fast-paced gaming session or while browsing social media. The seamless integration of the physical buttons for this purpose reflects OnePlus's commitment to user-friendly design.
To take a screenshot using the physical buttons, simply locate the power button and the volume down button on your OnePlus Nord 2. Once you have the content on the screen that you want to capture, press the power button and the volume down button simultaneously. This action will trigger the device to capture a screenshot instantly, preserving the displayed content in a single, easily accessible image.
The physical buttons method offers a tactile and responsive way to capture screenshots, allowing you to execute the action with precision and speed. The audible confirmation of the screenshot being captured, often in the form of a subtle sound or haptic feedback, provides reassurance that the process was successful. This tactile and auditory feedback enhances the overall user experience, ensuring that you can capture screenshots with confidence and ease.
Furthermore, the physical buttons method is universally accessible, making it intuitive for users of all levels of technical proficiency. Whether you're a seasoned smartphone user or a newcomer to the OnePlus Nord 2, the simplicity and reliability of this method ensure that you can capture screenshots effortlessly.
In addition to its ease of use, the physical buttons method offers a seamless way to capture screenshots in various scenarios, including when the screen is displaying dynamic or time-sensitive content. Whether you're capturing a fleeting moment in a game or preserving a time-sensitive message, the physical buttons method empowers you to capture screenshots with precision and efficiency.
Mastering the physical buttons method for capturing screenshots on your OnePlus Nord 2 is a valuable skill that enhances your overall user experience. By leveraging the tactile and responsive nature of the physical buttons, you can effortlessly capture and preserve important content, memorable moments, and valuable information with a simple and intuitive gesture.
Using the Quick Settings Panel
The Quick Settings Panel on your OnePlus Nord 2 provides a convenient and efficient method for capturing screenshots. This approach is particularly useful when you prefer a gesture-based method that doesn't involve physical buttons. Whether you're browsing the web, reading an interesting article, or exploring social media, the Quick Settings Panel method offers a seamless way to capture screenshots with ease.
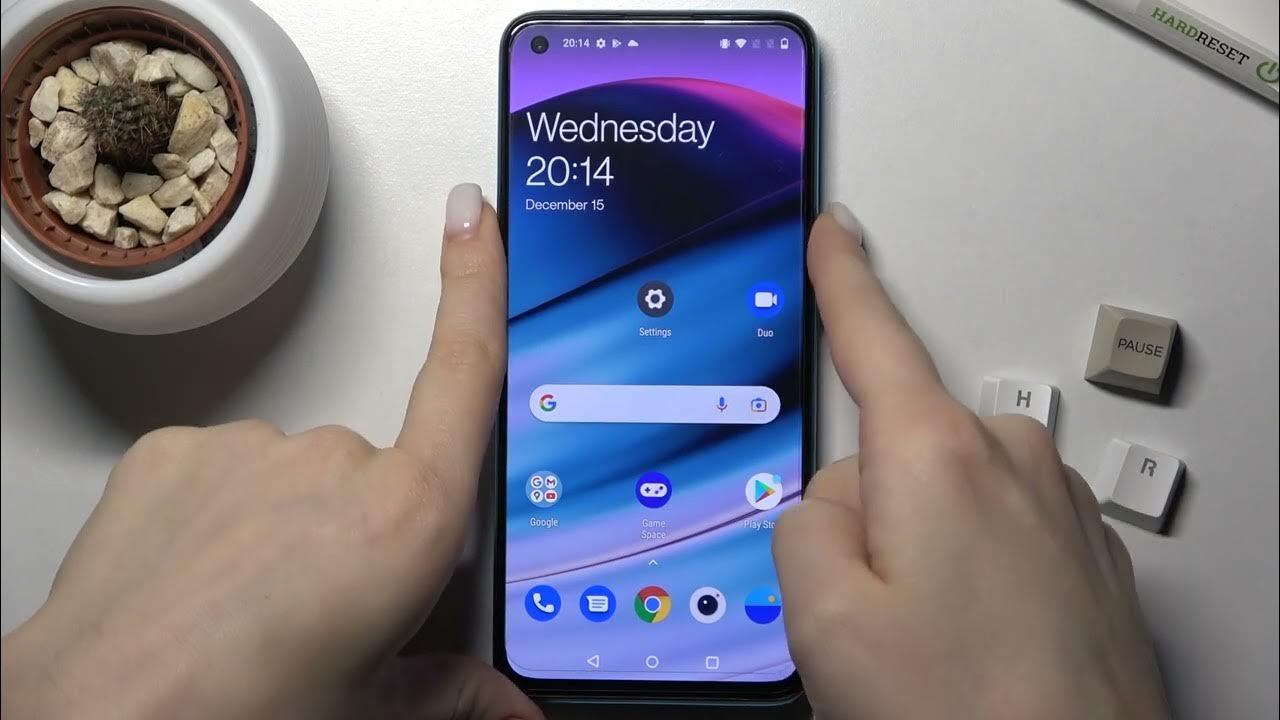
To initiate the screenshot capture process using the Quick Settings Panel, start by navigating to the screen or content that you want to capture. Once you have the desired content displayed, swipe down from the top of the screen to access the Quick Settings Panel. Within the Quick Settings Panel, you will find the "Screenshot" icon, typically represented by a small image of a phone or a rectangle with dashed lines.
Upon locating the "Screenshot" icon, simply tap on it to trigger the screenshot capture process. This action instantly captures the content displayed on your screen, preserving it as a screenshot in your device's gallery. The Quick Settings Panel method offers a gesture-based approach that is intuitive and accessible, catering to users who prefer touch-based interactions over physical button presses.
One of the key advantages of using the Quick Settings Panel for capturing screenshots is the seamless integration of the feature within the device's interface. The accessibility and visibility of the "Screenshot" icon within the Quick Settings Panel ensure that you can initiate the screenshot capture process with minimal effort and without disrupting your current activity. This makes it an ideal method for capturing screenshots in a variety of scenarios, from browsing social media to reading long-form content.
Furthermore, the Quick Settings Panel method provides a streamlined approach to capturing screenshots, allowing you to maintain a smooth and uninterrupted user experience. By leveraging the intuitive nature of the Quick Settings Panel, you can effortlessly capture screenshots without the need to navigate through complex menus or interrupt your current task. This seamless integration enhances the overall user experience, empowering you to capture and share content with ease.
Mastering the Quick Settings Panel method for capturing screenshots on your OnePlus Nord 2 expands your capabilities and enhances your overall user experience. By leveraging the gesture-based approach and seamless integration within the device's interface, you can effortlessly capture and preserve important content, memorable moments, and valuable information with a simple and intuitive gesture.
Using Three-Finger Swipe Gesture
The three-finger swipe gesture presents a modern and intuitive method for capturing screenshots on your OnePlus Nord 2. This approach leverages the device's touch-sensitive capabilities to offer a seamless and gesture-based way to capture content displayed on the screen. By utilizing the natural dexterity of your fingers, the three-finger swipe gesture provides a convenient and efficient alternative to traditional button-based or panel-based methods.
To initiate the screenshot capture process using the three-finger swipe gesture, begin by navigating to the screen or content that you wish to capture. Once you have the desired content displayed, gently place three fingers on the screen and swipe downwards in a swift and fluid motion. This action triggers the device to capture a screenshot instantly, preserving the displayed content as an image in your device's gallery.
The three-finger swipe gesture method offers a touch-based approach that aligns with modern user interactions, catering to individuals who prefer intuitive and gesture-driven methods. This method harnesses the natural dexterity and fluidity of finger movements, providing a tactile and responsive way to capture screenshots without the need for physical button presses or panel interactions.
One of the key advantages of using the three-finger swipe gesture for capturing screenshots is the seamless integration of the feature within the device's touch interface. The natural and fluid motion of swiping three fingers downwards ensures that you can initiate the screenshot capture process with ease, adding a touch of elegance to the overall user experience. This method is particularly well-suited for scenarios where you want to capture screenshots quickly and effortlessly, without interrupting your current activity.
Furthermore, the three-finger swipe gesture method offers a modern and stylish approach to capturing screenshots, aligning with the contemporary design philosophy of the OnePlus Nord 2. By leveraging the touch-sensitive capabilities of the device, this method provides a visually engaging and user-friendly way to capture and preserve content, enhancing the overall user experience.
Mastering the three-finger swipe gesture method for capturing screenshots on your OnePlus Nord 2 expands your capabilities and adds a touch of sophistication to your user experience. By embracing the modern and intuitive nature of this method, you can effortlessly capture and preserve important content, memorable moments, and valuable information with a simple and elegant gesture.
Using the Google Assistant
Leveraging the power of artificial intelligence and voice commands, the Google Assistant offers a hands-free and voice-activated method for capturing screenshots on your OnePlus Nord 2. This innovative approach aligns with the modern trend of voice-enabled interactions, providing a seamless and convenient way to capture and preserve content displayed on the screen.
To initiate the screenshot capture process using the Google Assistant, start by activating the Assistant using the wake word or the dedicated activation gesture, depending on your device settings. Once the Google Assistant is active, simply issue the voice command "Hey Google, take a screenshot" or "Hey Google, capture the screen." The Assistant will promptly execute the command, capturing the content displayed on the screen and saving it as a screenshot in your device's gallery.
The Google Assistant method offers a hands-free and voice-activated approach that caters to users who prefer voice commands and minimal physical interactions. This method is particularly useful in scenarios where using physical buttons or touch-based gestures may not be convenient, such as when your hands are occupied or when you prefer a seamless voice-enabled experience.
One of the key advantages of using the Google Assistant for capturing screenshots is the effortless and intuitive nature of voice commands. By simply issuing a voice command to the Assistant, you can initiate the screenshot capture process without the need for manual interactions, adding a layer of convenience and accessibility to the overall user experience.
Furthermore, the Google Assistant method aligns with the trend of voice-enabled interactions, showcasing the innovative capabilities of the OnePlus Nord 2. By integrating voice commands with essential functions such as capturing screenshots, the device offers a modern and user-centric approach to everyday tasks, enhancing the overall user experience.
Mastering the Google Assistant method for capturing screenshots on your OnePlus Nord 2 expands your capabilities and adds a touch of futuristic convenience to your user experience. By embracing the hands-free and voice-activated nature of this method, you can effortlessly capture and preserve important content, memorable moments, and valuable information with a simple and intuitive voice command.