Introduction
Venmo has revolutionized the way we handle payments among friends, family, and even businesses. With its easy-to-use platform and seamless integration with popular social media networks, it has become the go-to app for many people when it comes to sending and receiving money. Whether you’re splitting the bill at a restaurant, paying your roommate for rent, or receiving funds for your freelance work, Venmo makes the process quick and hassle-free.
In this article, we will guide you through the process of accepting a Venmo payment. You’ll learn how to set up your Venmo account, link it to your bank account or debit card, and receive and confirm payments. Additionally, we’ll provide troubleshooting tips for common issues you may encounter and offer some useful advice for maximizing your Venmo experience.
By the end of this article, you’ll have all the information you need to confidently accept Venmo payments and navigate the platform with ease.
Setting Up Your Venmo Account
Before you can start accepting Venmo payments, you’ll need to set up your Venmo account. Follow these steps to get started:
- Download the Venmo app: Head to the App Store (for iOS) or Google Play Store (for Android) and search for “Venmo”. Download and install the app on your smartphone.
- Create a Venmo account: Open the Venmo app and click on “Sign up”. You’ll have the option to sign up using your Facebook account, Google account, or with your email address. Choose the method that is most convenient for you and follow the on-screen instructions to create your account.
- Set up a profile: Once you’ve created your Venmo account, you’ll be prompted to set up your profile. Add a profile picture, a catchy username, and a brief bio if you’d like. The profile information will help your friends or customers recognize you.
- Privacy settings: Venmo gives you control over your privacy settings. You can choose to make your transactions public, visible to friends, or private. To access your privacy settings, go to the “Settings” tab in the app and select “Privacy”. Choose the level of privacy that makes you comfortable.
- Add security measures: To secure your Venmo account, consider enabling additional security measures. Venmo offers features like two-factor authentication and PIN codes, which add an extra layer of protection. You can access these settings in the “Security” section of the app’s settings.
Once you’ve completed these steps, your Venmo account will be ready to receive payments. Next, we’ll discuss how to link your bank account or debit card to Venmo to facilitate the transfer of funds.
Linking Your Bank Account or Debit Card
To receive Venmo payments, you’ll need to link your bank account or debit card to your Venmo account. Follow these steps to link your preferred payment method:
- Open the Venmo app: Launch the Venmo app on your smartphone and log in to your account.
- Access the settings: Tap on the menu icon (usually in the top-left corner) to open the side menu. From there, select “Settings”.
- Choose “Payment Methods”: In the “Settings” menu, you’ll find an option called “Payment Methods”. Tap on it to proceed.
- Add a bank account or debit card: Once you’re in the “Payment Methods” section, you’ll have the option to add either a bank account or a debit card. Select the desired option based on your preference.
- Follow the instructions: Venmo will guide you through the process of adding your bank account or debit card. You may need to provide your account or card details, such as the account number, routing number, or card number.
- Confirm the payment method: After providing the necessary information, Venmo will send a small amount to your bank account or charge a nominal fee to your debit card. This step is done to verify your ownership of the account or card. Check your bank statement or transaction history to find the exact amount charged or deposited.
- Enter the verification amount: Once you have received the verification amount, return to the Venmo app and enter the exact amount to confirm your bank account or debit card.
- Success! You’ve linked your payment method: Once you have successfully completed the verification process, your bank account or debit card will be linked to your Venmo account. You can now accept payments directly into your chosen payment method.
Linking your bank account or debit card to your Venmo account eliminates the need for manual transfers, making it easier to receive payments and withdraw funds. In the next section, we’ll discuss how to receive a Venmo payment and confirm its receipt.
Receiving a Venmo Payment
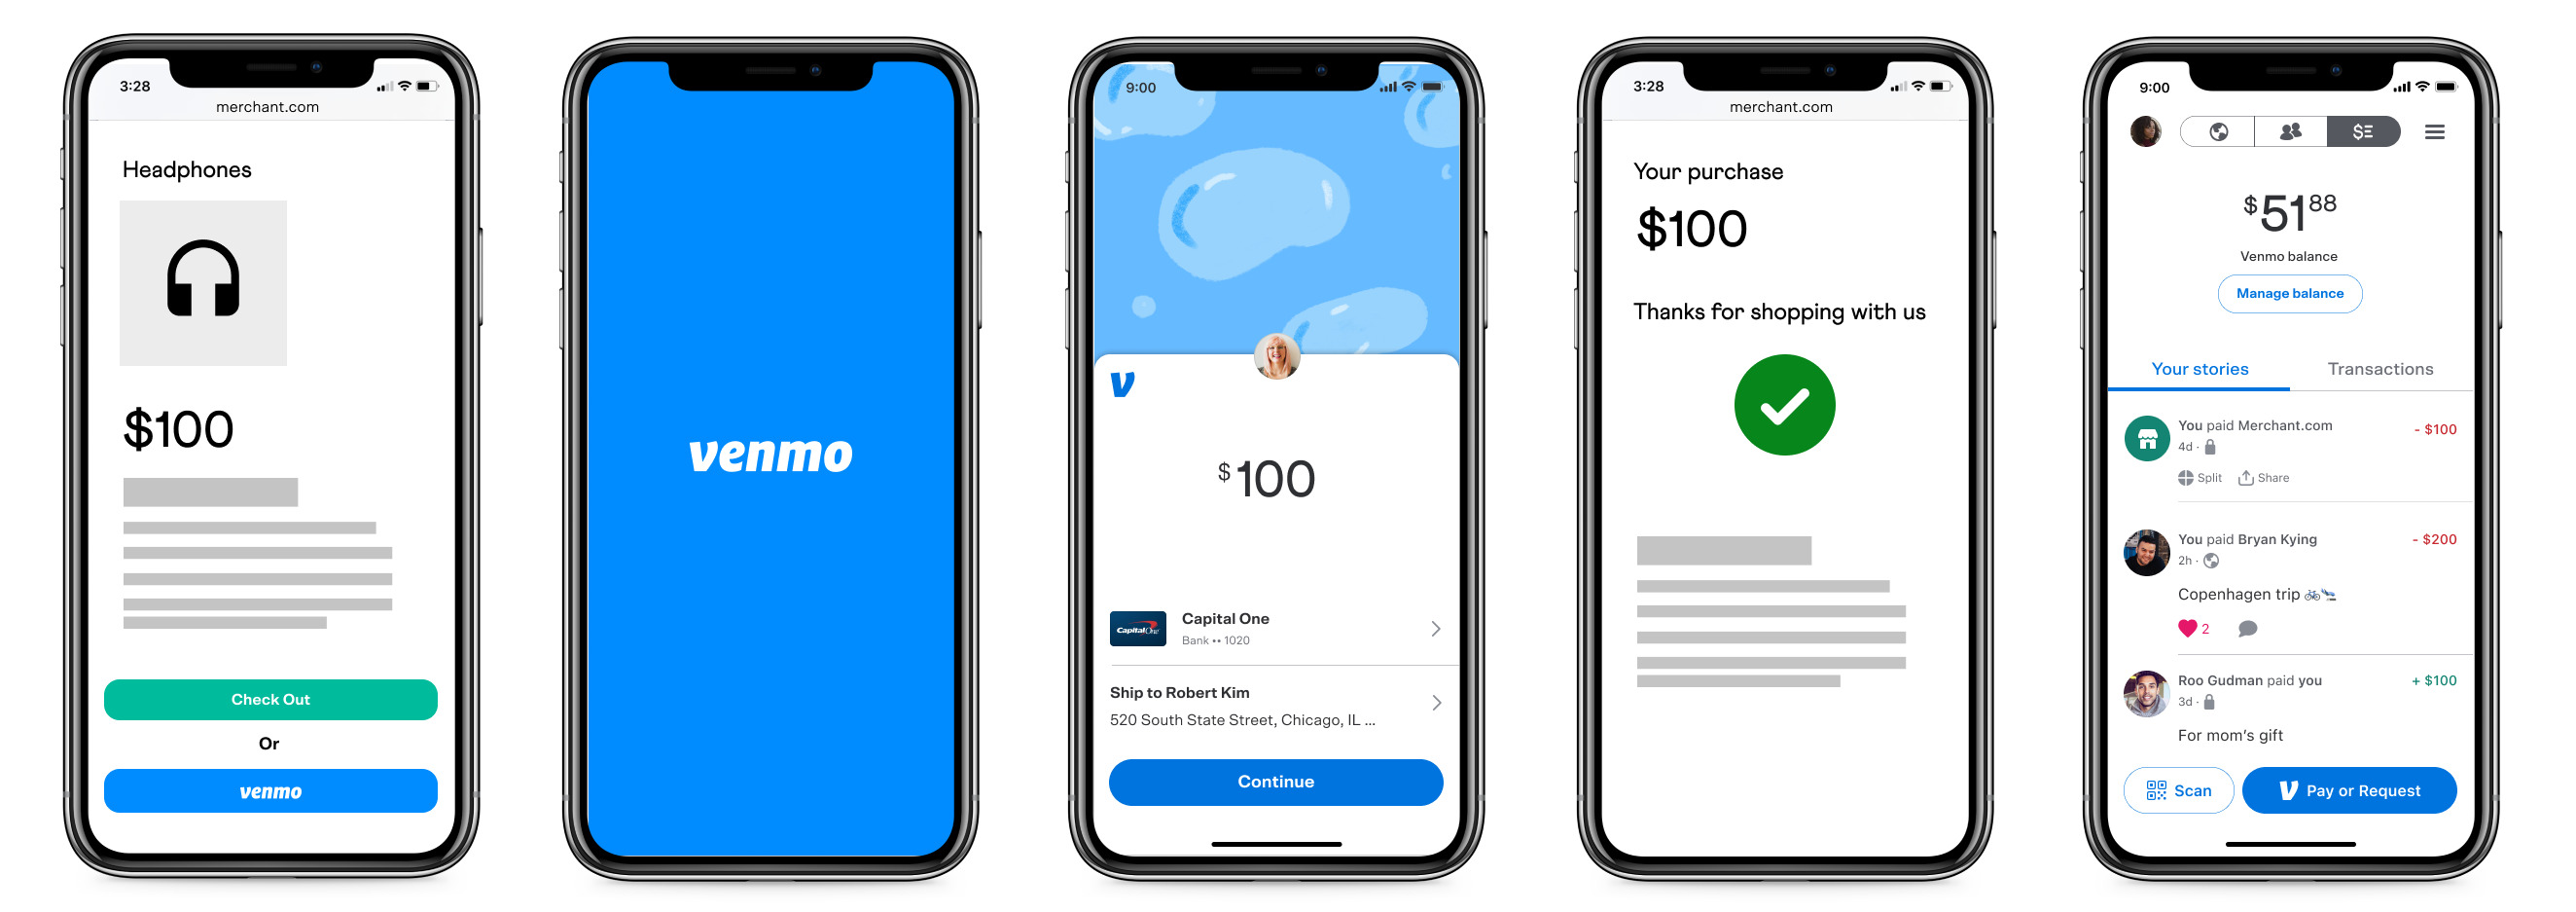
Once your Venmo account is set up and your preferred payment method is linked, you’re ready to start receiving Venmo payments. Follow these steps to receive a payment:
- Open the Venmo app: Launch the Venmo app on your smartphone and log in to your account.
- Navigate to the home screen: The home screen is usually the first screen you see after logging in. It displays a feed of recent Venmo transactions.
- Initiate a payment request: To receive a payment, you can either request a specific amount from someone or wait for them to send you money. If you know the username or email address of the person sending you money, simply tap the “Request” button and enter their details along with the payment amount.
- Specify the payment purpose: When requesting a payment, it can be helpful to include a note specifying the purpose of the transaction. For example, if a friend is reimbursing you for concert tickets, you can mention it in the note to avoid any confusion.
- Double-check the payment details: Before sending the payment request, make sure to review all the information, including the payment amount and recipient details, to ensure accuracy.
- Send the payment request: Once you’re confident with the details, tap the “Request $” button to send the payment request to the intended recipient.
- Wait for the payment notification: When someone sends you a Venmo payment, you’ll receive a notification in the app and via email (if enabled). The payment will also appear in your Venmo feed.
- Check your Venmo balance: To confirm the payment, navigate to the “Balance” tab in the Venmo app. The funds received will be reflected in your Venmo balance.
Once you’ve received a Venmo payment and confirmed it in your account, you can use the funds to make other payments or choose to withdraw the balance to your linked bank account or debit card. We’ll cover the latter in the next section.
Confirming the Payment
When you receive a Venmo payment, it’s important to confirm its receipt to ensure accuracy and maintain transparency. Here are the steps to confirm a payment:
- Open the Venmo app: Launch the Venmo app on your smartphone and log in to your account.
- Navigate to the home screen: The home screen displays a feed of your recent Venmo transactions. Find the specific payment you want to confirm.
- Select the payment: Tap on the payment you wish to confirm to access its details.
- Review the payment details: Double-check the payment amount, the username or email address of the sender, and any notes associated with the payment. Confirm that everything matches your expectations.
- Confirm the payment: To confirm the payment, tap the “Confirm” button. This action verifies that you have received the funds and are satisfied with the transaction.
- Add a note (optional): If desired, you can add a note to the payment, expressing your gratitude or providing additional context. It’s a polite gesture that can enhance your communication with the sender.
After following these steps, the payment will be marked as confirmed in your Venmo account. Confirming payments not only helps you keep track of your transactions but also provides reassurance to the sender that you have received their payment.
Now that you’re familiar with how to confirm a payment, let’s move on to the next section, which covers the process of withdrawing funds from your Venmo account.
Withdrawing Funds from Venmo
Once you have received Venmo payments and your account balance has accumulated, you may want to withdraw the funds to your linked bank account or debit card. Here’s how you can do it:
- Open the Venmo app: Launch the Venmo app on your smartphone and log in to your account.
- Access the settings: Tap on the menu icon (usually in the top-left corner) to open the side menu. From there, select “Settings”.
- Select “Transfer to Bank” or “Transfer to Card”: In the “Settings” menu, you’ll find options like “Transfer to Bank” or “Transfer to Card.” Tap on the appropriate option based on your preferred withdrawal method.
- Enter withdrawal details: Provide the necessary details such as the amount you wish to withdraw and the destination account or card information.
- Review and confirm the withdrawal: Carefully review the withdrawal details, ensuring that the provided information is accurate. Once you’re satisfied, confirm the withdrawal request.
- Wait for the funds to transfer: The withdrawal process typically takes a few business days to complete. Venmo will notify you via email or in-app notifications when the transfer is successful.
- Check your bank account or card statement: After the transfer is complete, monitor your bank account or card statement to verify that the withdrawn funds have been successfully deposited.
By following these steps, you can conveniently withdraw funds from your Venmo account, allowing you to use the money for your day-to-day expenses or for any other financial needs.
Should you encounter any issues during the withdrawal process or face any unexpected obstacles, don’t fret. The next section will provide troubleshooting tips for common Venmo payment-related problems.
Troubleshooting Common Issues
While using Venmo to accept payments, you may come across some common issues that can hinder the smooth transaction process. Here are a few troubleshooting tips to help you resolve these problems:
1. Payment not received: If you haven’t received a payment that was sent to you, double-check that the sender used the correct username or email address. Ask them to confirm the payment details and resend if necessary. It’s also a good idea to check your connection and ensure that your Venmo app is up to date.
2. Payment verification failure: If you’re having trouble verifying your bank account or debit card, make sure that you entered the correct account or card details. If the verification still fails, contact Venmo support for assistance. They can help troubleshoot the issue and guide you through the necessary steps to confirm your payment method.
3. Withdrawal delay: If it’s taking longer than expected for your funds to transfer to your bank account or debit card, there may be a delay in the processing. Keep in mind that weekends and holidays can affect the transfer time. If the delay persists or seems excessive, reach out to Venmo support for further assistance.
4. Limited account access: In some cases, Venmo may restrict or limit account access due to security concerns or suspicious activity. If you find yourself unable to accept payments or access your funds, contact Venmo support immediately. They will guide you through the steps to regain access to your account.
5. Payment disputes or unauthorized transactions: If you notice any unrecognized or unauthorized transactions on your Venmo account, report the issue to Venmo support as soon as possible. They have procedures in place to handle disputes and unauthorized transactions, and they will work with you to resolve the situation.
Remember, if you encounter any problems while accepting Venmo payments, it’s always best to reach out to Venmo support for timely assistance. They have dedicated customer service representatives who can address your concerns and provide guidance specific to your situation.
With the troubleshooting tips covered, let’s move on to some useful tips for accepting Venmo payments more efficiently and effectively.
Tips for Accepting Venmo Payments
To make the most out of your Venmo experience and ensure a smooth payment process, consider these helpful tips for accepting Venmo payments:
1. Set clear payment expectations: When requesting a payment, specify the purpose of the payment and any additional details that may be necessary. This clarity can avoid misunderstandings and streamline the payment process.
2. Use descriptive notes: When confirming a payment or sending a payment request, provide descriptive notes that help both you and the sender remember the nature of the payment. This can be especially helpful when reviewing past transactions.
3. Communicate payment preferences: If you prefer to receive Venmo payments for a specific purpose or from a specific group of people, communicate your payment preferences to your friends, family, or customers. This will help ensure that payments are made in a way that aligns with your preferences.
4. Verify sender identities: Before confirming a payment, verify the sender’s identity to avoid any potential scams or unauthorized transactions. Check their Venmo profile, review the transaction details, and reach out to them directly if you have any concerns.
5. Enable notifications: Enable notifications in the Venmo app to stay updated on incoming payments, payment requests, and any important account activity. This will help you respond promptly and keep track of your transactions.
6. Regularly review your account: Take the time to review your Venmo account regularly. This includes checking your transaction history, verifying your linked payment methods, and reviewing your privacy and security settings. Staying proactive can help you identify any potential issues early on.
7. Educate yourself on fees: Familiarize yourself with any applicable fees associated with Venmo transactions. While most payments between friends are typically free, there may be fees associated with certain types of transactions, such as instant transfers or commercial transactions.
8. Utilize Venmo’s social features: Venmo includes social features that allow you to interact with friends and view public transactions. These features can be a fun way to connect with others and discover new opportunities.
9. Keep your app updated: Regularly update your Venmo app to access the latest features and improvements. Updated versions often come with enhanced security measures and overall performance enhancements.
10. Stay vigilant and protect your account: As with any online platform, it’s important to stay vigilant and protect your Venmo account. Use strong, unique passwords, enable two-factor authentication, and be cautious when sharing your account information.
By following these tips, you’ll be able to maximize the benefits of Venmo and navigate the payment process smoothly. Now that you’re equipped with these suggestions, you can confidently accept Venmo payments and make the most out of this convenient payment app.
Conclusion
Venmo has become a popular and convenient platform for accepting payments from friends, family, and customers. By following the steps outlined in this article, you can easily set up your Venmo account, link your preferred payment method, receive payments, confirm their receipt, and withdraw funds when needed. Troubleshooting tips have been provided to help you navigate common issues, and useful tips have been shared to enhance your Venmo experience.
Remember to prioritize security by regularly reviewing your account, verifying sender identities, and keeping your app updated. Communication is key when requesting payments, and using descriptive notes can help streamline the transaction process. Additionally, take advantage of Venmo’s social features and stay informed about any applicable fees.
Now that you have a clear understanding of how to accept Venmo payments, you can confidently use the platform to handle your financial transactions efficiently and securely. Whether you’re splitting expenses with friends or receiving payments for your services, Venmo’s user-friendly interface and seamless integration make it an ideal choice for hassle-free transactions.
As Venmo continues to evolve, be sure to stay updated with any changes and new features that may enhance your experience. By staying informed and utilizing the tips shared in this article, you can make the most out of your Venmo account and enjoy the convenience of easy, digital payments.