Introduction
Welcome to the world of projectors, where you can enjoy larger-than-life cinematic experiences in the comfort of your own home or deliver impactful presentations in the office. However, one common issue that projector owners may encounter is a crooked or misaligned image. If you’ve been wondering why your projector is projecting a tilted or slanted image, you’ve come to the right place.
In this article, we’ll delve into the possible causes of a crooked projector image and explore the steps you can take to fix it. Whether you’re a home theater enthusiast or a professional presenter, understanding the root causes and finding the appropriate solutions can make a significant difference in your viewing or presenting experience.
Before we dive into the troubleshooting steps, it’s essential to grasp the basics of projector settings and configurations. Projectors employ advanced technologies to display images on a surface, and various factors can contribute to a misaligned projection. By familiarizing ourselves with these settings and adjustments, we can better diagnose and resolve the crooked image problem.
Next, we’ll discuss the different adjustments that can be made to rectify a crooked projector image. Aligning the projector angle is often a crucial step in achieving a straight and level projection. We’ll guide you through the process of adjusting the angle and ensuring that the projected image is accurately positioned.
In some cases, the issue may not lie with the projector angle but rather with the mounting setup. We’ll explore how to check if the projector mount is properly installed and adjust it accordingly to eliminate any potential misalignment.
Another factor that can affect the projection is the surface onto which the image is being projected. We’ll discuss how to inspect and optimize the projection surface to ensure a level and distortion-free display.
Moving on, we’ll consider the input source as a possible cause of a misaligned projection. We’ll examine how to verify the input source settings and make necessary adjustments to eliminate any skewness or inconsistency in the projected image.
In some cases, outdated firmware can lead to various issues, including a crooked projector image. We’ll explore the process of updating the projector’s firmware to address any potential software-related problems.
Lastly, we’ll cover some common troubleshooting tips and techniques that can come in handy when dealing with a crooked projector image. By following these troubleshooting methods, you’ll be equipped with practical solutions to quickly diagnose and resolve the problem.
Now that we have outlined the topics we’ll be covering, let’s delve into the specifics of projector settings and adjustments to help you find the solution to your crooked projection issue.
Understanding Projector Settings
Before we dive into troubleshooting and fixing your crooked projector image, it’s important to have a solid understanding of the various settings and configurations that can impact your projection. By familiarizing yourself with these settings, you’ll be able to diagnose and adjust them accordingly to achieve a straight and level image.
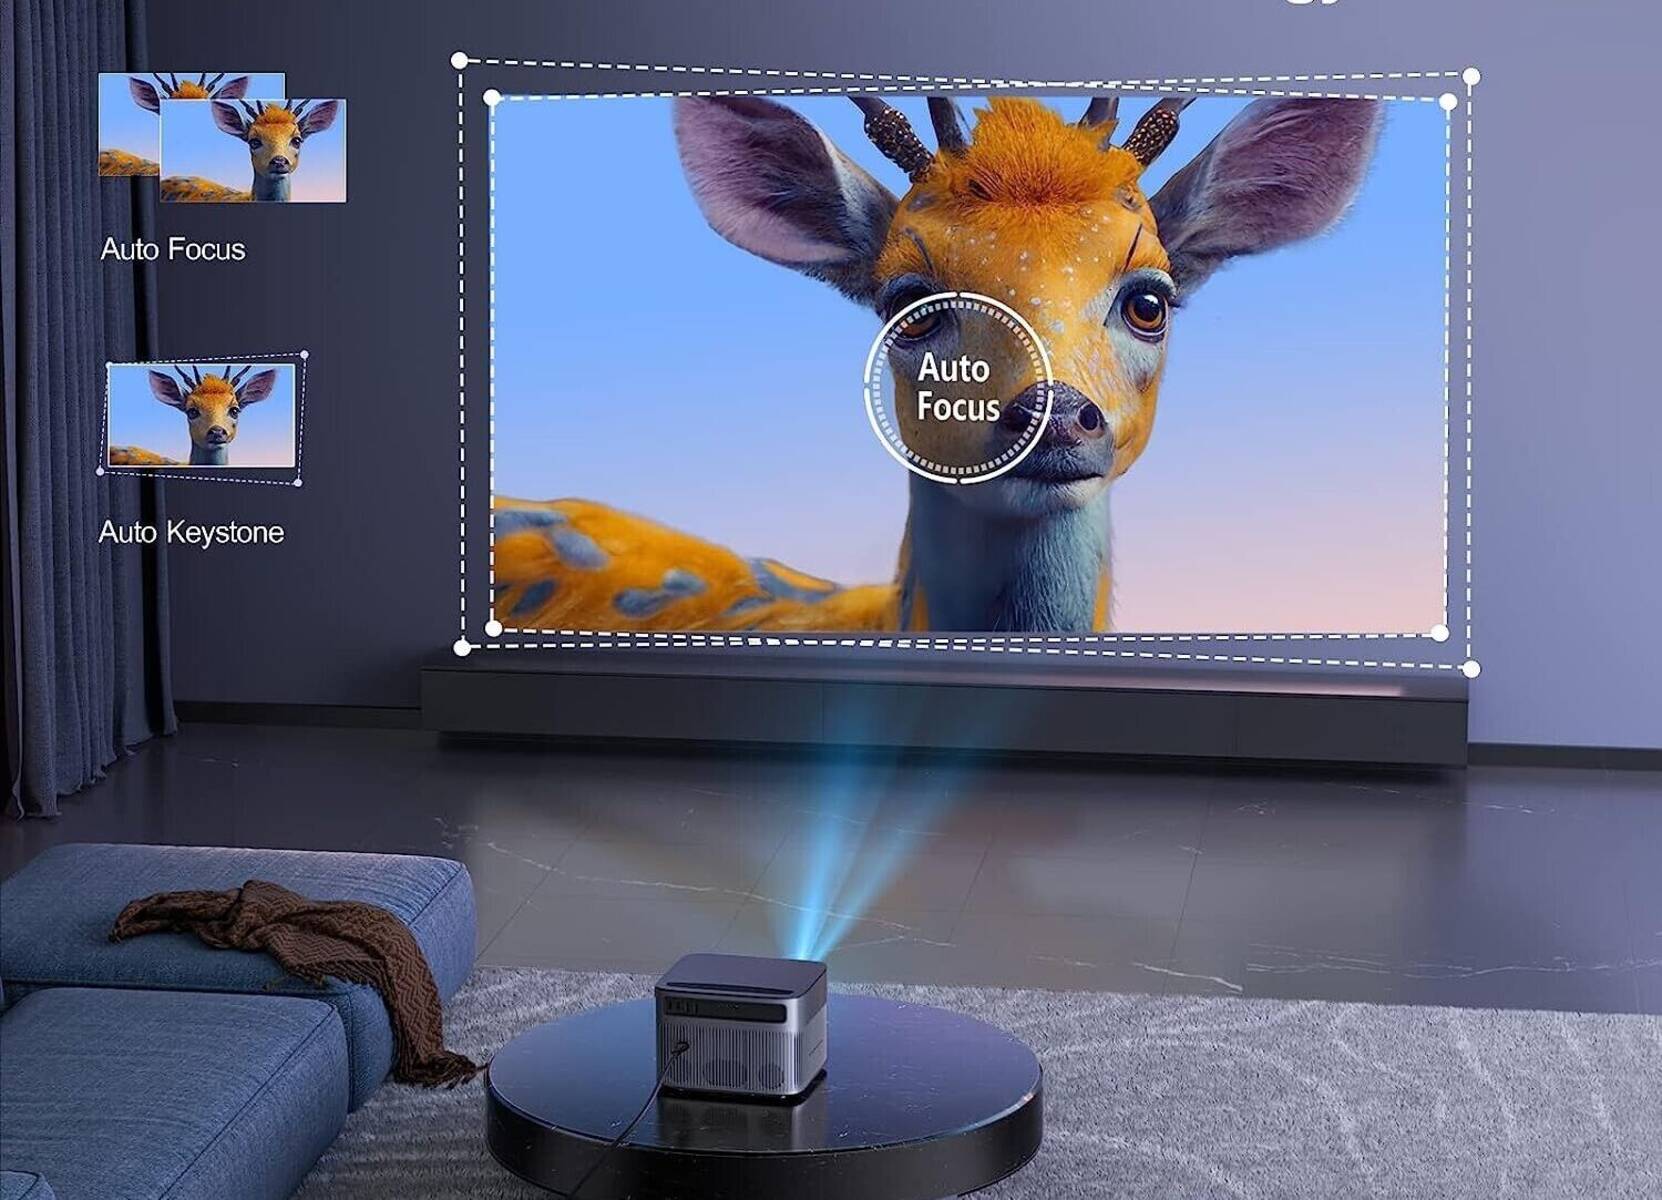
One of the primary settings to be aware of is the Keystone Correction. Keystone Correction is a feature found in most projectors that allows you to correct the trapezoidal distortion caused by projecting onto a surface at an angle. This distortion can make the image appear slanted or stretched. By accessing the projector’s settings menu, you can adjust the Keystone Correction settings to align the image properly and eliminate any crookedness.
Another important setting is the Aspect Ratio. This setting determines the proportional relationship between the width and height of the projected image. If the aspect ratio is set incorrectly, it can result in a distorted or skewed image. Make sure to select the appropriate aspect ratio based on the content you’re projecting, such as widescreen (16:9) for movies or standard (4:3) for presentations.
Resolution is another critical setting that affects the clarity and sharpness of the projected image. The resolution refers to the number of pixels displayed on the screen and is typically expressed as width x height (e.g., 1920×1080 for Full HD). Ensure that your projector is set to the native resolution of your content to avoid any stretching or pixelation.
Additionally, be mindful of the Zoom and Focus settings. These settings allow you to adjust the size and clarity of the projected image. If the zoom is set incorrectly, it can cause the image to appear distorted or unevenly magnified. Similarly, an out-of-focus image can result in a lack of sharpness and clarity. Take the time to adjust these settings properly to ensure a straight and crisp projection.
Lastly, consider the Color and Brightness settings. The color settings allow you to manipulate the vibrancy and temperature of the projected image, while brightness controls the overall luminosity. Adjusting these settings properly can greatly enhance the visual quality and clarity of your projection.
Understanding and adjusting these projector settings is crucial for achieving a straight and level projection. However, keep in mind that the specific steps for accessing and adjusting these settings may vary depending on your projector model. Refer to your projector’s user manual or manufacturer’s website for detailed instructions specific to your device.
Now that you have a solid understanding of projector settings, let’s move on to the next step of adjusting the projector angle to fix your crooked projection.
Adjusting the Projector Angle
One of the most common reasons for a crooked projector image is a misaligned projector angle. The angle at which the projector is positioned can greatly affect the projection, causing the image to appear slanted or tilted. Fortunately, adjusting the projector angle is a relatively simple yet effective solution.
Start by examining the position of the projector in relation to the projection surface. Ensure that the projector is placed directly in front of the screen or wall and is centered both horizontally and vertically. Any deviation from the center can result in a crooked projection.
Next, determine the ideal angle at which the projector should be positioned. Consider the height and distance of both the projector and the projection surface. If the projector is mounted on a ceiling or wall, make sure it is level and perpendicular to the screen or wall. A slight tilt in any direction can cause the projection to appear crooked.
Once you have determined the ideal angle, adjust the projector accordingly. Most projectors come with adjustable feet or a keystone correction feature that can help fine-tune the angle. If using adjustable feet, make small adjustments to raise or lower specific corners of the projector until the projection appears level.
If your projector has a keystone correction feature, access the projector’s menu settings and navigate to the Keystone Correction option. From there, you can adjust the vertical and horizontal keystone to align the image properly. However, note that excessive keystone correction can lead to a decrease in image quality, so aim to minimize the correction as much as possible.
Remember to take your viewing or presentation location into consideration when adjusting the projector angle. If you typically sit or stand off-center, align the projector to ensure a straight and level image from your usual viewing angle.
After making adjustments to the projector angle, perform a test projection to inspect the alignment. Use a level or straight object, such as a ruler, to ensure that the projected image appears perfectly straight. Make further adjustments if necessary until you are satisfied with the alignment.
It’s important to note that adjustments to the projector angle may require some trial and error. Be patient and take the time to fine-tune the angle to achieve the desired projection. Additionally, depending on the complexity of your projector mount or installation, you may consider seeking assistance from a professional to ensure the proper alignment of your projector.
Now that you have adjusted the projector angle, let’s move on to the next step of checking the projector mount to eliminate any potential misalignment.
Checking the Projector Mount
If you have successfully adjusted the projector angle and are still experiencing a crooked projection, it’s time to examine the projector mount. A misaligned or improperly installed mount can cause the projector to project at an angle, resulting in a tilted or slanted image. By checking the projector mount, you can eliminate any potential misalignment and achieve a straight and level projection.
Start by visually inspecting the projector mount. Look for any visible signs of misalignment, such as a tilted or uneven mount. Ensure that all mounting screws are properly tightened and secure. Loose screws can lead to instability and misalignment of the projector.
If your projector mount allows for height adjustment, ensure that it is set at the appropriate level. Verify that the projector is mounted parallel to the projection surface. Any deviation from a parallel alignment can cause the projected image to appear crooked.
Using a level, check the horizontal and vertical alignment of the projector mount. Place the level on top of the projector or on a nearby surface, making sure it is perfectly level. Measure the alignment from both the left-to-right and top-to-bottom perspectives. If the level indicates that the mount is uneven, make necessary adjustments to ensure a level projection.
In some cases, the mounting surface itself may be uneven or at an angle, causing the projector to project crookedly. Use a spirit level or a flat object, such as a ruler, to determine if the surface is level. If it is not, make adjustments to the mount or consider using shims to achieve a level surface for mounting the projector.
Furthermore, confirm that the mount is securely attached to the ceiling, wall, or other mounting surface. Ensure that the weight capacity of the mount exceeds the weight of your projector. If you suspect that the mount is not capable of securely holding the projector, consider investing in a more robust and suitable mounting solution.
Lastly, if you’re unsure about the installation or adjustment of the projector mount, consider consulting the manufacturer’s instructions or seeking assistance from a professional installer. They can provide expert guidance and ensure that the mount is properly aligned to achieve a straight projection.
After checking and making any necessary adjustments to the projector mount, perform a test projection to examine the alignment. If the image appears straight and level, you have successfully resolved any misalignment issues related to the projector mount.
Now that you have examined and addressed the projector mount, let’s move on to the next step of checking the projection surface to eliminate any factors that may contribute to a crooked projection.
Checking the Projection Surface
When troubleshooting a crooked projector image, it’s important to consider the projection surface itself. Even if the projector and mount are properly aligned, an uneven or distorted projection surface can cause the image to appear slanted or tilted. By checking and optimizing the projection surface, you can achieve a straight and level projection.
Start by examining the surface onto which you are projecting. If you are using a wall, ensure that it is flat and free from any bumps or irregularities. Use your hands or a level to feel for any imperfections that could impact the projection. If the wall is not smooth, consider using a projection screen or a dedicated surface designed for optimal image display.
Next, check the levelness of the projection surface. Use a spirit level or a straight object, such as a ruler, to determine if the surface is level. Place the level horizontally and vertically on the projection surface, ensuring that it aligns perfectly. If the level indicates any deviations from a straight line, adjustments may be needed to rectify the surface or find an alternative projection area.
If you are using a projection screen, inspect the screen for any wrinkles or unevenness. Ensure that the screen is properly tensioned and stretched to provide a flat and smooth surface for projection. Any distortions or ripples in the screen can cause the image to appear crooked.
Consider the lighting conditions in the room where you are projecting. Excessive ambient light or glare can impact the clarity and visibility of the projected image. Make sure to dim the lights or use curtains or blinds to block out unwanted light. A well-lit, controlled environment can greatly enhance the quality of the projection.
If you are projecting onto a portable surface, such as a whiteboard or a pull-down screen, ensure that it is securely mounted and held in place. Any movement or instability of the surface can result in a misaligned projection. Double-check the mounting mechanisms or fasteners to guarantee stability during projection.
Lastly, consider the distance and viewing angle between the projector and the projection surface. If the projector is positioned too far or too close to the surface, it can lead to distortions and a crooked image. Consult your projector’s user manual or manufacturer’s recommendations to determine the optimal distance and viewing angle for your specific model.
By checking and optimizing the projection surface, you can eliminate any factors that may contribute to a crooked projection. Take the time to ensure that the surface is flat, level, and tensioned properly, while also considering the lighting conditions and viewing distance. Once you have addressed these factors, perform a test projection to evaluate the alignment and enjoy a straight and level projection.
Now that you have examined and optimized the projection surface, let’s move on to the next step of verifying the input source to troubleshoot any potential issues.
Verifying the Input Source
When dealing with a crooked projector image, it’s important to consider the input source as a potential factor. Sometimes, the issue may not lie with the projector itself, but rather with the settings or content being fed into it. By verifying the input source, you can troubleshoot and eliminate any issues that may be contributing to the crooked projection.
Start by checking the aspect ratio settings of the input source. Different devices and content may have different aspect ratios, such as 16:9 for widescreen or 4:3 for standard. If the aspect ratio of the input source doesn’t match the aspect ratio settings of the projector, it can result in a distorted or misaligned image. Ensure that the aspect ratio is properly set to match the resolution and aspect ratio capabilities of your projector.
Additionally, inspect the output resolution settings of the input source. Ensure that the resolution is set to match the native resolution of your projector. If the input source is set to a lower or higher resolution than your projector’s native resolution, it can result in a stretched or distorted image. Adjust the resolution settings to match your projector’s capabilities for optimal results.
If you are using a computer or laptop as the input source, check the display settings on your device. Make sure that the display settings are configured correctly, including the resolution, aspect ratio, and screen orientation. Incorrect display settings can cause the output to appear misaligned or crooked when projected.
In some cases, using different cables or adapters to connect the input source to the projector can lead to signal disruptions or distortion. Ensure that the cables and adapters are securely connected and free from any damage. Consider using high-quality cables and adapters to ensure a reliable and stable connection between the input source and the projector.
Moreover, double-check the alignment and positioning of the input source. Ensure that it is properly centered and aligned with the projection surface. If the input source is positioned at an angle or off-center, it can cause the projected image to appear crooked or skewed. Take the time to align the input source with the projection surface to achieve a straight and level projection.
If you have verified and adjusted the input source settings, cables, and alignment, but are still experiencing a crooked projection, consider testing the projector with a different input source. Connect a different device or use a different content source to determine if the issue persists. This will help you narrow down whether the problem is specific to the input source or if it’s related to the projector itself.
By verifying the input source and ensuring that the settings, cables, and alignment are configured correctly, you can troubleshoot and resolve any potential issues contributing to a crooked projector image. Take the necessary steps to eliminate any input source-related factors before moving on to further troubleshooting steps.
Now that you have verified the input source, let’s explore the option of updating the projector’s firmware as a potential solution to the crooked projection issue.
Updating the Projector Firmware
If you’ve checked and adjusted the projector settings, angle, mount, and input source without resolving the crooked projection issue, it may be time to consider updating the projector’s firmware. Outdated firmware can sometimes cause various issues, including a misaligned or distorted projection. By updating the projector’s firmware, you can address potential software-related problems and potentially resolve the crooked projection.
Start by visiting the manufacturer’s website or checking the user manual for instructions on how to update the firmware. Different projector models may have different methods for updating the firmware, so it’s important to follow the specific guidelines provided by the manufacturer.
Ensure that you have a stable internet connection before proceeding with the firmware update. Some projectors may allow for direct updates through a USB drive, while others may require an online connection to download and install the latest firmware version.
If the firmware update requires a USB drive, download the latest firmware file from the manufacturer’s website and save it to the USB drive. Insert the USB drive into the projector and follow the on-screen instructions to initiate the firmware update process. Be patient and allow the update to complete without interruption.
For online firmware updates, access the projector’s menu or settings and navigate to the firmware update section. Follow the prompts to connect the projector to the internet and download the latest firmware version. Depending on the size of the firmware file, the update process may take some time. Ensure that the projector remains connected and powered on throughout the update.
During the firmware update, it’s crucial to avoid turning off or disconnecting the power supply to the projector. Interrupting the update process can result in a failed update and potential damage to the projector. Follow the manufacturer’s instructions closely to ensure a successful firmware update.
After the firmware update is complete, restart the projector and test the projection again. Check if the crooked projection issue has been resolved. If the image now appears straight and level, the firmware update was successful in addressing the misalignment problem.
However, if the crooked projection issue persists even after updating the firmware, it’s recommended to reach out to the manufacturer’s customer support for further assistance. They can provide additional troubleshooting steps or suggest other solutions specific to your projector model.
Remember, firmware updates can introduce new features, bug fixes, and improvements to the projector’s performance, not just for addressing misalignment issues. It’s a good practice to periodically check for and install firmware updates even if you aren’t experiencing any problems, as they can enhance the overall functionality and reliability of your projector.
Now that you have updated the projector’s firmware, let’s move on to the next step of troubleshooting common issues that may contribute to a crooked projection.
Troubleshooting Common Issues
If you’ve tried adjusting the projector settings, angle, mount, input source, and updated the firmware, but are still encountering a crooked projection, it’s time to explore some common issues that may be contributing to the problem. By troubleshooting these issues, you can narrow down the root cause and find a solution to your crooked projection.
One common issue that can affect the projection is an uneven or warped projection screen. If you’re using a screen, inspect it for any wrinkles, bumps, or misalignment. Consider replacing the screen or adjusting it to ensure a flat and even surface for projection.
Another possible issue is a distorted or damaged lens. Check the lens of your projector for any scratches, smudges, or signs of damage. Clean the lens gently using a microfiber cloth and lens cleaner. If the lens is severely damaged, it may need to be replaced by a professional.
Examine the projector’s ventilation and cooling system. Overheating can cause the projector to malfunction and result in crooked projection. Ensure that the projector has sufficient airflow and is not placed in a confined or excessively hot environment. Clean the projector’s air filters regularly to prevent dust buildup, which can impede proper cooling.
Inspect the projector’s cables and connections. Loose or faulty cables can cause signal disruptions or interference, resulting in a distorted or misaligned projection. Check that all cables are securely connected and free from any damage. Consider using high-quality cables and adapters to ensure a reliable connection.
If you’re using a digital source, such as an HDMI connection, try using a different HDMI cable or port to rule out any issues with the connection. Sometimes, a faulty cable or port can result in a crooked projection. Test multiple sources or inputs to see if the crooked projection issue persists across different devices or content.
Consider resetting the projector to its default factory settings. This can help resolve any software-related issues that may be causing the crooked projection. Refer to the user manual or manufacturer’s website for instructions on how to perform a factory reset. Keep in mind that this will erase any customized settings you may have made, so be prepared to reconfigure the projector after the reset.
If possible, try connecting the projector to a different power source or using a power conditioner. Fluctuations or disruptions in the power supply can impact the projector’s performance and result in a misaligned projection.
If you have access to another projector or the ability to borrow one, test your content on a different projector. This can help determine if the issue is with the content or the specific projector you’re using. If the projection appears straight and level on a different projector, it may indicate a problem with your original projector that requires further investigation or professional assistance.
If none of the troubleshooting steps resolve the crooked projection issue, it’s recommended to contact the manufacturer’s customer support for additional guidance. They have the expertise to diagnose and assist with more complex problems related to your specific projector model.
Now that we’ve explored troubleshooting common issues, it’s time to summarize the key points and consider the actions you can take to address the crooked projection issue.
Conclusion
Dealing with a crooked projector image can be frustrating, but with the right troubleshooting steps, you can rectify the issue and enjoy a straight and level projection. Throughout this article, we’ve explored various aspects, from understanding projector settings to checking the projector mount, the projection surface, verifying the input source, updating the projector firmware, and troubleshooting common issues.
By understanding and adjusting projector settings, such as keystone correction, aspect ratio, resolution, zoom, focus, color, and brightness, you can ensure that the projection is aligned properly. Adjusting the projector angle and checking the mount can further improve the alignment, while inspecting the projection surface ensures that you have a flat, level, and optimized surface for projection.
Verifying the input source and updating the firmware are important steps to troubleshoot any software-related issues. Additionally, troubleshooting common issues such as warped screens, lens problems, ventilation, cables, and power supply can bring you closer to resolving the crooked projection problem.
However, it’s important to remember that each projector model and scenario is unique, and the solutions provided may not apply to every situation. If you have exhausted all troubleshooting options and are still experiencing the crooked projection issue, don’t hesitate to reach out to the manufacturer’s customer support for further assistance and guidance.
By following the steps outlined in this article and seeking professional help when needed, you can overcome the challenge of a crooked projector image and enjoy a seamless and immersive projection experience for your home theater or professional presentations.


