Introduction
Welcome to our guide on how to clean a projector filter. Projectors have become an essential part of our lives, whether for business presentations, educational purposes, or home entertainment. Just like any other electronic device, projectors require regular maintenance to ensure optimal performance and longevity. One crucial aspect of projector maintenance is cleaning the filter.
The projector filter is responsible for trapping dust, dirt, and debris, preventing them from entering the internal components of the projector. Over time, the filter can become clogged, negatively impacting image quality, cooling efficiency, and overall performance. Regularly cleaning the projector filter is essential to maintain optimal airflow and prevent overheating.
Not only does cleaning the projector filter improve performance, but it also extends the lifespan of your device. By removing dust particles from the filter, you can prevent them from settling on delicate internal components and causing damage over time. Cleaning the filter is a relatively simple process that can be done by following a few easy steps.
In this guide, we will provide you with a step-by-step approach to cleaning your projector filter, along with essential tips and common mistakes to avoid. Before we dive into the cleaning process, let’s gather the necessary tools and materials you will need for this maintenance task.
Why is it important to clean the projector filter?
Regularly cleaning the projector filter is essential for maintaining optimal performance and longevity of your projector. Here are a few reasons why cleaning the filter is important:
- Improves image quality: A clogged projector filter can cause dust and debris to accumulate on the projector’s internal components, including the lens. This buildup can result in reduced image quality, affecting the clarity, brightness, and color accuracy of the projected image. By cleaning the filter, you can ensure a clean pathway for light, resulting in a sharper and more vibrant image.
- Prevents overheating: The projector filter plays a crucial role in maintaining proper airflow and cooling the internal components. When the filter becomes clogged, it restricts the airflow, leading to overheating. Overheating can cause the projector to shut down unexpectedly and may even result in permanent damage. Regularly cleaning the filter will prevent overheating and ensure the optimal performance and longevity of your projector.
- Extends the lifespan of the projector: Dust, dirt, and debris that accumulate on the filter can find their way into the projector’s internal components. These particles can settle on delicate parts, such as the lamp, fans, and circuit boards, causing damage over time. Cleaning the filter regularly helps prevent dust from reaching these sensitive parts, thus extending the overall lifespan of your projector.
- Ensures smooth operation: A clogged filter can lead to reduced airflow, causing fans to work harder to cool the internal components. This can result in increased noise levels as the fans try to compensate for the restricted airflow. By cleaning the filter, you can maintain proper airflow, ensuring smoother and quieter operation of your projector.
In summary, regularly cleaning the projector filter not only improves image quality and prevents overheating but also extends the lifespan of the projector and ensures smooth operation. With these benefits in mind, let’s move on to the tools and materials you will need for cleaning the projector filter.
Tools and Materials Needed
Before we start cleaning the projector filter, make sure you have the following tools and materials ready:
- Clean, lint-free cloth: This will be used to wipe down the external surfaces of the projector.
- Compressed air canister or air blower: This tool will help remove loose dust and debris from the filter.
- Mild cleaning solution: Use a mild, non-abrasive cleaning solution to gently clean the filter. Avoid using harsh chemicals or solvents that may damage the filter.
- Soft-bristle brush: A soft-bristle brush is useful for dislodging stubborn dirt and dust particles from the filter.
- Latex or nitrile gloves: Wearing gloves will prevent oils and residue from your hands from transferring onto the filter.
- Plastic bags or a dustbin: Have a plastic bag or a dustbin nearby to dispose of any debris that is removed from the filter.
- User manual: It is always a good idea to consult the user manual of your specific projector model for any cleaning instructions or precautions.
Once you have gathered these tools and materials, you are ready to move on to the step-by-step guide on how to clean the projector filter. It’s important to note that different projector models might have slightly different filter designs, so consult your user manual if you have any doubts about the location or removal of the filter.
Step-by-step guide on cleaning the projector filter
Now that you have gathered the necessary tools and materials, let’s dive into the step-by-step process of cleaning your projector filter:
- Turn off the projector: Before starting the cleaning process, make sure to turn off the projector and unplug it from the power source. This will ensure your safety and prevent any potential damage to the projector.
- Locate the filter: Consult your projector’s user manual to locate the filter. The filter is typically located on the side or back of the projector. It might be covered by a removable panel or grille that you need to unscrew or slide off.
- Remove the filter: Once you have accessed the filter, gently remove it from the projector. Be cautious and handle the filter with care to avoid causing any damage.
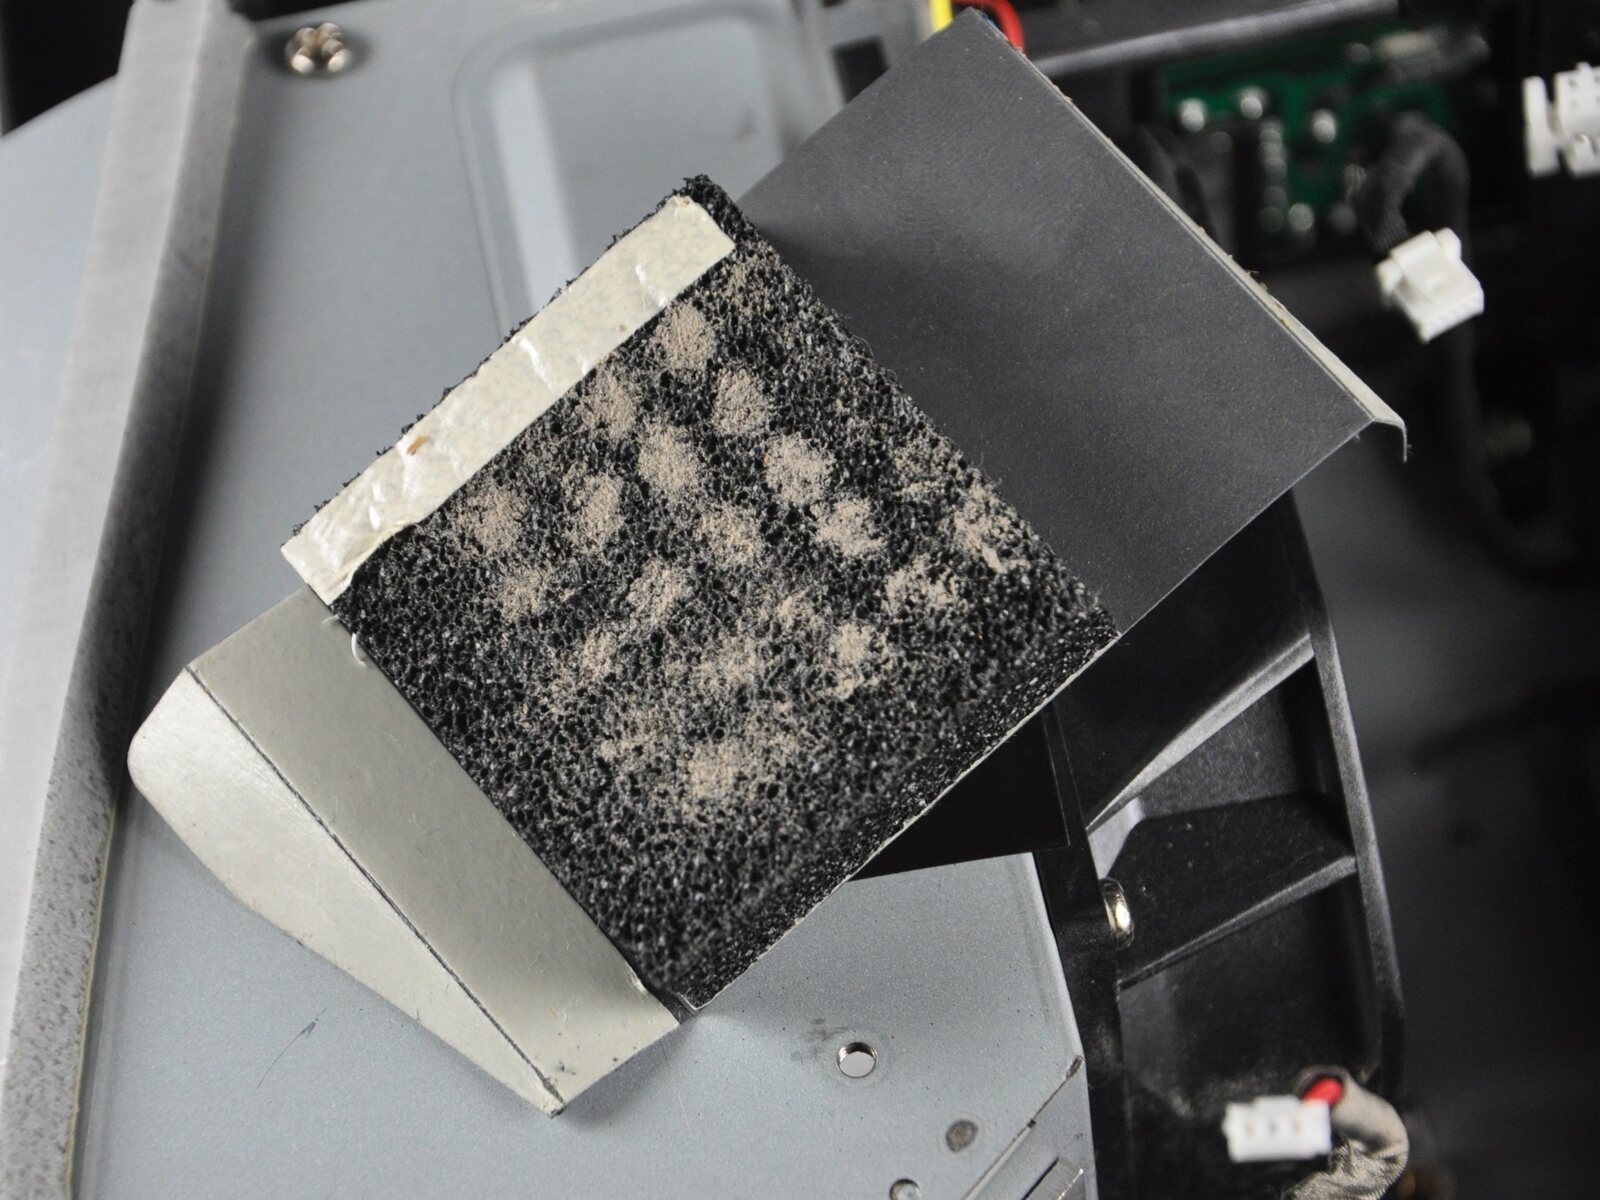
- Inspect the filter: Take a close look at the filter to assess the level of dirt and debris buildup. If the filter appears to be heavily clogged or damaged, it may be a good idea to consider replacing it instead of cleaning.
- Use compressed air: Holding the filter at a safe distance, use a canister of compressed air or an air blower to blow away any loose dust and debris. Move the canister or blower in a sweeping motion to ensure all areas of the filter are thoroughly cleaned.
- Brush away stubborn dirt: If there are any stubborn dirt particles clinging to the filter, use a soft-bristle brush to gently brush them away. Be careful not to apply too much pressure, as this could damage the filter.
- Clean the filter with a mild solution: Dampen a clean, lint-free cloth with a mild cleaning solution. Gently wipe the filter in a careful motion, removing any remaining dirt or residue. Avoid applying excessive moisture to the filter as this can cause damage.
- Dry the filter: After cleaning, allow the filter to air dry completely before reinserting it into the projector. Avoid using heat sources or direct sunlight to speed up the drying process.
- Reinstall the filter: Once the filter is dry, carefully reinsert it back into the projector. Ensure that it is positioned correctly and that any securing mechanisms, such as screws or latches, are properly tightened.
- Clean the exterior surfaces: Take a clean, lint-free cloth and wipe down the external surfaces of the projector. This will remove any dust or fingerprints that may have accumulated.
- Power on the projector: Plug the projector back into the power source and turn it on to ensure that it is functioning properly. Check the image quality and monitor the projector’s performance to ensure that it has been successfully cleaned.
Following these steps will help you effectively clean your projector filter and maintain optimal performance. However, it’s important to note that the cleaning process may vary slightly depending on the specific make and model of your projector, so always refer to the user manual for any model-specific instructions or precautions.
Tips for maintaining the projector filter
In addition to regular cleaning, here are some tips to help you maintain the projector filter and ensure its longevity:
- Keep the projector in a clean environment: Minimize the amount of dust, dirt, and debris in the room where you use the projector. Regularly dust and clean the surfaces to reduce the overall amount of airborne particles that can settle on the projector and its filter.
- Avoid smoking near the projector: Smoking near the projector can cause the filter to clog quickly due to the accumulation of smoke particles. Keep the projector in a smoke-free environment to maintain optimal filter cleanliness.
- Set up proper ventilation: Ensure that the projector has proper ventilation around it. Good airflow will help prevent dust from circulating and settling on the filter. Avoid placing the projector in enclosed spaces or near heat sources that can lead to the accumulation of dust.
- Regularly inspect the filter: Take a quick look at the filter every few weeks to check for any signs of excessive dirt buildup or damage. If you notice a significant amount of dirt, it might be time for a cleaning. If the filter is damaged, consider replacing it to maintain optimal projector performance.
- Follow the manufacturer’s guidelines: Always refer to the user manual or manufacturer’s guidelines for specific cleaning and maintenance instructions for your projector model. Different projector models may have varying recommendations, so it’s important to follow the guidelines provided.
- Keep spare filters on hand: If your projector uses a replaceable filter, it’s a good idea to keep spare filters on hand. This allows you to quickly replace a dirty or damaged filter without causing any downtime in your projector usage.
- Schedule regular maintenance: Consider creating a maintenance schedule to ensure that you clean the projector filter at regular intervals. This will help keep the filter clean and prevent any potential performance issues caused by dirt or debris buildup.
Following these tips will help you maintain the projector filter in good condition and ensure optimal performance for years to come. Remember, a clean filter leads to better image quality, improved airflow, and a longer lifespan for your projector.
Common Mistakes to Avoid While Cleaning the Projector Filter
While cleaning the projector filter is a relatively simple process, there are some common mistakes that you should avoid to ensure the best results and prevent any damage to your projector:
- Using harsh chemicals: Avoid using harsh or abrasive chemicals to clean the projector filter. These can cause damage to the filter material, reducing its effectiveness and ultimately affecting the projector’s performance. Stick to mild, non-abrasive cleaning solutions specifically designed for electronics.
- Applying excessive force: When handling the filter, be gentle and avoid applying excessive force. Scrubbing or pressing too hard can result in bending or damaging the delicate filter material, rendering it less effective.
- Skipping the user manual: Each projector model may have specific instructions or precautions for cleaning the filter. Skipping the user manual and not following the manufacturer’s guidelines can lead to improper cleaning or damage to the projector. Always refer to the user manual before starting the cleaning process.
- Not allowing the filter to dry: After cleaning the filter, make sure it is completely dry before reinstalling it. Installing a wet or damp filter can lead to moisture buildup and potential damage to the projector’s internal components.
- Using excessive moisture: While it’s important to clean the filter thoroughly, avoid using excessive moisture during the cleaning process. Excess water can seep into the projector and damage the electronics. Use a damp cloth or a small amount of cleaning solution to gently clean the filter.
- Forgetting to power off the projector: Always remember to turn off the projector and unplug it from the power source before cleaning the filter. This ensures your safety and prevents any accidental damage that could occur when handling the filter or accessing the internal components.
- Ignoring signs of filter damage: If you notice signs of significant damage or excessive wear on the filter, it may be time to replace it instead of attempting to clean it. Continuing to use a damaged filter can compromise the performance of your projector.
- Not maintaining a cleaning schedule: Cleaning the projector filter regularly is crucial for maintaining optimal performance. Skipping or forgetting to clean it can result in a buildup of dirt and debris, leading to poor image quality and potential damage to the projector.
By avoiding these common mistakes, you can effectively clean your projector filter without any issues and ensure the longevity and performance of your projector for years to come.
Conclusion
Regularly cleaning the projector filter is a vital part of projector maintenance that should not be overlooked. By following the step-by-step guide and implementing the tips mentioned in this article, you can ensure optimal performance, longevity, and image quality for your projector.
The importance of cleaning the projector filter lies in improving image quality, preventing overheating, extending the lifespan of the projector, and ensuring smooth operation. By removing dust, dirt, and debris from the filter, you can maintain proper airflow and prevent damage to internal components.
Remember to gather the necessary tools and materials before cleaning, follow the manufacturer’s instructions, and be cautious while handling the filter. Avoid common mistakes such as using harsh chemicals, applying excessive force, and neglecting the user manual.
By maintaining a clean environment, setting up proper ventilation, and scheduling regular maintenance, you can ensure the longevity and optimal performance of your projector for years to come. Don’t forget to inspect the filter regularly and consider keeping spare filters on hand for quick replacements when needed.
Now that you have a comprehensive understanding of how to clean the projector filter properly, we hope you feel confident in taking the necessary steps to maintain your projector’s performance and image quality. So grab your cleaning tools, follow the steps provided, and enjoy crisp and vibrant images from your well-maintained projector!