Introduction
Welcome to our guide on where to plug in case fan to motherboard. If you are a PC enthusiast or a gamer, you probably understand the importance of proper cooling for your computer’s components. Case fans play a crucial role in maintaining optimal temperatures within your PC, ensuring the longevity and performance of your hardware.
When it comes to connecting case fans, it’s essential to understand the different types of fans and the various headers on your motherboard where they can be plugged in. This article aims to provide you with a comprehensive overview of where to plug in case fans on your motherboard, ensuring you make the best choices for your cooling setup.
Whether you’re building a new computer or upgrading your existing system, proper airflow is key to keep your components operating at optimal temperatures. Heat buildup can lead to performance throttling, instability, and even hardware damage. By strategically placing case fans and connecting them to the appropriate headers on your motherboard, you can effectively dissipate heat and keep your system cool under heavy workloads.
In the following sections, we’ll explore the different types of case fans, discuss the importance of connecting them to the motherboard, and provide guidance on where to plug in your case fans to achieve optimal cooling performance. So without further ado, let’s dive in and discover the best practices for connecting your case fans.
What is a case fan?
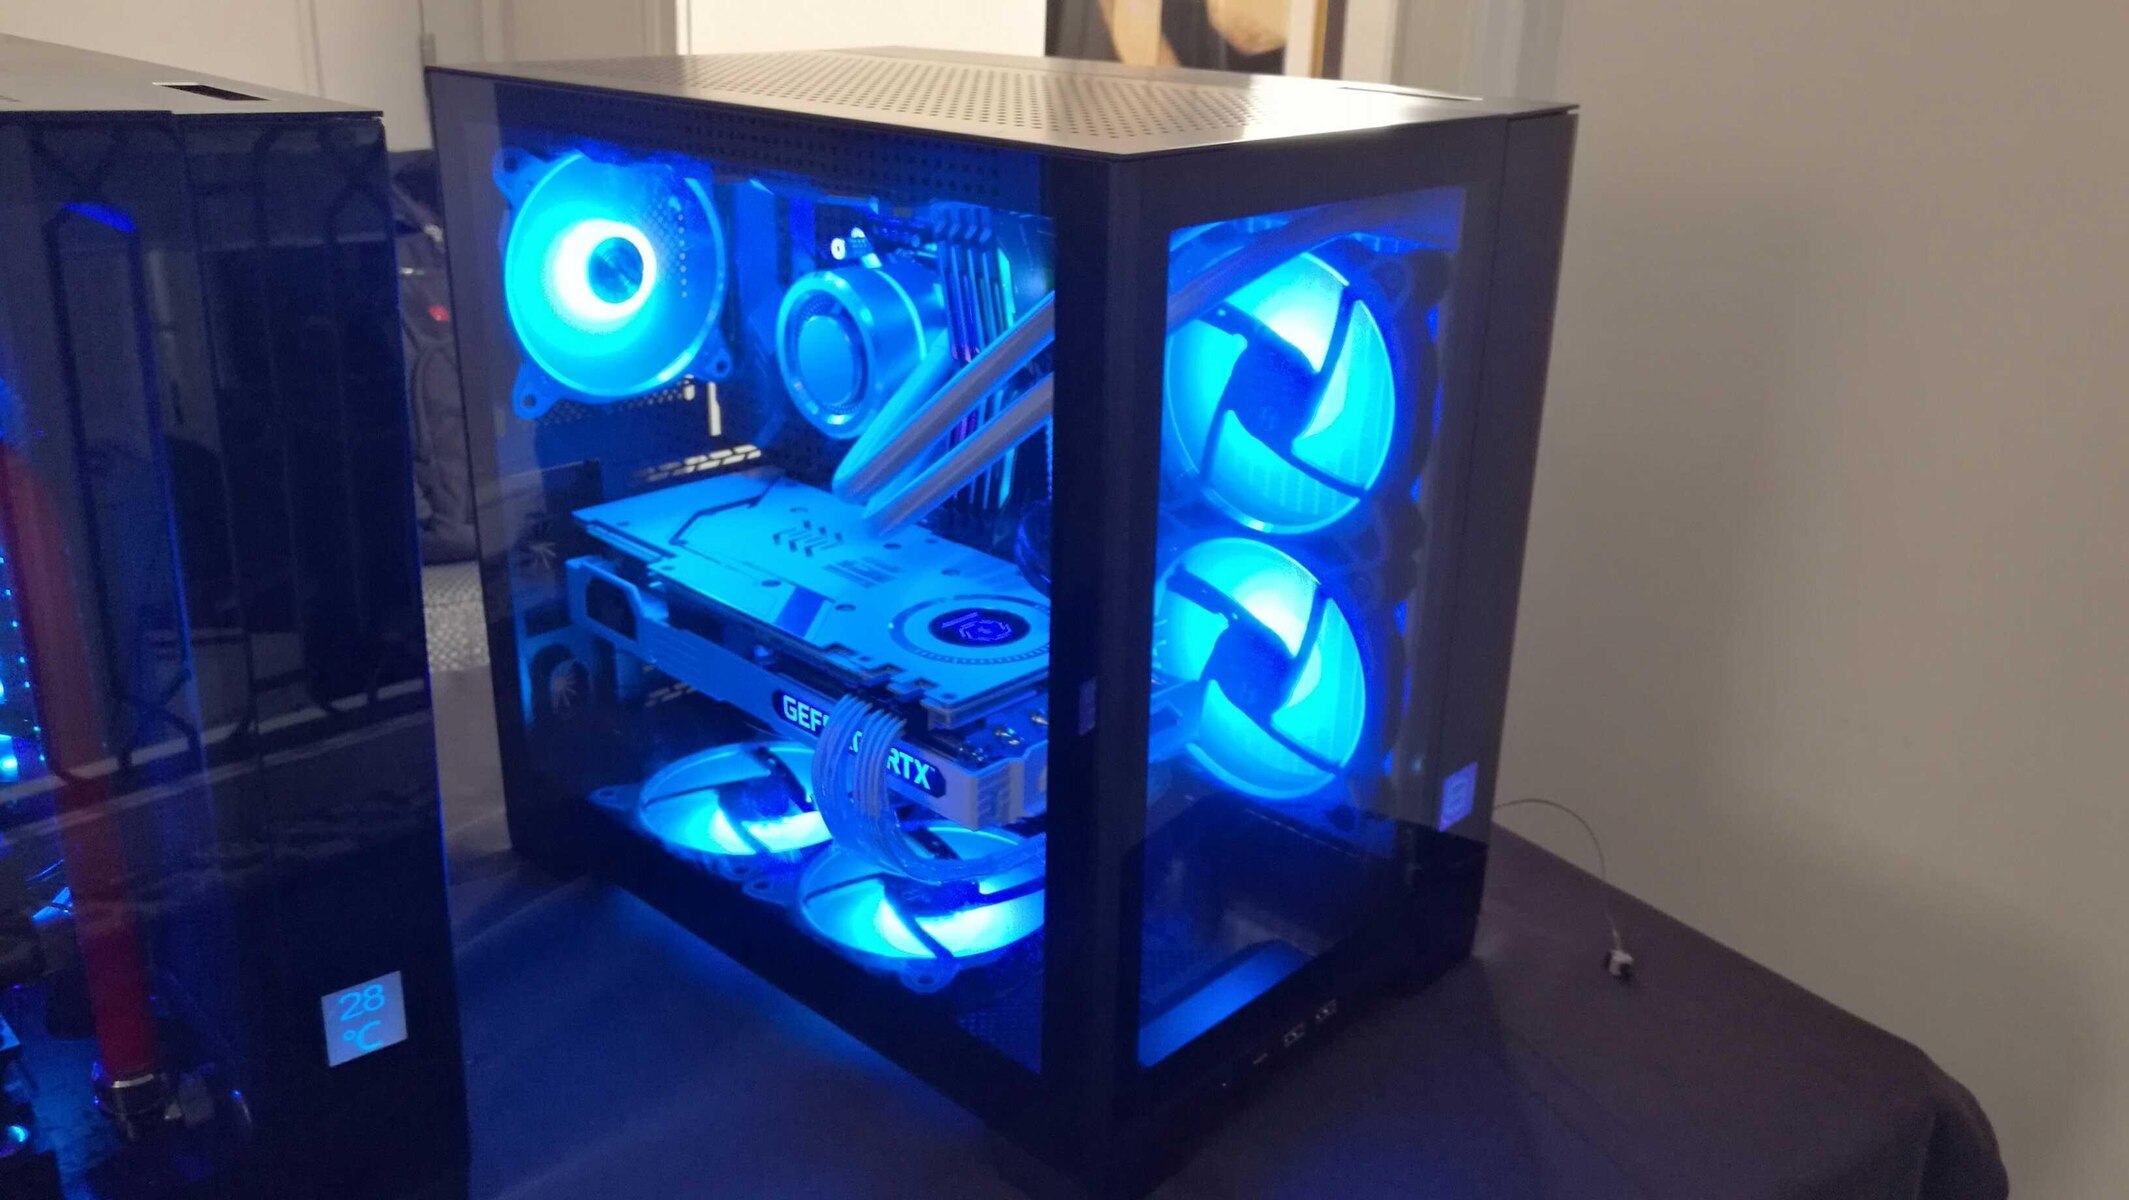
A case fan, also known as a computer fan or cooling fan, is an essential component of a personal computer. Its primary function is to circulate air within the computer case, facilitating the removal of heat generated by the internal components.
Case fans come in various sizes, with the most common being 120mm and 140mm. They are typically mounted on the front, rear, top, or side panels of the computer case. Some cases can accommodate multiple fans, allowing for improved airflow and cooling performance.
These fans consist of a motor, blades, and a frame. The motor spins the blades, creating airflow and drawing cooler air from outside the case while expelling hot air. The frame ensures stability and provides a mounting point for the fan within the case.
There are different types of case fans available on the market, each offering distinct characteristics and suitability for specific cooling requirements. These fans vary in terms of airflow, static pressure, noise level, and control features.
High airflow fans are designed to move a large volume of air at lower speeds, making them well-suited for providing general case ventilation. On the other hand, static pressure fans are designed to generate higher pressure, making them ideal for cooling restricted spaces, such as radiators or heat sinks.
Furthermore, case fans can be categorized by their bearing type, which determines their longevity and noise level. Common bearing types include sleeve bearings, ball bearings, and fluid dynamic bearings (FDB). Sleeve bearings offer a balance between performance and affordability, ball bearings provide durability and higher heat resistance, while FDB fans offer quiet operation and a longer lifespan.
Ultimately, the selection of a case fan depends on your specific cooling needs, the size of your computer case, and your preference for noise levels. By ensuring adequate airflow and heat dissipation, case fans play a crucial role in maintaining the stability and performance of your PC components.
Types of case fans
When it comes to choosing a case fan, it’s important to consider the different types available in the market. Each type offers unique features and performance characteristics. Here are the common types of case fans:
- Airflow Fans: Airflow fans are designed to move a large volume of air and are commonly used for general case ventilation. They have wide blades and are optimized for high airflow at low noise levels. These fans are suitable for improving overall airflow and reducing temperature buildup in your computer case.
- Static Pressure Fans: Static pressure fans are optimized for generating high-pressure airflow, making them ideal for cooling restricted spaces. They have narrower blades and can push air efficiently through obstacles such as heat sinks or radiators. Static pressure fans are commonly used in liquid cooling setups or cases with tight airflow paths.
- Noise-Optimized Fans: Noise-optimized fans, as the name suggests, prioritize low noise levels over maximum airflow. These fans come with advanced features such as rubber dampeners or fan blade designs that minimize vibrations and noise. Noise-optimized fans are ideal for those who prioritize a quiet computing experience.
- LED Fans: LED fans incorporate colorful LED lighting into their design, adding a visual element to your computer case. These fans come in various colors and can enhance the overall aesthetics of your PC build. LED fans are suitable for users who want to add a touch of style and personalization to their system.
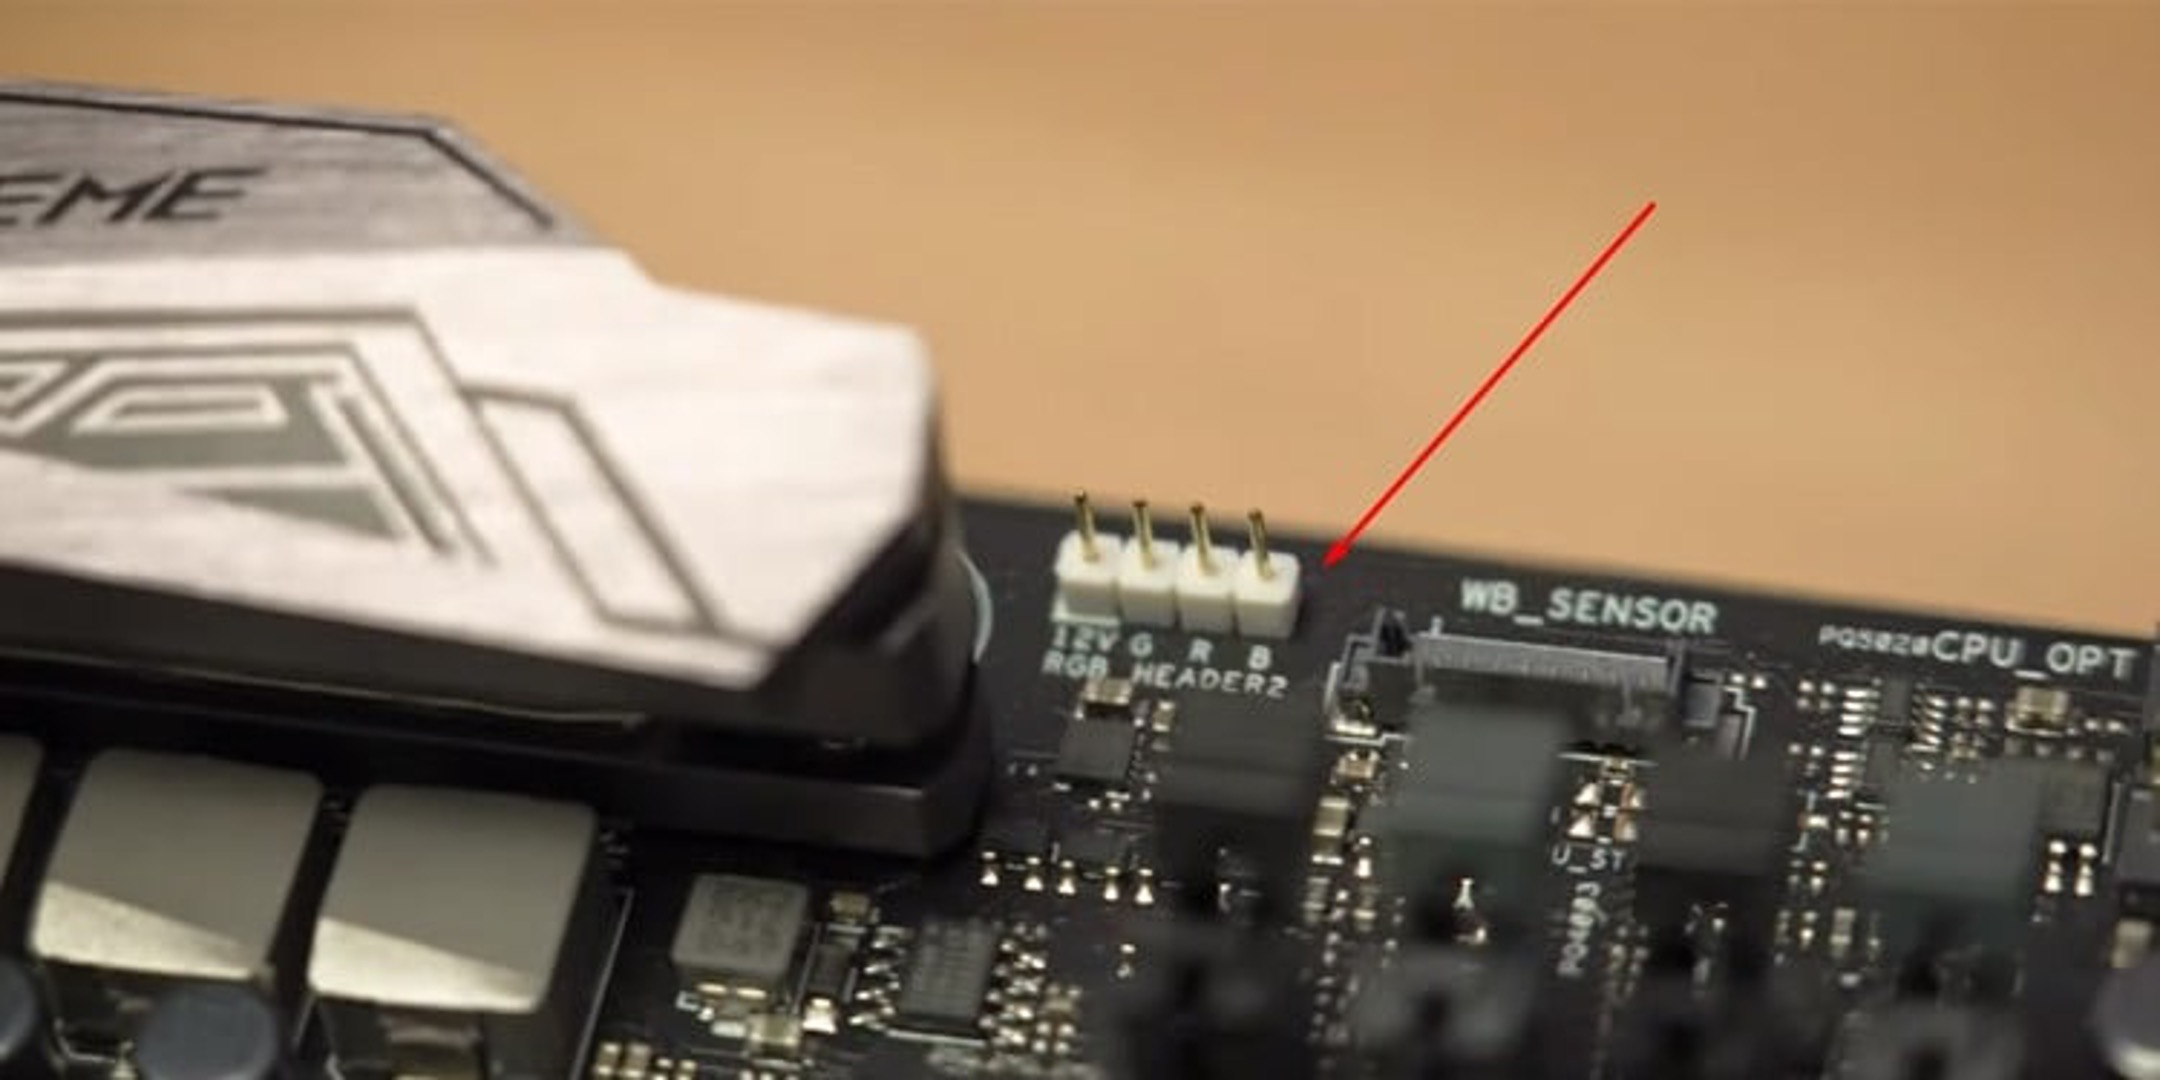
- RGB Fans: RGB (Red, Green, Blue) fans offer customizable lighting effects, allowing you to choose from a wide spectrum of colors and lighting patterns. These fans often come with software or hardware controllers that enable you to synchronize the lighting effects with other RGB components in your system. RGB fans are popular among users who want to create a visually stunning and synchronized lighting setup.
It’s essential to consider the purpose and requirements of your computer build when selecting a case fan. Whether you prioritize airflow, static pressure, noise reduction, or visual aesthetics, there is a case fan type to suit your needs. Combining different types of fans strategically in your system can help achieve optimal cooling performance and create an impressive visual impact.
Importance of connecting case fans to the motherboard
Connecting case fans to the motherboard offers several benefits and is crucial for effective cooling within your computer system. Here’s why it’s important:
- Temperature Monitoring: When case fans are connected to the motherboard, the system can monitor the fan speed and provide real-time temperature readings for better control over cooling. This allows you to identify potential temperature issues and adjust fan speeds accordingly to maintain optimal operating temperatures.
- Fan Control: Most motherboards provide BIOS or software-based control for the connected fans. This allows you to adjust the fan speed manually or automatically based on temperature thresholds. By controlling the speed of the case fans, you can strike the right balance between performance, noise level, and cooling efficiency.
- Optimized Cooling Profiles: Modern motherboards often come equipped with built-in fan control features. These features allow you to create custom cooling profiles tailored to your specific needs. Whether you prefer silent operation during light tasks or maximum cooling performance during intense gaming sessions, connecting case fans to the motherboard allows you to optimize cooling based on your preferences.
- Reduced Cable Clutter: Connecting case fans directly to the motherboard eliminates the need for additional fan controllers or manual fan speed adjustment knobs. This helps keep cable clutter to a minimum, resulting in a cleaner and more organized cable management within your computer case.
- Improved Power Efficiency: When case fans are powered by the motherboard, they can take advantage of power saving features such as fan speed throttling or intelligent fan curves. This ensures that the case fans operate at an optimal speed based on the current system temperature, reducing power consumption while still providing efficient cooling.
By connecting case fans to the motherboard, you gain better control over cooling, reduce cable clutter, and improve power efficiency. This not only enhances the overall performance of your system but also increases the longevity of your components by maintaining optimal temperatures. Therefore, it’s highly recommended to connect your case fans to the motherboard for optimal cooling management.
Where to plug in case fans on the motherboard
Knowing where to plug in your case fans on the motherboard is essential for proper functioning and control of your cooling system. Motherboards typically come with a variety of fan headers, each serving a specific purpose. Here are the common locations on the motherboard where you can connect your case fans:
- CPU_FAN header: As the name suggests, the CPU_FAN header is designed for the CPU cooler fan. However, it can also be used for case fans if needed. Connecting fans to this header allows the motherboard to monitor the CPU temperature and adjust fan speeds accordingly. It’s important to note that some motherboards may require the CPU_FAN header to be occupied, so check your motherboard manual for compatibility.
- SYS_FAN headers: These headers are dedicated to case fans and are usually found near the CPU socket. SYS_FAN headers provide monitoring and control capabilities, allowing you to adjust fan speeds based on temperature thresholds. These headers are ideal for connecting multiple case fans in your system.
- CHA_FAN headers: CHA_FAN (Chassis Fan) headers are additional headers specifically designed for case fans. They are usually found on the side or bottom of the motherboard. CHA_FAN headers often offer individual control over fan speeds, allowing you to create different cooling zones within your PC case by connecting multiple case fans to different headers.
- AIO_PUMP header: The AIO_PUMP header is specifically designed for all-in-one liquid coolers (AIO). However, some motherboards allow you to use it as an additional fan header for case fans. This header provides dedicated power and control for high-performance fans or pumps used in liquid cooling setups.
- OPT headers: OPT (Optional) headers are additional fan headers that provide flexibility for connecting more case fans. These headers often share the same control capabilities as other fan headers on the motherboard, allowing for efficient fan management.
- Molex connectors: In some cases, you might come across case fans that use Molex connectors instead of motherboard headers. These connectors directly draw power from the power supply unit (PSU) and offer a constant fan speed without any temperature control or monitoring. While Molex connectors can be useful in specific scenarios, connecting fans directly to the motherboard headers is generally recommended for better control and management.
When deciding where to plug in your case fans on the motherboard, consider the availability of headers, their control capabilities, and the number of fans you need to connect. It’s important to consult your motherboard manual for specific information about the headers and their functionalities. Additionally, make sure to plan your fan placement and cable routing to ensure proper airflow and cable management within your PC case.
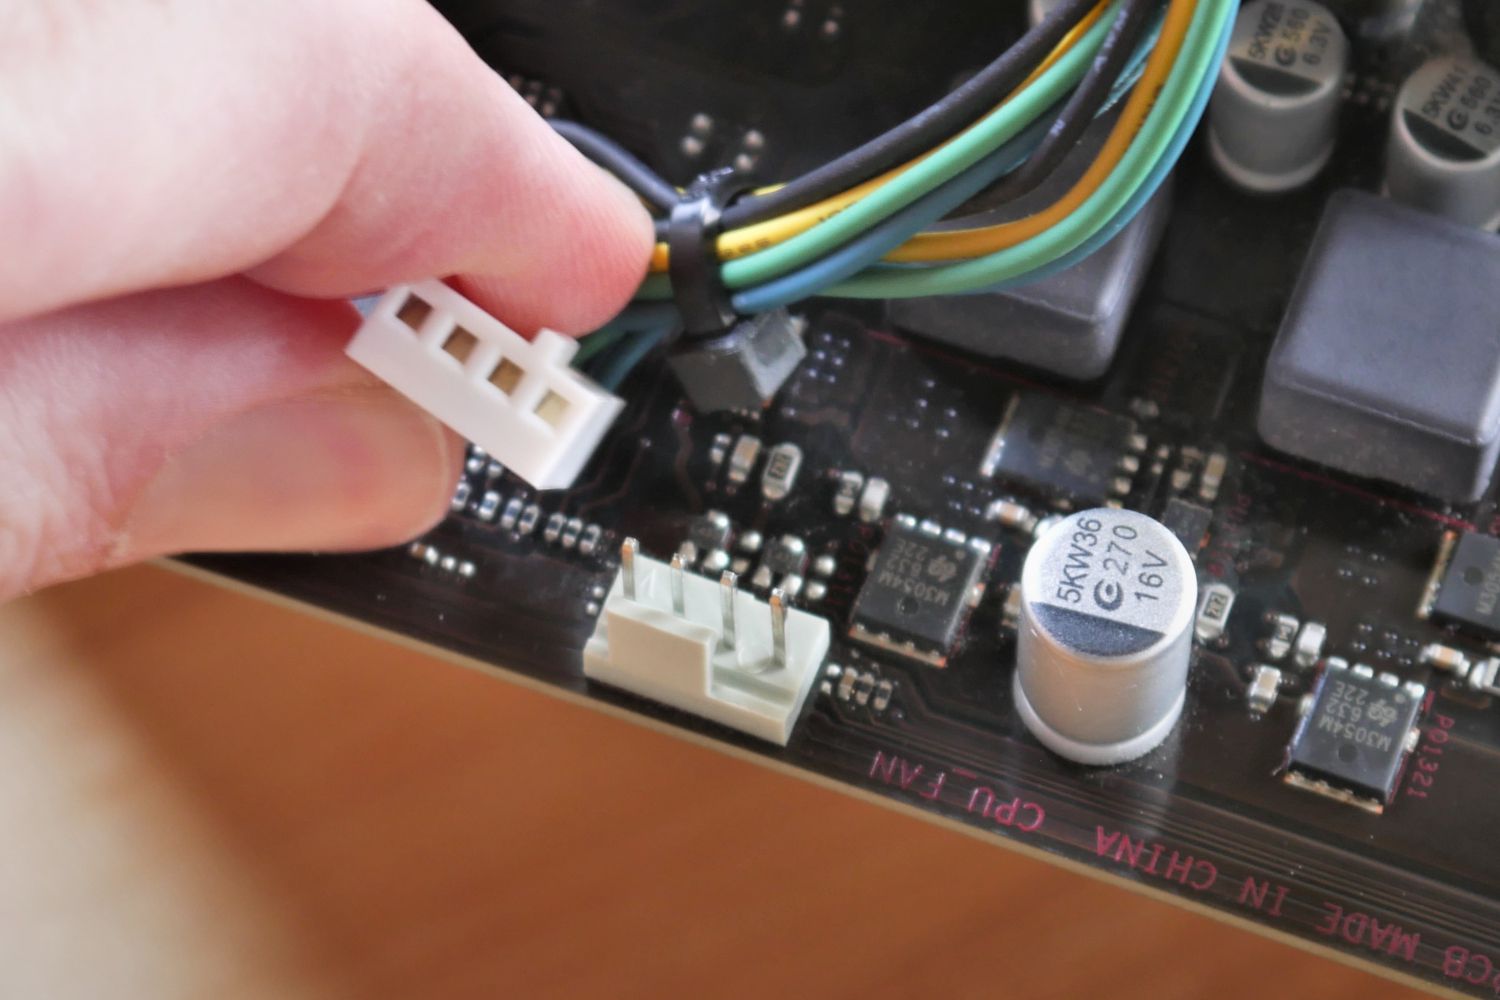
1 CPU_FAN header
The CPU_FAN header is a dedicated header on the motherboard specifically designed for the CPU cooler fan. This header provides power to the fan and allows the motherboard to monitor the CPU temperature and control the fan speed accordingly. While its primary function is to connect the CPU cooler fan, it can also be used to connect case fans depending on your motherboard’s compatibility.
When using the CPU_FAN header for case fans, it’s important to note that some motherboards require the CPU_FAN header to be occupied by the CPU cooler fan in order to function properly. Therefore, it’s crucial to check your motherboard manual or manufacturer’s website for compatibility and any specific instructions regarding its usage.
Connecting case fans to the CPU_FAN header provides several benefits. First, it allows the motherboard to monitor the CPU temperature accurately since it is in close proximity to the CPU. This enables the motherboard to adjust the fan speed based on the CPU’s heat output, ensuring optimal cooling performance.
Another advantage of utilizing the CPU_FAN header for case fans is the ability to control the fan speed. Most motherboards offer various fan control options, such as manual adjustment or automatic control based on temperature thresholds. By using the CPU_FAN header, you can take advantage of these control features, allowing you to customize the fan speed to best suit your cooling needs.
It’s important to keep in mind that if you choose to connect case fans to the CPU_FAN header along with the CPU cooler fan, the total power draw of the fans should remain within the capabilities of the header. Exceeding the power limit of the header can result in unstable operation or fan failure. Always check the specifications and limitations of the CPU_FAN header to ensure compatibility.
While the CPU_FAN header primarily serves the purpose of connecting the CPU cooler fan, it can also be utilized for case fans depending on your motherboard’s compatibility and power limitations. By doing so, you can take advantage of temperature monitoring and fan speed control capabilities, ensuring optimal cooling performance for both the CPU and the overall system.
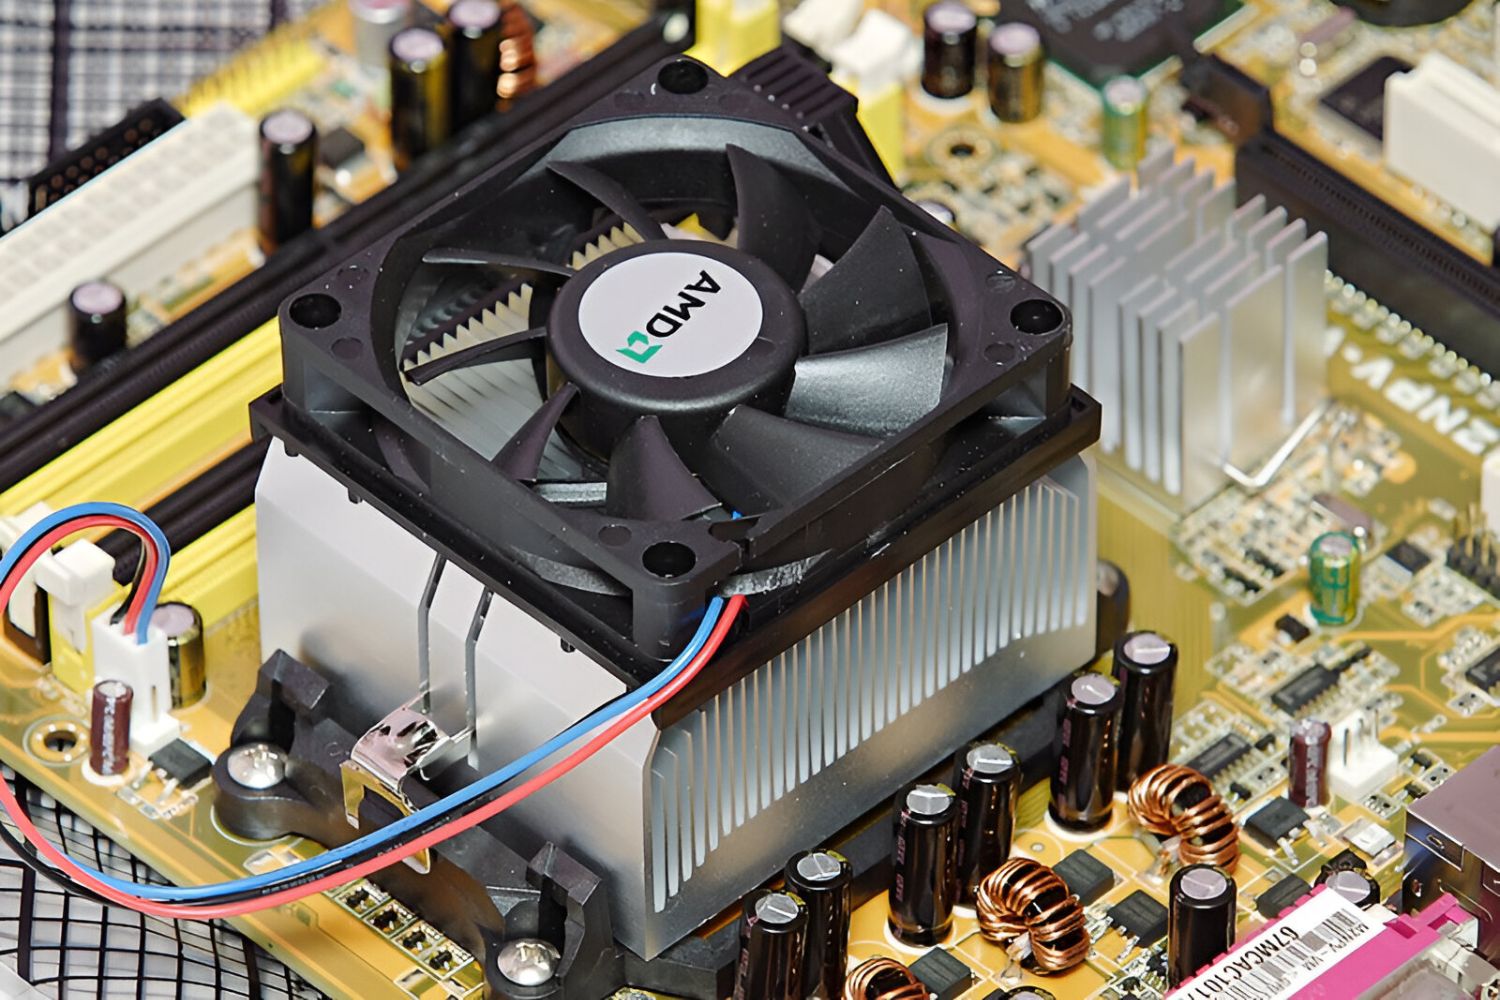
2 SYS_FAN headers
SYS_FAN headers, also known as system fan headers, are dedicated headers on the motherboard specifically designed for connecting case fans. These headers are usually located near the CPU socket or in different areas around the motherboard. They provide power to the case fans and allow the motherboard to monitor and control their speeds.
One of the main advantages of using SYS_FAN headers to connect case fans is the ability to monitor the fan speeds and temperatures. Through these headers, the motherboard can provide real-time readings of the fan speeds, allowing you to keep track of the cooling performance within your system. Additionally, by monitoring the fan speeds, the motherboard can also alert you if a fan is not running at the expected speed, indicating a potential issue.
Most motherboards offer BIOS or software-based fan control for the SYS_FAN headers. This means that you can manually adjust the fan speeds or set them to automatically increase or decrease based on temperature thresholds. This control allows you to strike a balance between cooling performance and noise levels, ensuring your system stays cool and quiet when needed.
When connecting case fans to SYS_FAN headers, it’s important to consider the power requirements. Each SYS_FAN header is designed to handle a specific maximum power output, usually measured in watts or amps. Before connecting your case fans, check the specifications of the motherboard and the fans to ensure compatibility and to avoid exceeding the power limit of the header.
SYS_FAN headers are commonly used to connect multiple case fans in a system. Some motherboards offer several SYS_FAN headers, enabling you to manage the cooling for different areas or components of your PC. By strategically connecting case fans to SYS_FAN headers in your system, you can optimize airflow and cooling efficiency, reducing temperatures and ensuring the stable operation of your components.
Overall, SYS_FAN headers provide a convenient and efficient way to connect and control case fans on the motherboard. With temperature monitoring and fan speed control capabilities, these headers allow you to create an optimal cooling setup for your system, ensuring the best performance and longevity for your PC components.
3 CHA_FAN headers
CHA_FAN headers, also known as chassis fan headers, are specific headers on the motherboard designed for connecting case fans. These headers are typically located on the side or bottom of the motherboard, and they provide power to the case fans while offering monitoring and control capabilities.
CHA_FAN headers provide an excellent option for connecting case fans because they offer additional control and flexibility. Unlike other fan headers, CHA_FAN headers often allow for individual control over fan speeds. This means that you can connect multiple case fans to different CHA_FAN headers and set different fan speed profiles for each one.
By utilizing CHA_FAN headers, you have the ability to create different cooling zones within your PC case. For example, you can connect front case fans to one CHA_FAN header and rear case fans to another. This allows you to optimize cooling for specific areas or components, ensuring efficient airflow and targeted cooling where it is needed most.
Most modern motherboards offer BIOS or software-based control for CHA_FAN headers, allowing you to set fan speed profiles based on temperature thresholds. This control enables you to tailor the fan speeds to your specific cooling needs, striking a balance between performance and noise levels.
When connecting case fans to CHA_FAN headers, it’s important to consider the power limitations of each header. Just like SYS_FAN headers, CHA_FAN headers have a maximum power output that should not be exceeded. Make sure to check the specifications of your motherboard and the fans to ensure compatibility and to prevent any potential damage from exceeding the power limits.
CHA_FAN headers offer a convenient solution for managing case fans in your system. Their individual control capabilities allow for fine-tuned fan speed adjustments and targeted cooling. By utilizing these headers effectively, you can achieve optimal cooling performance, lower temperatures, and a quieter system.
Overall, CHA_FAN headers provide the flexibility and control needed when connecting case fans to the motherboard. Consider using these headers to create different cooling zones and optimize airflow within your PC case, ensuring efficient cooling and extending the lifespan of your components.
4 AIO_PUMP header
The AIO_PUMP header, short for All-In-One Pump header, is a dedicated header on the motherboard specifically designed for connecting all-in-one liquid coolers (AIO). However, some motherboards allow the AIO_PUMP header to be used as an additional fan header for case fans or other cooling devices.
The main purpose of the AIO_PUMP header is to provide ample power delivery and control specifically tailored for use with AIO liquid coolers. These coolers often consist of a pump and radiator with integrated fans. The AIO_PUMP header supplies power to the pump and can offer specific control features like pump speed control or additional monitoring options.
While its primary function is for AIO coolers, some motherboards allow the AIO_PUMP header to be used with case fans. This provides a dedicated power source and control for high-performance fans used in extensive cooling setups or for users who require more power than traditional fan headers can offer.
When utilizing the AIO_PUMP header for case fans, it’s important to consider the power requirements of the fans. It’s recommended to check the specifications of your motherboard and the fans to ensure compatibility and to avoid exceeding the power limits of the AIO_PUMP header.
Using the AIO_PUMP header for case fans can have some advantages. Firstly, it provides a dedicated power source for high-performance fans, ensuring sufficient voltage and stable operation. Secondly, it can offer additional control features, such as customized fan curves or synchronization with other cooling components. This level of control allows for precise management of case fan speeds and cooling performance based on temperature readings.
It’s worth noting that not all motherboards support using the AIO_PUMP header for case fans, so it’s important to consult the motherboard manual or manufacturer’s website for detailed information and compatibility. Additionally, some motherboards may have specific restrictions or recommendations when using the AIO_PUMP header for purposes other than AIO coolers.
Overall, the AIO_PUMP header serves as a specialized header on the motherboard primarily for all-in-one liquid coolers. However, in some cases, it can also offer a powerful and controlled solution for connecting case fans or other cooling devices. Make sure to verify compatibility, power limitations, and any specific recommendations from your motherboard manufacturer before utilizing the AIO_PUMP header for case fans.
5 OPT headers
OPT headers, short for Optional headers, are additional fan headers found on some motherboards. These headers provide flexibility and expandability for connecting additional case fans or cooling devices. While their functionality may vary between motherboard models, OPT headers often offer similar features as other fan headers, such as power delivery and fan speed control.
OPT headers are useful for users who require additional fan control or have a need for more case fans than the available primary fan headers can accommodate. These headers provide a convenient solution to expand the cooling capacity of your system and optimize airflow within your PC case.
Connecting case fans to OPT headers allows for better cable management and organization since you won’t need to rely on additional fan controllers or adapters. This helps maintain a cleaner and more efficient build while reducing clutter within the system.
When using OPT headers, it’s essential to consider the power limits of each header. Just like other fan headers, OPT headers have a maximum power output that should not be exceeded to ensure proper functioning and prevent any potential damage. Refer to your motherboard’s specifications or user manual to ensure compatibility and adhere to the recommended power limitations when connecting case fans to OPT headers.
Most motherboards provide control over OPT headers, allowing you to adjust fan speeds manually or set up automatic control based on temperature thresholds. This ensures that your additional case fans can work in harmony with the rest of the cooling system, optimizing cooling efficiency and maintaining a balance between temperatures and noise levels.
It’s important to note that not all motherboards include OPT headers, so it’s crucial to check your motherboard specifications or manufacturer’s documentation to determine if your motherboard has these additional fan headers.
Overall, OPT headers offer a convenient and flexible solution for connecting additional case fans or cooling devices to your motherboard. They expand the cooling capacity of your system, allowing for better airflow and temperature management. If your motherboard has OPT headers available and you require additional cooling for your PC, utilizing these headers can be an effective way to optimize your system’s cooling performance.
6 Molex connectors
Molex connectors are a type of power connector commonly used in computer systems. They provide a direct connection to the power supply unit (PSU) and can be found on various components, including case fans. While not as commonly used today, Molex connectors still offer a reliable and straightforward method of powering case fans.
Connecting case fans using Molex connectors has a few key advantages. Firstly, Molex connectors provide a consistent and constant power source to the fans, ensuring they operate at a fixed speed. This can be useful in situations where you prefer a stable and consistent airflow, regardless of the system temperature.
Furthermore, Molex connectors eliminate the need to connect case fans to the motherboard. This can be beneficial if your motherboard lacks available fan headers or if you want to control the fans independently from the motherboard’s power regulation. By bypassing the motherboard, you also free up fan headers for other devices or fans.
However, it’s important to note that using Molex connectors for case fans does come with a few limitations. Since the fans are powered directly from the PSU, there is no temperature-based control or monitoring available. This means the fans will run at a fixed speed and won’t adjust according to the system’s temperature, which may impact cooling performance.
Another consideration is cable management. Molex connectors can require more space and can be bulkier compared to utilizing fan headers on the motherboard. It’s important to plan your cable management properly to avoid tangling or obstructing airflow within the system.
Lastly, using Molex connectors for case fans can result in higher noise levels since the fans will run at a fixed speed without any temperature-based regulation. If you prioritize a quiet system, it may be more suitable to use motherboard fan headers that offer fan speed control.
Overall, Molex connectors provide a straightforward and reliable method of powering case fans directly from the PSU. They offer a consistent and steady airflow but lack the ability for temperature-based control. When using Molex connectors, it’s important to consider cable management and the potential for increased noise levels. Depending on your specific needs and preferences, connecting case fans with Molex connectors can be a viable option for maintaining steady and fixed fan speed.
Choosing the best header for your case fan
Choosing the best header for your case fan is essential for optimal cooling performance and control. Each header on the motherboard offers different features and capabilities. Here are some factors to consider when selecting the best header for your case fan:
- Power and compatibility: Ensure that the header you choose can provide sufficient power to the case fan. Check the specifications of both the fan and the motherboard to ensure compatibility and avoid exceeding the power limit of the header.
- Fan control: Consider whether you want to have control over the fan speed. Headers like the CPU_FAN, SYS_FAN, or CHA_FAN headers often offer fan speed control features, giving you the ability to manually adjust or set automatic fan curves based on temperature thresholds.
- Temperature monitoring: If temperature monitoring is important to you, choose a header that allows for temperature readings and monitoring. Headers like the CPU_FAN or SYS_FAN headers provide temperature-based control and monitoring, ensuring the system can adjust the fan speed according to temperature changes.
- Number of fans: Take into account the number of fans you want to connect and ensure that the selected header can accommodate the desired quantity. Headers like the SYS_FAN or CHA_FAN headers often support multiple fans, allowing you to connect and control multiple case fans simultaneously.
- Cable management: Consider the layout and cable management within your PC case. Opt for headers that provide the most practical cable routing for your fans, ensuring neatness and proper airflow. Choose headers that allow for clean cable management and avoid clutter that could obstruct airflow.
- Specific fan requirements: Some fans may have specific requirements or recommendations for header connections. For instance, certain high-performance fans may require higher power outputs or specialized headers like the AIO_PUMP header. Always check the fan’s specifications or manufacturer’s recommendations for the best header choice.
Ultimately, the best header for your case fan depends on your specific requirements and the capabilities of your motherboard. Consider factors like power, control, monitoring, cable management, and fan specifications to make an informed decision. Selecting the appropriate header ensures seamless integration, optimal cooling performance, and better control over your case fans.
Tips for fan cable management
Proper fan cable management is crucial for maintaining a clean and organized PC build. By managing your fan cables effectively, you can ensure optimal airflow, minimize cable clutter, and create a visually appealing system. Here are some tips for fan cable management:
- Plan your fan placement: Before connecting your fans, plan their placement within your PC case. Consider the optimal airflow path, ensuring that intake fans bring in cool air while exhaust fans expel hot air. This planning will help you route the cables more efficiently.
- Use fan splitters or hubs: If you have more case fans than available headers on the motherboard, consider using fan splitters or hubs. These accessories allow you to connect multiple fans to a single header, reducing cable clutter and simplifying cable management.
- Route cables along the back of the motherboard tray: Take advantage of the space behind the motherboard tray to route your fan cables. Use cable ties or Velcro straps to secure the cables along the edges of the tray. This helps keep the cables out of sight and prevents them from interfering with airflow within the case.
- Utilize cable management features: Many PC cases come equipped with built-in cable management features, such as routed cable channels, tie-down points, or cable grommets. Utilize these features to route and secure your fan cables, keeping them neat and organized.
- Opt for shorter cables: Consider using shorter fan cables to minimize excess cable lengths. Excessively long cables can lead to more cable clutter and may obstruct airflow within the case. If necessary, you can use cable extensions to achieve the desired length, ensuring a clean and organized appearance.
- Use adhesive-backed cable clips: Adhesive-backed cable clips can be attached to the inside of your PC case, allowing you to secure fan cables along the walls or bottom of the case. This prevents cables from obstructing fans or components and helps maintain a tidy cable arrangement.
- Label your cables: To easily identify and manage your fan cables, consider labeling them. Use cable labels or color-coded tags to distinguish between different fan cables, making troubleshooting or adjustments much simpler in the future.
- Consider custom-length cables: If you’re seeking the cleanest and tidiest cable management solution, you can opt for custom-length fan cables. Custom cables are made to fit your specific case and component layout, ensuring minimal cable clutter and maximizing airflow.
- Regularly check and adjust cables: Once your fan cables are properly managed, periodically check for any cables that may have come loose or shifted. Ensure that the cables are not obstructing fans or components and make adjustments as necessary.
By following these tips, you can achieve a well-organized and visually pleasing cable management system for your case fans. Properly managed fan cables not only improve the aesthetics of your build but also contribute to better airflow and cooling performance within your PC case.
Conclusion
In conclusion, understanding where to plug in case fans on the motherboard is essential for effective cooling and optimal performance in your computer system. Case fans play a crucial role in maintaining proper airflow and dissipating heat generated by the components within your PC case. By utilizing the various headers available on the motherboard, you can enhance cooling efficiency and ensure the longevity of your hardware.
We explored several types of case fans, including airflow fans, static pressure fans, noise-optimized fans, LED fans, and RGB fans. Each type offers distinct characteristics and benefits, allowing you to choose the best fan that suits your cooling needs and personal preferences.
Connecting case fans to the motherboard offers numerous advantages. It allows for temperature monitoring, fan speed control, and optimized cooling profiles. The CPU_FAN header, SYS_FAN headers, CHA_FAN headers, AIO_PUMP header, and OPT headers on the motherboard provide specific functionalities and control options for different types of fans.
We also provided tips for fan cable management to ensure clean cable routing, minimize clutter, and maintain optimal airflow within your PC case. Properly managing fan cables not only improves the visual aesthetics of your build but also contributes to better cooling performance and system stability.
When choosing the best header for your case fans, consider factors such as power requirements, fan control options, temperature monitoring, and cable management. Understanding the capabilities of each header will allow you to make informed decisions and optimize cooling performance in your system.
By applying the knowledge and tips provided in this guide, you can effectively connect and manage your case fans on the motherboard, creating a well-cooled and visually pleasing computer system. Remember to consult your motherboard’s manual and specifications for detailed guidance and compatibility considerations.