Introduction
Welcome to this guide on finding your graphics card in Device Manager. If you’re experiencing issues with your graphics card or simply want to learn more about it, Device Manager is a handy tool that can provide valuable information. In this article, we’ll walk you through the steps of accessing Device Manager and locating the graphics card category.
Device Manager is a built-in Windows utility that allows you to manage and view the hardware devices connected to your computer. It provides detailed information about each device, including drivers, status, and any potential issues. By accessing Device Manager, you can find the specific category where your graphics card is listed.
Having a clear understanding of how to navigate Device Manager can be beneficial, especially when troubleshooting graphics card-related problems. Whether you’re updating drivers, checking for conflicts, or diagnosing issues, Device Manager is a valuable resource.
In the sections that follow, we’ll cover everything you need to know about using Device Manager to locate your graphics card. We’ll also discuss common graphics card categories and provide tips for identifying and troubleshooting graphics card issues. Let’s get started!
How to Access Device Manager in Windows
Accessing Device Manager in Windows is a straightforward process. Follow these steps to open Device Manager:
- Press the Windows key + R on your keyboard to open the Run dialog box.
- Type “devmgmt.msc” (without the quotes) in the Run dialog box and press Enter.
- This will open the Device Manager window, where you can view and manage your computer’s hardware devices.
Alternatively, you can access Device Manager through the Control Panel or the Windows Settings app:
Method 1: Accessing Device Manager through the Control Panel:
- Open the Control Panel by clicking on the Start button and searching for “Control Panel”.
- Click on the Device Manager option under the System and Security category.
Method 2: Accessing Device Manager through the Windows Settings app:
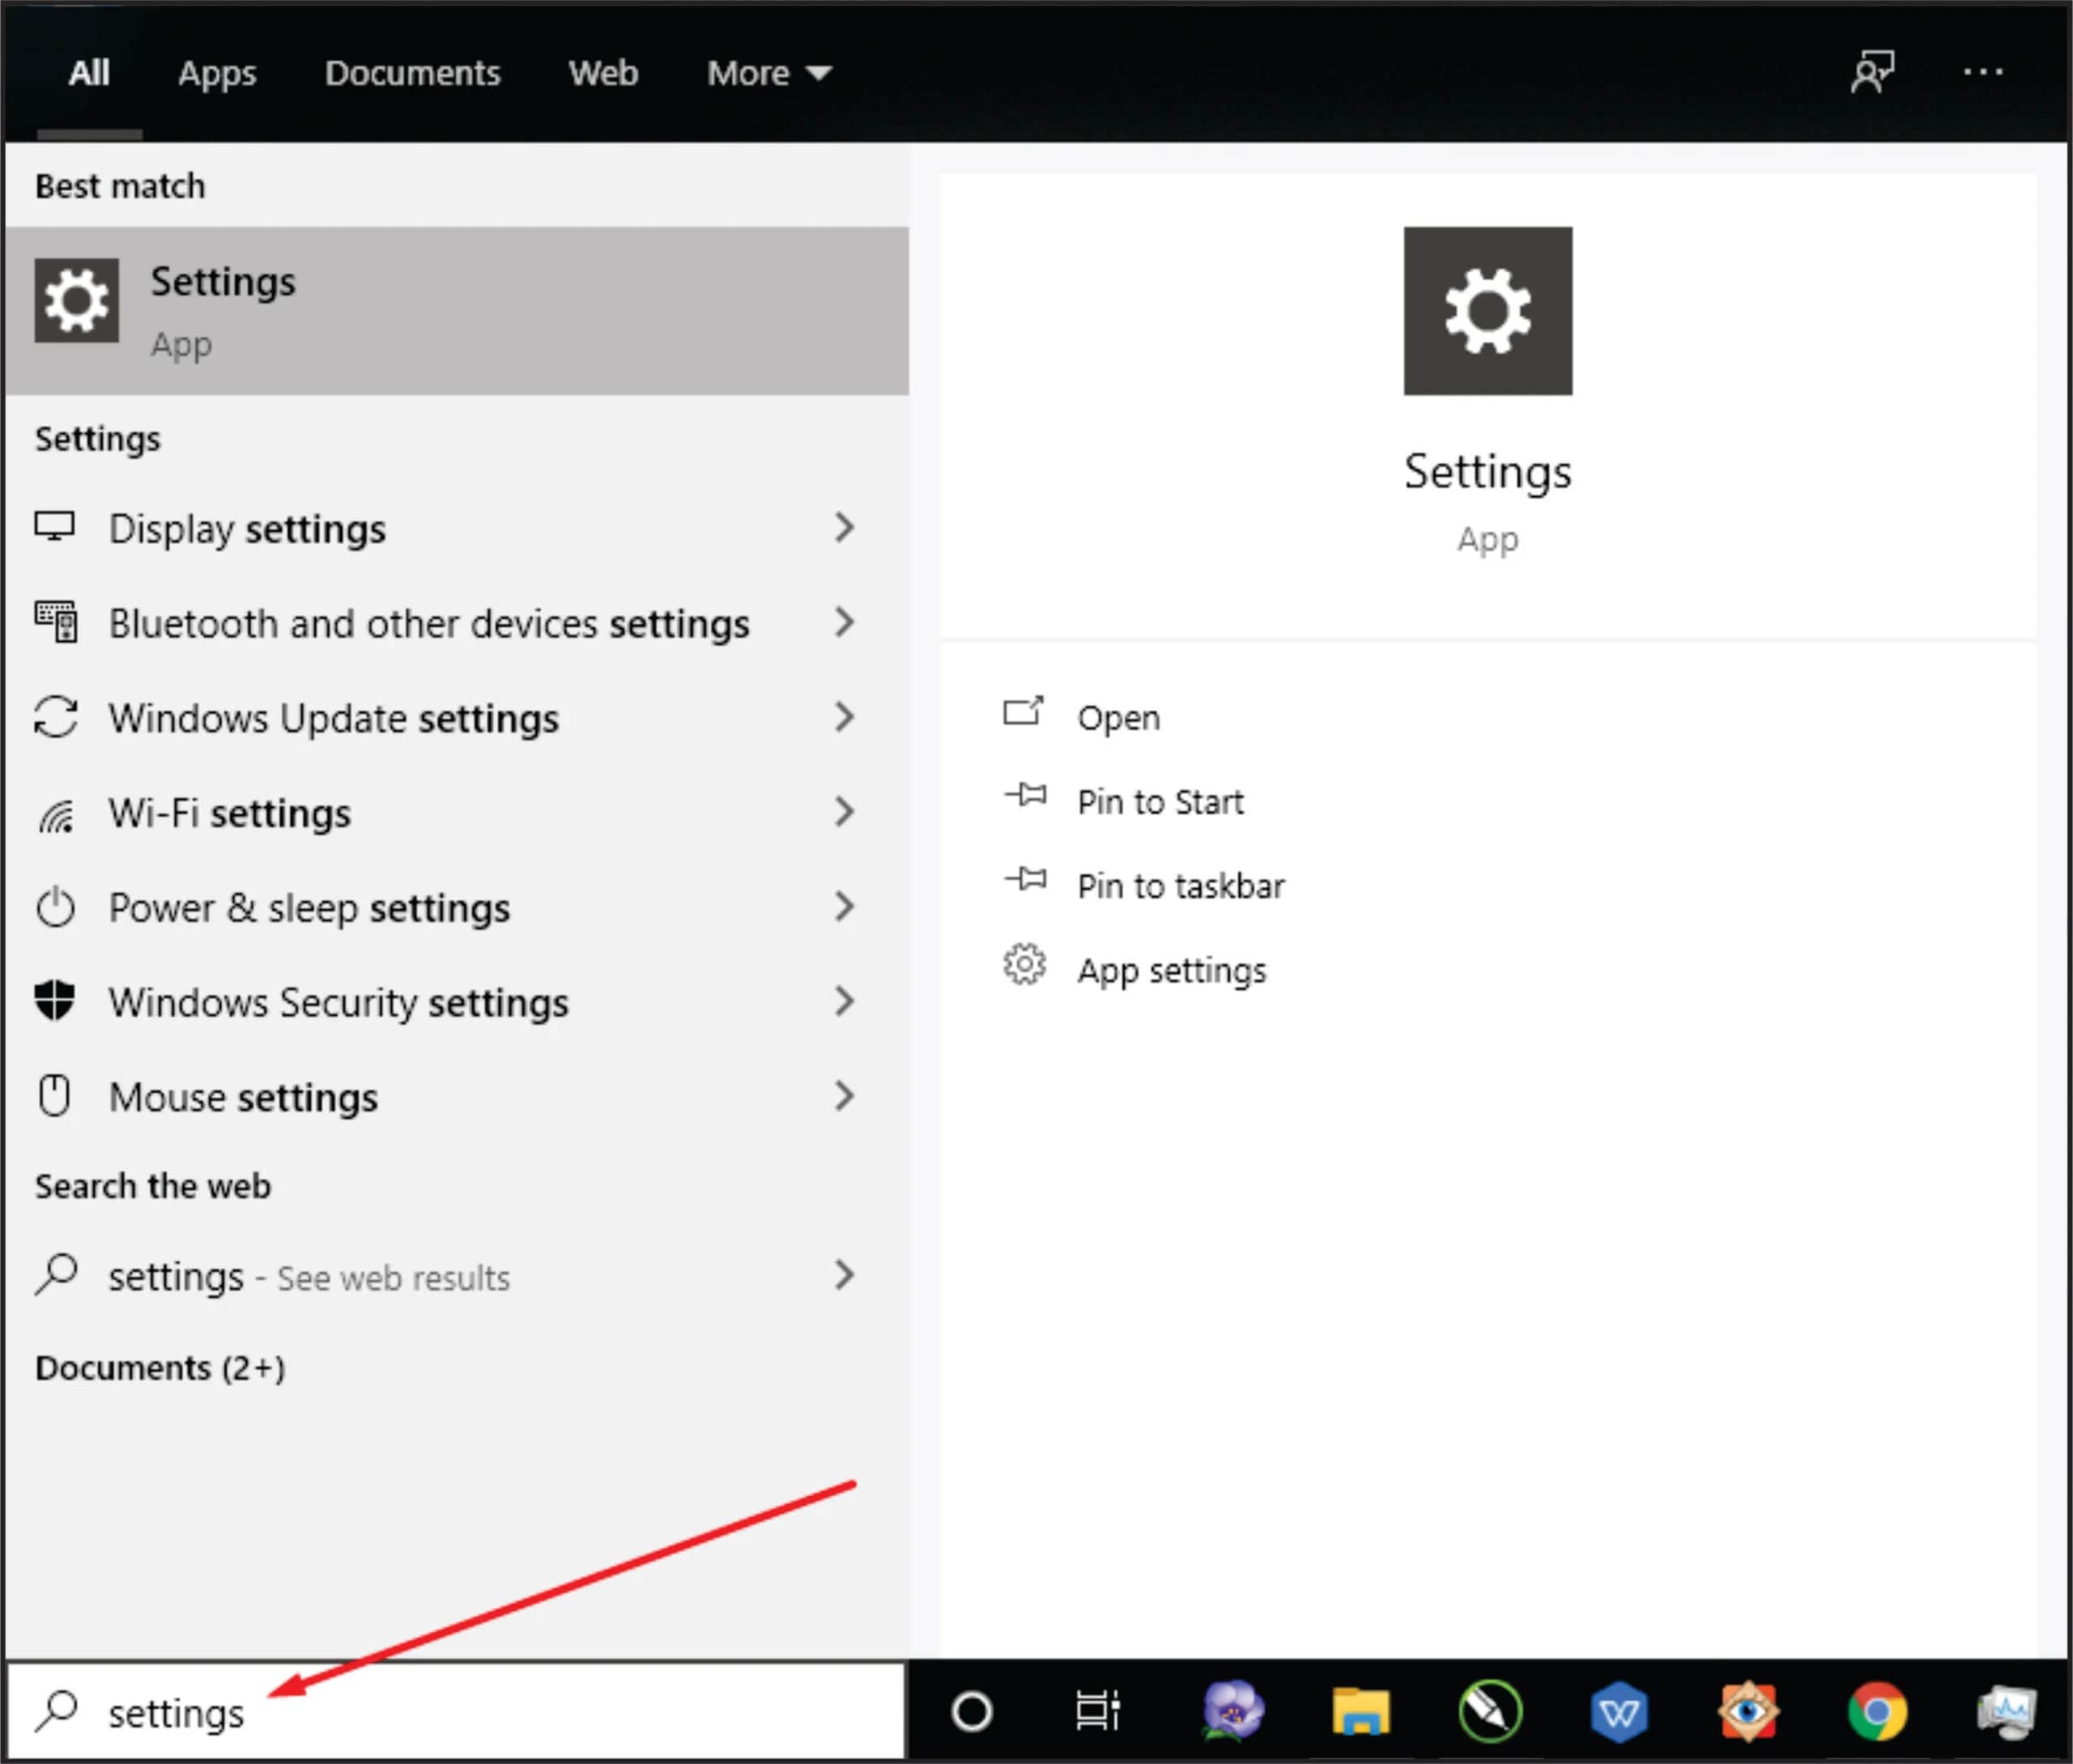
- Click on the Start button and select the Settings cog icon.
- In the Settings window, click on System, and then select About.
- Scroll down and click on the Device Manager link.
Once you’ve successfully opened Device Manager, you’ll be able to navigate through the different categories to find your graphics card. In the next section, we’ll discuss how to locate the graphics card category in Device Manager.
Understanding Device Manager
Device Manager is a powerful tool in Windows that allows you to manage and troubleshoot the hardware devices connected to your computer. It provides a comprehensive view of all the devices, including your graphics card, that are installed on your system. Understanding how Device Manager works can help you effectively locate and manage your graphics card.
When you open Device Manager, you’ll see a hierarchical list of device categories. Each category represents a different type of hardware device. These categories can range from display adapters and network adapters to keyboards and mice.
Within each category, you’ll find individual devices. These devices can be physical components, such as graphics cards or USB devices, or virtual devices, such as software drivers. Each device may have its own properties, drivers, and specific settings that you can access through Device Manager.
Device Manager also provides important information about the status of each device. If a device is functioning properly, it will be listed without any error indicators. However, if there are issues with a device, you may see an exclamation mark or a question mark icon next to it, indicating a problem that needs attention.
By understanding the structure of Device Manager, you can easily navigate to the category that contains your graphics card. This will enable you to access specific information about your graphics card, update drivers, and troubleshoot any potential issues.
Now that you have a basic understanding of Device Manager, let’s move on to the next section where we’ll guide you through locating the graphics card category in Device Manager.
Locating the Graphics Card Category
Locating the graphics card category in Device Manager allows you to access detailed information about your graphics card and perform necessary actions, such as updating drivers or troubleshooting issues. Follow the steps below to find the graphics card category:
- Open Device Manager by following the methods mentioned in the previous section.
- Once Device Manager opens, you’ll see a list of categories displaying different hardware devices.
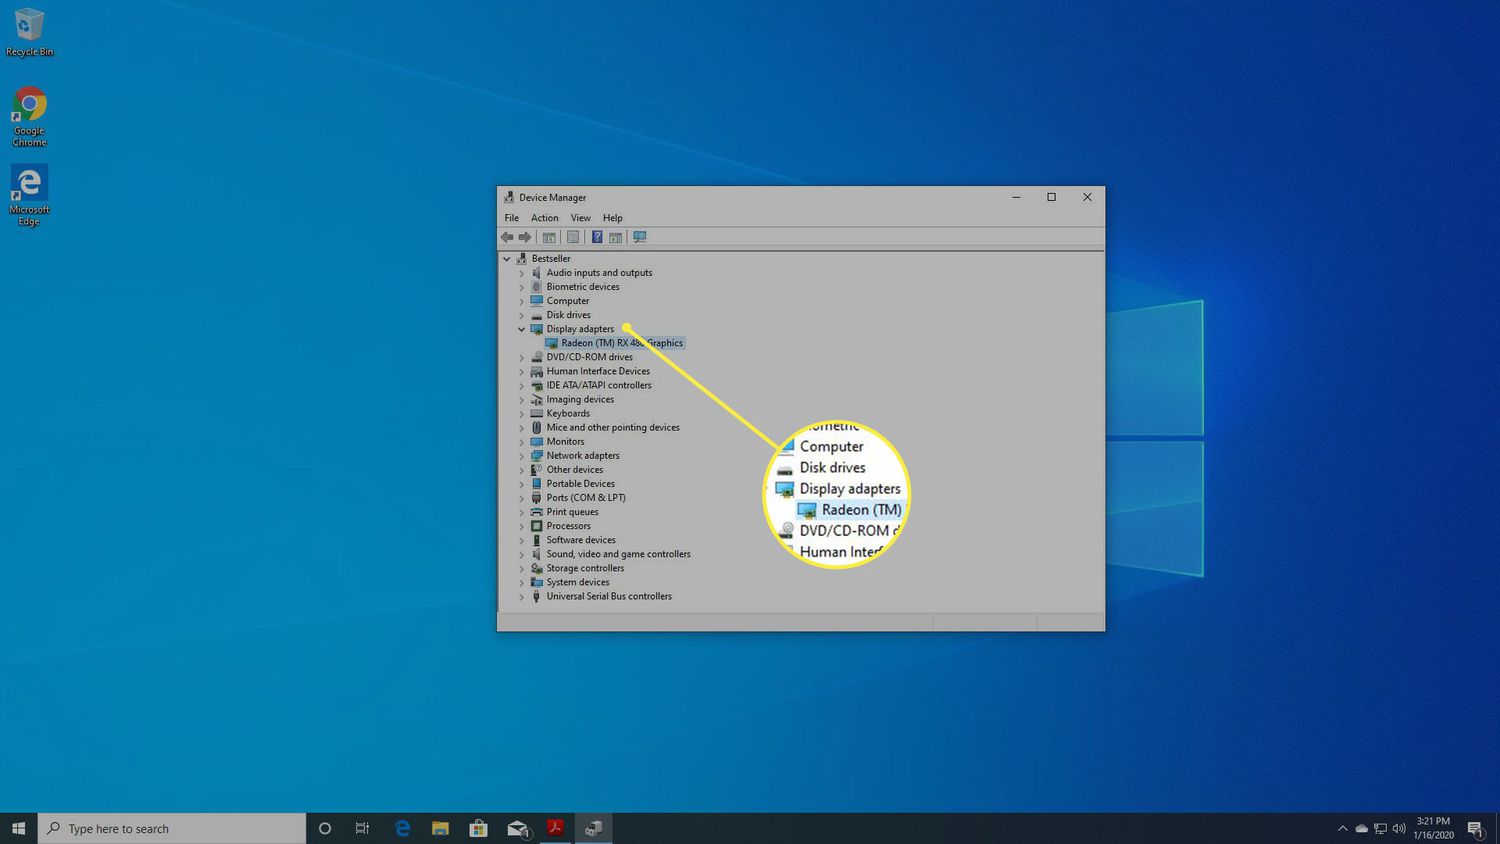
- Scroll through the list and look for the category labeled “Display adapters” or “Graphics cards”.
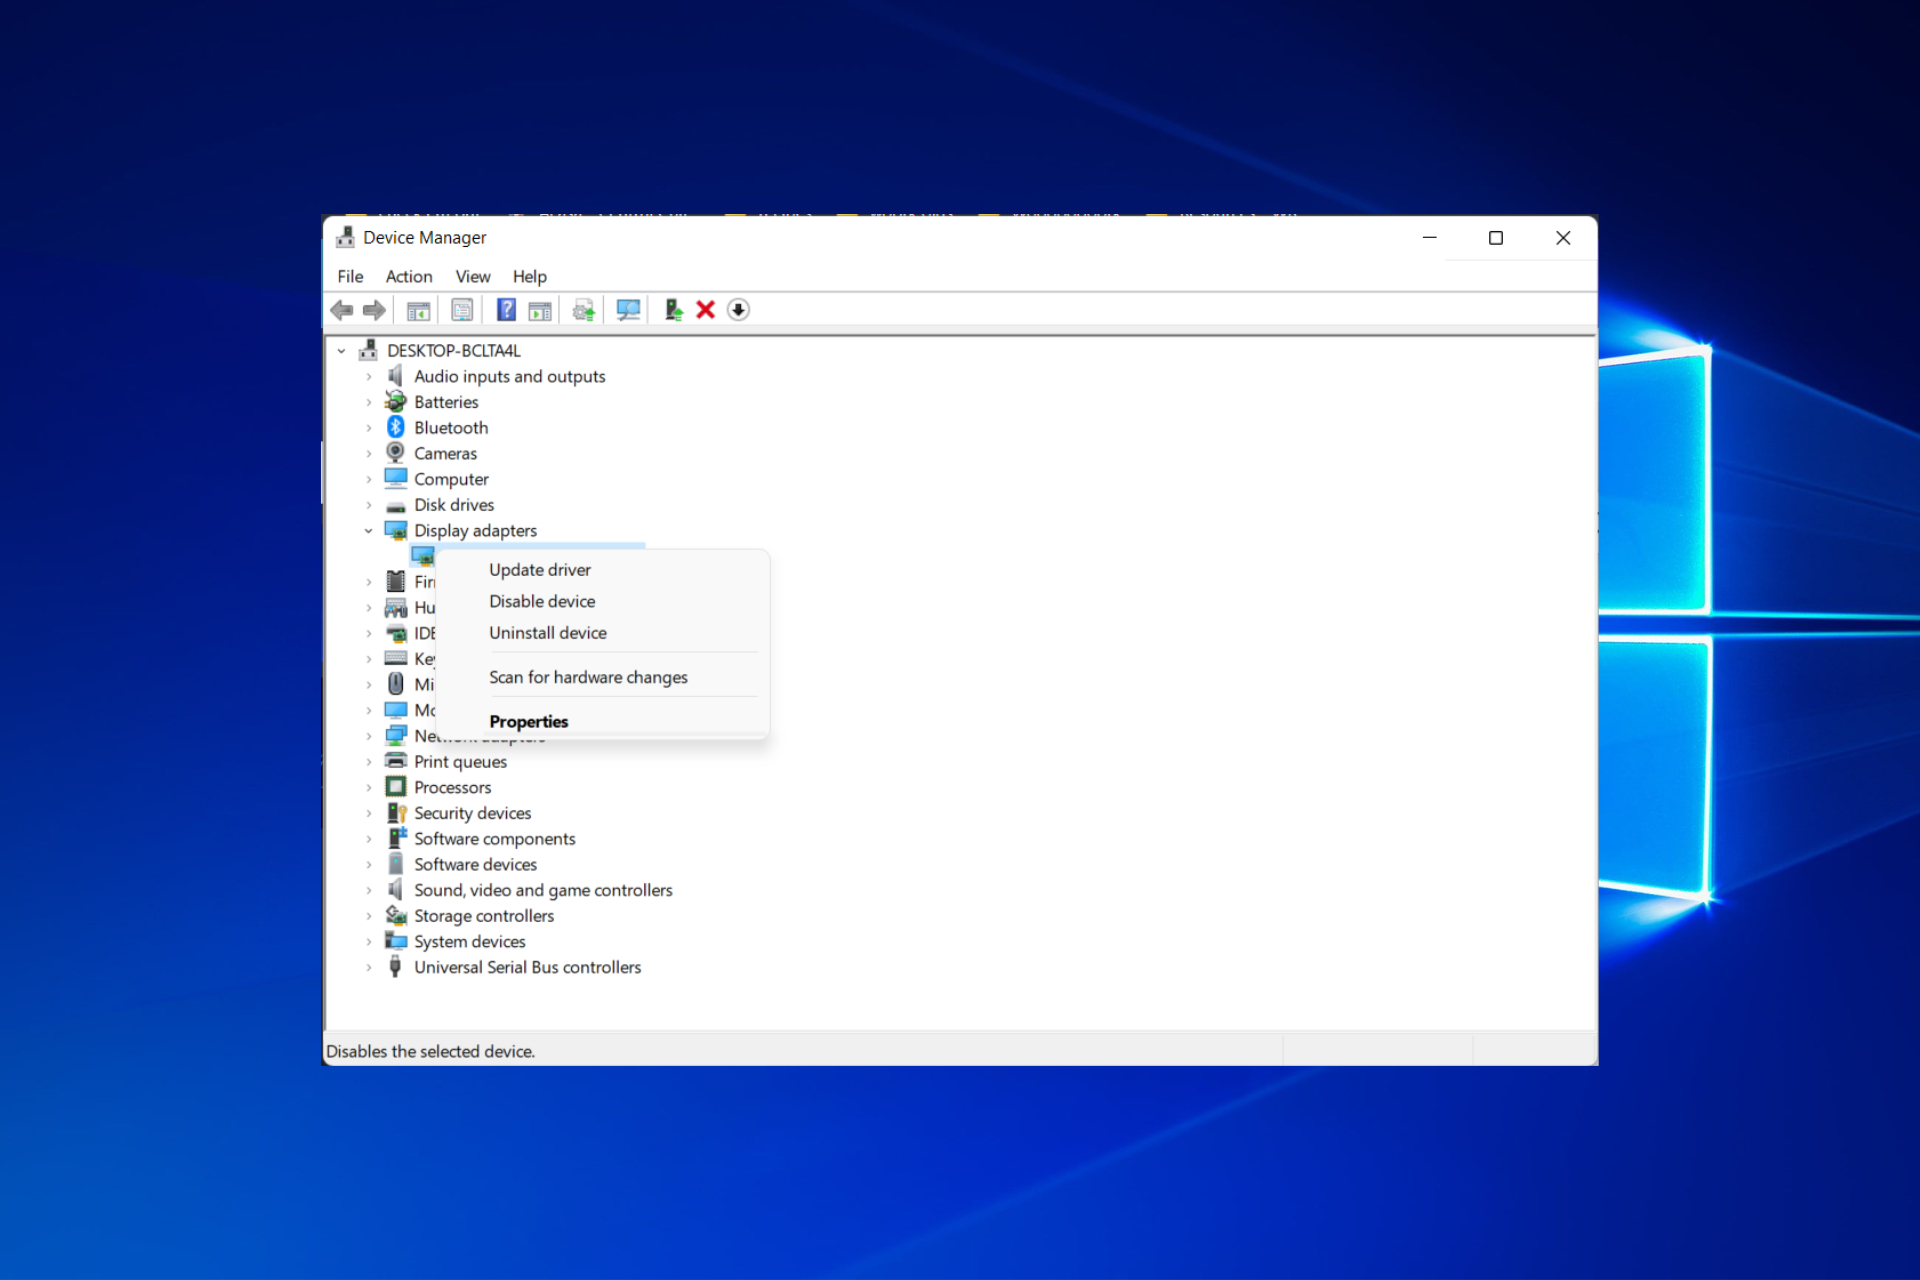
- Expand the “Display adapters” or “Graphics cards” category by clicking on the small arrow icon next to it.
Within the expanded category, you’ll find the name of your graphics card model. It may be listed as the exact model name or as a generic name, such as “Standard VGA Graphics Adapter” if the drivers are not installed or up to date.
If you have multiple graphics cards installed, you’ll see them all listed under the “Display adapters” or “Graphics cards” category. This is particularly common in systems with integrated graphics and dedicated graphics cards. In this case, you’ll be able to identify each graphics card by its individual name or model.
Once you’ve located the graphics card category and identified your graphics card, you can right-click on it to access a range of options. These options may include updating drivers, disabling or enabling the device, uninstalling drivers, and accessing properties for more information.
Now that you know how to find the graphics card category in Device Manager, let’s move on to the next section where we’ll discuss common categories that you might encounter when locating your graphics card.
Common Graphics Card Categories
When exploring the graphics card category in Device Manager, you may come across different categories and terms related to your graphics card. Here are a few common categories you might encounter:
- Display adapters: This category is commonly found in Device Manager and typically represents the graphics cards installed in your system. It may display the specific model names of your graphics cards or generic names if the drivers are not installed or up to date.
- Graphics cards: Similar to the “Display adapters” category, the “Graphics cards” category can also indicate the presence of graphics cards in your system. It may provide detailed information about each installed graphics card, such as the manufacturer, model, and driver version.
- Standard VGA Graphics Adapter: If you see this category listed under “Display adapters,” it means that Windows is using a generic VGA driver for your graphics card. This typically occurs when the proper drivers are not installed or if there’s an issue with the existing drivers. In such cases, it’s recommended to update or reinstall the appropriate graphics card drivers.
- Intel HD Graphics: This category usually appears when your computer has integrated Intel graphics. It represents the graphics capabilities of your processor and may include specific model numbers or series names, such as Intel HD Graphics 620 or Intel UHD Graphics.
- NVIDIA GeForce: If you have an NVIDIA graphics card installed, you may come across this category. It denotes the presence of NVIDIA GeForce graphics cards in your system and provides information about the model and driver version.
- AMD Radeon: AMD graphics card users may find this category in Device Manager. It signifies the presence of AMD Radeon graphics cards and displays information about the specific model, series, and driver version.
These are just a few examples of common graphics card categories you may encounter in Device Manager. The specific categories and names will depend on your system configuration and the graphics card manufacturer. It’s important to note that not all graphics cards will have their own separate category and may be listed under a more general category like “Display adapters.”
Now that you’re familiar with some of the common graphics card categories in Device Manager, let’s move on to the next section, where we’ll discuss how to identify and troubleshoot graphics card issues.
Identifying and Troubleshooting Graphics Card Issues
If you’re experiencing problems with your graphics card, whether it’s related to display issues, performance, or compatibility, Device Manager can help you identify and troubleshoot the issues. Here are some common graphics card issues and the steps to address them:
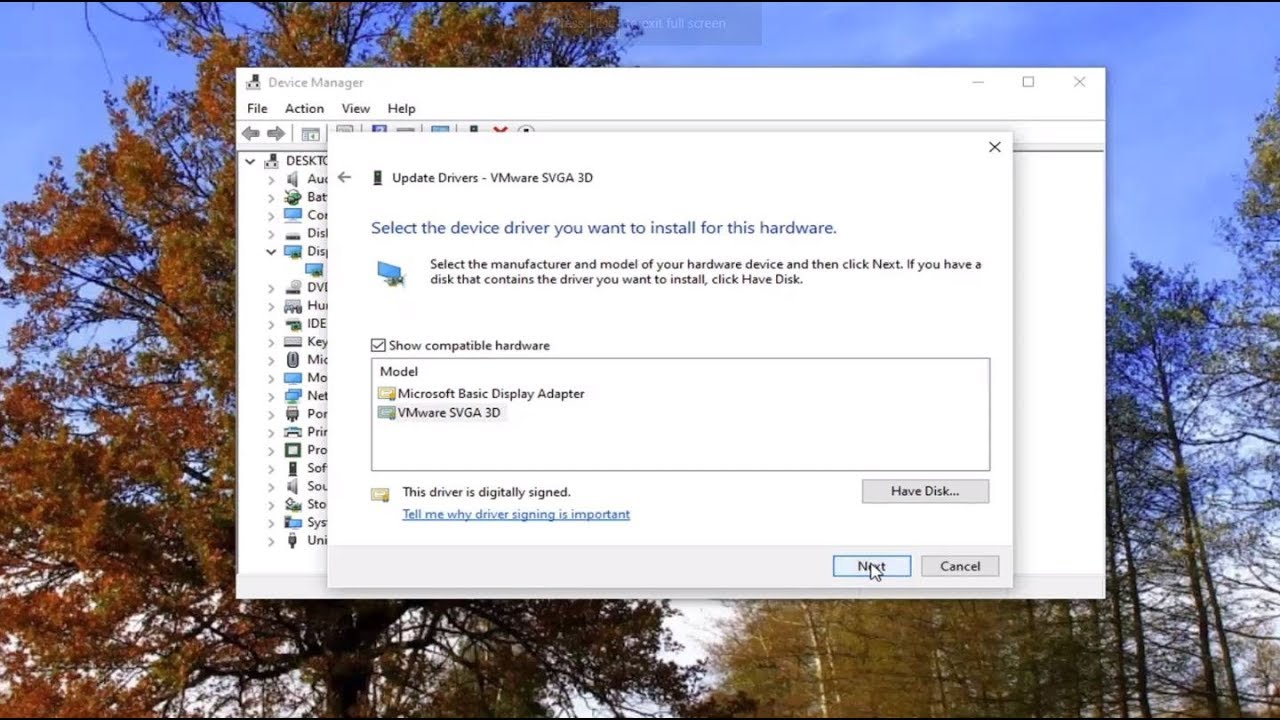
1. Display Issues: If you’re encountering problems with your display, such as blurry or distorted images, flickering, or no display at all, there may be an issue with your graphics card. First, ensure that your cables are properly connected. If the problem persists, right-click on your graphics card in Device Manager and select “Update driver.” If there are no updates available, you may need to uninstall and reinstall the graphics card drivers.
2. Performance Problems: If you’re experiencing poor performance in graphics-intensive applications or games, it could be due to outdated or incompatible drivers. Ensure that you have the latest drivers installed for your graphics card. You can check for updates through Device Manager or by visiting the manufacturer’s website. Additionally, check for any background processes or applications that may be consuming excessive resources and affecting graphics card performance.
3. Driver Conflicts: In some cases, conflicts between graphics card drivers and other drivers or software on your system can cause issues. To resolve this, navigate to Device Manager, right-click on your graphics card, and select “Properties.” Under the “Driver” tab, click on “Driver details” to view the list of driver files associated with your graphics card. If you notice any conflicting files or outdated drivers, update or uninstall them accordingly.
4. Overheating: Graphics cards can generate a significant amount of heat, and excessive heat can lead to performance issues or system crashes. Make sure your graphics card’s fan is working properly and that there’s adequate airflow in your computer case. Cleaning the dust from your card and ensuring that it’s not overclocked beyond its limits can also help prevent overheating.
5. Compatibility Problems: If you’ve recently upgraded your operating system or installed new hardware or software, it’s possible that there may be compatibility issues with your graphics card. Check the graphics card manufacturer’s website for any available updates or patches that address compatibility issues.
By using Device Manager to identify and troubleshoot graphics card issues, you can resolve common problems and ensure optimal performance. Remember to check for driver updates regularly and keep your graphics card drivers up to date.
Next, we’ll discuss the importance of updating graphics card drivers and how to do it effectively.
Updating Graphics Card Drivers
Updating your graphics card drivers is crucial for maintaining optimal performance and compatibility with the latest software and games. Outdated or incompatible drivers can result in various issues, including display problems, reduced performance, and system crashes. Here are the steps to effectively update your graphics card drivers:
1. Determine the Graphics Card Model: Before updating the drivers, it’s important to know the exact model of your graphics card. You can find this information in Device Manager under the “Display adapters” or “Graphics cards” category. Note down the model name for reference.
2. Visit the Manufacturer’s Website: Once you know your graphics card model, navigate to the manufacturer’s website. For example, if you have an NVIDIA graphics card, visit the NVIDIA website, or if you have an AMD card, go to the AMD website. Look for the “Drivers” or “Support” section on the website.
3. Download the Latest Driver: On the manufacturer’s website, locate the download page for your specific graphics card model. Select the latest driver version compatible with your operating system. Download the driver to your computer, making note of its location for easy access during installation.
4. Uninstall Old Drivers (optional): It’s generally recommended to uninstall the old graphics card drivers before installing the new ones. To do this, go to Device Manager, right-click on your graphics card, and select “Uninstall device.” Follow the on-screen prompts to complete the uninstallation process.
5. Install the New Driver: Double-click on the downloaded driver file to start the installation process. Follow the on-screen instructions, and make sure to select the appropriate installation options tailored to your needs. Restart your computer after the installation is complete.
6. Verify the Driver Installation: After restarting your computer, open Device Manager and navigate to the graphics card category. Verify that the updated driver is installed and displayed correctly. You can also verify this information by opening the graphics card manufacturer’s software, such as NVIDIA Control Panel or AMD Radeon Settings.
7. Enable Automatic Driver Updates (optional): To ensure you’re always using the latest graphics card drivers, you can enable automatic driver updates. Most manufacturers offer software utilities or settings within their drivers that allow for automatic updates. Enable this feature if available and stay on top of driver updates effortlessly.
Regularly updating your graphics card drivers ensures that your graphics card functions optimally and remains compatible with the latest software and games. It’s a simple yet effective way to enhance your computer’s performance and resolve any graphics-related issues you may encounter.
In the following section, we’ll wrap up this guide with a brief summary and some closing thoughts.
Conclusion
Congratulations! You’ve now learned how to access Device Manager, locate the graphics card category, and troubleshoot common graphics card issues. By familiarizing yourself with Device Manager, you can easily manage and troubleshoot your graphics card, ensuring optimal performance and compatibility.
Remember, Device Manager is a powerful tool that provides detailed information about your computer’s hardware devices. By accessing the graphics card category in Device Manager, you can easily identify your graphics card model, update drivers, and diagnose and resolve any issues that may arise.
In addition to using Device Manager, it’s important to keep your graphics card drivers updated. Updating your drivers ensures that your graphics card functions at its best, providing optimal performance and compatibility with the latest software and games. Regularly checking for driver updates on the manufacturer’s website and installing them can help prevent issues and enhance your overall computing experience.
Keep in mind that graphics card categories in Device Manager may vary depending on your system configuration and the manufacturer of your graphics card. However, the general steps outlined in this guide should help you locate and manage your graphics card effectively.
We hope this guide has been informative and helpful in your quest to find your graphics card in Device Manager. If you have any further questions or need additional assistance, don’t hesitate to reach out to the manufacturer’s support or consult online resources.
Thank you for reading, and happy exploring and troubleshooting with Device Manager!


