Introduction
Welcome to the world of computer graphics and the quest to figure out what kind of graphics card you have. Whether you’re a gamer, a graphic designer, or simply someone who wants to understand their computer better, knowing the details of your graphics card is essential. Your graphics card plays a crucial role in rendering images, videos, and games on your computer screen, and having the right one can significantly impact your overall computing experience.
Whether you’re using a desktop, laptop, or even a Mac, there are various ways to determine the type of graphics card you have. This article will guide you through the process of checking your graphics card on different operating systems, using system information tools, and even physically inspecting your hardware to identify your graphics card.
Understanding your graphics card not only helps you keep track of your computer’s capabilities but also enables you to update drivers, troubleshoot issues, and ensure compatibility with the latest software and games. So, let’s dive into the different methods that will help you figure out what kind of graphics card you have.
Checking your graphics card on Windows
If you’re a Windows user, there are a few methods to determine the type of graphics card you have. The easiest way is to use the built-in Device Manager tool:
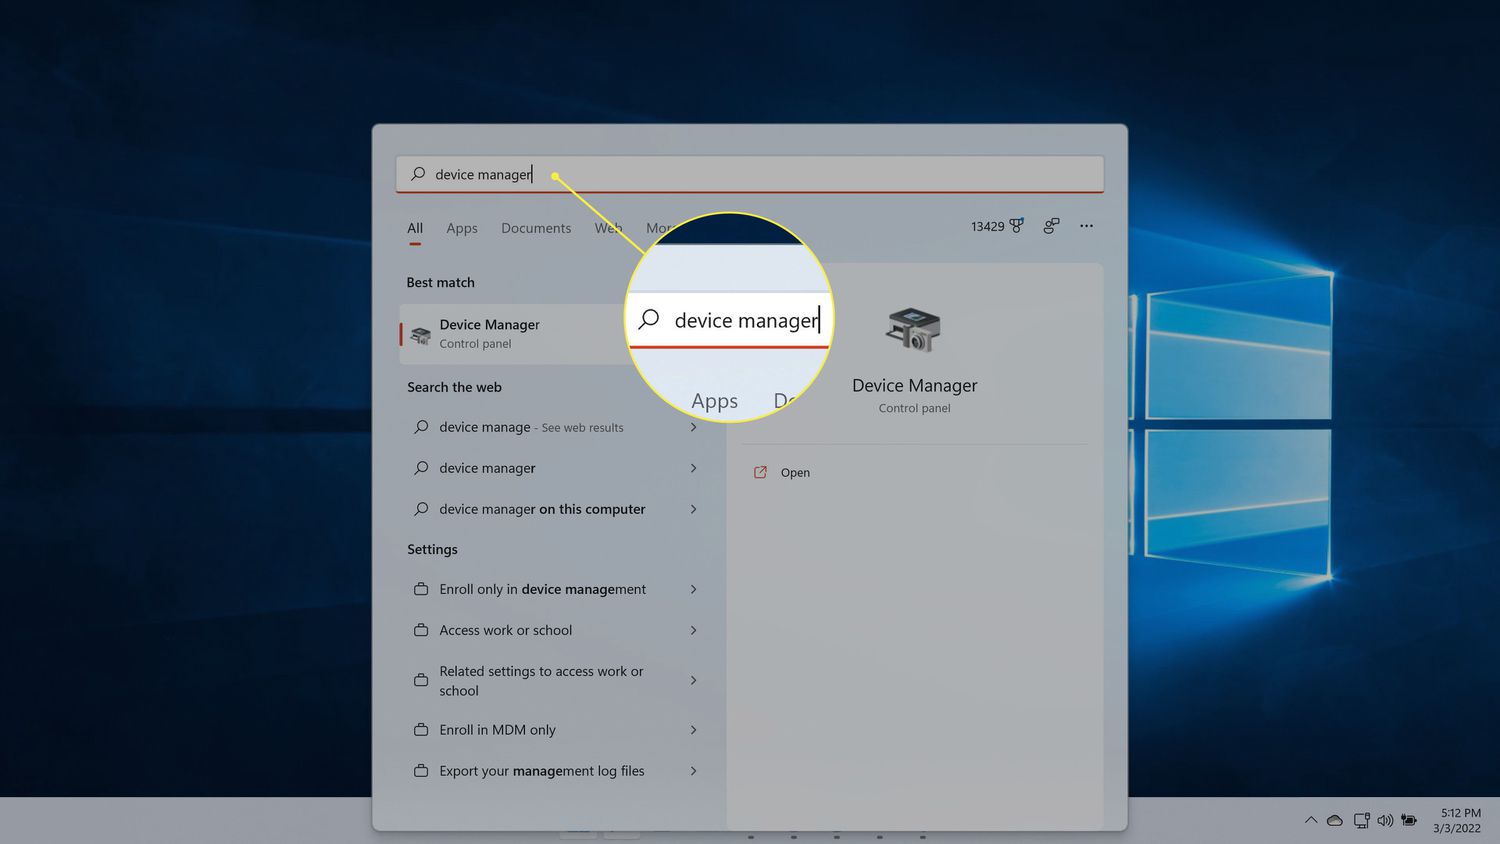
- Press the Windows key + R to open the Run dialog box.
- Type “devmgmt.msc” and press Enter to open the Device Manager.
- Expand the Display adapters section to see your graphics card. The name of the card will be listed here.
If you prefer a more detailed view, you can use the DirectX Diagnostic Tool:
- Press the Windows key + R to open the Run dialog box.
- Type “dxdiag” and press Enter to open the DirectX Diagnostic Tool.
- In the Display tab, you’ll find the name and manufacturer of your graphics card under the “Device” section.
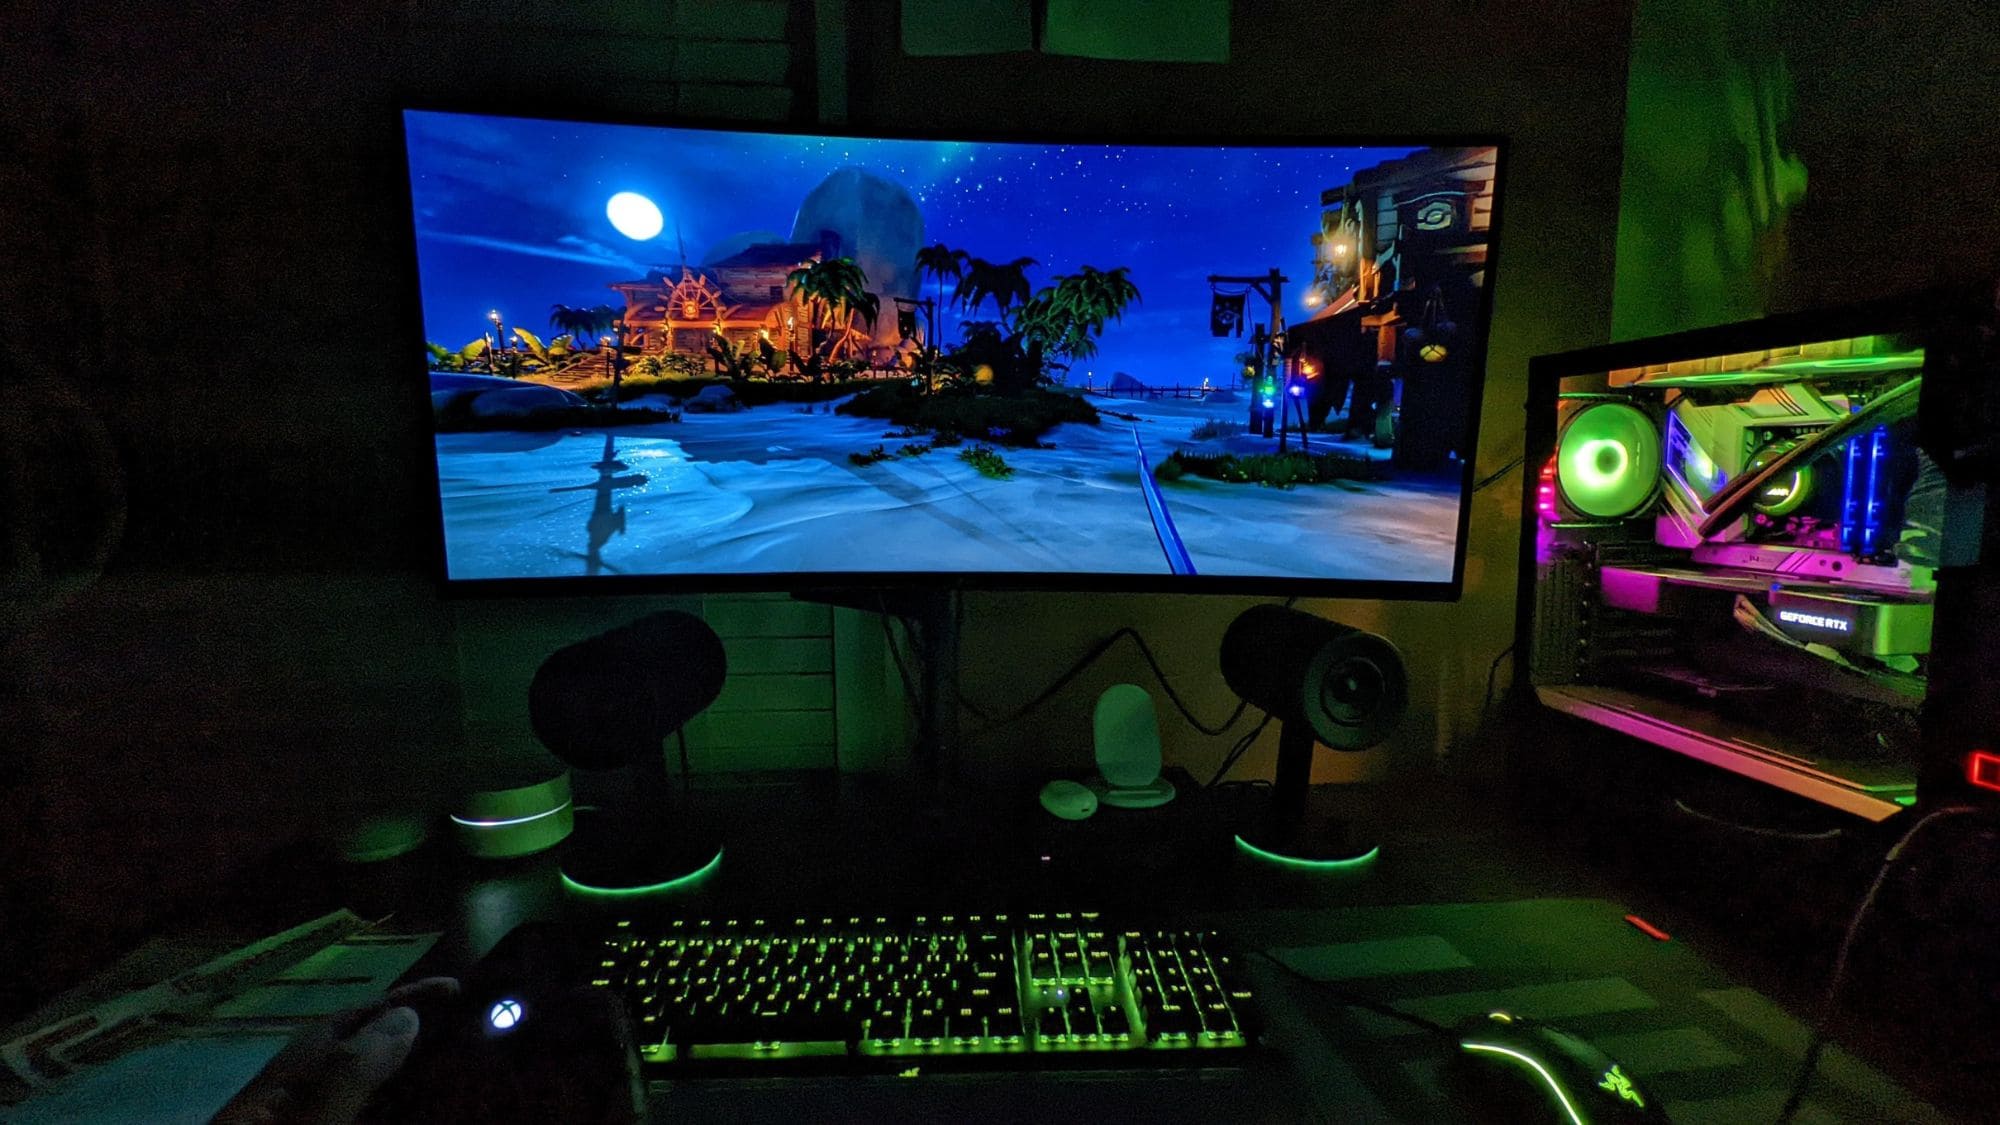
Another option is to use third-party software such as GPU-Z, which provides comprehensive information about your graphics card, including its model, memory size, clock speed, and more. Simply download and install GPU-Z from the developer’s website, launch the program, and it will display all the details you need.
Additionally, some graphics card manufacturers offer their own software for checking and managing their products. For example, NVIDIA has the NVIDIA Control Panel, while AMD has the AMD Radeon Settings software. These applications not only allow you to check your graphics card information but also provide access to advanced settings and features.
By following these methods, you can easily check and identify your graphics card on Windows. This information will come in handy when updating drivers or troubleshooting any graphics-related issues that you might encounter.
Checking your graphics card on macOS
For those using macOS, finding out the details of your graphics card is a straightforward process. Here’s how you can check it:
- Click on the Apple menu in the top-left corner of the screen and select “About This Mac”.
- In the window that appears, click on the “System Report” button.
- In the left sidebar, under the Hardware section, click on “Graphics/Displays”.
You’ll now see information about your graphics card in the right pane. This includes the name, model, and other details such as VRAM (video RAM) size and display resolution capability. Take note of the graphics card information for reference or troubleshooting purposes.
In addition to the System Report, you can also use third-party applications like iStat Menus or MacTracker to gather detailed information about your graphics card on macOS. These apps provide a user-friendly interface with comprehensive hardware specifications, including your graphics card model.
Remember that not all Macs have dedicated graphics cards. Some may use integrated graphics, which means the graphics processing is handled by the computer’s CPU. In such cases, the System Report or third-party applications will display information about the integrated graphics processor.
Knowing the specifics of your graphics card is useful when determining its compatibility with software requirements, troubleshooting graphics-related issues, or deciding whether an upgrade is necessary. So, keep this information handy for a better understanding of your Mac’s graphics capabilities.
Checking your graphics card on Linux
Linux offers a variety of methods to check and identify your graphics card. Here are a few ways to get the information you need:
- One of the simplest methods is to use the Terminal and run the following command:
lspci -k | grep -A 2 -i "VGA". This will display the details of your graphics card, including the vendor, model, and driver in use. - If you prefer a graphical interface, you can use system information tools such as GNOME System Monitor or KDE Info Center. These applications provide a user-friendly view of your hardware, including your graphics card.
- For more advanced users, the
lshwcommand can provide a detailed overview of your system’s hardware, including your graphics card. Runningsudo lshw -C displayin the Terminal will show you all the relevant information.
Another option is to use the “Additional Drivers” tool in Linux, which allows you to manage and install proprietary drivers for your graphics card. This tool will display the detected graphics card and available driver options.
Additionally, there are third-party applications available for Linux, such as GPU-Viewer, which provide a graphical interface to view detailed information about your graphics card. These applications can be installed through package managers like APT or by downloading them from the developer’s website.
With Linux’s flexibility and vast array of tools, you can easily check and identify your graphics card. This knowledge will prove invaluable when configuring or troubleshooting graphics issues, as well as ensuring compatibility with specific Linux distributions and software.
Using system information tools
Another convenient way to check your graphics card is by using system information tools. These tools provide a comprehensive overview of your system’s hardware, including your graphics card. Here are a few popular system information tools you can use:
- Speccy: Speccy is a free system information tool developed by Piriform. It provides detailed information about various components of your computer, including the graphics card. You can download and install Speccy from the official website and launch it to see the specifics of your graphics card.
- HWiNFO: HWiNFO is a powerful system information tool that provides in-depth hardware analysis. It offers detailed information about your graphics card, including its model, driver version, clock speeds, and temperatures. HWiNFO is available for both Windows and Linux and can be downloaded from the official website.
- AIDA64: AIDA64 is a comprehensive system diagnostics and benchmarking tool. It provides extensive information about all aspects of your computer, including the graphics card. AIDA64 is available for Windows and offers a trial version that can be downloaded from the developer’s website.
These system information tools give you a detailed and user-friendly view of your graphics card, including information like the model, manufacturer, driver version, and even temperature statistics. They also provide additional information about other hardware components, which can be useful for troubleshooting or upgrading purposes.
When using system information tools, it’s important to ensure that you download them from official sources or reputable websites to avoid any potential security risks. Additionally, keep in mind that some tools may be more suited for specific operating systems or offer advanced features that require a paid version.
By utilizing these system information tools, you can quickly and easily gather all the pertinent details about your graphics card and gain a deeper understanding of its capabilities.
Checking your graphics card on a laptop
If you’re using a laptop, checking your graphics card might require a slightly different approach compared to a desktop computer. Here are a few methods you can use to identify the graphics card on your laptop:
- Device Manager: On Windows laptops, you can access the Device Manager by right-clicking on the Start menu and selecting “Device Manager.” Expand the “Display adapters” section to see the name of your graphics card.
- System Information: On both Windows and macOS laptops, you can access the system information to check the graphics card details. On Windows, press the Windows key + R, type “msinfo32,” and press Enter. On macOS, click on the Apple menu, select “About This Mac,” and then click on “System Report” or “System Information.”
- Manufacturer’s Software: Laptop manufacturers often provide their own software to manage and check hardware components. Check your laptop manufacturer’s website or support page to see if they offer any software specifically for checking graphics card information.
In addition to these methods, you can also try third-party software like GPU-Z or system information tools like Speccy. These applications work on both desktops and laptops and provide detailed information about your graphics card.
It’s important to note that some laptops may have integrated graphics, where the graphics processing is done by the CPU. In such cases, the system information will display details about the integrated graphics rather than a separate graphics card.
By using these methods, you can easily identify the graphics card on your laptop. Understanding the specifications of your graphics card will help you make informed decisions when it comes to gaming, video editing, or any other tasks that require graphical processing power.
Identifying your graphics card by physical inspection
If you’re unable to find the information about your graphics card through software or system tools, you can resort to physically inspecting your computer to identify the graphics card. Here’s how:
- Desktop Computers: Open up your computer case by removing the side panel. Take caution and ensure your computer is powered off and unplugged before proceeding. Locate the graphics card, which is usually inserted into a PCI Express slot on the motherboard. It is a rectangular circuit board with a fan or heatsink and multiple connectors. Take note of the manufacturer and model name printed on the graphics card.
- Laptops: Identifying the graphics card on a laptop can be more challenging as they are usually integrated into the motherboard and not easily accessible. In most cases, you won’t be able to physically inspect or remove the graphics card. However, you can search for your laptop model online, visit the manufacturer’s website, or check your laptop’s user manual to find the specifications, including the type and model of the graphics card used.
When physically inspecting your graphics card in a desktop computer, you may encounter various connectors and ports on the card. These can include display outputs such as HDMI, DisplayPort, DVI, or VGA. These connectors can assist you in identifying the ports available on your graphics card and their compatibility with your monitor or other devices.
It’s worth mentioning that some high-end graphics cards may have LED lights that display the brand and model name. These lights may also provide useful information about the card’s temperature or activity levels.
Physical inspection of your graphics card can be helpful in situations where software-based methods fail, or you want to verify the specific model or manufacturer yourself. However, be cautious when working with computer hardware and ensure you follow proper anti-static precautions.
By physically examining your computer’s graphics card, you can obtain the necessary information about its manufacturer, model, and potentially additional features. This knowledge can assist in troubleshooting, driver updates, or even upgrading your graphics card in the future.
Conclusion
Figuring out what kind of graphics card you have is essential for understanding your computer’s capabilities, troubleshooting graphics-related issues, and ensuring compatibility with software and games. Thankfully, there are several methods available to check and identify your graphics card.
On Windows, you can use the Device Manager or third-party software like GPU-Z to easily find the details of your graphics card. On macOS, the System Report provides comprehensive information, while third-party applications like iStat Menus can offer a more user-friendly interface. Linux users can rely on Terminal commands like lspci or utilize system information tools like GNOME System Monitor or KDE Info Center.
In addition to software-based methods, physically inspecting your computer can help identify the graphics card. In desktop computers, opening the case and locating the graphics card can reveal its manufacturer and model. For laptops, searching for your model online or checking the manufacturer’s website can provide information about the integrated graphics card.
Using system information tools can also simplify the process of checking your graphics card. Applications like Speccy, HWiNFO, and AIDA64 offer detailed hardware information, including graphics card specifications.
Knowing the specifics of your graphics card empowers you to update drivers, troubleshoot issues, and ensure optimal performance for gaming, graphic design, or other graphics-intensive tasks.
By utilizing the methods outlined in this article, you’ll have the knowledge and tools to confidently determine what kind of graphics card you have. This information will help you make informed decisions about your computer setup and ensure you’re getting the most out of your graphics card’s capabilities.