Introduction
Are you wondering if your computer is utilizing its graphics card to its full potential? The graphics card, also known as the GPU (Graphics Processing Unit), plays a crucial role in rendering high-quality graphics, running resource-intensive applications, and enhancing overall system performance.
Knowing whether your computer is utilizing the graphics card efficiently can help you determine if you’re getting the most out of your system, especially when it comes to gaming, video editing, or other graphics-intensive tasks. In this article, we will explore various methods to check if your computer is using the graphics card effectively.
By monitoring your graphics card’s usage and ensuring that it is correctly integrated into your computer’s operations, you can ensure smoother graphics performance, reduced system lag, and an overall enhanced computing experience.
Throughout this article, we will discuss different methods for checking if your computer is using the graphics card. We’ll cover using the Device Manager and Task Manager, running GPU-Z, utilizing the System Information Tool, checking the BIOS settings, running graphics benchmark tests, monitoring GPU usage through third-party software, and checking the graphics card settings in the Control Panel.
By following these steps, you’ll be able to determine if your computer is effectively utilizing its graphics card and make any necessary adjustments or optimizations for optimal performance.
Checking the Graphics Card in Device Manager
One of the easiest ways to check if your computer is using the graphics card is by accessing the Device Manager. Here’s how you can do it:
- Press the Windows key + R to open the Run dialog box. Type “devmgmt.msc” and press Enter.
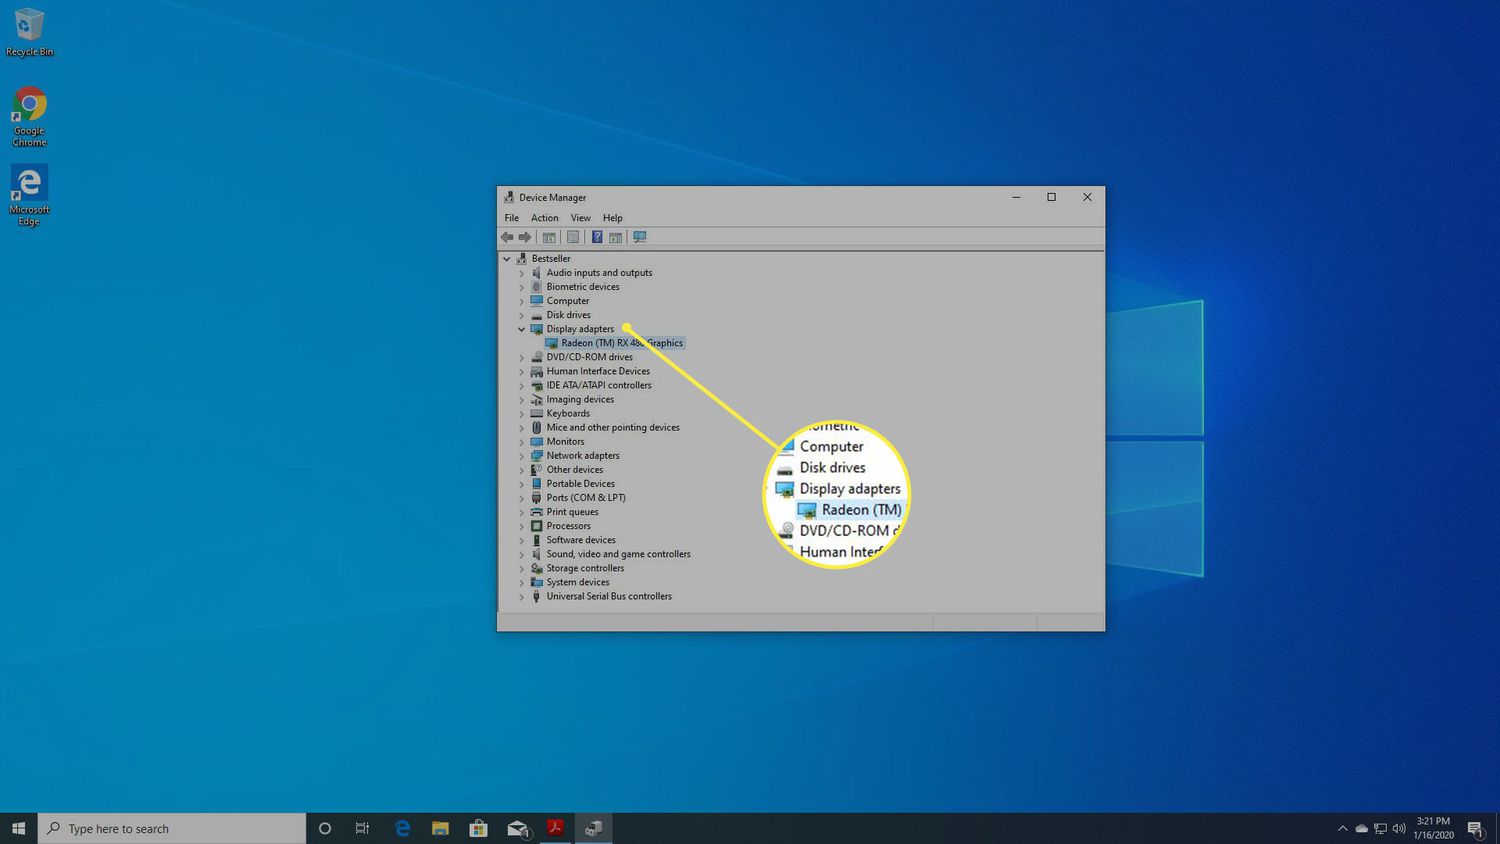
- In the Device Manager window, expand the “Display adapters” category.
- You should see your graphics card listed. It may be labeled as NVIDIA, AMD, Intel, or another manufacturer’s name, followed by the model number.
- If you can’t find your graphics card or see a generic display adapter, it indicates that your computer may not be utilizing the graphics card correctly. Consider updating the drivers for your graphics card to ensure optimal performance.
Note: If your computer has more than one graphics card (such as an integrated GPU and a dedicated graphics card), you may need to expand the “Display adapters” category further to see all the listed devices.
Checking the graphics card in Device Manager allows you to confirm if it’s detected by your system. If you encounter any issues, such as a missing or generic display adapter, it’s recommended to update the drivers for your graphics card. This will ensure that your computer is utilizing the graphics card effectively and taking full advantage of its capabilities.
Checking the Graphics Card in Task Manager
Another way to check if your computer is utilizing the graphics card is by using the Task Manager. Here’s how you can do it:
- Right-click on the taskbar and select “Task Manager” from the context menu. Alternatively, you can press Ctrl + Shift + Esc simultaneously to open the Task Manager.
- In the Task Manager window, click on the “Performance” tab.
- Click on “GPU” in the left-hand menu.
- Under the “GPU” section, you’ll find information about your graphics card, including its utilization percentage and dedicated memory usage.
- If you see a high utilization percentage and memory usage, it indicates that your computer is effectively using the graphics card for running applications and rendering graphics.
Task Manager provides real-time information about the usage and performance of your graphics card. By monitoring the GPU utilization and memory usage, you can determine if your computer is making proper use of the graphics card. If the utilization percentage remains consistently low, it may imply that your system is not utilizing the graphics card to its full capacity.
In such cases, you can try updating the graphics card drivers, closing unnecessary background applications, or adjusting the settings of graphics-intensive programs to ensure that your computer leverages the full power of the graphics card.
Running GPU-Z
GPU-Z is a popular and powerful tool for gathering detailed information about your graphics card. It provides comprehensive data on various aspects of the GPU, including clock speed, memory usage, temperature, and more. Here’s how you can use GPU-Z to check if your computer is using the graphics card effectively:
- Download and install GPU-Z from the official website.
- Launch GPU-Z by double-clicking on the desktop shortcut or accessing it from the Start menu.
- Once GPU-Z is open, it will display information about your graphics card, including the GPU model, driver version, and BIOS version.
- Pay attention to the “GPU Load” section. This indicates the current GPU utilization, providing insights into how efficiently your computer is using the graphics card.
- The “Memory Used” section shows the amount of dedicated graphics memory being utilized by your system.
GPU-Z provides a real-time snapshot of your graphics card’s performance. By monitoring GPU utilization and memory usage, you can determine if your computer is effectively utilizing the graphics card for tasks and applications that require its power.
If you notice low GPU load or high memory usage, it may indicate a potential issue with your graphics card or its settings. Consider updating drivers, optimizing graphics settings, or troubleshooting any hardware-related problems to ensure optimal utilization of your graphics card.
Using GPU-Z allows you to have a deeper understanding of your graphics card’s performance and helps you identify any potential bottlenecks or areas for improvement. By utilizing this tool, you can ensure that your computer is using the graphics card efficiently and make any necessary adjustments to enhance its performance.
Using System Information Tool
The System Information tool is a built-in utility in Windows that provides detailed information about your computer’s hardware and software components. It can also be used to check if your computer is utilizing the graphics card effectively. Here’s how you can use the System Information tool:
- Press the Windows key + R to open the Run dialog box. Type “msinfo32” and press Enter.
- The System Information window will open, displaying various categories on the left-hand side.
- Expand the “Components” category and click on “Display”.
- In the right-hand pane, you’ll find detailed information about your graphics card, including the name, manufacturer, driver version, and more.
- The “Driver Model” field indicates whether your system is using the graphics card as it should be. It should show “WDDM” (Windows Display Driver Model) followed by a version number.
By using the System Information tool, you can quickly verify if your computer recognizes and utilizes the graphics card correctly. If you encounter any issues or discrepancies in the driver model or driver version, it might be necessary to update the graphics card drivers to ensure optimal utilization.
Furthermore, the System Information tool provides additional insights into your graphics card’s capabilities, such as the available display modes, video memory, and resolution settings. This information can be helpful in troubleshooting graphics-related problems or optimizing your system’s performance.
Overall, the System Information tool is a valuable resource for assessing how your computer is utilizing the graphics card. By utilizing this tool, you can ensure that your graphics card is recognized by the system and functioning as intended, guaranteeing optimal performance for graphics-intensive tasks and applications.
Checking the Graphics Card in BIOS
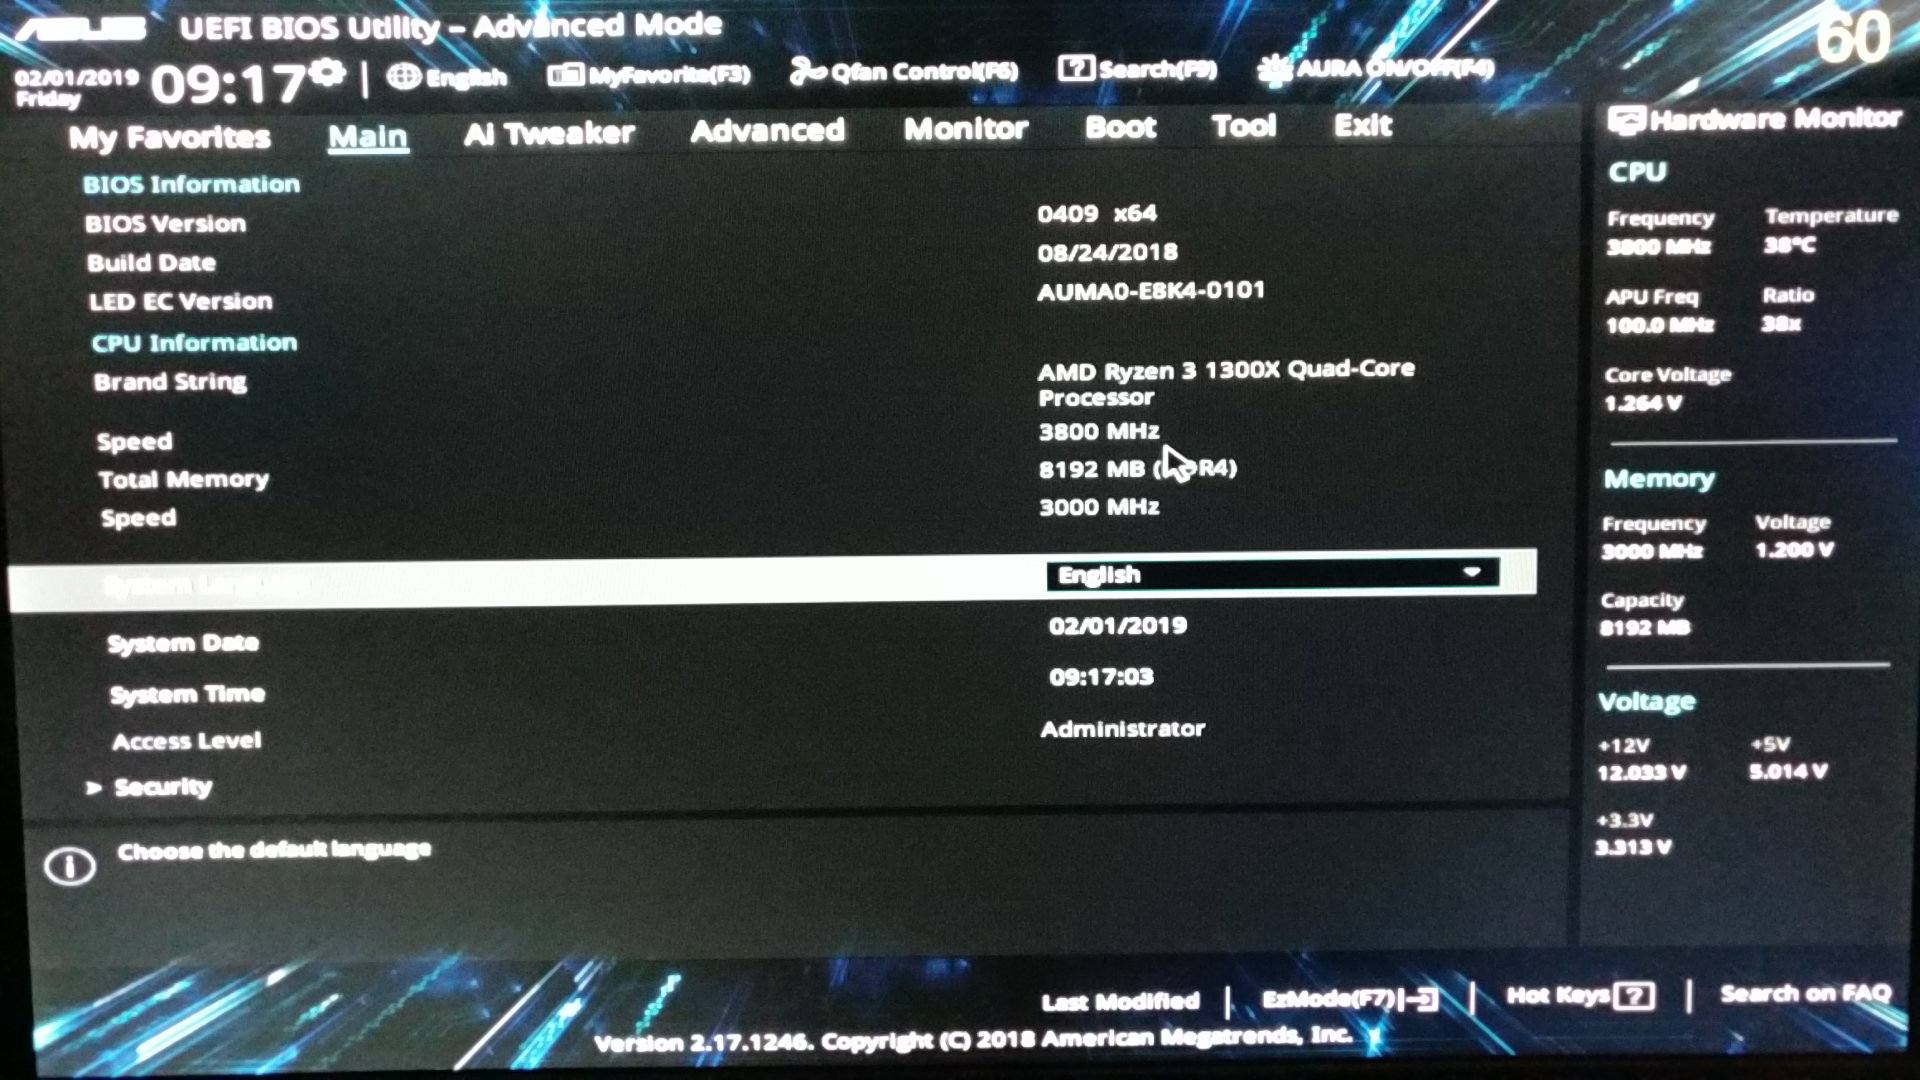
The BIOS (Basic Input/Output System) is a firmware interface that allows you to configure and manage your computer’s hardware at a low level. Checking the graphics card settings in the BIOS can provide valuable information about its detection and utilization. Here’s how you can do it:
- Restart your computer and access the BIOS settings. The specific key to enter the BIOS varies depending on your computer’s manufacturer and model. Common keys include F2, F10, or Del. Refer to your computer’s user manual or perform a quick internet search for the specific BIOS key for your device.
- Once in the BIOS settings, navigate to the “System Information”, “Advanced” or “Video” tab.
- In this section, you’ll find information about your graphics card, such as the model name, BIOS version, and graphics memory size.
- Depending on your computer’s BIOS, you may also have options to adjust the graphics card settings or prioritize the use of dedicated graphics memory.
- Ensure that the BIOS recognizes your graphics card correctly and that any relevant settings are properly configured.
Checking the graphics card in the BIOS can help you identify any issues with its detection or configuration. If your graphics card is not detected or there are discrepancies in the displayed information, it may indicate a hardware or compatibility problem that requires further investigation.
It’s essential to ensure that the BIOS settings align with the hardware specifications of your graphics card to achieve optimal performance. If there are available options, you may consider adjusting settings related to the graphics card, such as enabling/disabling integrated graphics, choosing a primary display adapter, or adjusting the size of shared graphics memory.
Keep in mind that making changes in the BIOS requires caution, as modifying incorrect settings can potentially lead to system instability. If you’re unsure or uncomfortable navigating the BIOS, it’s recommended to consult your computer’s manufacturer or seek assistance from a knowledgeable professional.
By checking the graphics card in the BIOS and ensuring its proper detection and configuration, you can maximize its performance and ensure smooth operation in demanding graphics applications and games.
Running Graphics Benchmark Tests
Graphics benchmark tests are a reliable method to assess the performance and capabilities of your graphics card. These tests measure the card’s ability to handle complex graphics tasks and provide insights into its overall efficiency. By running benchmark tests, you can determine if your computer is utilizing the graphics card to its full potential. Here’s how you can do it:
- There are various benchmarking software available, such as 3DMark, Heaven Benchmark, and FurMark. Choose one that suits your needs and download it from a trusted source.
- Install and launch the benchmarking software on your computer.
- Follow the instructions provided by the software to initiate the benchmark test. This usually involves selecting the appropriate settings for the test, such as resolution and graphics quality.
- Allow the benchmark test to run for the specified duration. During this time, the software will put your graphics card through intensive graphics tasks and measure its performance.
- Once the test is complete, the software will provide you with a detailed report or score that represents the graphics card’s performance.
By running graphics benchmark tests, you can obtain a quantitative assessment of your graphics card’s capabilities. These tests often provide scores or rankings that can be compared to other systems or industry standards to gauge performance levels.
If the benchmark test indicates lower than expected performance, it may be a sign that your computer is not utilizing the graphics card effectively. Possible solutions include updating graphics card drivers, optimizing system settings, or checking for any hardware-related issues that might be impacting performance.
Benchmark tests also allow you to compare the performance of your graphics card over time. By periodically running these tests, you can track any changes in performance and identify potential hardware issues or optimizations that need to be addressed.
Keep in mind that benchmark tests can put your graphics card under considerable stress, which may cause it to heat up. Ensure that your system has proper cooling measures in place to prevent overheating during these tests. Additionally, it’s crucial to use benchmarking software from reputable sources to ensure accurate and reliable results.
Running graphics benchmark tests provides valuable insights into your graphics card’s performance and helps you determine if your computer is utilizing it optimally. By utilizing this method, you can identify any potential performance bottlenecks and take appropriate actions to enhance your system’s graphics capabilities.
Monitoring GPU Usage through Third-Party Software
Monitoring the GPU usage in real-time through third-party software can provide valuable insights into how effectively your computer is utilizing the graphics card. These tools allow you to track GPU utilization, temperature, clock speed, and other performance metrics. Here’s how you can monitor GPU usage using third-party software:
- There are several popular GPU monitoring software available, such as MSI Afterburner, HWiNFO, and GPU-Z. Choose one that suits your requirements and download it from a trusted source.
- Install and launch the monitoring software on your computer.
- Once the software is running, it will display real-time information about your graphics card, including GPU utilization, temperature, clock speed, and fan speed.
- You can customize the software interface and choose which metrics you want to track.
- Observe the GPU utilization percentage. Higher GPU utilization indicates that your computer is effectively utilizing the graphics card for demanding tasks.
By monitoring the GPU usage through third-party software, you can gain valuable insights into how your graphics card is performing during different tasks and applications. This information can help you identify any performance bottlenecks or issues that might be affecting the utilization of your graphics card.
In addition to monitoring the GPU utilization, these software tools allow you to track other critical metrics such as temperature and clock speed. Monitoring the GPU temperature ensures that it stays within safe operating limits, preventing any thermal throttling or performance degradation.
If you notice low GPU utilization or abnormal behavior, you may need to investigate further to determine the cause. Potential solutions include updating graphics card drivers, optimizing software settings, or checking for hardware-related issues such as inadequate power supply or faulty connections.
Monitoring the GPU usage through third-party software also enhances your ability to diagnose any performance-related issues during gaming or graphics-intensive tasks. By analyzing the real-time data, you can make informed decisions about system optimization, such as adjusting graphics settings or upgrading hardware components if necessary.
Remember to use reputable and trustworthy software from legitimate sources to ensure accurate monitoring results and to protect your computer from any potential security risks.
By monitoring the GPU usage through third-party software, you can gain valuable insights into how effectively your computer is utilizing the graphics card. This knowledge allows you to optimize system performance, troubleshoot any issues, and ensure that your graphics card is operating at its full potential.
Checking the Graphics Card in Control Panel
The Control Panel in Windows provides a convenient way to access and adjust various system settings, including the settings related to your graphics card. By checking the graphics card settings in the Control Panel, you can ensure that it is recognized and configured correctly. Here’s how you can do it:
- Open the Control Panel by clicking on the Start menu and searching for “Control Panel” or by right-clicking on the Start button and selecting “Control Panel.”
- In the Control Panel, navigate to the “Hardware and Sound” category.
- Click on “Device Manager” to open the Device Manager window.
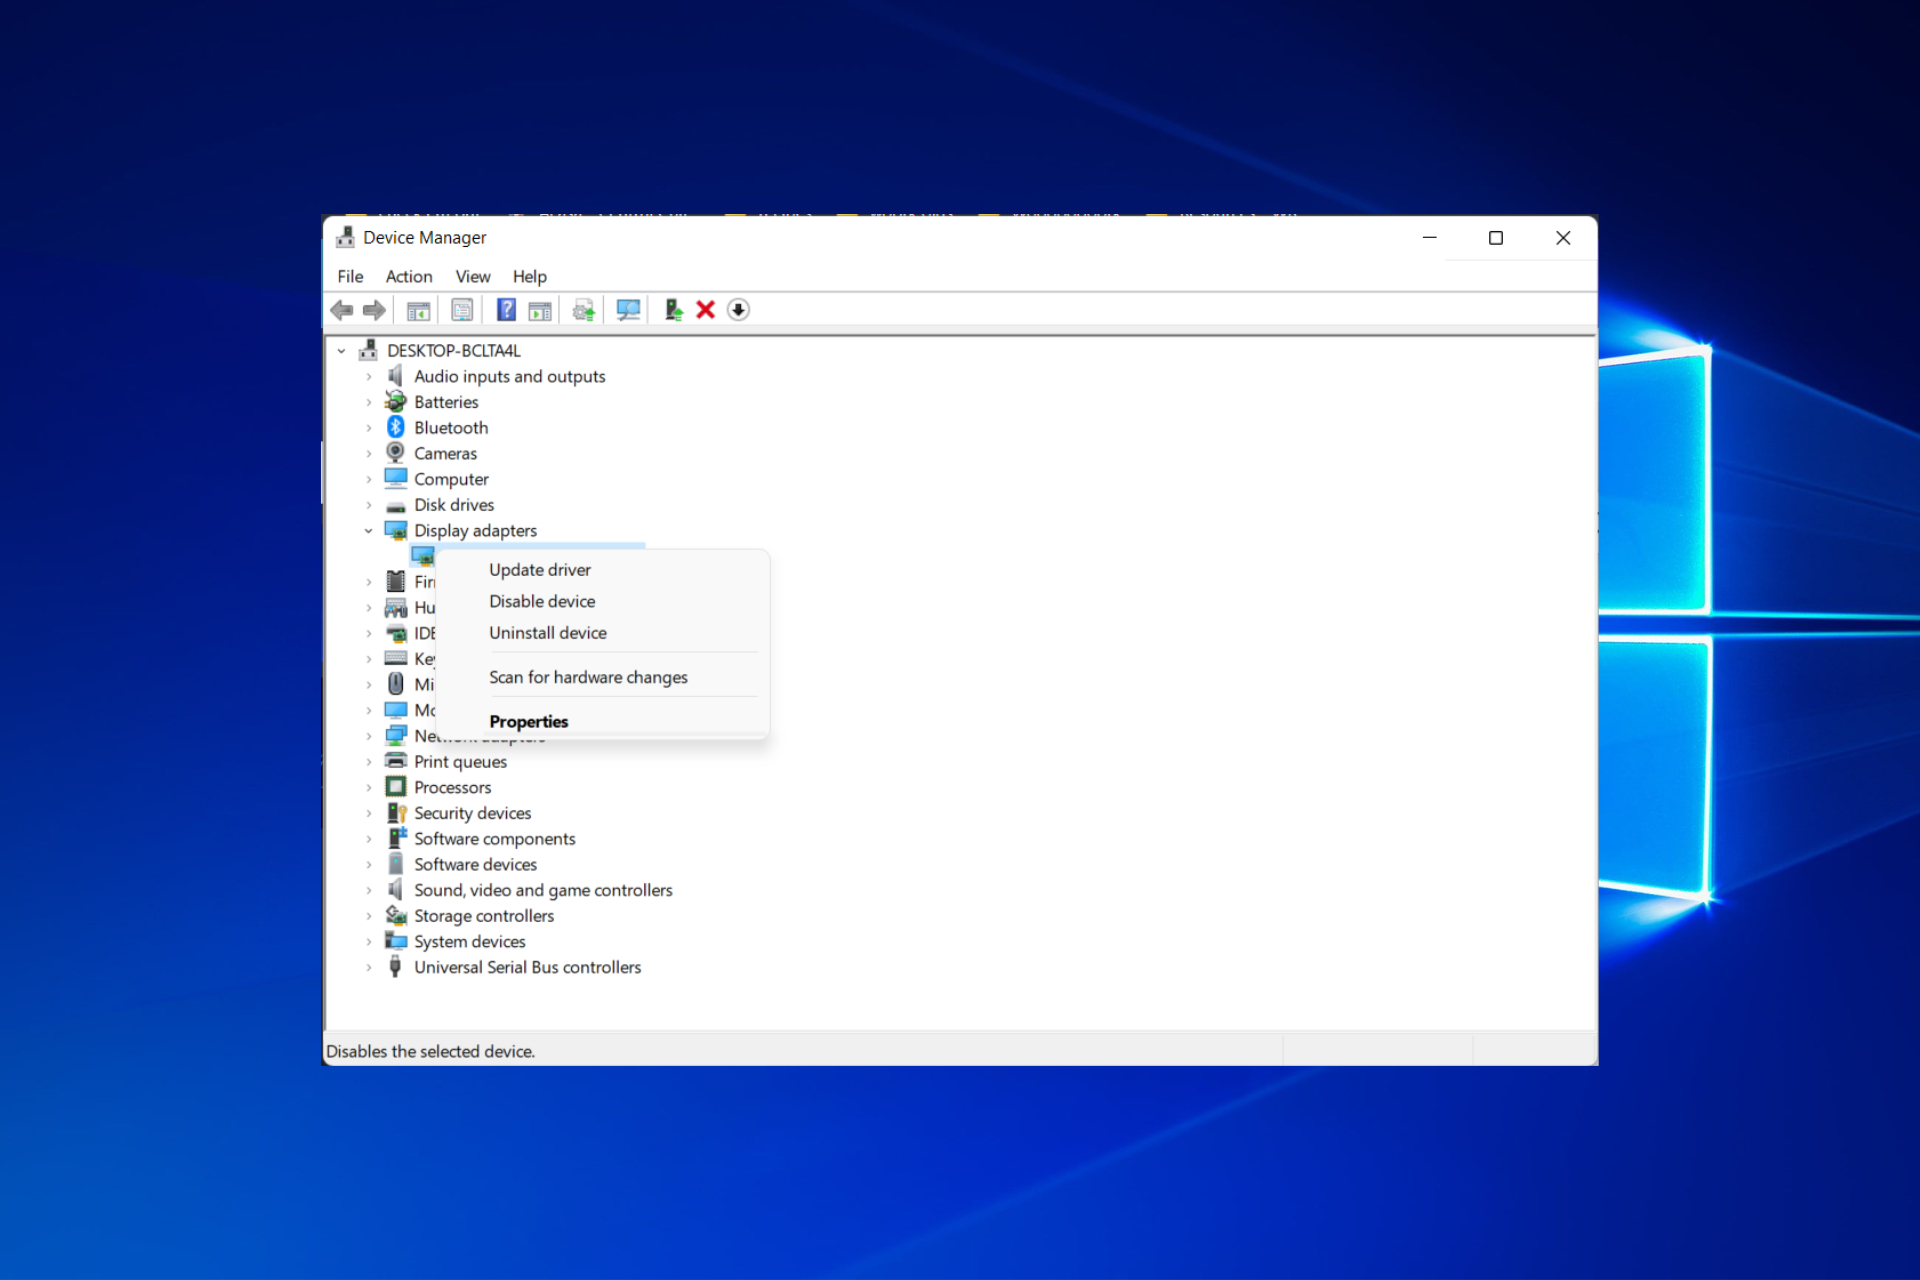
- In the Device Manager window, double-click on the “Display adapters” category. This will expand the section and display the listed graphics card(s) on your system.
- Right-click on your graphics card and select “Properties” from the context menu.
- In the Properties window, you can access various settings and information related to your graphics card, such as the driver version, manufacturer details, and more. Ensure that this information aligns with your graphics card’s specifications.
Checking the graphics card in the Control Panel allows you to confirm if it is detected and configured correctly by your system. If you notice any discrepancies or issues, such as a generic display adapter or outdated drivers, consider updating the graphics card drivers to ensure optimal performance.
Furthermore, the Control Panel may provide additional configuration options for your graphics card, allowing you to adjust settings such as display resolution, multiple displays, color calibration, and more. Exploring these settings can help you further optimize the usage of your graphics card based on your preferences and requirements.
It’s important to note that the appearance and options in the Control Panel may vary depending on your Windows version and the graphics card manufacturer’s software installed on your system. Some graphics card manufacturers provide their own control panel software with additional settings and features. In such cases, you can access the manufacturer’s control panel through the Control Panel or by directly searching for it in the Start menu.
By checking the graphics card settings in the Control Panel, you can ensure that it is recognized by your system and configured correctly. This step allows you to verify driver information, access additional configuration options, and make necessary updates or adjustments to maximize the performance of your graphics card.
Final Thoughts
Checking if your computer is utilizing the graphics card effectively is crucial for ensuring optimal performance and getting the most out of your system. Throughout this article, we have explored various methods to check if your computer is effectively using the graphics card.
From checking the graphics card in Device Manager and Task Manager to running GPU-Z and benchmark tests, monitoring GPU usage through third-party software, and exploring the settings in the Control Panel, each method provides valuable insights into the utilization and performance of your graphics card.
By regularly checking and monitoring the graphics card, you can identify any issues or bottlenecks that might be affecting its performance. This allows you to take appropriate actions, such as updating drivers, optimizing system settings, or troubleshooting hardware-related problems, to ensure that your graphics card is operating at its full potential.
Remember that the specific steps and options within each method may vary depending on your computer’s configuration, Windows version, and the graphics card manufacturer’s software. It’s always recommended to refer to the official documentation or seek assistance from technical support if you encounter any difficulties or have specific questions.
Understanding how your computer is utilizing the graphics card not only improves performance but also enhances your overall computing experience. Whether you’re a gamer, a video editor, or simply someone who wants their system to run smoothly, ensuring that your graphics card is being used effectively is essential.
Keep in mind that along with optimizing software and settings, it’s also important to regularly clean the graphics card and maintain proper cooling to prevent overheating and prolong its lifespan. Proper care and maintenance will ensure that your graphics card continues to deliver superior performance for a long time.
By utilizing the methods discussed in this article and staying vigilant about monitoring and optimizing your graphics card’s usage, you can unlock its full potential and enjoy a seamless, visually impressive computing experience.