Introduction
Welcome to our guide on how to find the Launcher on a Chromebook! If you’re new to Chromebooks or just need a refresher, this article will help you understand and access the Launcher, as well as provide some troubleshooting tips. Chromebooks are known for their simplicity and efficiency, and the Launcher is an essential part of the Chrome OS experience.
The Launcher is a central hub that allows you to access your apps, settings, and other features quickly and easily. Think of it as a virtual command center that provides a convenient way to navigate your Chromebook and launch applications. Whether you want to open a web browser, search the internet, or manage your files, the Launcher is where it all begins.
By default, the Launcher is located at the bottom-left corner of your Chromebook’s screen. It is represented by a circular icon with a series of dots inside. However, depending on the model and version of your Chromebook, the Launcher’s appearance and position may vary slightly.
In this guide, we will walk you through the process of accessing the Launcher, customizing it to suit your preferences, and troubleshooting any issues you may encounter. So, let’s dive in and explore the wonderful world of Chromebook Launchers!
Understanding the Chromebook Launcher
The Chromebook Launcher is a key component of the Chrome OS, providing users with quick and easy access to a variety of applications and features. Understanding how the Launcher works will allow you to make the most of your Chromebook experience.
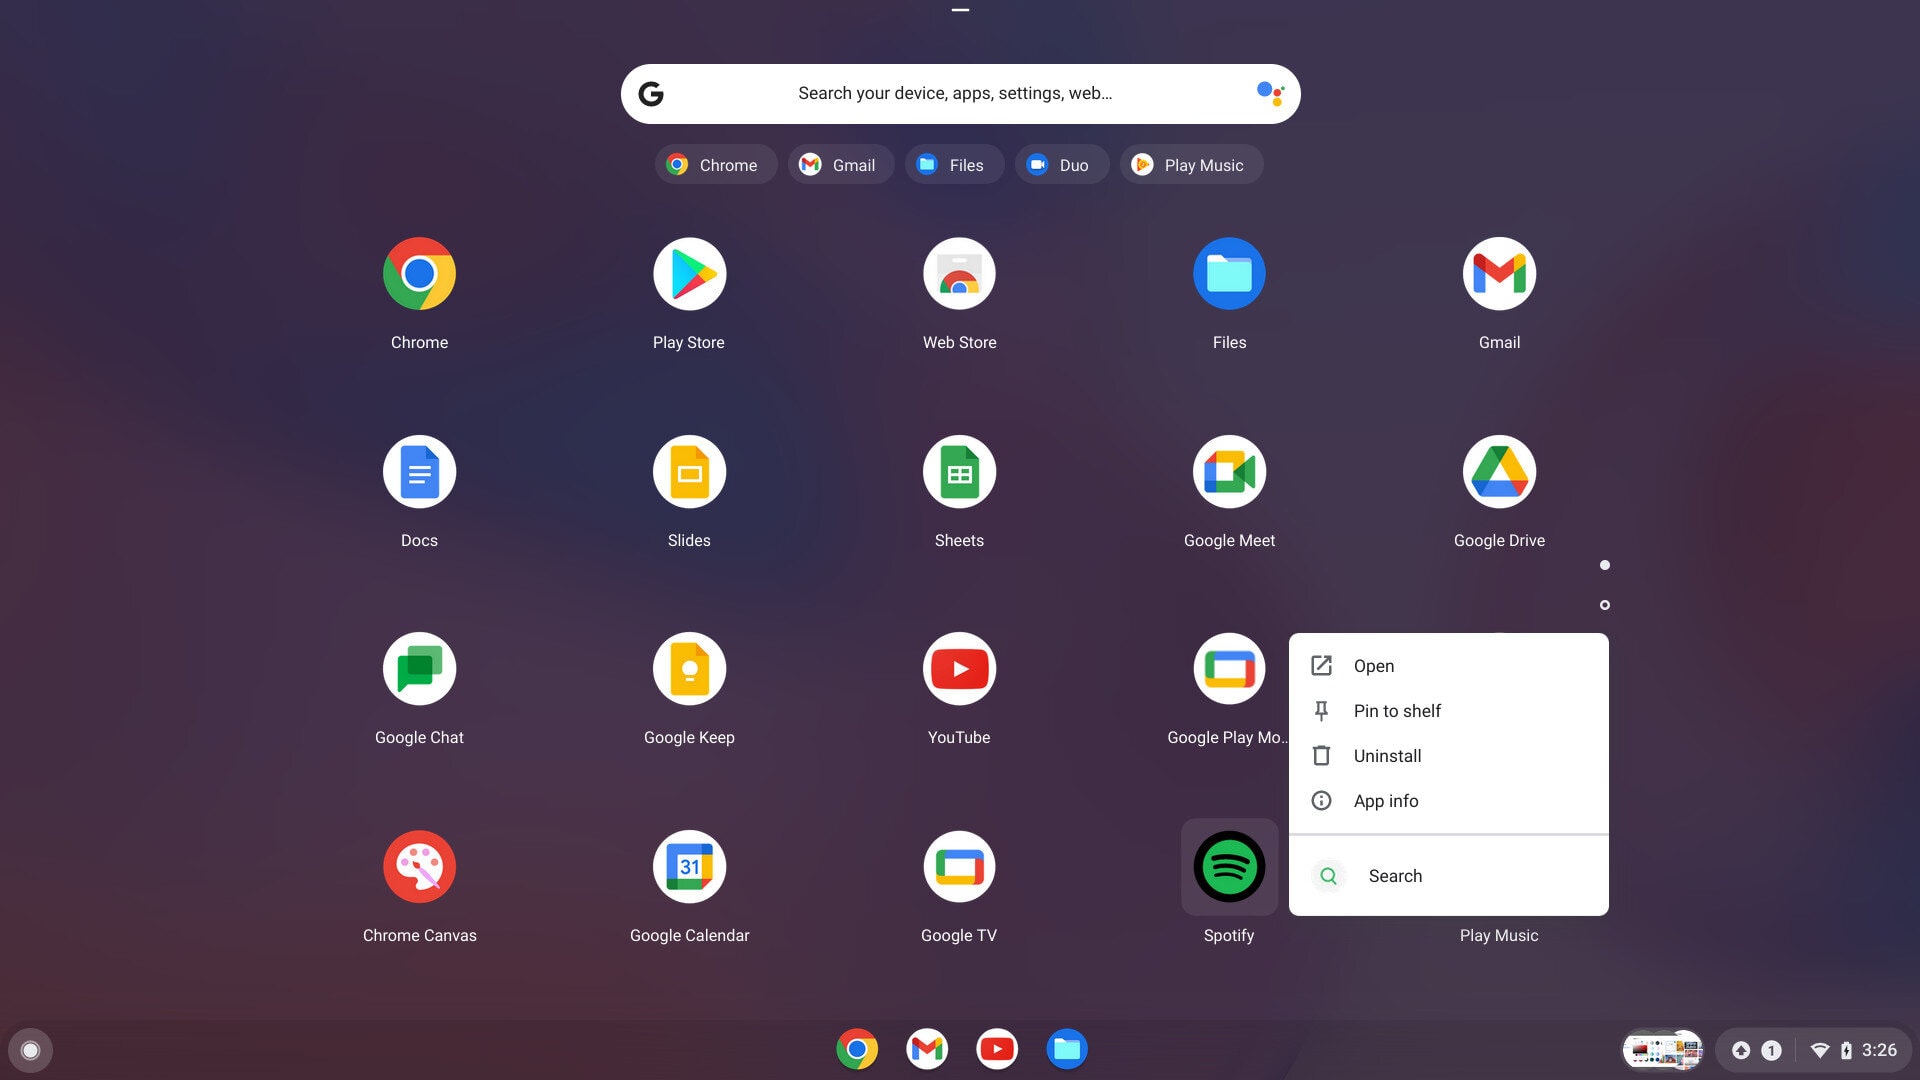
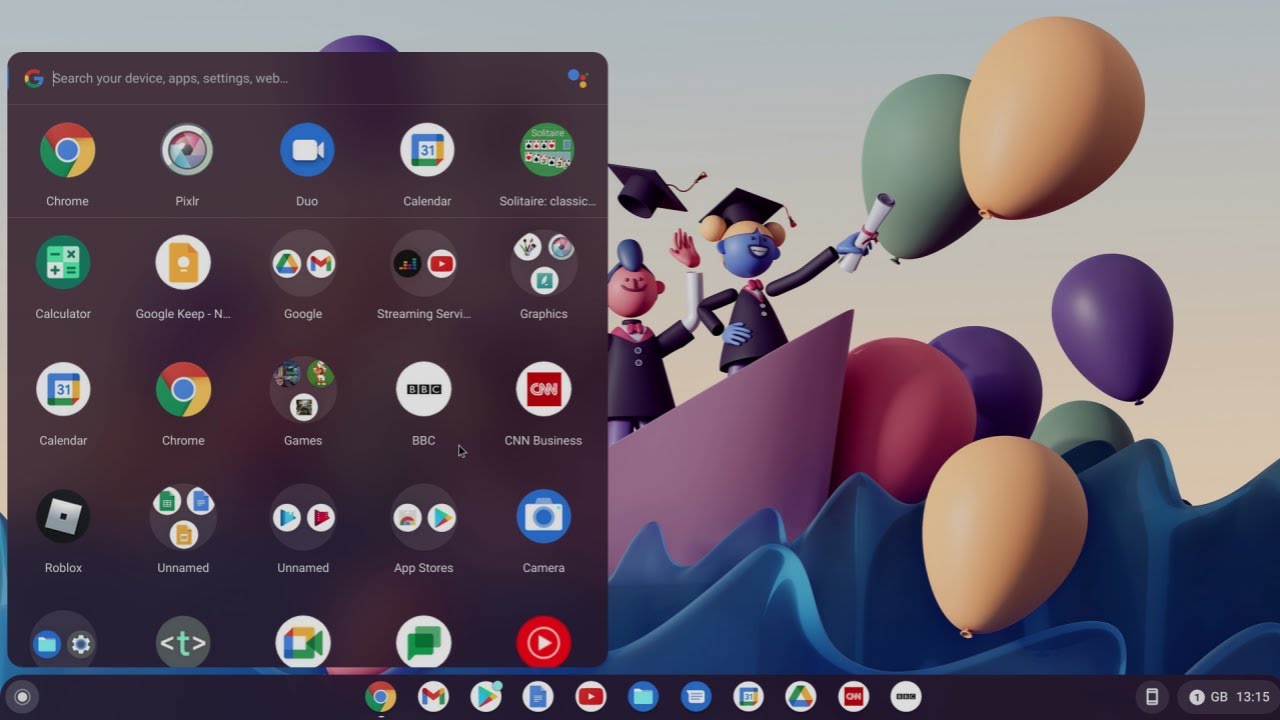
First and foremost, the Launcher acts as a central hub for all your apps. When you click on the Launcher icon, a pop-up window will appear, displaying all the apps installed on your Chromebook. These apps can include web apps, Chrome extensions, and even Android apps if your Chromebook supports the Play Store. You can easily launch an app by clicking on its icon in the Launcher.
Furthermore, the Launcher provides a search bar that allows you to quickly find and launch apps, open web pages, or perform a Google search. Simply type your query in the search bar, and the Launcher will display relevant results. This can save you time and make navigating your Chromebook more efficient.
In addition to apps and search, the Launcher also houses your pinned apps. Pinned apps are shortcuts that appear directly in the Launcher, making them easily accessible. To pin an app, you can either right-click on its icon in the Launcher and select “Pin” or drag and drop the app’s icon from the Launcher onto the shelf at the bottom of your screen.
Another important feature of the Launcher is the “Recent” section. This section displays your most recently used apps, making it convenient to switch between them. You can either click on an app in the “Recent” section or use the arrow keys on your keyboard to navigate through the list.
Lastly, the Launcher also provides access to your Chromebook’s settings. By clicking on your profile picture located in the bottom-right corner of the pop-up window, you can quickly access settings such as Wi-Fi, volume control, display settings, and more.
By understanding the functionality and features of the Chromebook Launcher, you can navigate your Chromebook more efficiently, access your favorite apps quickly, and personalize your experience to suit your needs.
How to Access the Launcher on a Chromebook
Accessing the Launcher on your Chromebook is a simple and straightforward process. There are multiple ways to open the Launcher, depending on your preference and the model of your Chromebook.
Method 1: Clicking the Launcher Icon
The most common way to access the Launcher is by clicking the Launcher icon located at the bottom-left corner of your screen. The icon is represented by a circular shape with a series of dots inside. Simply click on the Launcher icon, and a pop-up window will appear, displaying your apps, search bar, and other features.
Method 2: Using the Keyboard Shortcut
If you prefer using keyboard shortcuts, you can press the magnifying glass key (typically located in the top row of the keyboard, labeled with a search icon) or the dedicated key with the Launcher icon (a square grid of dots). Pressing either of these keys will instantly open the Launcher.
Method 3: Gestures (Chrome OS with touch support)
For Chromebooks with touch support, you can access the Launcher by swiping up from the bottom of the screen. This gesture will reveal the Launcher with all your apps, search bar, and settings.
Method 4: Using the Shelf
If you have apps pinned to your shelf (the bar at the bottom of your screen), you can access the Launcher by clicking on any of the pinned app icons. This will not only open the app but also reveal the Launcher for further navigation.
Now that you know how to access the Launcher on your Chromebook, you can easily launch apps, perform searches, and access your settings with just a few clicks or keyboard shortcuts. The Launcher is designed to provide a seamless and efficient experience, helping you make the most of your Chromebook’s capabilities.
Customizing the Launcher
Your Chromebook’s Launcher can be customized to suit your preferences, allowing you to personalize your experience and make it even more efficient. Here are some ways you can customize the Launcher:
Changing the Position
By default, the Launcher is positioned at the bottom-left corner of your screen. However, you can change its position to the left or right side of the screen. To do this, right-click on the Launcher icon, select “Position,” and choose your desired side. The Launcher will then move to the selected position.
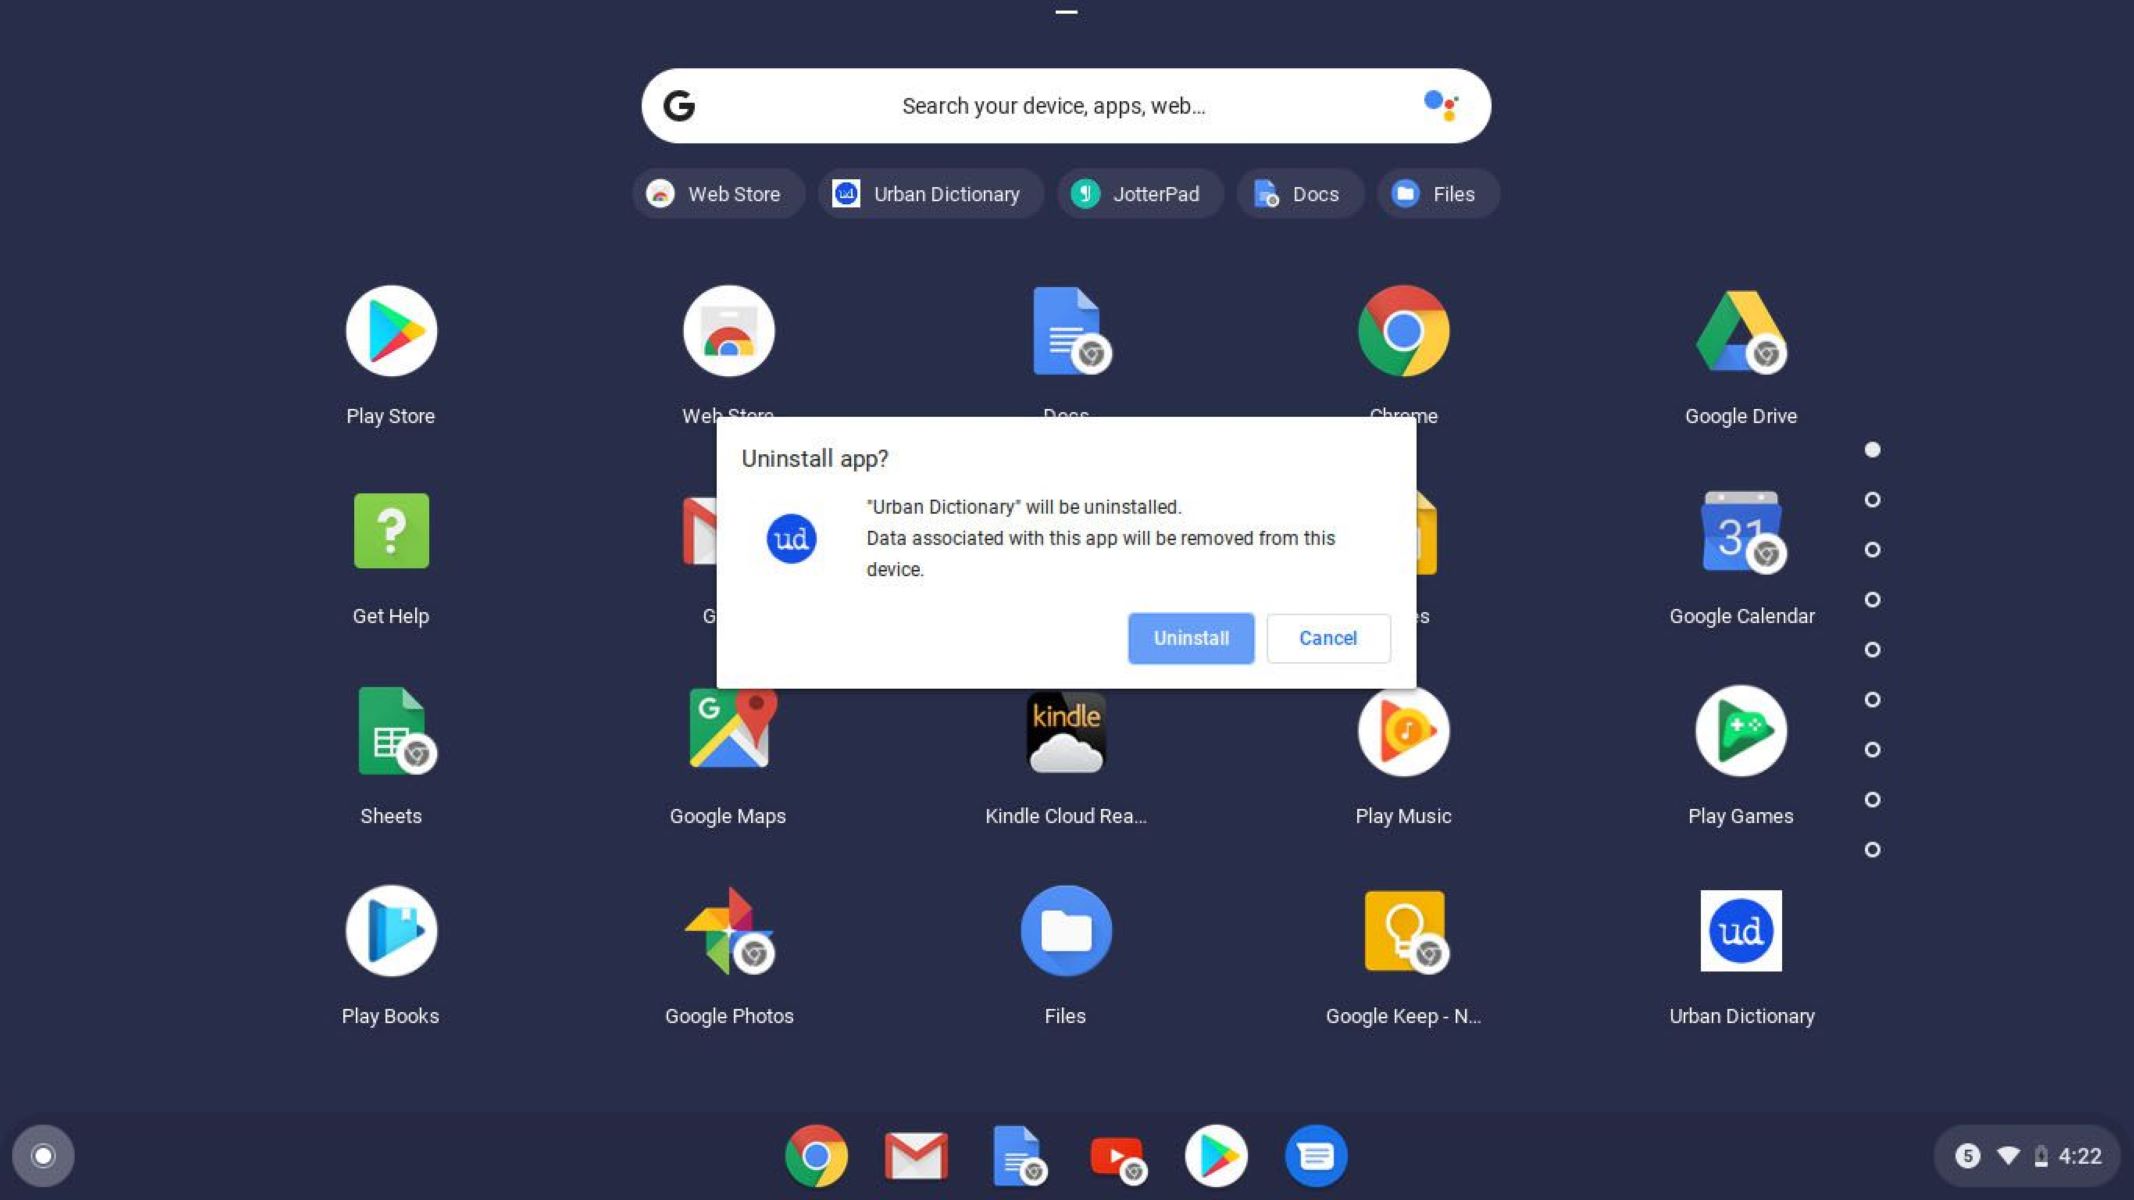
Adding or Removing Apps
The Launcher displays all the apps installed on your Chromebook, but you can choose which apps to show or hide. To add an app to the Launcher, simply open the app and right-click on its icon in the Launcher. Then, select “Pin” to add it as a pinned app. To remove an app from the Launcher, right-click on its icon and select “Unpin.”
Organizing Apps in Folders
If you have a large number of apps in the Launcher, you can organize them into folders to keep things tidy. To create a folder, drag one app icon onto another in the Launcher. This will create a folder containing both apps. You can then add more apps to the folder by dragging and dropping them onto the folder icon.
Changing the App Grid Size
If you prefer a more compact or spacious layout in the Launcher, you can adjust the app grid size. Right-click on the Launcher icon and select “App Grid Size.” Choose either “Small” or “Large” to change the size of the app icons in the Launcher.
Enabling or Disabling Google Assistant
Some Chromebooks have Google Assistant integration in the Launcher, allowing you to perform voice commands and searches. If you want to enable or disable Google Assistant, right-click on the Launcher icon, select “Google Assistant,” and toggle the switch to your preferred setting.
Changing the Launcher Background
If you want to customize the appearance of the Launcher, you can change the background image. Right-click on the desktop, select “Set wallpaper,” and choose your desired background image. The new wallpaper will also be reflected in the Launcher.
By customizing the Launcher, you can make your Chromebook feel more personalized and tailored to your needs. Experiment with different settings, layouts, and organization methods to create a Launcher that is both functional and visually appealing.
Troubleshooting: Missing or Inaccessible Launcher
While the Launcher on a Chromebook is usually reliable, there may be instances where it goes missing or becomes inaccessible. If you’re experiencing this issue, don’t worry – there are a few troubleshooting steps you can try to resolve the problem:
Restart your Chromebook
Often, a simple restart can fix any minor glitches or temporary issues. Close all open apps, click on the system tray in the bottom-right corner, and select the power button. Choose “Restart” and wait for your Chromebook to reboot. Once it starts up again, check if the Launcher has reappeared.
Update Chrome OS
Outdated software can sometimes cause conflicts or problems with the Launcher. Make sure your Chromebook is up to date by clicking on the system tray, selecting the settings cogwheel, and then clicking on “About Chrome OS.” Here, you can check for updates and install any available updates. After the update is complete, see if the Launcher is accessible.
Reset Chrome OS Flags
In some cases, certain Chrome OS flags may cause conflicts with the Launcher. To reset the flags to their default settings, type “chrome://flags” into the Chrome browser’s address bar and press Enter. On the flags page, click on “Reset all to default” at the top-right corner. Restart your Chromebook and see if the Launcher returns.
Perform a Powerwash
If none of the above troubleshooting steps work, you can try performing a powerwash. A powerwash erases all data on your Chromebook, so make sure you have a backup of any important files. To perform a powerwash, click on the system tray, select the settings cogwheel, click on “Advanced,” and then choose “Reset settings.” Follow the on-screen instructions to complete the powerwash. Afterward, set up your Chromebook again and check if the Launcher is back.
Contact Chromebook Support
If you’ve tried all the troubleshooting steps and the Launcher is still missing or inaccessible, it’s best to reach out to Chromebook support for further assistance. Visit the Chromebook support website or contact the manufacturer’s customer support for guidance and expert help.
Remember, the Launcher is a crucial part of the Chromebook experience, and restoring its functionality will ensure smooth navigation and app access. By following these troubleshooting steps, you can hopefully resolve any issues with the missing or inaccessible Launcher.
Conclusion
The Launcher on a Chromebook is a powerful tool that provides quick and easy access to apps, settings, and search functionality. Understanding how to access and customize the Launcher can greatly enhance your Chromebook experience.
In this guide, we covered the basics of the Launcher, including its position on the screen, how to access it using different methods, and the various features it offers. We also explored how to customize the Launcher by changing its position, adding or removing apps, organizing apps into folders, adjusting the app grid size, enabling or disabling Google Assistant, and changing the background image.
Furthermore, we provided troubleshooting steps for situations where the Launcher goes missing or becomes inaccessible. By restarting your Chromebook, updating Chrome OS, resetting Chrome OS flags, or performing a powerwash, you can often resolve any issues with the Launcher.
If you have exhausted all troubleshooting options and still cannot restore the Launcher, we recommend contacting Chromebook support for further assistance.
Remember, the Launcher is a central part of the Chromebook experience, providing a convenient and efficient way to navigate your device. By mastering its use and customization options, you can streamline your workflow and tailor your Chromebook to your individual preferences.
So go ahead, explore the capabilities of your Chromebook’s Launcher, personalize it to your liking, and enjoy a seamless and user-friendly computing experience!