Signs that your gaming laptop fan needs cleaning
Your gaming laptop’s fan plays a crucial role in keeping your device cool and preventing overheating. Over time, dust and debris can accumulate on the fan blades, inhibiting its performance and potentially causing damage to your laptop. It is important to be aware of the signs that indicate your gaming laptop fan needs cleaning. Let’s take a look at some telltale signs:
1. Increased fan noise
If you notice that your gaming laptop’s fan is making more noise than usual, it could be an indication of dirt and dust buildup. As debris accumulates on the fan blades, they become unbalanced and cause the fan to work harder, resulting in increased noise. If you hear unusual and loud noises such as grinding or rattling, it’s a clear sign that your fan needs cleaning.
2. Overheating issues
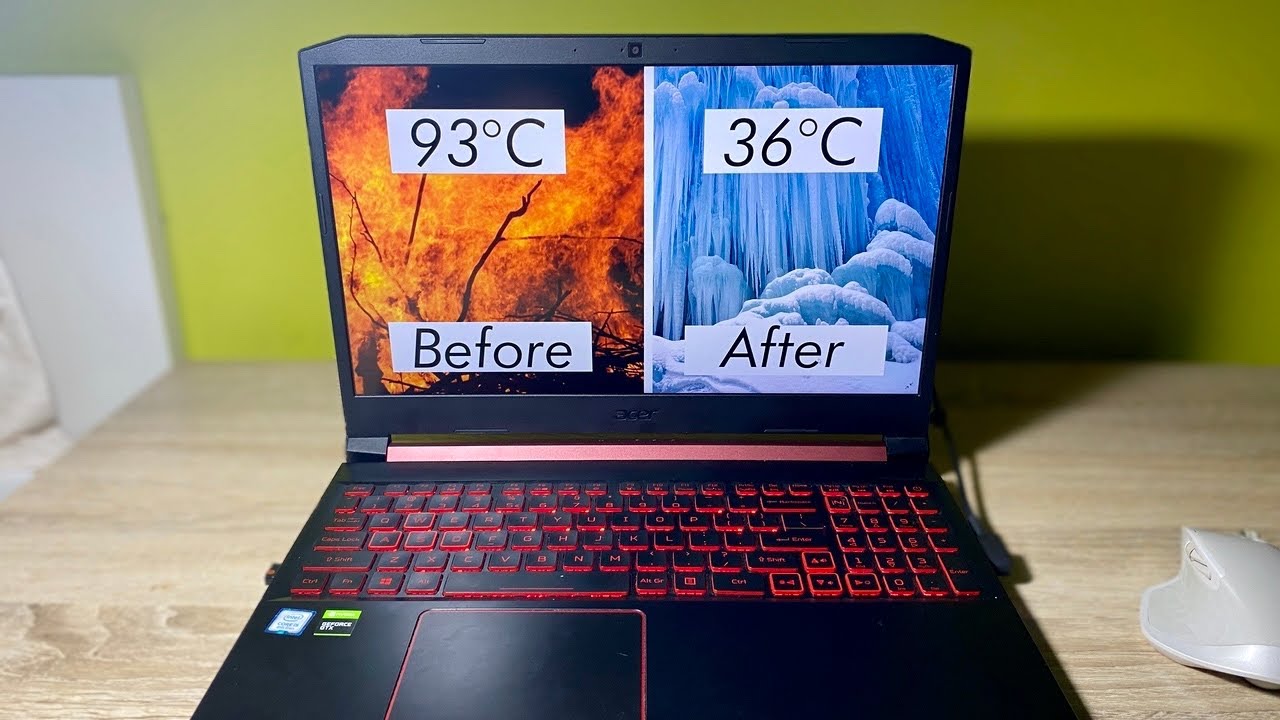
One of the primary functions of your gaming laptop’s fan is to cool down the internal components and prevent overheating. If you experience frequent overheating issues, such as sudden shutdowns or performance drops, it could signify a clogged or inefficient fan. When the fan is unable to expel heat effectively, it compromises the laptop’s ability to regulate its temperature, leading to overheating problems.
3. Sluggish performance
Dust and debris on the fan blades can hinder proper airflow within your gaming laptop, which in turn affects its overall performance. If you notice that your laptop is running slower or lagging during gaming sessions or other resource-intensive tasks, it could be a result of an overheating processor or GPU. Cleaning the fan can improve airflow and optimize performance.
4. Constant overheating warnings
Modern gaming laptops often have built-in temperature monitoring systems that warn users when the internal components reach unsafe temperatures. If you consistently receive overheating warnings or prompts on your screen, it indicates that your fan is not effectively cooling your laptop. Cleaning the fan and ensuring proper ventilation can help resolve this issue and prevent damage to your device.
By being vigilant and watching out for these signs, you can identify when it’s time to clean your gaming laptop’s fan. Regular maintenance and cleaning will not only improve your laptop’s performance but also prolong its lifespan. In the next section, we will discuss why it is important to regularly clean your gaming laptop fan.
Why it is important to regularly clean your gaming laptop fan
Your gaming laptop’s fan plays a critical role in maintaining optimal performance and preventing overheating. Regularly cleaning your fan is essential for several reasons, including:
1. Improved cooling efficiency
Over time, dust, pet hair, and other debris can accumulate on the fan blades, blocking the airflow and reducing its cooling efficiency. When the fan is clogged, it struggles to dissipate heat properly, resulting in increased temperatures inside your laptop. By regularly cleaning the fan, you ensure that it can function optimally, maintaining lower temperatures and preventing overheating issues.
2. Enhanced laptop performance
When your gaming laptop operates at higher temperatures due to a dirty fan, it can negatively affect its performance. The processor and GPU may throttle their performance to prevent overheating, resulting in decreased frame rates, slower load times, and overall less responsive gaming experience. Regularly cleaning the fan helps to maintain lower temperatures and allows your laptop to run at its best, delivering smoother gameplay and faster performance.
3. Prolonged lifespan of your laptop
Overheating is one of the leading causes of component failure and can significantly shorten the lifespan of your gaming laptop. Excessive heat can damage delicate components, such as the CPU and GPU, leading to decreased performance and potential hardware failures. By regularly cleaning the fan and preventing overheating, you can extend the lifespan of your laptop, ensuring that it remains reliable and functional for years to come.
4. Reduction in fan noise
A dirty fan tends to work harder and spin at higher speeds to compensate for the reduced cooling efficiency. This can result in increased fan noise, which can be annoying and distract from your gaming experience. Cleaning the fan removes the debris that causes imbalance and allows the fan to operate more smoothly and quietly, creating a more pleasant and peaceful gaming environment.
Regularly cleaning your gaming laptop’s fan is a simple and effective way to improve cooling efficiency, enhance performance, extend the lifespan of your device, and reduce fan noise. In the next section, we will discuss how to clean your gaming laptop fan, providing you with a step-by-step guide to follow.
How to clean your gaming laptop fan
Cleaning your gaming laptop’s fan is a relatively simple process that can be done at home with a few tools and some patience. Here’s a step-by-step guide to help you clean your gaming laptop fan:
1. Prepare the necessary tools
Before you begin, make sure you have the following tools ready:
- Small Phillips screwdriver – to open the laptop and access the fan
- Compressed air canister – to blow away dust and debris from the fan and other components
- Soft brush or toothbrush – to gently brush away stubborn dirt and dust particles
- Microfiber cloth – to wipe down the laptop’s exterior and remove any remaining dust
2. Power off your laptop and unplug it
Start by shutting down your gaming laptop and unplugging it from the power source. This ensures your safety and prevents any potential damage to your laptop during the cleaning process.
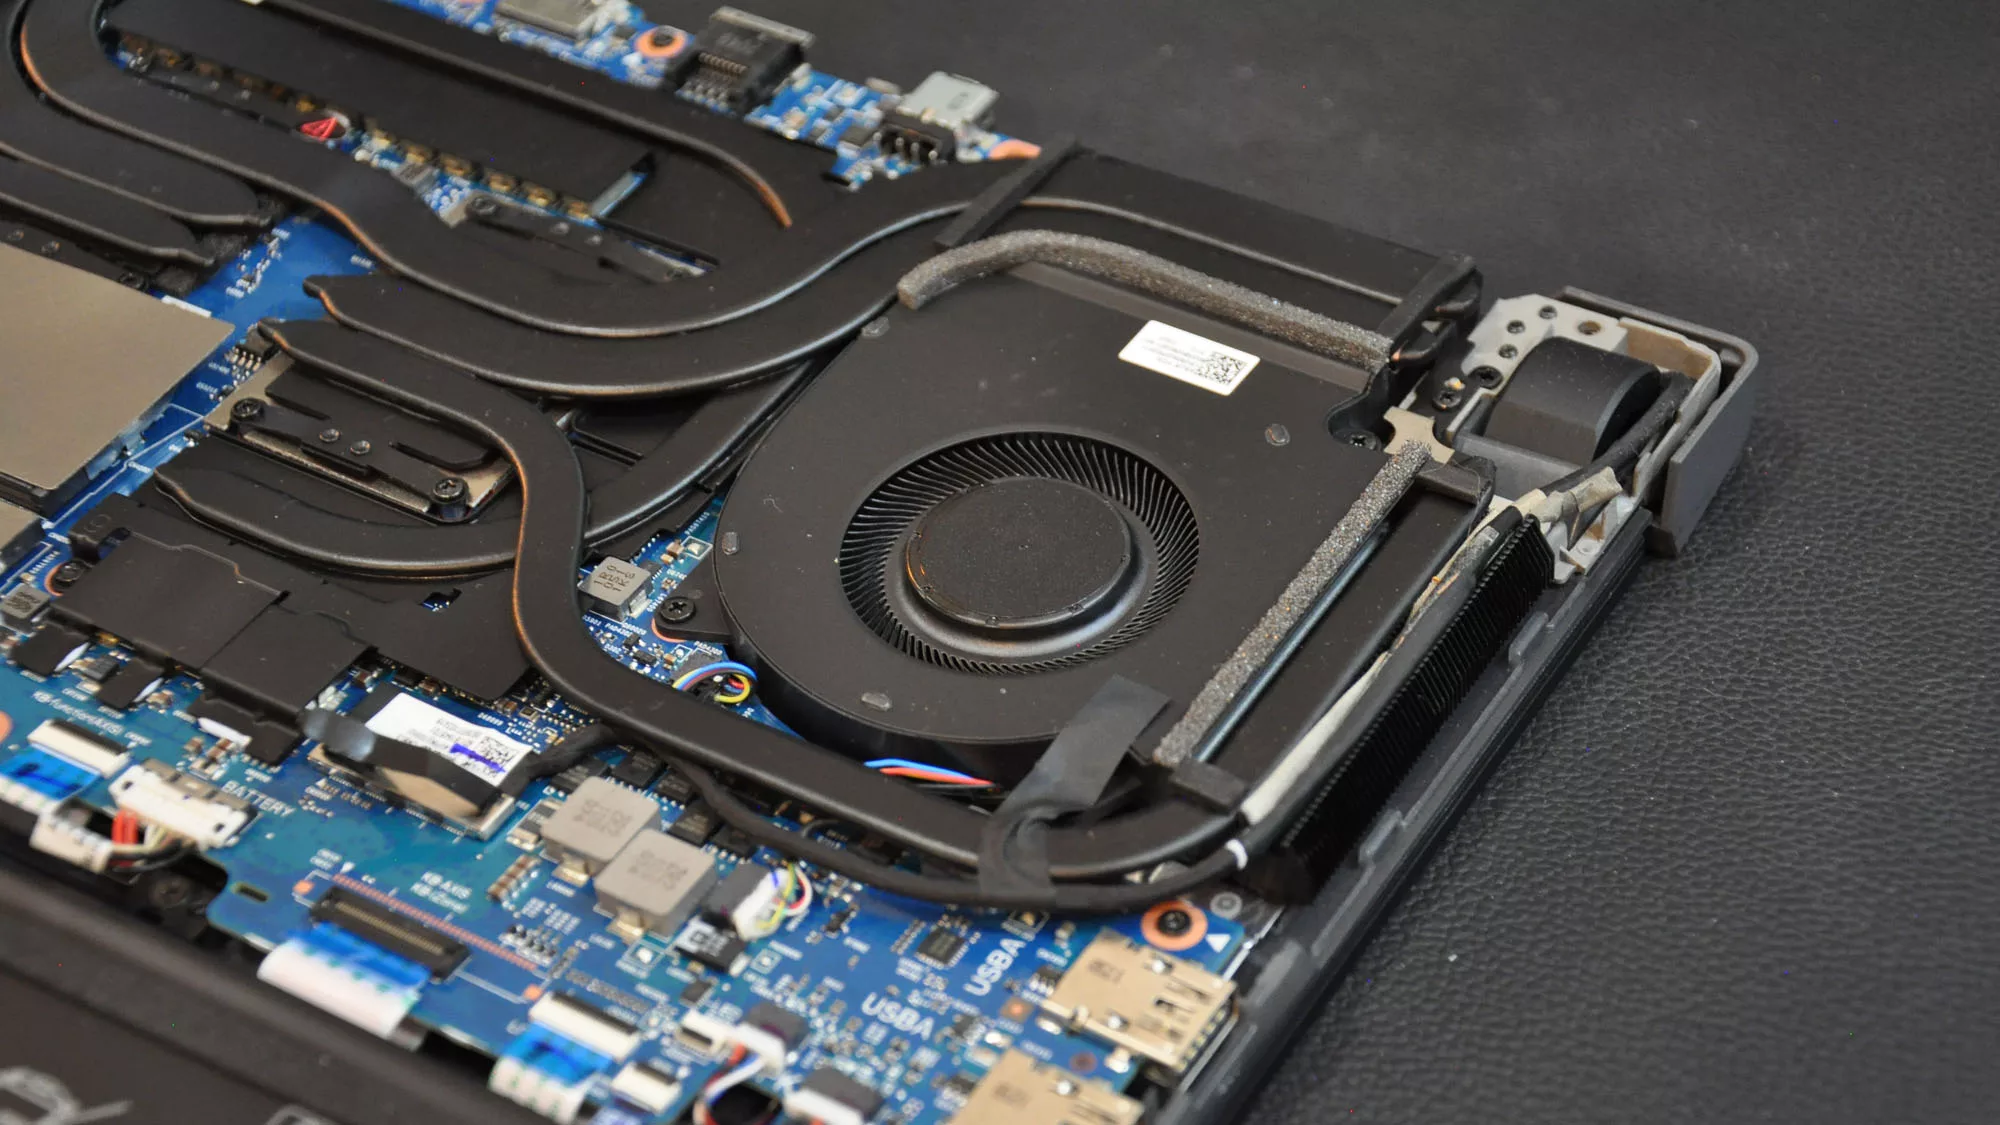
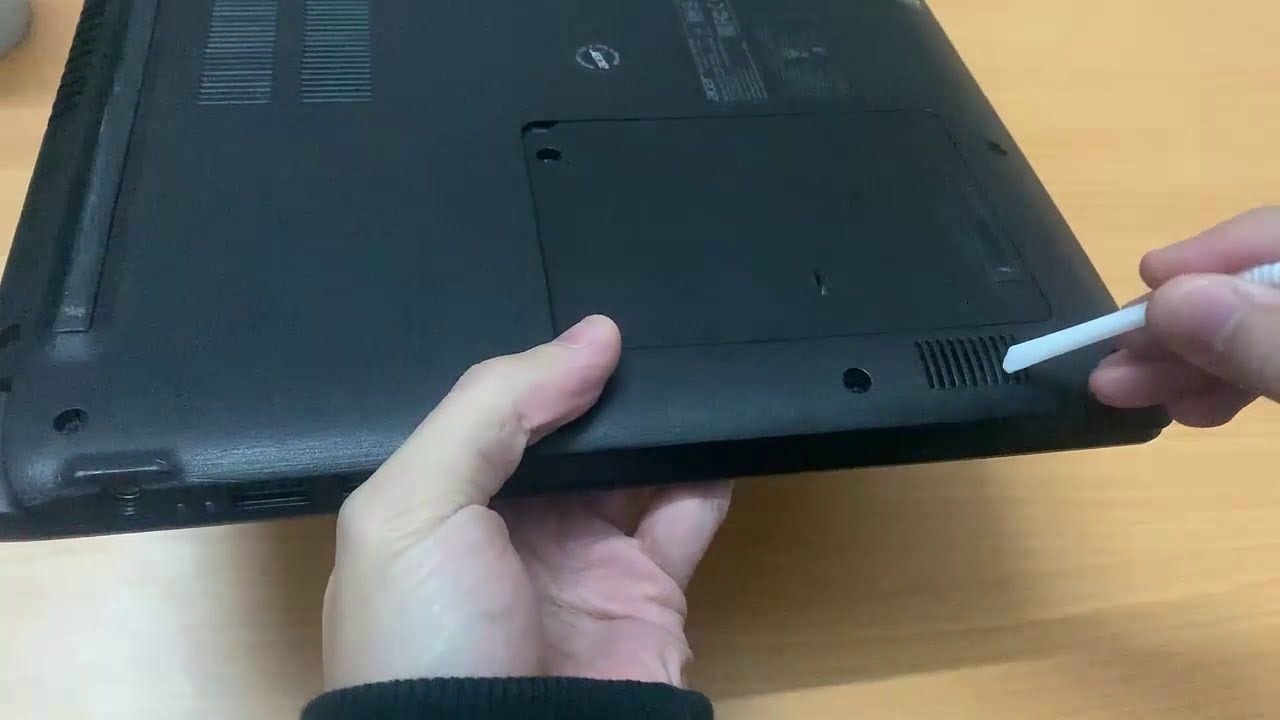
3. Remove the laptop’s back panel
Use the small Phillips screwdriver to carefully remove the screws on the back panel of your laptop. Keep the screws in a safe place or use a magnetic mat to keep them organized. Gently lift off the back panel to expose the internal components, including the fan.
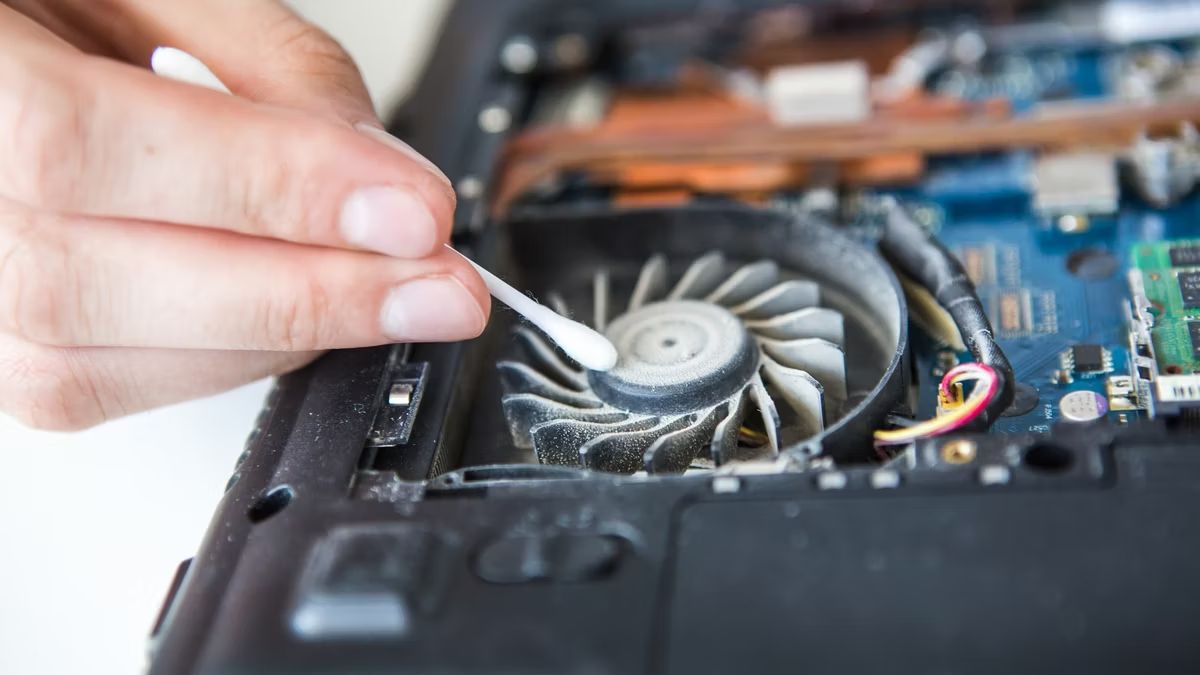
4. Use compressed air to blow away dust
Holding the compressed air canister upright, direct the nozzle towards the fan and other areas where dust may have built up. Use short bursts of air to blow away the dust and debris. Be careful not to shake the canister vigorously, as this can release moisture and potentially damage your laptop. Keep a safe distance and make sure to blow away the dust from all angles.
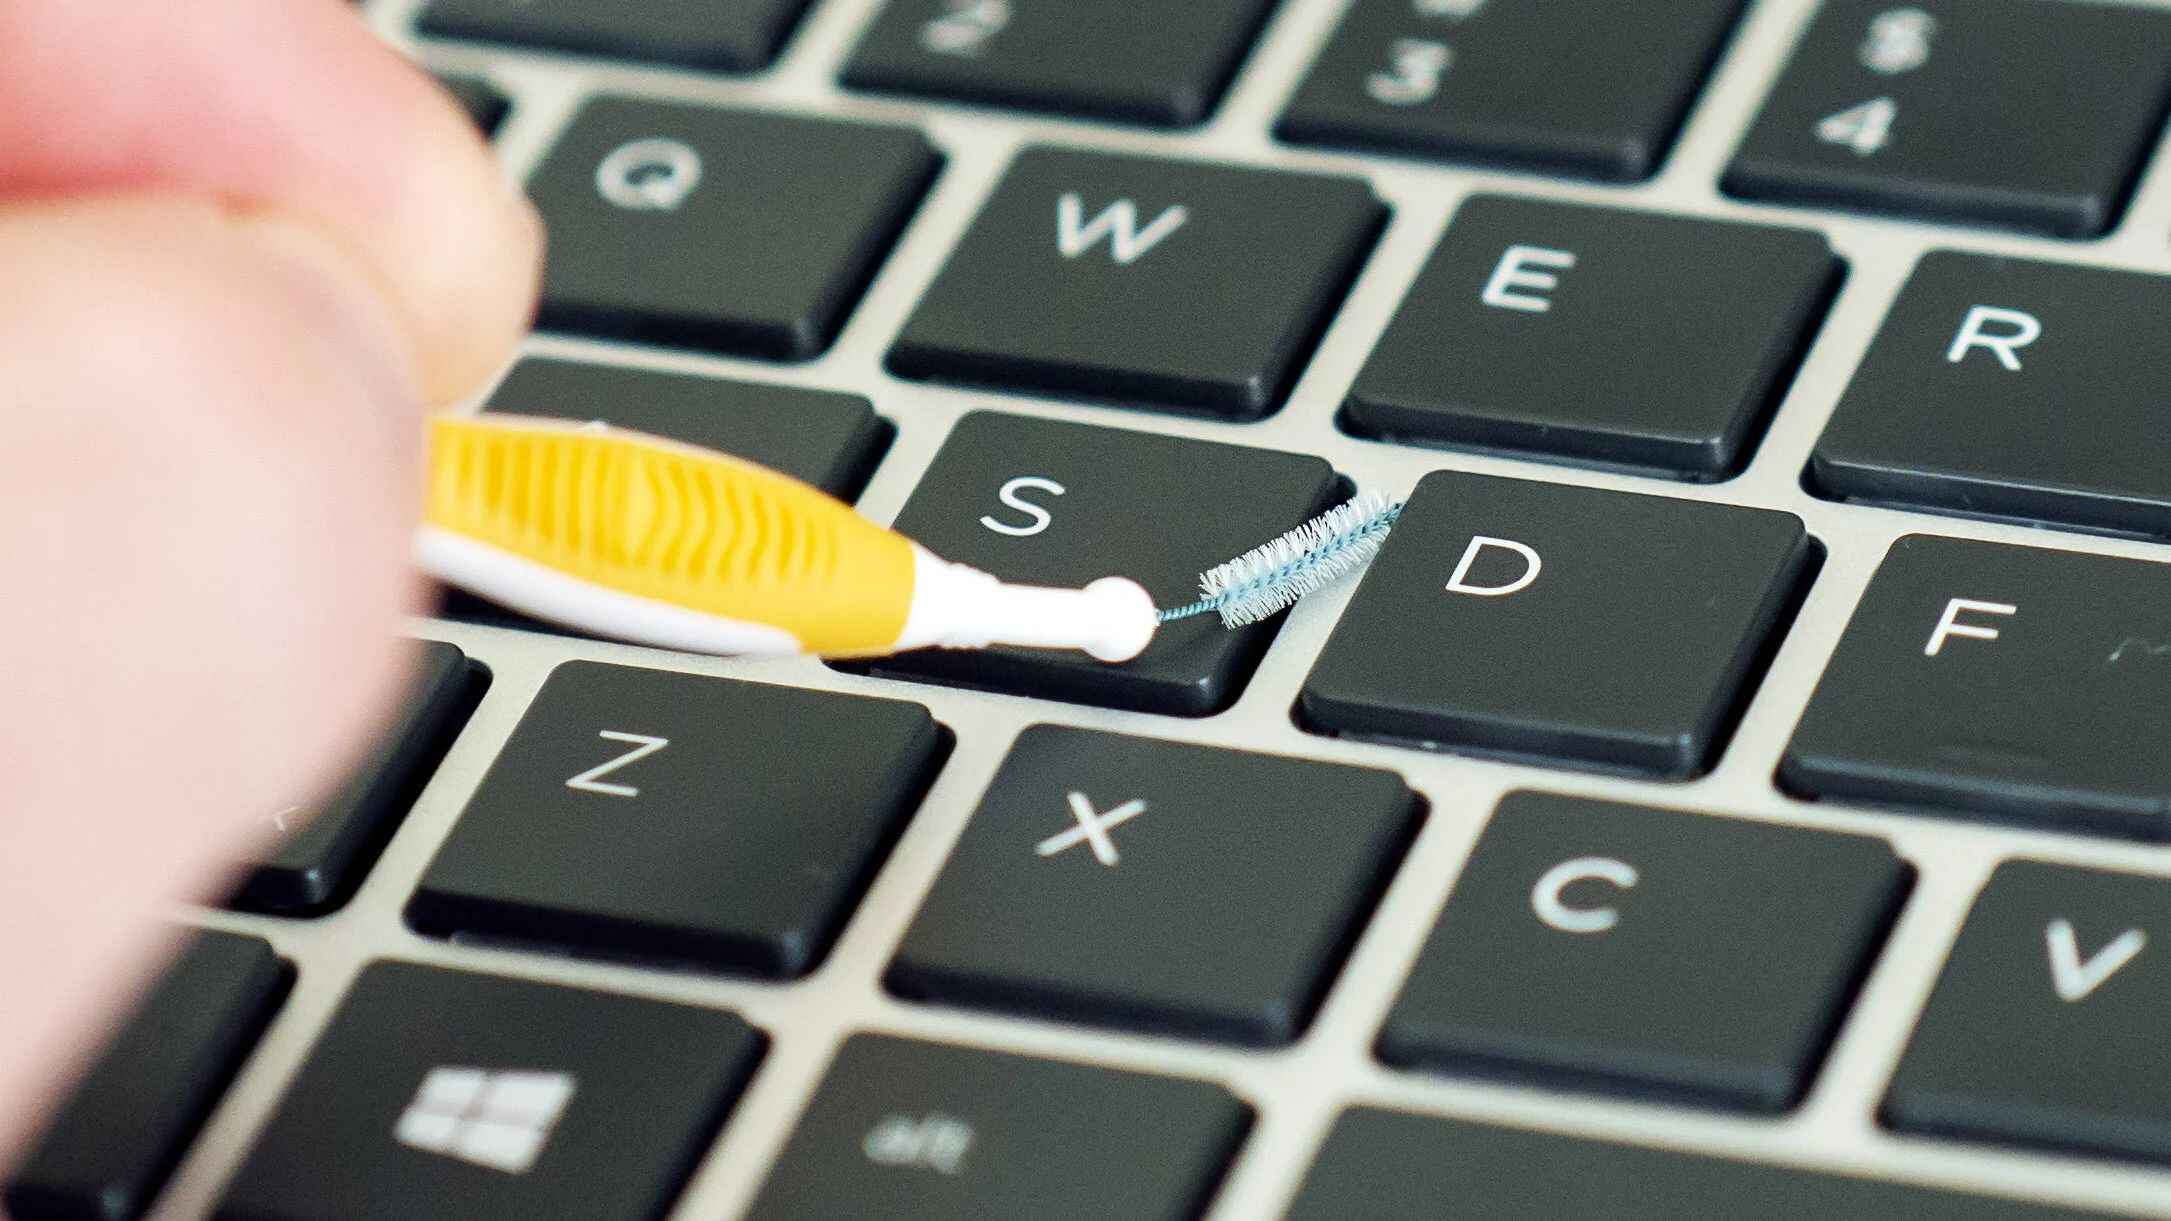
5. Brush away stubborn dirt
If there are any stubborn dirt or dust particles remaining on the fan or other components, use a soft brush or toothbrush to gently brush them away. Be gentle and take your time to ensure you don’t damage any delicate parts.
6. Wipe down the laptop’s exterior
Once you’ve cleaned the fan and other internal components, use a microfiber cloth to wipe down the laptop’s exterior. This will remove any remaining dust and give your laptop a clean and polished look.
7. Reassemble your laptop
Carefully place the back panel back onto your gaming laptop and secure it with the screws. Make sure to tighten the screws evenly and not to overtighten them. Once the back panel is back in place, your gaming laptop is ready for use.
Cleaning your gaming laptop fan on a regular basis will help maintain its performance and prevent overheating issues. In the next section, we’ll discuss how often you should clean your gaming laptop fan and share some tips for preventing dust buildup.
Tools you’ll need to clean your gaming laptop fan
Cleaning your gaming laptop fan requires a few essential tools to ensure a thorough and effective cleaning process. Here are the tools you’ll need to clean your gaming laptop fan:
1. Small Phillips screwdriver
A small Phillips screwdriver is necessary to remove the screws that secure the back panel of your laptop. It allows you to access the internal components, including the fan, for cleaning. Make sure you have the right size screwdriver to avoid damaging the screws.
2. Compressed air canister
A compressed air canister is an invaluable tool for removing dust and debris from the fan and other hard-to-reach areas of your gaming laptop. The compressed air blasts away dust and allows for a more thorough cleaning. It’s important to hold the canister upright and use short bursts of air to prevent moisture from escaping and potentially damaging your laptop.
3. Soft brush or toothbrush
A soft brush or toothbrush is useful for dislodging stubborn dirt and dust particles that may have accumulated on the fan blades or other components. The soft bristles ensure that you can remove the dirt without causing any damage to the delicate parts of your gaming laptop. Be gentle when using the brush to avoid any accidental scratching or dislodging of components.
4. Microfiber cloth
A microfiber cloth is essential for wiping down the laptop’s exterior and removing any remaining dust after cleaning the internal components. The microfiber cloth is gentle on the surface of your laptop and helps to leave it clean and free from fingerprints or smudges.
5. Optional tools
While the above tools are essential for cleaning your gaming laptop fan, there are a few optional tools you might want to consider, depending on your preferences and needs. These include:
- Isopropyl alcohol and cotton swabs – for cleaning stubborn stains or sticky residue around the fan area.
- Dust mask or face covering – to protect yourself from inhaling dust particles while cleaning.
- Anti-static wrist strap – if you are concerned about static electricity, you can use an anti-static wrist strap to discharge any static and minimize the risk of damaging sensitive components.
By gathering these tools before you start cleaning your gaming laptop fan, you can ensure a smooth and efficient cleaning process. In the next section, we will provide you with a step-by-step guide on how to clean your gaming laptop fan.
Step-by-step guide to cleaning your gaming laptop fan
Cleaning your gaming laptop fan is a relatively simple process that can help improve its performance and prevent overheating issues. Follow this step-by-step guide to clean your gaming laptop fan effectively:
Step 1: Power off and unplug your laptop
Before you begin cleaning your gaming laptop fan, make sure it is powered off and unplugged from the power source. This ensures your safety and prevents any potential damage to your laptop.
Step 2: Locate and access the fan
Depending on the model of your gaming laptop, the fan may be located on the bottom or side panel. Consult your laptop’s user manual or do a quick online search to determine the exact location of the fan. Once you have located it, you’ll need to open the laptop to access the fan.
Step 3: Remove the laptop’s back panel
Use a small Phillips screwdriver to carefully remove the screws that secure the back panel of your laptop. Place the screws in a safe location or use a magnetic mat to keep them organized. Gently lift off the back panel to expose the internal components, including the fan.
Step 4: Blow away dust with compressed air
Hold the compressed air canister upright and carefully direct the nozzle towards the fan. Use short bursts of air to blow away the dust and debris from the fan blades and surrounding areas. Make sure to blow the air from different angles to ensure a thorough cleaning. Keep a safe distance to prevent damaging any delicate components.
Step 5: Brush away stubborn dirt
If there are any stubborn dirt or dust particles remaining on the fan or other components, gently brush them away using a soft brush or toothbrush specifically designated for this purpose. Take your time and be delicate when brushing to avoid causing any damage to the fan or other delicate parts of your gaming laptop.
Step 6: Wipe down the laptop’s exterior
After cleaning the fan and other internal components, use a microfiber cloth to wipe down the laptop’s exterior. This helps remove any remaining dust or debris and gives your gaming laptop a clean and polished look.
Step 7: Reassemble your laptop
Carefully place the back panel back onto your gaming laptop and secure it with the screws. Ensure that the screws are tightened evenly but avoid overtightening them. Once the back panel is securely in place, your gaming laptop is ready for use.
By following these step-by-step instructions, you can effectively clean your gaming laptop fan and maintain its performance and longevity. In the next section, we will discuss how often you should clean your gaming laptop fan and provide tips for preventing dust buildup.
How often should you clean your gaming laptop fan
Cleaning your gaming laptop fan regularly is crucial to maintain optimal performance and prevent overheating. However, the frequency of cleaning will depend on various factors such as the environment in which you use your laptop and the level of dust accumulation. Here are some guidelines to help you determine how often you should clean your gaming laptop fan:
1. Environmental factors
If you frequently use your gaming laptop in a dusty or dirty environment, such as a gaming room with poor air circulation or a workspace with pet hair, you might need to clean your fan more often. These environmental factors can contribute to faster dust buildup on the fan blades, compromising its cooling efficiency.
2. Usage intensity
The intensity of your gaming laptop usage also affects how quickly dust and debris accumulate on the fan. If you use your laptop for long gaming sessions or perform resource-intensive tasks regularly, there is a higher chance of dust buildup. Higher usage intensity generates more heat, which can attract and stick debris to the fan blades. Cleaning the fan more frequently is recommended in this case.
3. Regular maintenance schedule
As a general guideline, it is recommended to clean your gaming laptop’s fan at least every 3 to 6 months. This timeframe ensures that you prevent excessive dust buildup and maintain efficient cooling performance. However, if you notice any signs of increased fan noise, overheating issues, or sluggish performance, it might be an indication that your fan needs cleaning sooner.
4. Inspection and monitoring
Regularly inspecting and monitoring the condition of your gaming laptop fan can help you determine when it needs cleaning. Keep an eye out for any signs of dust accumulation or reduced airflow. Pay attention to changes in fan noise, increased temperatures, or performance issues. If you notice any of these signs, it’s a good indication that your fan requires immediate cleaning.
Ultimately, it is better to err on the side of caution and clean your gaming laptop fan more frequently rather than risk overheating and potential damage to your device. Cleaning your fan is a simple maintenance task that can significantly improve the performance and lifespan of your gaming laptop. Remember to consult your laptop’s user manual for specific cleaning instructions or seek professional help if you’re unsure about the cleaning process.
In the next section, we will provide you with some tips and preventive measures to minimize dust buildup and maintain a cleaner gaming laptop fan.
Tips for preventing dust buildup in your gaming laptop fan
Dust buildup is a common issue that can affect the performance and lifespan of your gaming laptop fan. Fortunately, there are several preventive measures you can take to minimize dust accumulation and keep your fan running smoothly. Here are some tips to help you prevent dust buildup in your gaming laptop fan:
1. Keep your gaming area clean
Maintaining a clean gaming area is crucial in preventing dust from entering your laptop and settling on the fan. Regularly dust the surfaces around your gaming setup, vacuum or sweep the floor, and keep your gaming area clear of any debris or clutter that may contribute to dust buildup.
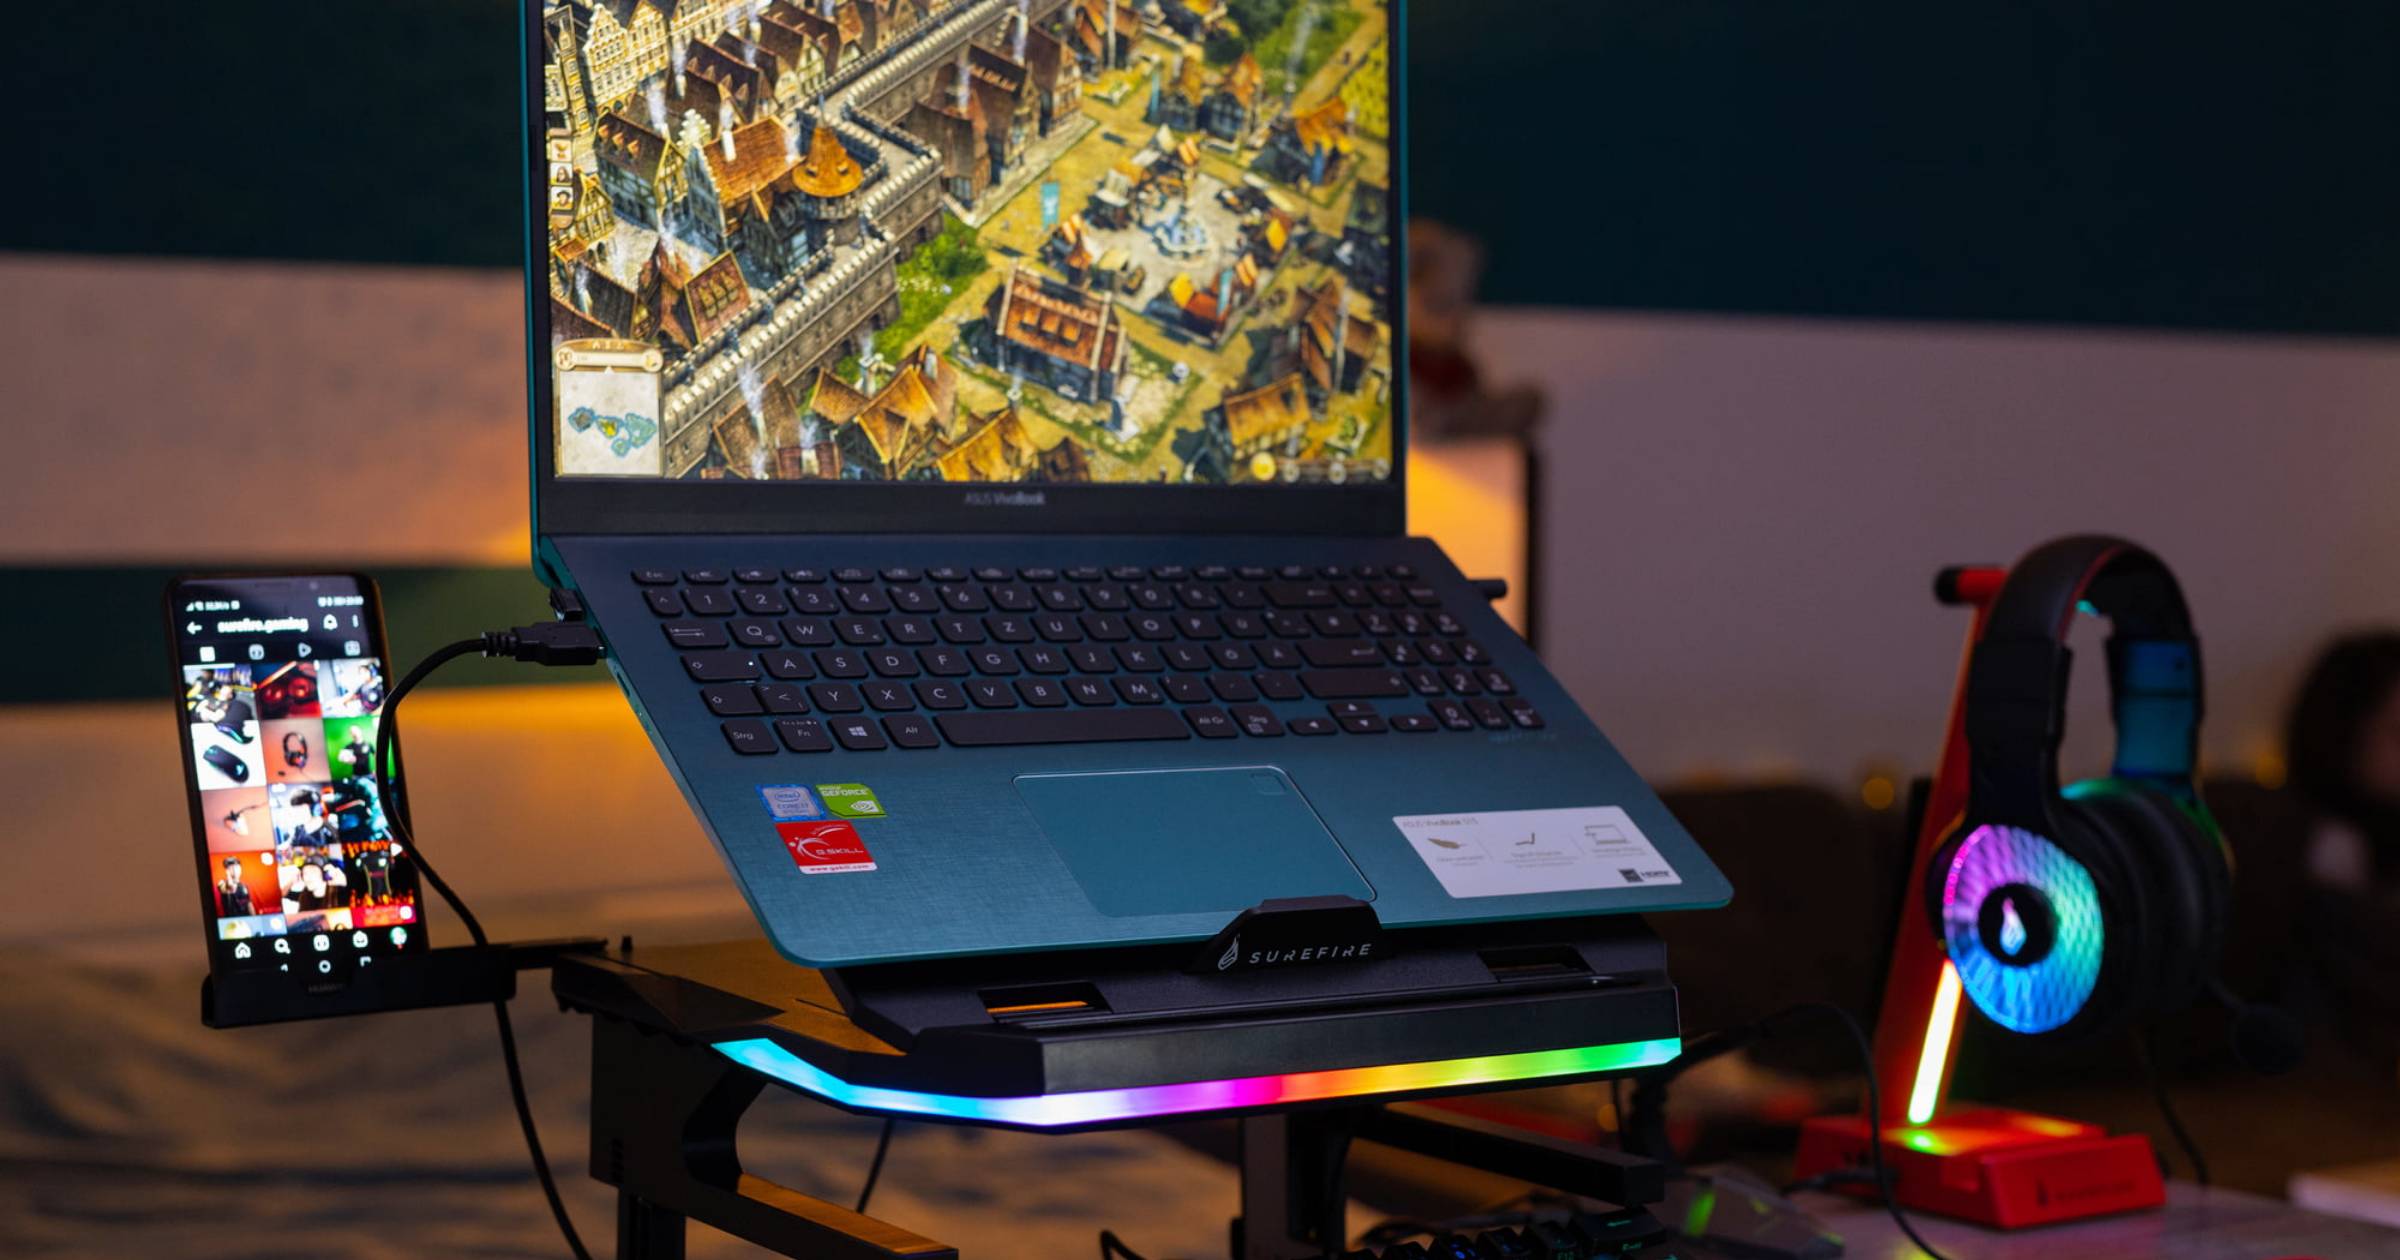
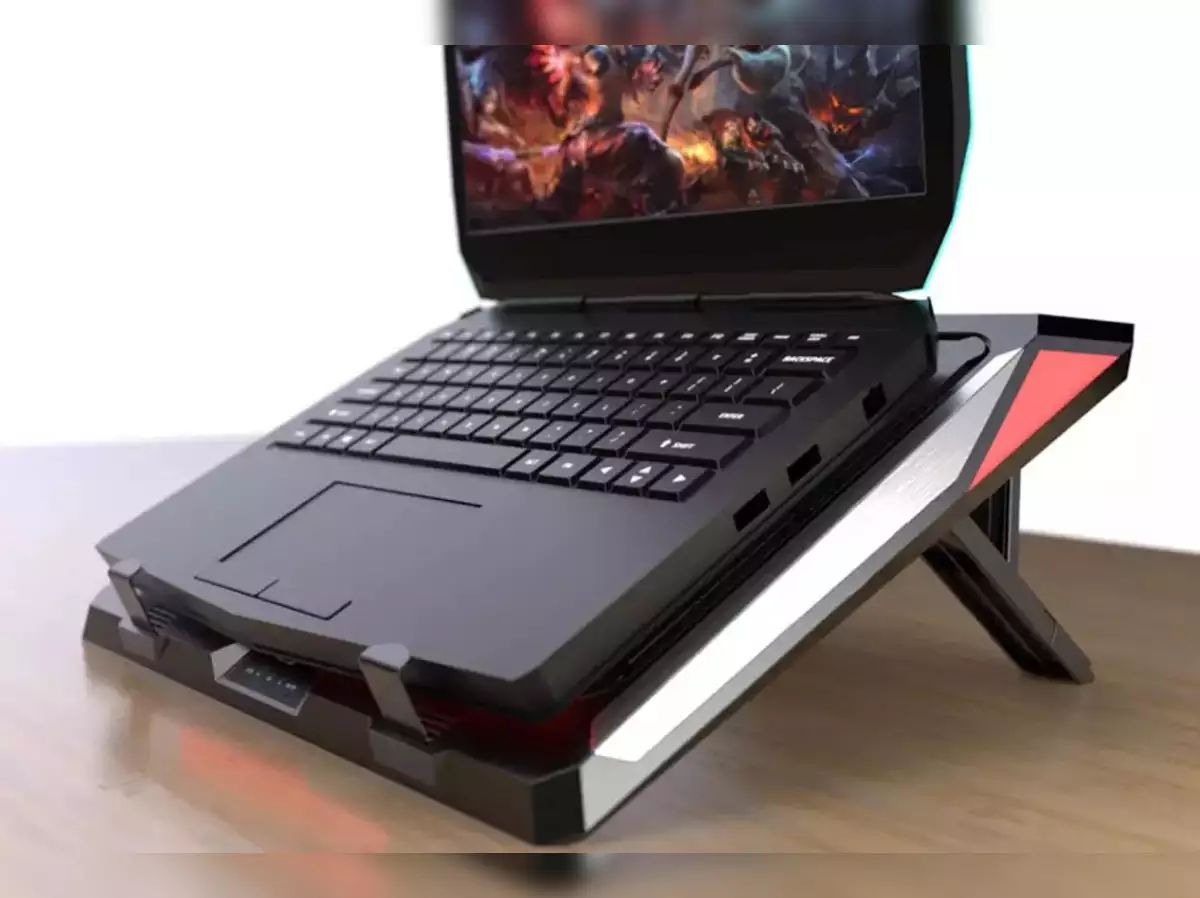
2. Use a laptop cooling pad
Laptop cooling pads can help improve airflow around your gaming laptop, reducing the amount of dust that gets drawn into the fan. These pads generally have built-in fans or additional cooling mechanisms that provide extra ventilation. By keeping your laptop cool, they can minimize dust accumulation and improve overall cooling efficiency.
3. Elevate your laptop
Elevating your gaming laptop slightly off the surface can help reduce dust intake. Using a laptop stand or a cooling pad with an elevated design allows for better airflow and limits the contact between your laptop and the dust-prone surface. This can help prevent dust from settling on the fan and other components.
4. Regularly change air filters and clean the surrounding area
If you have a gaming setup in a room with air filters or vents, make sure to change them regularly and keep them clean. Dusty air filters or vents can circulate dust particles into the room, increasing the chances of them settling on your gaming laptop and its fan. Additionally, regularly dust and clean the area around your laptop to prevent dust from accumulating and being drawn into the fan.
5. Consider using a laptop case or sleeve
Using a laptop case or sleeve when transporting your gaming laptop can help protect it from dust and other debris. These cases create a barrier between your laptop and the external environment, minimizing the chances of dust settling on the fan and other critical components. Look for cases that offer additional padding and protection for your laptop.
6. Schedule regular fan cleanings
Instead of waiting for visible signs of dust buildup, schedule regular cleanings for your gaming laptop fan. By keeping a consistent cleaning routine, you can remove dust before it causes performance issues or damages your laptop. Set a reminder every few months to inspect and clean your fan using the steps outlined in the previous section.
By following these preventive measures, you can minimize dust buildup in your gaming laptop fan and maintain optimal performance. Regular cleaning and proactive maintenance will help ensure that your gaming laptop operates at its best for a longer period. In the next section, we will conclude with a summary of the importance of cleaning your gaming laptop fan and the benefits it provides.
Conclusion
Regularly cleaning your gaming laptop fan is crucial for maintaining optimal performance, preventing overheating issues, and prolonging the lifespan of your device. By paying attention to the signs of a dirty fan, such as increased fan noise and overheating problems, you can identify when cleaning is necessary.
Cleaning your gaming laptop fan is a straightforward process that can be done at home with a few essential tools. By following a step-by-step guide and using tools like a small Phillips screwdriver, compressed air canister, soft brush or toothbrush, and a microfiber cloth, you can effectively clean your fan and remove dust and debris that hinder its cooling efficiency.
The frequency of cleaning your gaming laptop fan depends on several factors, including environmental conditions, intensity of usage, and regular maintenance schedule. It is recommended to clean your fan at least every 3 to 6 months, though more frequent cleaning may be necessary based on your specific circumstances and signs of dust buildup.
Preventive measures, such as keeping your gaming area clean, using a laptop cooling pad, elevating your laptop, regularly changing air filters, and using a laptop case or sleeve, can help minimize dust accumulation and keep your fan cleaner for longer periods.
By incorporating regular cleaning into your maintenance routine and following preventive measures, you can maximize the performance, lifespan, and overall functionality of your gaming laptop. Taking the time to clean your fan not only keeps your laptop running smoothly but also enhances your gaming experience by reducing fan noise and optimizing cooling efficiency.
So, make it a habit to clean your gaming laptop fan regularly and enjoy a smooth, enjoyable gaming experience for years to come.