Introduction
Have you ever wondered what PSU (Power Supply Unit) you have in your PC? While it may not be a question that comes to mind often, knowing the specifications of your PSU can be crucial for various reasons. Whether you are planning to upgrade your PC’s components, troubleshoot power-related issues, or simply satisfy your curiosity, having this information at hand can save you time and effort.
The PSU is an essential component of any computer system as it provides the necessary power to all the other components. Without a properly functioning PSU, your PC may not operate reliably or at all. As technology advances and power-hungry components become more prevalent, it is important to ensure that your PSU can handle the demands of your PC.
In this article, we will explore various methods to identify and determine the specifications of your PSU. We will walk you through the process of checking the label on your PSU, using system information tools, checking the BIOS settings, and even visually inspecting the PSU by opening your PC case. By the end of this article, you will have a clear understanding of what PSU you have and its capacity to meet your computer’s power requirements.
Before we delve into the methods of identifying your PSU, it is important to note that each method may vary depending on the type and model of your PC. Furthermore, it is crucial to exercise caution when working with computer hardware. If you are not confident in your ability to safely handle your PC, consult a professional technician for assistance.
Now, let’s begin our journey to discovering the PSU inside your PC and unlocking the power secrets that lie within.
Why do you need to know what PSU you have?
The Power Supply Unit is often overlooked when it comes to PC maintenance and upgrades, but it plays a crucial role in the overall performance and stability of your system. Here are some important reasons why it is essential to know what PSU you have:
1. Compatibility and Upgrades: When upgrading your PC’s components, such as adding a more powerful graphics card or increasing the amount of RAM, it is important to ensure that your PSU can handle the increased power requirements. By knowing the specifications of your current PSU, you can determine if it has enough wattage, the required connectors, and the necessary power efficiency to support your desired upgrades.
2. Troubleshooting Power-related Issues: If you are experiencing random system crashes, sudden shutdowns, or other power-related issues, the PSU could be the culprit. Knowing the specifications of your PSU will help you determine if it is providing enough power to the system. By identifying the wattage, amperage, and voltage ratings of your PSU, you can troubleshoot and pinpoint potential problems more effectively.
3. Power Efficiency: The efficiency of a PSU affects both its performance and energy consumption. Higher efficiency PSUs can provide stable and reliable power to your components while consuming less electricity, helping to reduce your overall energy costs. By knowing the efficiency rating of your PSU, you can make informed decisions about energy consumption and choose more efficient options when replacing or upgrading your PSU.
4. Overclocking: Overclocking your CPU or GPU can significantly increase their performance but also requires additional power. To ensure stability and avoid system instability or damage, it’s crucial to have a PSU with sufficient wattage and robust power delivery capabilities. Knowing the specifications of your PSU is essential when venturing into the world of overclocking.
5. Planned Maintenance and Cleaning: Cleaning your PC’s components and maintaining proper airflow is crucial for the longevity and performance of your system. Knowing the model and size of your PSU allows you to plan and execute cleaning sessions more effectively. By removing dust and debris from the PSU and its fan, you can prevent overheating and extend the lifespan of your system.
In summary, knowing what PSU you have in your PC is essential for compatibility, troubleshooting, power efficiency, overclocking, and planned maintenance. It empowers you to make informed decisions when upgrading components, and ensures your system operates optimally and reliably. By understanding your PSU’s specifications, you can confidently navigate the world of PC hardware and take the necessary steps to enhance your computer’s performance and longevity.
How to check what PSU you have
There are several methods you can use to determine what PSU you have in your PC. We will walk you through each method step by step:
Method 1: Checking the label on your PSU
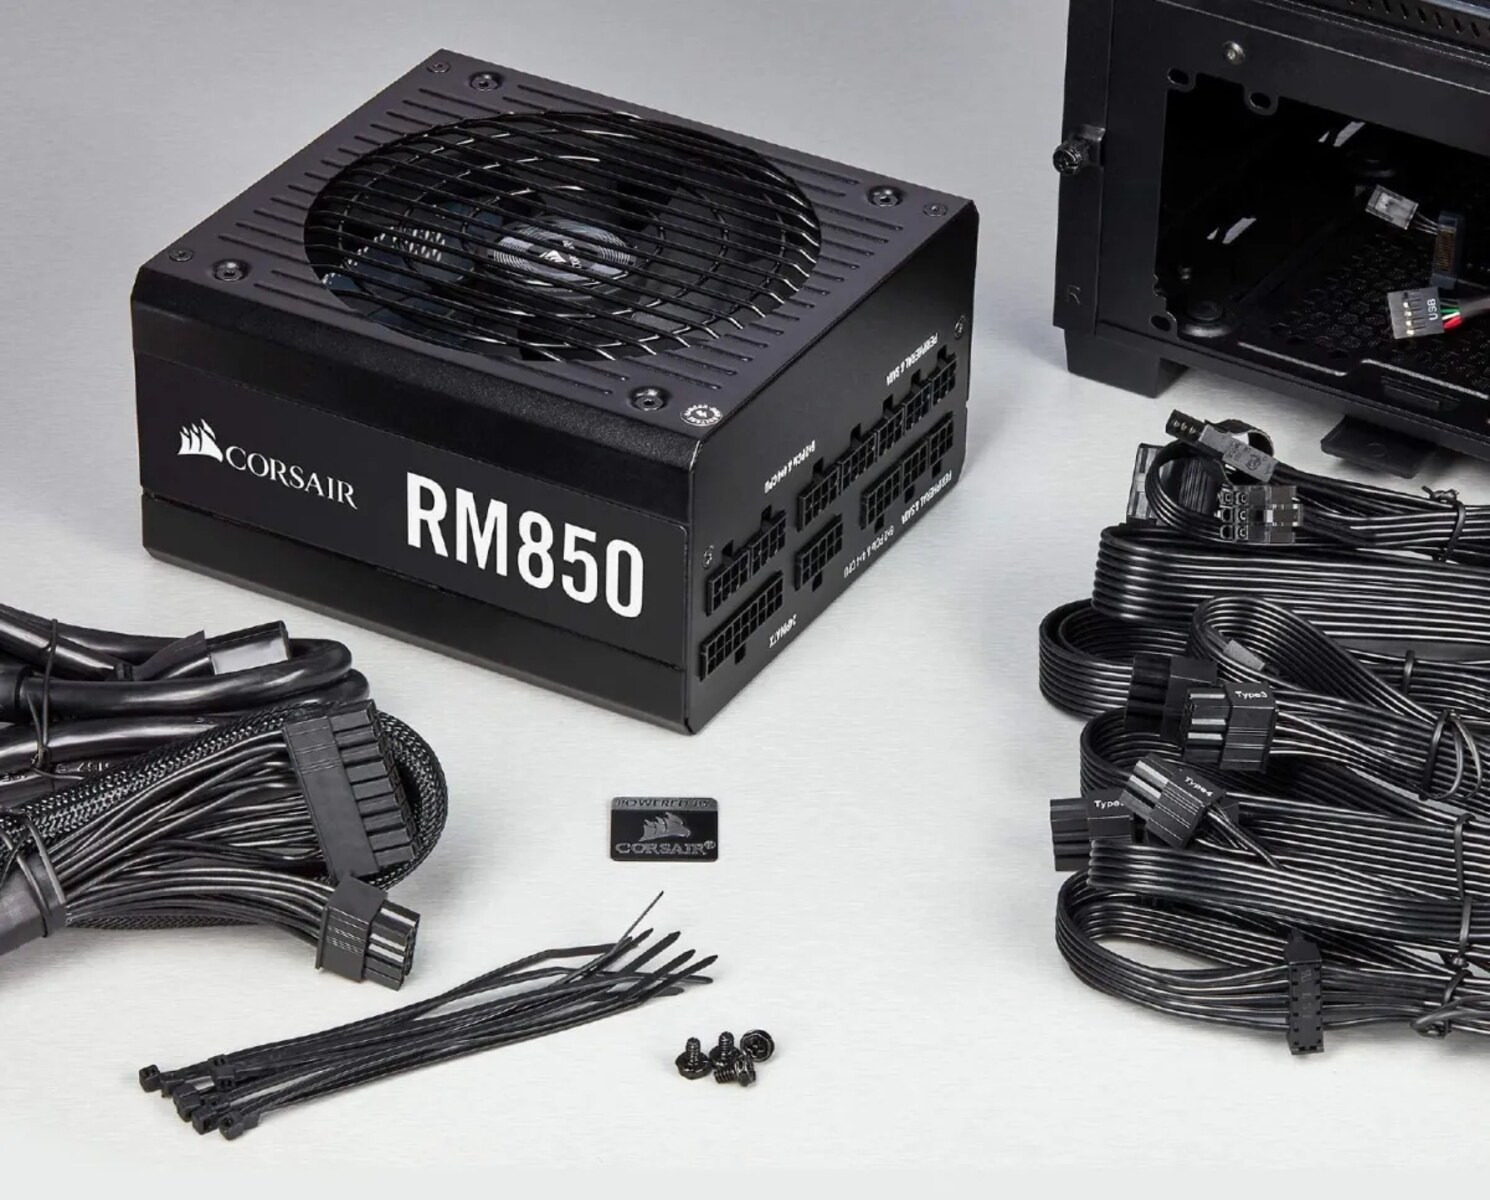
The easiest way to identify your PSU is by checking the label or sticker on the unit itself. The label is typically located on the side or bottom of the PSU and contains vital information about its specifications. Look for details such as the brand, model number, wattage, and any certifications or ratings, such as 80 Plus Bronze, Silver, Gold, or Platinum.
Method 2: Using system information tools
Another way to check your PSU is by using system information tools built into your operating system. Both Windows and macOS provide built-in tools that can display hardware information, including your PSU. In Windows, you can use the DirectX Diagnostic Tool or third-party applications like CPU-Z or Speccy. On macOS, you can use the system profiler or applications like iStat Menus or Macs Fan Control.
Method 3: Checking the BIOS settings
Your computer’s BIOS (Basic Input/Output System) stores various hardware information, including your PSU details. To access the BIOS settings, restart your computer and press the designated key (usually Del, F2, or F10) during the boot process to enter the BIOS menu. Look for a section dedicated to hardware information or system settings, where you can find the details of your PSU.
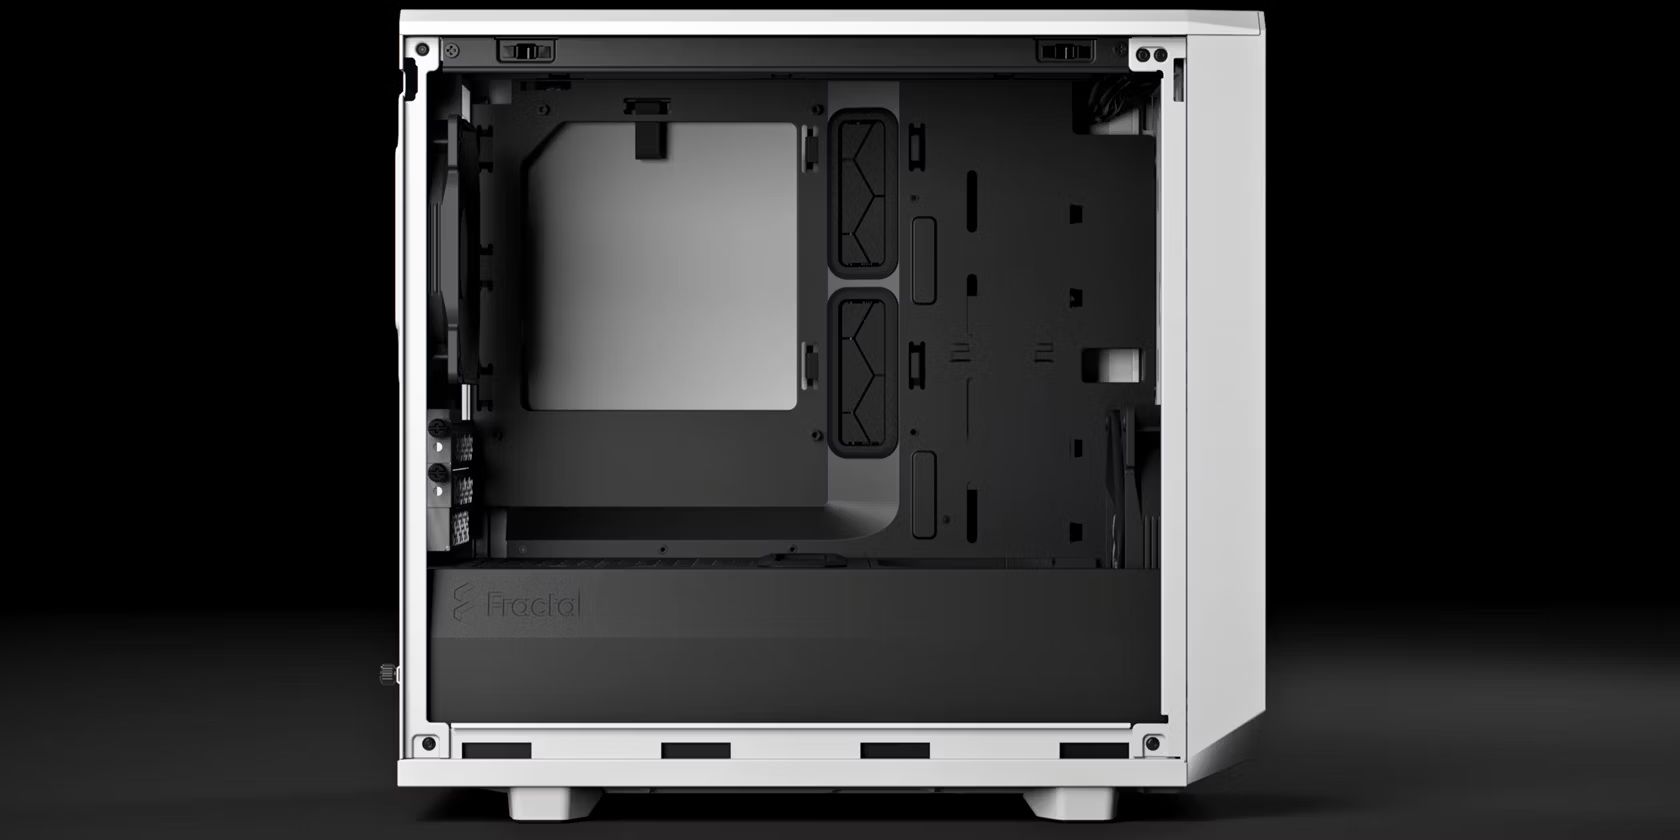
Method 4: Opening your PC case and visually inspecting the PSU
If all else fails, you can physically open your PC case and visually inspect the PSU for its specifications. Before doing so, make sure to turn off your computer and unplug it from the power source. Open the case by removing the side panel and locate the PSU, which is typically positioned at the top or bottom of the case. Look for any labels, stickers, or markings indicating the wattage, model number, and other specifications.
Remember, when working with computer hardware, ensure you are grounded and take precautions to avoid electric shocks. If you are uncomfortable with opening your PC case or handling sensitive electronic components, consult a professional technician for assistance.
By utilizing these methods, you can easily determine what PSU you have in your PC and gather the necessary information about its specifications. Knowing these details will allow you to make informed decisions when upgrading your components, troubleshooting power-related issues, and maintaining the overall health and performance of your computer system.
Method 1: Checking the label on your PSU
One of the simplest and most straightforward methods to determine your PSU’s specifications is by checking the label or sticker on the unit itself. Here’s how you can do it:
1. Power off your PC: Before checking the PSU label, it is crucial to power off your computer and unplug it from the wall outlet. This step ensures your safety and prevents any accidental damage to your system.
2. Locate the PSU: The Power Supply Unit is typically positioned at the top or bottom of your PC case. It is a rectangular-shaped metal box with cables coming out of it. Locate the PSU and prepare to examine its label.
3. Read the label: Look for a label or sticker on the side or bottom of the PSU. This label contains vital information about the unit’s specifications. The details you can expect to find include the brand, model number, wattage, voltage, amperage, and any certifications or ratings, such as 80 Plus Bronze, Silver, Gold, or Platinum.
4. Make note of the specifications: Take note of the important specifications mentioned on the label. The wattage indicates the maximum power output of the PSU, while the voltage and amperage ratings indicate the specific power levels provided to different components of your PC. The certifications or ratings reflect the efficiency of the PSU and its compliance with energy-saving standards.
5. Research and verify: Once you have gathered the information from the PSU label, you can search online using the brand and model number to find more details about its capabilities and performance. This research can help you determine if your PSU is sufficient for your PC’s power requirements or if an upgrade is necessary.
By following these steps, you can easily check the label on your PSU and obtain the necessary information about its specifications. Knowing the wattage, voltage, amperage, and efficiency ratings of your PSU allows you to make informed decisions when it comes to upgrading components, troubleshooting power-related issues, and ensuring the overall stability and performance of your computer system.
Method 2: Using system information tools
Another convenient method to determine your PSU’s specifications is by using built-in system information tools available on your operating system. Here’s how you can use these tools:
1. Windows: If you are using Windows, there are several system information tools you can utilize. The DirectX Diagnostic Tool is one option that provides detailed information about your hardware components. To access it, press the “Windows + R” keys to open the Run dialog box, then type “dxdiag” and hit Enter. The DirectX Diagnostic Tool window will open, displaying various tabs. Click on the “System” and “Power” tabs to view the PSU-related information.
2. Third-party software: In addition to the built-in tools, there are third-party applications like CPU-Z and Speccy that can provide comprehensive hardware information. These software tools not only display PSU details but also provide information about other components in your system. You can search for these applications online, download and install them, and run them to obtain accurate information about your PSU.
3. macOS: If you are using macOS, you can access system information through the system profiler. To open the profiler, click on the Apple menu in the top left corner of your screen, then select “About This Mac.” In the window that appears, click on “System Report.” In the System Information window, select “Hardware” in the left sidebar, then click on “Power” in the main window. Here, you can find information about your PSU, including its wattage and other specifications.
4. Third-party macOS tools: Similar to Windows, there are third-party applications available for macOS that provide even more detailed hardware information. Programs like iStat Menus and Macs Fan Control can provide comprehensive data about your PSU and other system components. You can find these applications online, download and install them, and use them to gather accurate information about your PSU.
By using system information tools, you can quickly and easily access detailed information about your PSU without the need to physically inspect your computer. Whether you are using the built-in tools provided by your operating system or installing third-party software, these tools offer a convenient way to obtain accurate and comprehensive information about your PSU’s specifications. This knowledge allows you to make informed decisions when it comes to upgrading components or troubleshooting power-related issues.
Method 3: Checking the BIOS settings
Accessing the BIOS (Basic Input/Output System) settings of your computer provides another method to check your PSU’s specifications. Here’s how you can do it:
1. Restart your computer: Save any ongoing work and restart your computer. As it boots up, keep an eye on the screen for a message that indicates the key you need to press to enter the BIOS. Common keys include Del, F2, or F10, but it may vary depending on your computer’s manufacturer.
2. Enter the BIOS: Once you identify the correct key, press it immediately when prompted. This action will take you to the BIOS setup utility, a blue or black screen with various options and settings.
3. Navigate to system information: Look for a tab or section within the BIOS menu that is labeled “System Information,” “Hardware Information,” or something similar. The positioning and labeling of this section can vary depending on your computer’s BIOS version and manufacturer.
4. Find PSU details: Once you have located the system information section, navigate through the options and look for details related to your PSU. The information displayed could include the wattage, voltage, amperage, and other relevant specifications of your PSU.
5. Take note of the specifications: Make a note of the PSU specifications displayed within the BIOS. Pay attention to the wattage, voltage, amperage, and any other parameters that may be relevant to your PSU’s performance and capabilities.
6. Exit the BIOS: After noting the specifications, carefully navigate through the BIOS menu and find the option to exit and save changes. Confirm the action, and your computer will continue to boot up as normal.
Checking the BIOS settings provides an alternative way to access your PSU’s specifications without relying on external tools or physically opening up your computer. However, it’s important to note that the BIOS interface can vary based on your computer’s manufacturer and BIOS version. Therefore, the exact steps to locate the PSU details may slightly differ. Refer to your computer’s user manual or manufacturer’s website for specific instructions related to your system.
By accessing the BIOS settings and gathering PSU information, you can make informed decisions regarding upgrades, power requirements, and ensure the overall stability and performance of your computer system.
Method 4: Opening your PC case and visually inspecting the PSU
If other methods fail or you prefer a physical approach, you can open your PC case and visually inspect the Power Supply Unit (PSU) to determine its specifications. Here’s how you can do it:
1. Prepare for safety: Before opening your PC case, ensure that your computer is turned off and unplugged from the power source. This step is crucial to avoid electrical shock and prevent any accidental damage to your system.
2. Open the PC case: Depending on the design of your computer case, you may need to remove screws, slide off panels, or push release buttons to access the internal components. Refer to your PC case manual or manufacturer’s website for specific instructions related to opening your case.
3. Locate the PSU: Once the case is open, locate the Power Supply Unit. The PSU is typically positioned at the top or bottom of the case and is a rectangular-shaped metal box. It will have cables coming out of it that connect to various components of your PC.
4. Visually inspect the PSU: Look for any labels, stickers, or markings on the PSU itself. These markings usually provide essential information such as the brand, model number, wattage, voltage, amperage, and any certifications or ratings. Take note of these specifications.
5. Take precautions: While inspecting the PSU, be cautious not to touch any internal components or cables. Static electricity can damage sensitive electronic parts, so it’s recommended to ground yourself by touching a metal part of the case before handling anything inside.
6. Document the specifications: Write down or take a clear picture of the PSU label or markings. Ensure that you capture all the relevant specifications accurately, including wattage, voltage, amperage, and any certifications or ratings.
7. Close the PC case: After gathering the necessary information about your PSU, securely close your PC case by reattaching panels, screws, or any other mechanisms that hold it together.
By physically inspecting the PSU, you can obtain direct and accurate information about its specifications. This method allows you to bypass any reliance on software tools or BIOS settings, providing a straightforward approach to identifying your PSU’s capabilities and power output. It is important to exercise caution while handling internal components and ensure that you follow proper safety procedures to protect both yourself and your computer system.
Things to consider when determining your PSU’s specifications
When determining the specifications of your Power Supply Unit (PSU), there are several key factors to consider. These factors will help you gauge whether your PSU meets the power requirements of your computer system and ensure its optimal performance. Here are some crucial things to consider:
1. Wattage: The wattage rating of your PSU indicates the maximum amount of power it can deliver to your components. It’s essential to ensure that the wattage of your PSU is sufficient to power all your components without exceeding its capacity. Consider the power requirements of your CPU, GPU, storage drives, and other peripherals to determine the appropriate wattage for your PSU.
2. Voltage and Amperage: The voltage and amperage specifications of your PSU determine the specific power levels delivered to different components. Different components may have varying voltage and amperage requirements, so it’s crucial to ensure that your PSU provides adequate power for each component.
3. Efficiency Rating: PSU efficiency is measured by ratings such as 80 Plus Bronze, Silver, Gold, or Platinum. Higher efficiency ratings indicate that the PSU converts more of the incoming AC power into DC power, reducing wasted energy and heat generation. A more efficient PSU can provide stable power while consuming less electricity, resulting in reduced energy costs and heat production.
4. Certifications and Protections: Look for certifications and protections offered by your PSU, such as Over Voltage Protection (OVP), Under Voltage Protection (UVP), Over Current Protection (OCP), Short Circuit Protection (SCP), and others. These features help safeguard your components against potential power issues and ensure the longevity of your system.
5. Modularity: Modular PSUs offer flexibility with cable management by allowing you to connect only the necessary cables. This not only improves airflow within your PC case but also reduces clutter. Consider whether a fully modular, semi-modular, or non-modular PSU is suitable for your needs.
6. Future Upgradability: If you plan to upgrade your PC in the future, it’s wise to choose a PSU with a higher wattage than the current power requirements. This ensures that your PSU can accommodate the power needs of new components without requiring a replacement.
7. Reliability and Brand: Investing in a reliable and reputable PSU brand is essential to ensure stable and consistent power delivery to your system. Research customer reviews, consult experts, and consider brands known for their quality and reliability in the market.
By considering these factors, you can assess whether your current PSU is sufficient for your computer system or if an upgrade is necessary. Always ensure that your PSU can handle the power demands of your components to maintain stable operation and avoid potential issues such as system crashes, shutdowns, or damaged hardware. Taking these factors into account will help you make informed decisions when selecting or upgrading your PSU.
Conclusion
Knowing the specifications of your Power Supply Unit (PSU) is essential for ensuring the stability, performance, and compatibility of your computer system. By following the methods outlined in this article, you can easily determine what PSU you have and gather the necessary information about its wattage, voltage, amperage, efficiency, and other specifications.
Whether you check the label on the PSU, use system information tools, access the BIOS settings, or physically inspect the PSU, each method provides a convenient way to obtain the necessary information. Take note of the specifications and use them as a reference when making decisions about upgrading components, troubleshooting power-related issues, or planning future system maintenance.
Consider the wattage and power requirements of your components, verify the voltage and amperage ratings, and evaluate the efficiency, certifications, and protections offered by your PSU. Additionally, think about the modularity, future upgradability, and the reliability of the PSU brand you choose.
Whether you decide to upgrade your PSU or determine that your current one meets your needs, the knowledge gained from these methods will empower you to make informed decisions regarding your computer system’s power requirements. This helps ensure stable, reliable, and efficient operation, while also avoiding potential power-related issues or limitations.
Always prioritize safety when working with computer hardware. If you are unsure or uncomfortable about handling your PC or its components, seek professional assistance from a technician to avoid any mishaps or damage to your system.
Now that you are equipped with the knowledge to determine what PSU you have and understand its specifications, you can confidently navigate the realm of PC hardware and optimize your computer’s performance and longevity.