Why Does My Monitor Turn Off When Gaming?
Experiencing your monitor turning off while gaming can be frustrating and disrupt your gaming experience. There can be several reasons behind this issue, ranging from hardware problems to software conflicts. Understanding the potential causes can help you troubleshoot and resolve the problem effectively.
Overheating Issues: High-intensity gaming sessions can push your hardware to its limits, causing overheating. When components like the GPU or CPU reach critical temperatures, they may automatically shut down to prevent damage. Ensure that your computer is well-ventilated and consider using additional cooling solutions, such as fans or liquid cooling systems, to keep temperatures in check.
Inadequate Power Supply: Gaming requires significant power, and if your PC does not have a sufficient power supply, it may result in the monitor shutting off. Check if your power supply unit (PSU) meets the power demands of your components, especially the graphics card. Consider upgrading to a higher wattage PSU if necessary.
Graphics Card Problems: A faulty or outdated graphics card can also cause your monitor to turn off during gaming. Ensure that your graphics card is properly seated in the PCIe slot and has the latest drivers installed. Overclocking the GPU beyond its stable limits can also lead to power issues, causing the monitor to shut down.
Display Driver Incompatibility: Outdated or incompatible display drivers can cause conflicts with your gaming software, resulting in the monitor turning off. Regularly update your graphics card drivers to ensure compatibility with the games you play. You can usually download the latest drivers from the manufacturer’s website or use driver update software.
Faulty Cables or Connectors: Sometimes, the issue may lie with the cables or connectors connecting your monitor to the computer. Check for any loose connections or damaged cables, especially the HDMI or DisplayPort cables. Consider replacing them if necessary to rule out any physical damage affecting the monitor’s performance.
Gaining insights into these common causes can help you troubleshoot and resolve the issue of your monitor turning off during gaming. In the following sections, we will discuss various steps you can take to identify and fix this problem, ensuring a smooth and uninterrupted gaming experience.
Common Causes for Monitor Turning Off During Gaming
Experiencing your monitor turning off unexpectedly during gaming can be both frustrating and perplexing. Several factors can contribute to this issue, and understanding the common causes can help you identify and resolve the problem effectively.
1. Overheating Issues: High-performance gaming can put a significant strain on your computer’s hardware, causing it to overheat. When your components, such as the graphics card or CPU, reach critical temperatures, they may shut down to prevent further damage. Ensure that your computer is well-ventilated and consider using additional cooling mechanisms, such as fans or liquid cooling systems, to maintain optimal temperatures.
2. Inadequate Power Supply: Gaming rigs often require substantial power to run smoothly. If your power supply unit (PSU) doesn’t have enough capacity to handle the power demands of your components, it may lead to the monitor shutting off. Check if your PSU is sufficient in terms of wattage and ensure that it’s functioning correctly. Upgrading to a higher wattage PSU may be necessary to provide enough power for your gaming setup.
3. Graphics Card Problems: Issues with your graphics card can also cause the monitor to turn off during gaming. A faulty or outdated graphics card may not be able to handle the graphical requirements of your games, leading to unexpected shut downs. Make sure your graphics card is properly seated in the PCIe slot and has the latest drivers installed. Overclocking the GPU beyond its stable limits can also result in power issues and trigger the monitor to turn off.
4. Display Driver Incompatibility: Outdated or incompatible display drivers can create conflicts between your gaming software and the monitor, leading to unexpected shutdowns. Regularly updating your graphics card drivers ensures compatibility with the latest games and resolves potential conflicts. Visit the manufacturer’s website to download the latest drivers or consider using dedicated driver update software to simplify the process.
5. Faulty Cables or Connectors: Sometimes, the issue may lie with the cables or connectors connecting your monitor to the computer. Loose connections or damaged cables, especially HDMI or DisplayPort cables, can disrupt the signal and cause the monitor to turn off. Inspect the cables for any visible damage and ensure they are securely plugged in. If necessary, try using different cables to rule out any physical damage affecting the monitor’s performance.
Understanding these common causes for the monitor turning off during gaming can serve as a starting point for troubleshooting. In the following sections, we will discuss various steps you can take to address these issues and ensure a smooth and uninterrupted gaming experience.
Overheating Issues
One of the common causes behind a monitor turning off during gaming is overheating. High-intensity gaming sessions can put a significant strain on your computer’s hardware, causing it to generate excessive heat. When components like the graphics card or CPU reach critical temperatures, they may automatically shut down to prevent damage. To address overheating issues, you can take the following steps:
1. Ensure Proper Airflow: Adequate airflow is crucial to keep your computer’s internal components cool. Make sure that your computer is placed in a well-ventilated area, away from any obstructions that might block the air intake or exhaust vents. Dust build-up can also hinder airflow, so regularly clean the fans and vents to remove accumulated dust and debris.
2. Use Additional Cooling Solutions: If your computer tends to overheat frequently, consider using additional cooling solutions to help regulate temperatures. You can install extra case fans to improve airflow inside the computer chassis. Alternatively, you might opt for liquid cooling solutions, such as an all-in-one (AIO) liquid cooler or a custom water cooling setup, for more efficient heat dissipation.
3. Monitor CPU and GPU Temperatures: Keep track of the temperatures of your CPU and GPU while gaming. You can use monitoring software, such as CPU-Z or GPU-Z, to check the temperatures in real-time. If you notice that the temperatures are consistently reaching dangerous levels, it might be necessary to take more aggressive cooling measures.
4. Clean the Internal Components: Over time, dust and debris can accumulate inside your computer, restricting airflow and leading to overheating. Regularly clean the internal components of your computer, including the fan blades, heat sinks, and filters. Use compressed air or a soft brush to remove the dust and ensure optimal airflow.
5. Consider Undervolting or Underclocking: Undervolting and underclocking are techniques used to reduce the power consumption and heat generation of your CPU and GPU. By slightly reducing the voltage or clock speeds, you can lower the temperatures without significant impact on performance. However, it’s essential to proceed with caution and research proper undervolting and underclocking techniques specific to your hardware.
6. Check Thermal Paste Application: The thermal paste between the CPU and the heat sink plays a crucial role in heat transfer. If the thermal paste is old or improperly applied, it can hinder heat dissipation. Consider reapplying thermal paste following the manufacturer’s instructions to ensure optimal thermal conductivity.
By addressing overheating issues, you can prevent your monitor from turning off during intensive gaming sessions. Implementing proper cooling techniques and regularly monitoring temperatures will help maintain optimal hardware performance and longevity.
Inadequate Power Supply
An inadequate power supply can be a common cause of a monitor turning off during gaming. Gaming rigs often require significant power to operate at their full potential, and if your power supply unit (PSU) doesn’t meet the power demands of your components, it can result in power-related issues. To address inadequate power supply issues, consider the following steps:
1. Determine Power Requirements: Before addressing the power supply issue, it’s essential to determine the power requirements of your components. Check the power consumption specifications of your CPU, graphics card, and other peripherals. Add up their wattage requirements to get an idea of the minimum power supply wattage you need.
2. Upgrade the Power Supply: If your current power supply is insufficient, consider upgrading to a higher wattage PSU. Look for a power supply that meets or exceeds the total power requirements of your components. A higher wattage PSU will provide the necessary power to your gaming rig, preventing power shortages that can cause the monitor to turn off.
3. Consult a Professional: If you’re unsure about choosing the right power supply or how to install it, consider seeking assistance from a professional. Computer technicians or enthusiasts can help you assess your power requirements and recommend a suitable power supply within your budget.
4. Check the Power Supply Connections: Ensure that all power supply connections are secure. Loose connections can cause power fluctuations that may lead to the monitor turning off. Check the connections at both ends of the power cables, including the PSU and the motherboard or graphics card. Reconnect any loose cables and verify that they are firmly seated in their respective sockets.
5. Calculate Power Load: Excessive power load on a PSU can also cause issues. Make sure your power supply isn’t overloaded by unnecessary peripherals or components. Remove any devices or components that are not essential for gaming to reduce the strain on the power supply.
6. Consider Power Management Settings: Adjusting power management settings in your computer’s BIOS or operating system can help optimize power distribution. For instance, you can disable power-saving features that may interfere with the performance of your gaming rig. However, keep in mind that modifying power management settings should be done cautiously, as it can impact power consumption and system stability.
Improving your power supply capabilities will provide stable and adequate power to your gaming components, preventing the monitor from turning off during intense gaming sessions. By upgrading the power supply and ensuring proper connections, you can maximize the performance and reliability of your gaming rig.
Graphics Card Problems
A faulty or outdated graphics card can be a common cause of a monitor turning off during gaming. The graphics card plays a critical role in rendering and displaying graphics, and if it encounters problems, it can lead to unexpected shutdowns. To address graphics card-related issues, consider the following steps:
1. Check Graphics Card Connections: Ensure that your graphics card is properly seated in the PCIe slot. Sometimes, the card can become slightly dislodged during transportation or heavy usage, causing connectivity issues. Remove the graphics card and reinsert it firmly into the slot to ensure a secure connection.
2. Update Graphics Card Drivers: Outdated or incompatible graphics card drivers can cause conflicts and result in the monitor turning off during gaming. Regularly update your graphics card drivers to the latest version available. Visit the manufacturer’s website or use driver update software to download and install the appropriate drivers for your graphics card.
3. Check for Overclocking Stability: Overclocking your graphics card can provide a performance boost, but it can also lead to stability issues. If you have overclocked your GPU, consider reducing the clock speeds and voltages to restore stability. Running the graphics card within manufacturer-recommended specifications can help prevent power-related problems that may cause the monitor to turn off.
4. Monitor GPU Temperatures: High temperatures can cause a graphics card to malfunction and lead to unexpected shutdowns. Monitor the temperatures of your GPU during gaming sessions to ensure they are within safe limits. Use monitoring software, such as MSI Afterburner or HWMonitor, to keep an eye on the GPU temperatures. If the temperatures consistently reach high levels, consider improving the cooling system or reducing the GPU workload.
5. Test the Graphics Card in Another System: If possible, test your graphics card in another computer to determine if the issue is specific to the card itself or related to other components in your gaming rig. If the card works fine in another system, the problem may lie elsewhere, such as the motherboard or power supply. In such cases, further investigation or professional assistance may be necessary.
6. Consider Replacing the Graphics Card: If all troubleshooting steps fail to resolve the issue, and you continue to experience the monitor turning off during gaming, it might be necessary to replace the graphics card. Consult with a reputable computer hardware expert or consider upgrading to a newer and more reliable graphics card that meets the requirements of your gaming needs.
Resolving graphics card problems can help prevent unexpected shutdowns and ensure a smooth gaming experience. By checking connections, updating drivers, monitoring temperatures, and considering necessary replacements, you can address graphics card-related issues and enjoy uninterrupted gaming sessions.
Display Driver Incompatibility
Display driver incompatibility can be a common cause of a monitor turning off during gaming. The display driver acts as a bridge between your operating system and the graphics card, allowing proper communication and rendering of graphics. If the display driver is outdated or incompatible with your gaming software, it can lead to conflicts and result in unexpected shut downs. To address display driver-related issues, consider the following steps:
1. Update Display Drivers: Regularly updating your display drivers is crucial to ensure compatibility with the latest games and software updates. Visit the website of your graphics card manufacturer (such as NVIDIA or AMD) to download and install the latest drivers for your specific graphics card model. Alternatively, you can use driver update software to simplify the process.
2. Use a Driver Removal Tool: In some cases, remnants of old display drivers may cause conflicts with newer versions. To ensure a clean installation of the updated display drivers, use a driver removal tool, such as Display Driver Uninstaller (DDU), to completely uninstall the existing drivers before installing the new ones. This can help eliminate any potential conflicting files or settings.
3. Check for Operating System Compatibility: Ensure that the display drivers you are installing are compatible with your operating system version. Different versions of Windows or other operating systems may require specific driver versions to function correctly. Verify the compatibility information provided by the graphics card manufacturer to avoid potential conflicts.
4. Disable Automatic Driver Updates: Sometimes, automatic driver updates from Windows or other software can cause issues with display drivers. If you experience problems after a driver update, you can disable automatic driver updates in the operating system settings. This allows you to manually install and control the display driver updates to avoid any unexpected incompatibilities.
5. Perform Clean Installations: When updating or reinstalling display drivers, consider performing a clean installation. This involves removing all existing drivers and associated files before installing the new ones. A clean installation can help eliminate potential conflicts and ensure a fresh start for the display drivers.
6. Roll Back Drivers: If you experience issues after updating display drivers, you can try rolling back to a previous driver version that was working correctly. Use the device manager or driver rollback feature (if available) in your operating system to revert to an older driver version. This rollback can help resolve any compatibility issues until a more stable update becomes available.
Addressing display driver incompatibility is essential to prevent unexpected shut downs and maintain a seamless gaming experience. By regularly updating display drivers, performing clean installations, and verifying compatibility, you can ensure smooth communication between your operating system, graphics card, and monitor.
Faulty Cables or Connectors
Faulty cables or connectors can be a common cause of a monitor turning off during gaming. The cables and connectors act as the communication link between your computer and the monitor, and any issues with them can disrupt the signal and result in unexpected shut downs. To address cable or connector-related issues, consider the following steps:
1. Check Cable Connections: Ensure that all cable connections are secure at both ends. Cables can become loose over time due to movement or accidental tugs. Confirm that the cables connecting your monitor to your computer, such as HDMI or DisplayPort cables, are firmly plugged in. Reconnecting any loose cables can help establish a stable connection and prevent the monitor from turning off.
2. Inspect Cables for Damage: Examine the cables for any visible signs of damage, such as fraying, bent pins, or breaks. Damaged cables can cause disruptions in the signal and lead to intermittent shut downs. If you notice any damage, consider replacing the affected cables with new ones to ensure a reliable connection.
3. Try Different Cables: In some cases, the issue may not lie with the monitor or the computer itself, but with the cables being used. To rule out cable-related problems, try using different cables to connect your monitor to the computer. If the monitor stops turning off when using different cables, it indicates that the previous cables were likely faulty or incompatible with your setup.
4. Use Quality Cables and Adapters: When choosing cables and adapters, opt for high-quality, reputable brands. Cheaper or generic cables may not provide a reliable and stable connection, increasing the risk of signal loss and monitor shut downs. Investing in quality cables and adapters can help ensure a consistent and uninterrupted gaming experience.
5. Avoid Daisy-Chaining Monitors: If you are using multiple monitors, avoid daisy-chaining them if possible. Daisy-chaining involves connecting monitors together through a single cable, which can lead to signal degradation and increased chances of monitor turning off. Instead, use separate connections for each monitor directly to the computer’s graphics card.
6. Test Different Ports or Connectors: If your computer has multiple display ports or connector options, try using different ports or connectors to narrow down the issue. Switching to another port can help determine if the problem lies with a specific port or connector on the computer or the monitor itself.
By addressing faulty cables or connectors, you can establish a reliable and uninterrupted connection between your computer and the monitor. Ensuring secure connections, inspecting for damage, using quality cables, and exploring different port options can help avoid the monitor turning off during your gaming sessions.
How to Troubleshoot and Fix Monitor Turning Off While Gaming
Experiencing the monitor turning off while gaming can be quite frustrating, but there are several troubleshooting steps you can take to identify and resolve the issue. By following these steps, you can ensure that your gaming experience remains uninterrupted:
1. Check Power and Connections: Ensure that the monitor is receiving power and that all cables connecting the monitor to the computer are securely plugged in. Verify that the power outlet is functioning correctly and try connecting the monitor to a different power source.
2. Test Another Monitor or Device: Connect a different monitor or device to your computer to determine if the issue is specific to your monitor or if it persists across different devices. If the problem is specific to your monitor, it may require further troubleshooting or potential repair.
3. Adjust Power Settings: Check your computer’s power settings to ensure that it is not set to turn off or go into sleep mode during gaming. Adjust the power plan settings to provide maximum performance and prevent the monitor from shutting off due to power-saving features.
4. Update Drivers and Firmware: Ensure that your graphics card drivers, as well as your monitor’s firmware, are up to date. Outdated drivers or firmware can lead to compatibility issues and may cause the monitor to turn off during gaming. Visit the respective manufacturer’s websites to download and install the latest updates.
5. Monitor Temperature and Cooling: Overheating can cause the monitor to shut down to protect the hardware. Monitor the temperatures of your CPU and GPU using monitoring software and ensure that your computer has adequate cooling solutions in place, such as fans or liquid cooling systems.
6. Check for Software Conflicts: Certain software programs or applications can conflict with your gaming software and result in the monitor turning off. Close any unnecessary background programs and ensure that your antivirus software is not interfering with the gaming process. Consider temporarily disabling non-essential software to see if it resolves the issue.
7. Inspect Hardware Components: Physically inspect your hardware components for any signs of damage or malfunction. Check for loose connections, damaged cables, or any visible issues with the graphics card, motherboard, or other internal components. Correcting or replacing any faulty components can help resolve the monitor turning off problem.
8. Seek Professional Assistance: If you have exhausted all troubleshooting steps and the issue persists, it may be best to seek professional assistance. Computer technicians or experts can provide a more in-depth analysis and diagnose any underlying hardware or software issues that may be causing the monitor to turn off.
By following these troubleshooting steps, you can pinpoint the cause of the monitor turning off while gaming and apply the appropriate fixes. Whether it’s adjusting power settings, updating drivers, monitoring temperatures, or seeking professional assistance, you can ensure a smooth and uninterrupted gaming experience.
Clean the Internal Components
One of the effective ways to address issues with a monitor turning off while gaming is to clean the internal components of your computer. Over time, dust and debris can accumulate inside the computer case, leading to poor airflow and overheating. Cleaning the internal components can improve airflow, prevent overheating, and ensure optimal performance. Here are the steps to clean the internal components:
1. Shut Down and Unplug: Before starting the cleaning process, make sure to shut down your computer and unplug it from the power source. This ensures your safety and prevents any potential damage to the components.
2. Open the Case: Depending on your computer case, use the appropriate method to access the internal components. This might involve removing screws or panels. Refer to your computer’s user manual or manufacturer’s guidelines for specific instructions.
3. Ground Yourself: To prevent any static discharge that could damage sensitive components, ground yourself by touching a metal object before touching any internal parts.
4. Remove Dust: Use compressed air or a soft brush to gently remove dust and debris from the internal components, including fans, heat sinks, and the power supply. Be thorough but careful not to apply too much pressure or damage any delicate components.
5. Clean the Fans: Pay special attention to cleaning the fans, as they are critical for proper airflow. Use the compressed air or a brush to remove any dust or dirt that has accumulated on the fan blades. Hold the fan still while cleaning to avoid spinning it faster than intended, which could potentially damage the fan or other components.
6. Clean the Heat Sinks: Heat sinks, typically found on the CPU and GPU, can accumulate dust, hindering their ability to dissipate heat effectively. Use compressed air or a brush to carefully clean the heat sink fins, making sure to remove any dust clinging to them.
7. Clean Filters: If your computer case has filters, such as those found on intake fans, remove them and clean them according to the manufacturer’s instructions. Dislodged or clogged filters can impede airflow and contribute to overheating.
8. Reassemble and Test: Once you have cleaned all internal components, reassemble the computer case and ensure that everything is securely in place. Plug in and power on your computer, then monitor its performance during gaming to see if the issue of the monitor turning off is resolved.
Cleaning the internal components of your computer can help improve airflow, eliminate dust-related issues, and prevent overheating that can cause the monitor to turn off during gaming. Performing regular maintenance by keeping your computer clean contributes to its overall longevity and performance.
Upgrade the Power Supply
Upgrading the power supply unit (PSU) is a recommended step to address issues with the monitor turning off while gaming. Power-hungry components, such as high-end graphics cards and processors, require an adequate and stable power supply to function optimally. If the current power supply is insufficient or unable to deliver power consistently, it can lead to the monitor shutting off. Here’s how you can upgrade the power supply:
1. Determine Power Requirements: Evaluate the power requirements of your components, including the graphics card, CPU, and other peripherals. Check the wattage requirements specified by the manufacturers. Note that a higher-end graphics card may have higher power demands. Add up the wattage requirements to determine the minimum power supply wattage needed for your system.
2. Research and Select a Suitable PSU: Familiarize yourself with reputable PSU brands and models that meet your power requirements. Consider factors like efficiency ratings, warranty, and available connectors. It’s recommended to choose a PSU with a higher wattage rating than your calculated requirements to allow for future upgrades and stability.
3. Ensure Compatibility and Size: Ensure that the dimensions and form factor of the new PSU align with your computer case and its PSU mounting location. Also, check if the new PSU has the necessary connectors to support your components, such as PCIe connectors for the graphics card and SATA connectors for storage devices.
4. Prepare for Installation: Before installing the new PSU, make sure to turn off your computer and unplug it from the power source. Take note of the existing cable connections and their corresponding locations to help with the installation of the new PSU.
5. Replace the PSU: Remove the old PSU by detaching the power cables connected to the various components, such as the motherboard, graphics card, and storage devices. Unscrew and remove the old PSU from the mounting location. Carefully install the new PSU, ensuring that it is securely in place. Connect the power cables to the appropriate components, referring to your computer’s manual if needed.
6. Cable Management: Organize the cables neatly within the computer case to improve airflow and prevent cables from obstructing the components. Use zip ties or cable management solutions to secure and route the cables properly, minimizing clutter and improving overall system aesthetics.
7. Test and Monitor: After installing the new PSU, power on your computer and monitor its performance. Check if the issue of the monitor turning off during gaming is resolved. Monitor temperatures and system stability to ensure that the new PSU is providing sufficient, stable power to your components.
Upgrading your power supply can provide your gaming rig with the necessary power to prevent the monitor from turning off during intense gaming sessions. By choosing a suitable PSU, ensuring compatibility, and following proper installation techniques, you can ensure reliable power delivery to your components and enhance your gaming experience.
Check and Update Graphics Card Drivers
Outdated or incompatible graphics card drivers can be a common cause of a monitor turning off while gaming. Graphics card drivers act as a communication bridge between the operating system and the graphics card, ensuring smooth and optimal performance. When the drivers are outdated or incompatible, conflicts may arise, leading to unexpected shut downs. Here’s how you can check and update your graphics card drivers:
1. Determine the Graphics Card Model: Identify the model of your graphics card. You can find this information in the device manager, on the graphics card box, or by checking the documentation provided with your computer or graphics card.
2. Visit the Manufacturer’s Website: Visit the website of your graphics card manufacturer, such as NVIDIA or AMD. Look for the support or driver download section of the website.
3. Find the Correct Drivers: Search for the drivers specific to your graphics card model and operating system version. Make sure to select the latest drivers available to ensure compatibility and performance improvements.
4. Download the Drivers: Download the appropriate drivers for your graphics card. Follow the instructions provided on the website to download the drivers and save them to a location on your computer where you can easily locate them.
5. Uninstall Existing Drivers: Before installing the new drivers, it’s recommended to uninstall the existing drivers. Open the device manager, locate your graphics card under the “Display Adapters” section, right-click, and select “Uninstall Device.” Follow the prompts to remove the drivers from your system.
6. Install the New Drivers: Navigate to the location where you saved the downloaded drivers and run the installer. Follow the on-screen instructions to install the new drivers. Restart your computer after the installation process is complete.
7. Verify the Driver Update: Once your computer restarts, verify that the new drivers are successfully installed. Open the device manager and check if your graphics card is listed under “Display Adapters.” Additionally, you can use third-party software, such as GPU-Z, to confirm that your drivers have been updated to the latest version.
8. Test and Monitor: After updating your graphics card drivers, test your gaming experience to see if the issue of the monitor turning off is resolved. Monitor system stability and performance during gaming sessions to ensure that the updated drivers are providing optimal performance.
Regularly checking and updating your graphics card drivers is essential for a smooth and uninterrupted gaming experience. By ensuring that you have the latest drivers installed, you can avoid conflicts, improve compatibility, and address issues that may cause the monitor to turn off during gaming.
Adjust Power Settings
Adjusting power settings on your computer can be an effective way to address the issue of the monitor turning off while gaming. Power settings control various aspects of your computer’s power management, including sleep mode, screen timeout, and power-saving features. By modifying these settings, you can prevent your monitor from turning off during intense gaming sessions. Here’s how you can adjust power settings:
1. Access Power Options: Open the Control Panel on your computer and navigate to the Power Options. Alternatively, you can right-click on the battery or power icon in the system tray and select “Power Options” from the context menu.
2. Select Power Plan: In the Power Options window, identify the power plan currently in use. There are usually three preconfigured power plans: “Balanced,” “Power Saver,” and “High Performance.” Choose the power plan that is currently active.
3. Modify the Power Plan: Click on “Change plan settings” next to the selected power plan. In the subsequent window, adjust the settings for “Turn off the display” and “Put the computer to sleep.” Set both options to “Never” to prevent the monitor and computer from automatically entering sleep or power-saving modes.
4. Advanced Power Options: For more granular control, click on “Change advanced power settings.” This will open the advanced power options dialog box, where you can fine-tune various power settings.
5. Modify Display and Sleep Settings: Within the advanced power options, expand the “Display” and “Sleep” categories. Adjust the settings to your preference, ensuring that the display remains active during gaming sessions without any interruptions.
6. Disable Hybrid Sleep: In some cases, hybrid sleep can cause issues with the monitor turning off. Within the advanced power options, navigate to “Sleep” and disable the “Hybrid Sleep” option if enabled.
7. Save Changes and Apply: Once you have made the necessary modifications, save the changes and apply the new power settings. Close the Power Options window, and the new settings will take effect immediately.
8. Test and Monitor: After adjusting the power settings, test your gaming experience to see if the issue of the monitor turning off is resolved. Monitor system stability and power consumption during gaming sessions to ensure that the adjusted power settings provide the desired results.
By customizing power settings to keep the display active during gaming sessions, you can prevent the monitor from turning off unexpectedly. Fine-tuning power options not only addresses the issue at hand but also allows you to optimize your computer’s power management for efficient performance during gaming and other activities.
Test Different Cables and Connectors
When experiencing issues with a monitor turning off while gaming, faulty cables or connectors can be the culprit. Poor or damaged connections can lead to signal loss or intermittent interruptions, resulting in the monitor shutting off. To troubleshoot this problem effectively, you can test different cables and connectors. Here’s how:
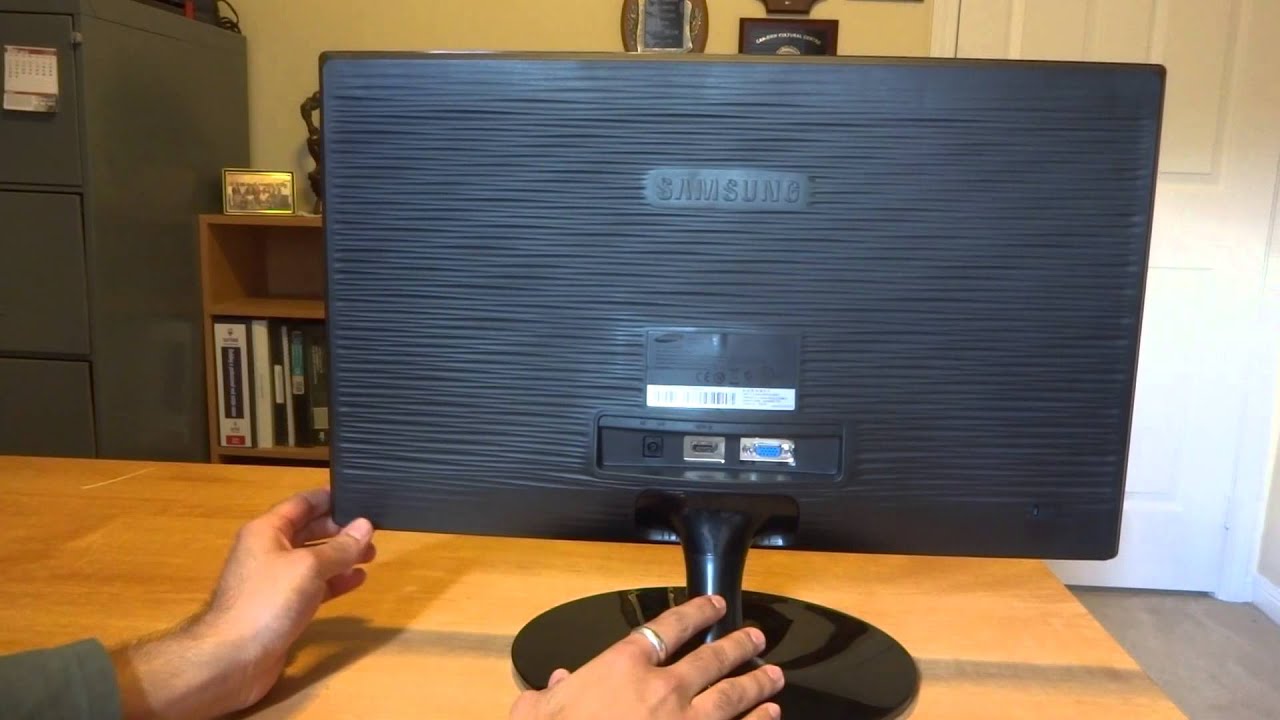
1. Identify the Cables and Connectors: Take note of the cables and connectors used to connect your computer to the monitor. Common interface options include HDMI, DisplayPort, DVI, and VGA. Identify the cables and connectors involved in the setup.
2. Check for Physical Damage: Inspect the cables and connectors for any visible signs of damage, such as bent pins, frayed wires, or broken connectors. Damage to any part of the cable or connector can cause connection issues and lead to the monitor turning off. If you find any damage, replace the affected cables or connectors.
3. Securely Reconnect Existing Cables: Sometimes, loose connections can be the cause of the problem. Ensure that all cables and connectors are firmly plugged into their respective sockets. Disconnect and reconnect each cable, making sure they are securely attached.
4. Swap Cables: If possible, try using different cables of the same type to connect your computer to the monitor. For example, if you are using an HDMI cable, try replacing it with another HDMI cable. This step helps determine whether the issue lies with the specific cable or connector being used.
5. Test Different Connectors: If multiple display connectors are available on your computer (e.g., HDMI, DisplayPort, VGA), try connecting the monitor using a different connector. This helps determine if the issue is related to a specific connector on the graphics card or the monitor.
6. Secondary Monitor Test: If you have access to another monitor, connect it to your computer using the same cables and connectors. This allows you to test whether the problem persists across different monitors, indicating whether the issue lies with the cables, connectors, or the primary monitor itself.
7. Replace Faulty Cables or Connectors: If testing different cables and connectors confirms that a specific cable or connector is the source of the problem, it is recommended to replace the faulty component. Purchase high-quality cables or connectors from reputable manufacturers to ensure reliable and stable connections.
8. Monitor Symptoms During Testing: During the testing phase, pay attention to any symptoms exhibited by the monitor, such as flickering, intermittent blackouts, or error messages. These symptoms can provide additional insights into the cause of the issue.
By systematically testing different cables and connectors, you can identify and resolve any issues related to faulty connections. Whether it’s securing existing connections, swapping cables, or testing different connectors, this troubleshooting approach can help determine the root cause of the monitor turning off during gaming.
Conclusion
Experiencing your monitor turning off while gaming can be frustrating, but there are several common causes and troubleshooting steps that can help you resolve the issue. Overheating, inadequate power supply, graphics card problems, display driver incompatibility, faulty cables or connectors – these are all potential factors that can contribute to the problem. By understanding these causes, you can take appropriate actions to address them.
It is important to ensure that your computer is well-ventilated, with proper cooling mechanisms in place, to prevent overheating. Upgrading your power supply unit (PSU) to meet the power demands of your components can provide stable power delivery and prevent the monitor from turning off. Checking and updating your graphics card drivers, as well as resolving any display driver incompatibilities, are crucial steps to ensure compatibility and stable performance.
Faulty cables or connectors can disrupt the signal and cause intermittent shutdowns. Testing different cables and connectors, and replacing them if necessary, can help rectify the issue. Cleaning the internal components of your computer to remove dust and debris is another important step to maintain optimal performance and prevent overheating.
Following these troubleshooting steps will help you identify the root cause and resolve the issue of the monitor turning off while gaming. It is essential to monitor the system’s performance, test different configurations, and seek professional assistance if needed to ensure a seamless and uninterrupted gaming experience.
Remember to always prioritize safety by turning off and unplugging your computer before performing any maintenance or hardware-related tasks. Additionally, consider consulting relevant manuals, manufacturer guidelines, or seeking assistance from professionals when necessary.
By addressing the specific causes of the monitor turning off while gaming and implementing the appropriate solutions, you can enjoy a reliable and immersive gaming experience without interruptions.


