Introduction
Welcome to this comprehensive guide on how to effectively use the Da Vinci Jr. 3D Printer. Whether you are a beginner or an experienced 3D printing enthusiast, this manual will take you through each step of the process, from setting up the printer to creating amazing prints.
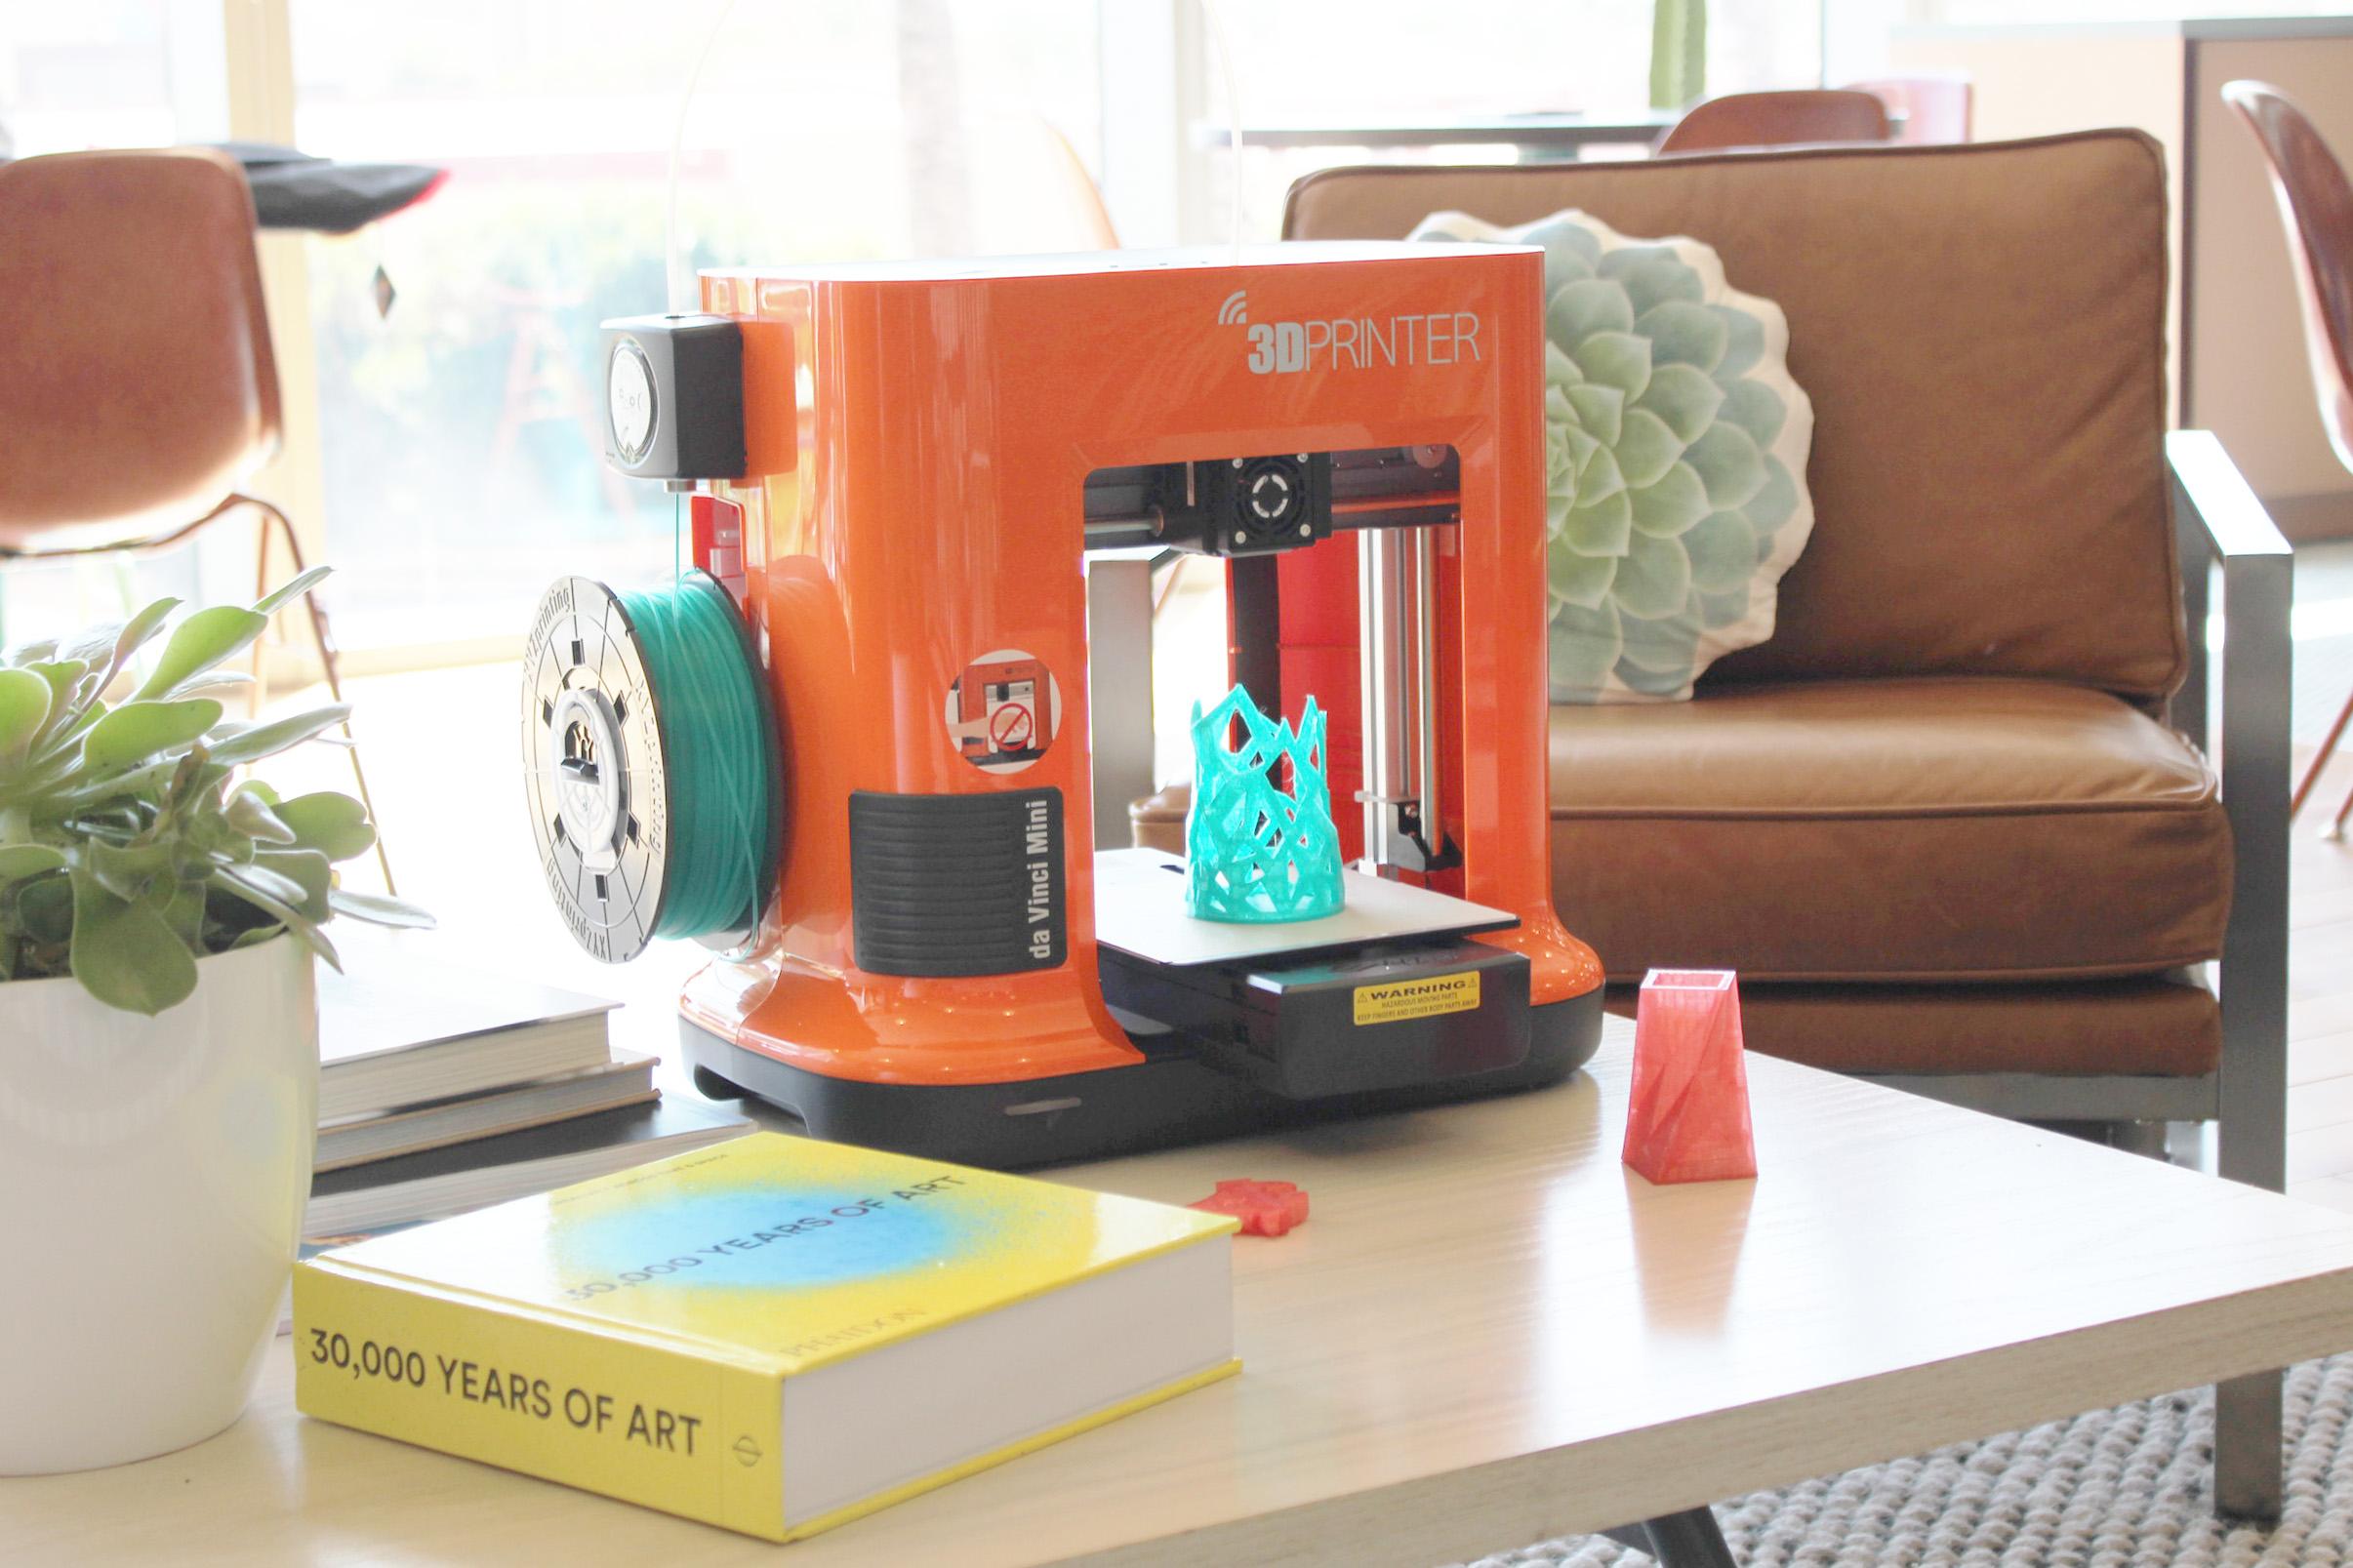
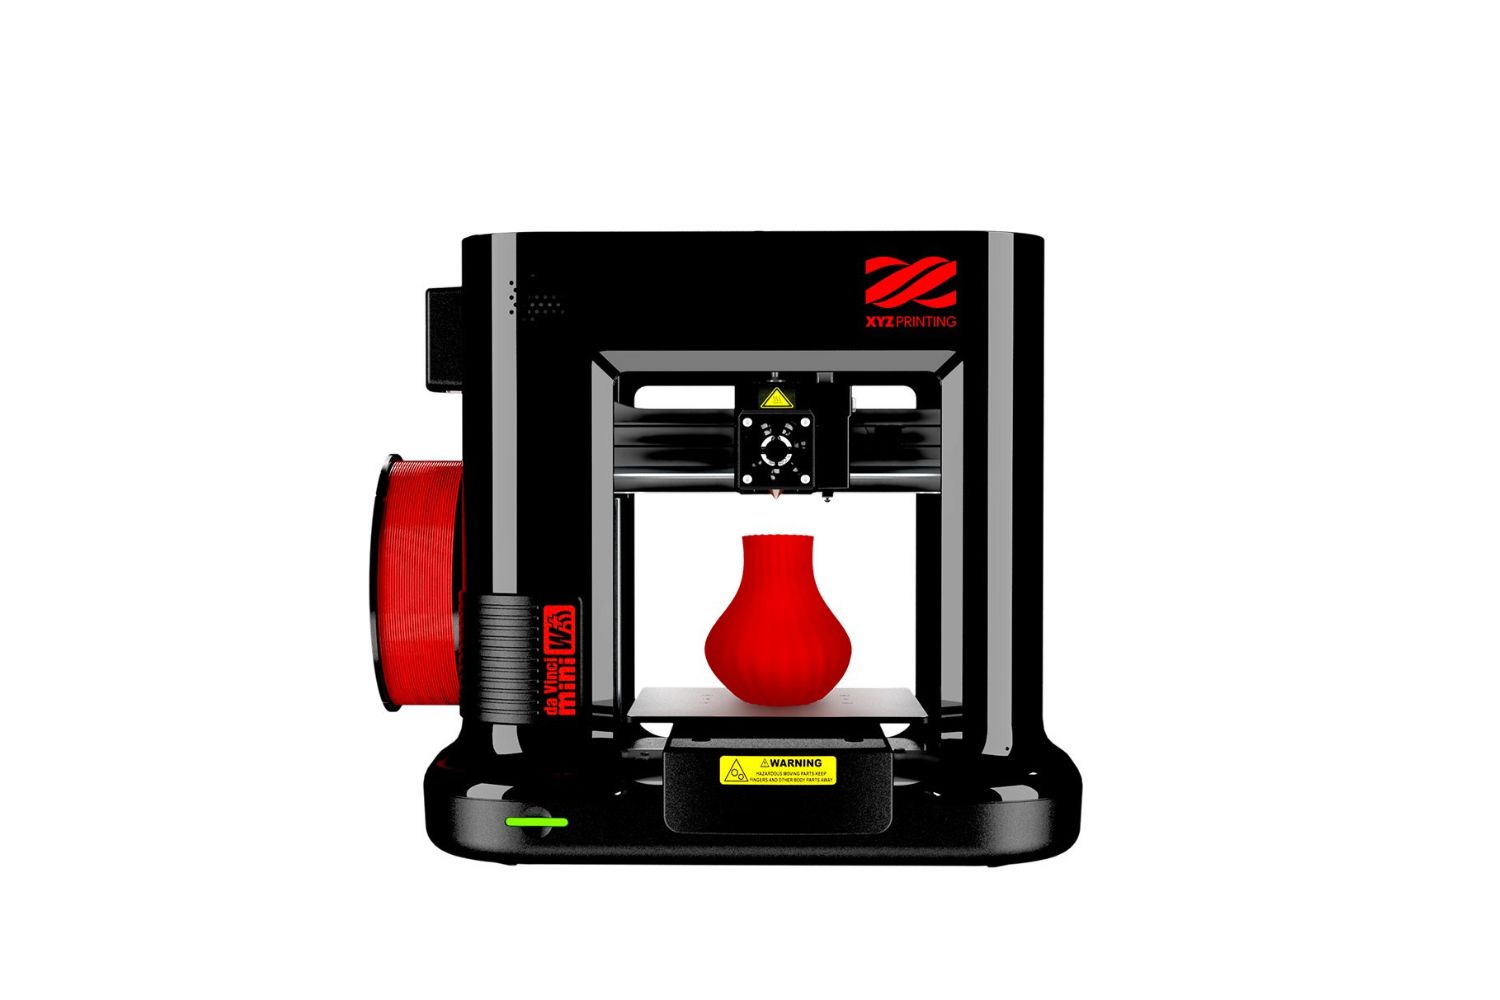
The Da Vinci Jr. 3D Printer is a user-friendly and affordable option for anyone interested in exploring the world of 3D printing. With its compact size and intuitive features, it’s perfect for home use, educational institutions, and small businesses.
In this guide, we will cover everything you need to know to get started with your Da Vinci Jr. 3D Printer. You will learn how to unpack and set up the printer, navigate the control panel, load filament, level the print bed, and calibrate the printer for optimal performance.
Additionally, we will explore the process of choosing a 3D design to print, importing the design into XYZware (the software provided by Da Vinci), and adjusting the print settings to achieve the desired results.
If you encounter any issues along the way, we’ve got you covered. This guide includes a troubleshooting section that addresses common problems and provides solutions to ensure smooth printing experiences.
Finally, we will also provide maintenance and cleaning tips to help you keep your Da Vinci Jr. 3D Printer in top condition for years to come. By following these guidelines, you can maximize the lifespan of your printer and consistently produce high-quality prints.
So, without further ado, let’s dive into the world of 3D printing with the Da Vinci Jr. 3D Printer. Get ready to unleash your creativity and bring your ideas to life!
Getting Started
Before we jump into the technical aspects of using the Da Vinci Jr. 3D Printer, let’s cover a few essential things to get you started on the right foot.
The first step is to ensure you have all the necessary components. When you unpack your Da Vinci Jr. 3D Printer, you should find the printer itself, a power cord, a USB cable, a filament spool, and a quick-start guide. Make sure you have everything before proceeding.
Next, find a suitable location for your printer. It should be placed on a stable surface with plenty of ventilation. Avoid placing it near heat sources or in direct sunlight, as extreme temperatures can affect the print quality.
Once you have a dedicated spot for your printer, it’s time to connect the power and turn it on. Plug the power cord into the printer and then into a wall outlet. Press the power button to start the printer.
Now, you need to connect the printer to your computer. Take the USB cable provided and plug one end into the printer’s USB port and the other end into a USB port on your computer. This connection will allow you to transfer 3D designs from your computer to the printer.
In the next section, we will dive into the unpacking process and setting up the Da Vinci Jr. 3D Printer. It’s important to follow the manufacturer’s instructions carefully to ensure proper installation and avoid any potential issues.
Remember, getting started with 3D printing can be an exciting journey, but it’s important to be patient and take things one step at a time. Understanding the basics and following the instructions will lay a solid foundation for your 3D printing adventures.
Unpacking the Da Vinci Jr. 3D Printer
When you receive your Da Vinci Jr. 3D Printer, the first step is unpacking it. Carefully remove the printer from the packaging materials and place it on a clean surface. Make sure to handle the printer with care, as it contains delicate components that need to be protected.
Once the printer is out of the box, check for any visible signs of damage. Inspect the outer casing, print bed, and all other components to ensure everything is in good condition. If you notice any damage, contact the manufacturer or retailer immediately for assistance.
Now, let’s take a closer look at the components included with the printer:
- The Printer: This is the main unit that houses all the necessary parts for 3D printing.
- Power Cord: The power cord connects the printer to a power source.
- USB Cable: This cable is used to connect the printer to your computer for file transfer.
- Filament Spool: The filament spool contains the material used for printing.
- Quick-Start Guide: This guide provides step-by-step instructions for setting up the printer.
It’s important to read the quick-start guide thoroughly before proceeding with the setup process. The guide will outline all the necessary steps and precautions you need to take to ensure a successful setup.
In addition to the components mentioned above, make sure you have a computer with the required specifications to run the printer software. This information can be found in the quick-start guide or on the manufacturer’s website.
By carefully unpacking the Da Vinci Jr. 3D Printer and familiarizing yourself with the components, you are taking the first step towards bringing your 3D printing projects to life. In the next section, we will cover the setup process in detail to ensure you are ready to start printing.
Setting Up the Printer
Now that you have unpacked the Da Vinci Jr. 3D Printer, it’s time to set it up for printing. Follow the step-by-step instructions below to ensure a smooth setup process.
- Place the Printer: Find a stable surface to place your printer. Avoid areas with high levels of dust or direct sunlight. Ensure there is enough space for the printer to operate effectively without any obstructions.
- Connect the Power: Plug the power cord into the printer’s power socket and then into a wall outlet. Make sure the power source is stable and grounded to avoid any electrical issues during operation.
- Turn on the Printer: Press the power button to turn on the printer. You should see the control panel light up, indicating that the printer is now ready for use.
- Install Filament: Open the filament loading compartment located on the side of the printer. Insert the filament spool, ensuring it is securely placed on the filament holder. Thread the filament through the guide tube until it reaches the extruder.
- Feed Filament: On the control panel, select the “Filament” option and then choose “Load Filament.” Follow the on-screen prompts to feed the filament into the extruder. This process will ensure that the filament is properly loaded and ready for printing.
- Level the Print Bed: Leveling the print bed is crucial for successful prints. Use the control panel options to access the bed leveling function. Follow the instructions provided to adjust the screws or knobs on the print bed until it is level.
- Calibrate the Printer: Calibrating the printer is essential to ensure accurate printing. Use the control panel to access the calibration settings and follow the on-screen instructions to align the printer’s components.
- Install Software: Download and install the XYZware software from the manufacturer’s website. This software will allow you to import, prepare, and send your 3D designs to the printer for printing.
- Connect to Computer: Connect the printer to your computer using the provided USB cable. This connection will enable you to transfer 3D designs from your computer to the printer.
Once you have completed these setup steps, your Da Vinci Jr. 3D Printer is ready to bring your 3D designs to life. In the next section, we will explore the control panel and its functions, allowing you to navigate through the printer’s settings with ease.
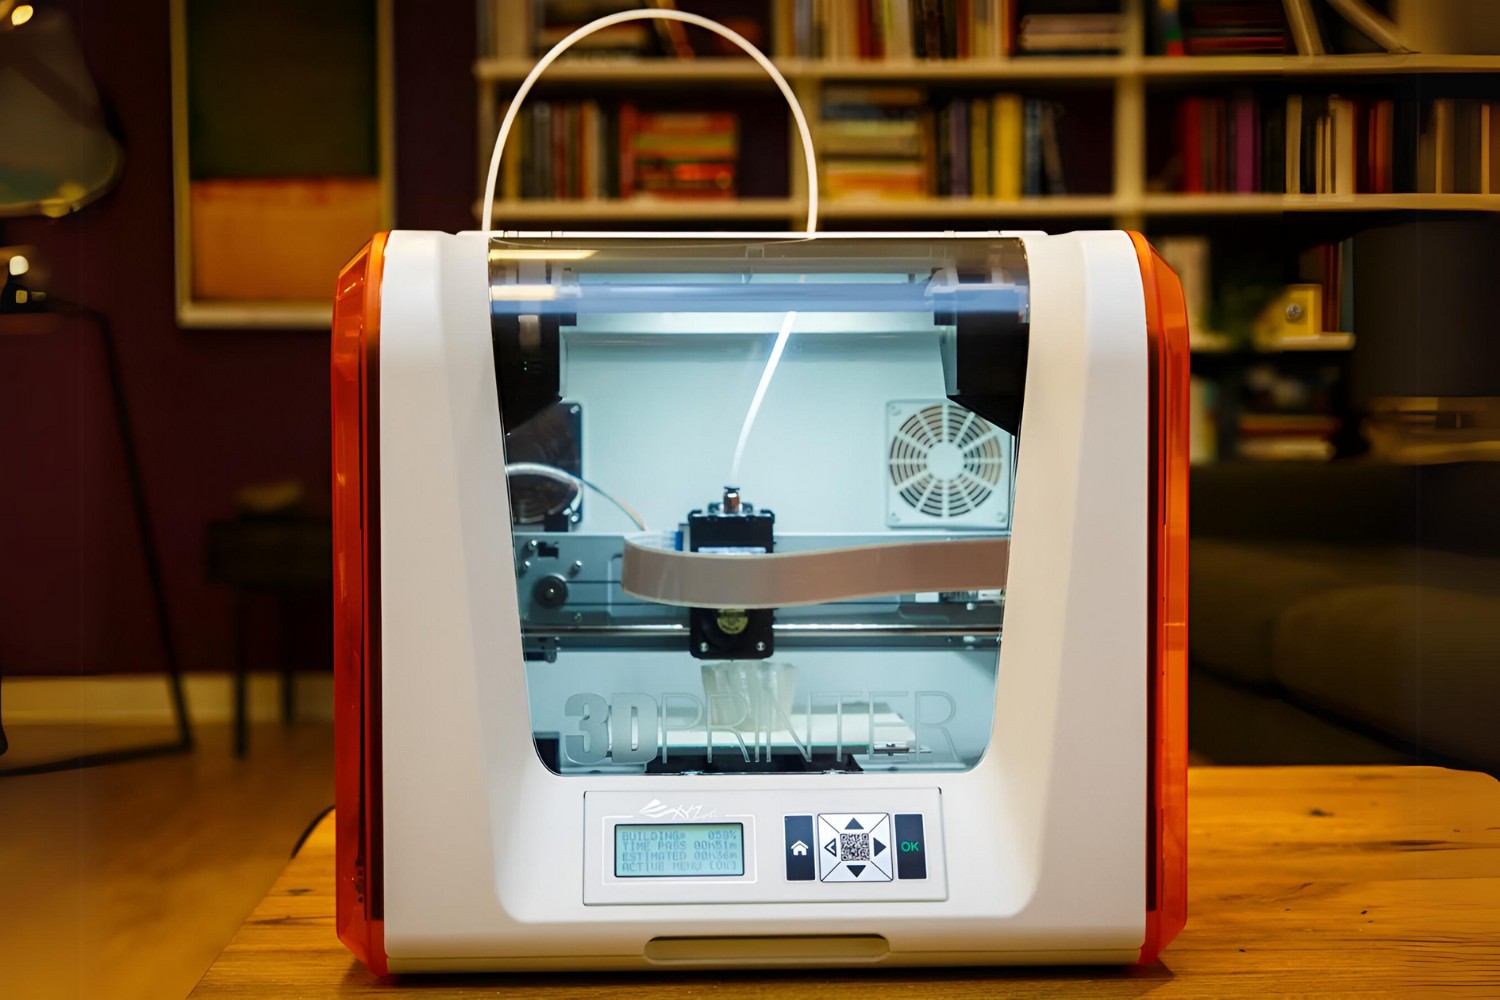
Understanding the Control Panel
The control panel of the Da Vinci Jr. 3D Printer is where you can access and adjust various settings and functions to control your printing experience. Familiarizing yourself with the control panel will enable you to navigate through the options seamlessly. Let’s take a closer look at the different elements on the control panel:
- Display Screen: The display screen provides a visual interface for accessing and adjusting settings. It shows important information such as the printer’s status, progress of the print job, and menu options.
- Navigation Buttons: These buttons allow you to scroll through menu options and select different settings. Use the up, down, left, and right buttons to navigate through the control panel menu.
- Home Button: The home button brings you back to the main screen, serving as a quick way to exit menus and return to the default display.
- OK Button: The OK button allows you to confirm selections or actions, such as choosing a specific print option or starting a print job.
- Cancel Button: The cancel button is used to cancel a current operation or navigate back to the previous screen.
- Settings Menu: The settings menu provides access to various printer settings, such as temperature control, filament loading, bed leveling, and calibration.
- Print Jobs: In the print jobs menu, you can view and select your desired 3D design files for printing. This is where you can import and manage your print jobs.
Navigating through the control panel is intuitive, using the buttons to scroll and select options. The display screen will guide you through each step, providing clear instructions and visual cues.
Understanding the control panel is crucial for managing your prints efficiently. Spend some time familiarizing yourself with the different buttons and menu options. This will give you the confidence to explore and make adjustments to optimize your 3D printing experience.
In the next section, we will discuss the process of loading filament into the printer, which is an important step in preparing for successful 3D prints.
Loading Filament
Properly loading filament into your Da Vinci Jr. 3D Printer is essential for successful and accurate prints. Follow the step-by-step instructions below to ensure that filament is loaded correctly:
- Locate the Filament Loading Compartment: The filament loading compartment is usually located on the side of the printer. Open the compartment by gently pushing the lever or pressing the release button.
- Prepare the Filament Spool: Take the filament spool and ensure that it is free from any tangles or knots. Place the spool on the filament holder, making sure it is secure and properly aligned.
- Thread the Filament: Guide the loose end of the filament through the guide tube until it reaches the extruder on the printer’s print head. You may need to gently push the filament into the tube to help it advance smoothly.
- Feed the Filament into the Extruder: On the control panel of the printer, navigate to the filament options and select “Load Filament.” Follow the on-screen instructions to begin the filament loading process.
- Monitor the Extrusion: As the filament is being loaded, keep a close eye on the extruder nozzle. You should start to see melted filament extruding from the nozzle. Once a steady flow of filament is observed, you can proceed to the next step.
- Complete the Filament Loading: When the filament is extruding smoothly without any irregularities, use the control panel to stop the loading process. The filament is now loaded and ready for printing.
It is important to note that for each new filament spool, you will need to follow these steps to load the filament into the printer. This ensures that the printer is properly primed and ready to produce high-quality prints.
Remember to always use compatible filament that is recommended by the manufacturer for optimal performance and compatibility with your Da Vinci Jr. 3D Printer.
With the filament successfully loaded, you are now ready to move on to the next step—leveling the print bed. This crucial step ensures proper adhesion and accuracy in your 3D prints. We will cover this process in detail in the next section.
Leveling the Print Bed
Leveling the print bed is a crucial step in achieving successful 3D prints with your Da Vinci Jr. 3D Printer. A leveled bed ensures proper adhesion of the printed object and accurate layering. Follow the steps below to level the print bed:
- Access the Bed Leveling Option: Using the control panel, navigate to the settings menu and locate the bed leveling option. Select it to initiate the leveling process.
- Adjust the Screws or Knobs: The printer will display specific instructions guiding you through the leveling process. You will need to make adjustments to the screws or knobs located on each corner of the print bed. Follow the on-screen instructions to tighten or loosen the screws until the print bed is level.
- Use the Provided Tools: Some printers come with leveling tools, such as an Allen wrench or a small leveling card. These tools can be used to ensure accurate leveling by measuring the distance between the print nozzle and the print bed. Follow the instructions provided to make precise adjustments.
- Check the Bed Level in Different Areas: It is important to check the levelness of the print bed in multiple areas. Pay close attention to each corner and the center of the bed. This will ensure that the entire bed is properly leveled, providing consistent print quality across the entire surface.
- Repeat the Leveling Process: Leveling the print bed is not a one-time task. It is recommended to periodically check and re-level the bed, especially if you notice any inconsistencies in print quality or bed adhesion. Regular maintenance will help maintain optimal printing conditions.
Properly leveled print bed is crucial for successful 3D printing. It ensures that the first layer of your print adheres evenly to the bed, preventing warping or lifting during the printing process.
With your print bed leveled, you are now ready to move on to the next step—calibrating the printer. Calibration ensures that the printer’s components are properly aligned, resulting in accurate and precise prints. We will cover the calibration process in the next section.
Calibrating the Printer
Calibrating your Da Vinci Jr. 3D Printer is an important step to ensure accurate and precise prints. Calibration involves aligning the printer’s components to optimize its performance. Follow the steps below to calibrate your printer:
- Access the Calibration Option: Using the control panel, navigate to the settings menu and locate the calibration option. Select it to initiate the calibration process.
- Follow On-Screen Instructions: The printer will provide clear instructions on the screen for each step of the calibration process. It may involve adjusting the X-axis, Y-axis, or Z-axis, depending on your specific printer model.
- Make Precise Adjustments: Use the provided tools, such as an Allen wrench or the calibration card, to make precise adjustments to the printer’s components. Follow the instructions on the screen to ensure maximum accuracy.
- Test Printing: Once the calibration process is complete, it is recommended to perform a test print. Choose a simple design and start the print job. Examine the print quality and check for any inaccuracies or misalignments. Fine-tune the calibration if necessary.
- Repeat Calibration As Needed: Calibration is not a one-time task. Over time, as the printer’s components may shift or wear, it is important to periodically recalibrate your printer. This will maintain optimal printing performance and ensure consistent print quality.
Correct calibration is crucial for producing accurate and precise prints. It minimizes the chances of misaligned layers, warped prints, or other common printing issues. By following the calibration process, you can fine-tune your printer’s settings to achieve the best possible print results.
Remember, the calibration process may vary depending on your specific printer model. Consult the user manual or the manufacturer’s website for detailed instructions tailored to your printer.
With proper calibration, you are now ready to move on to the exciting part—choosing 3D designs to print. In the next section, we will explore the process of choosing and importing designs into XYZware, the software used by the Da Vinci Jr. 3D Printer.
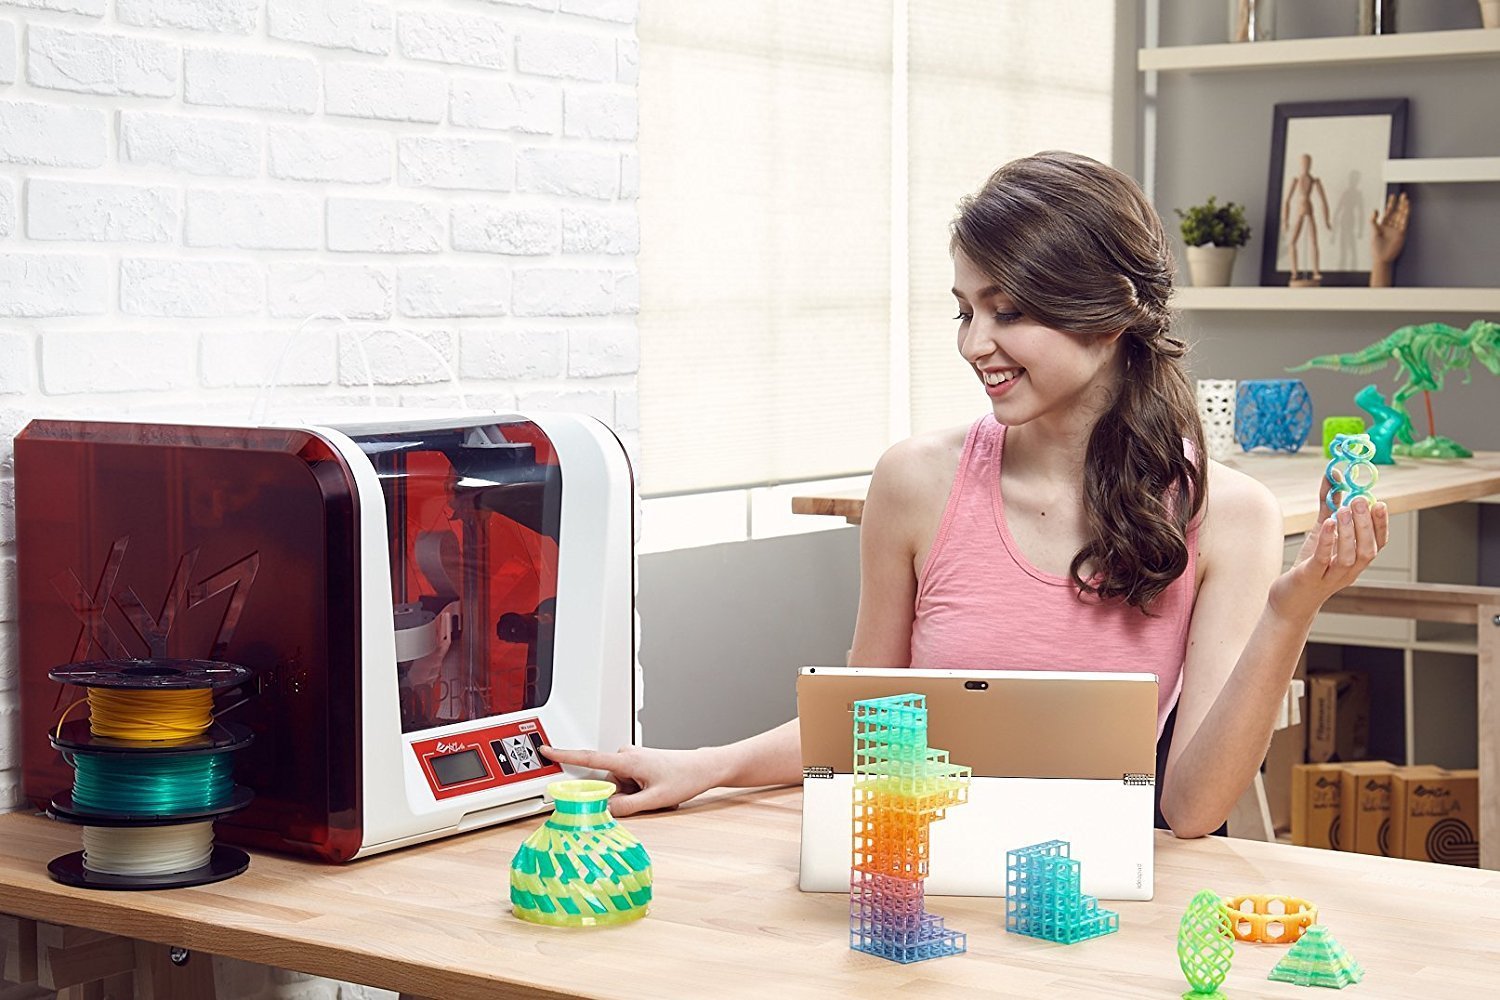
Choosing a 3D Design to Print
Now that your Da Vinci Jr. 3D Printer is calibrated and ready to go, it’s time to choose a 3D design to bring to life. With a wide range of options available, you can let your creativity soar. Here’s a step-by-step guide to help you choose the perfect design:
- Browse Online Repositories: There are various online platforms and repositories where you can find a plethora of 3D printable designs. Popular websites such as Thingiverse, MyMiniFactory, and Cults3D offer a vast collection of free and paid designs for you to choose from.
- Use Design Software: If you have experience or want to create your own 3D designs, you can use design software such as Tinkercad, Fusion 360, or Blender to bring your ideas to life. These software options allow you to create custom designs or modify existing ones to suit your preferences.
- Consider your Interests: Think about your interests and hobbies. Whether it’s figurines, home decor, useful gadgets, or educational models, choosing designs that reflect your passions will make the printing process more enjoyable and fulfilling.
- Check for Printability: Before selecting a design, pay attention to its printability. Look for designs that have been tested and validated by other users. Read reviews and comments to ensure that the design is suitable for your printer and won’t require extensive modifications.
- Download or Purchase the Design: Once you have found the perfect design, either download it for free or purchase it through the provided platform. Make sure to save the file in a compatible format, such as .STL or .OBJ, which can be imported into your printer software.
Remember, the size and complexity of the design will impact the printing time and required printer settings. Start with simpler designs to familiarize yourself with the printing process, and gradually move on to more complex projects as you gain experience.
Choosing a 3D design is an opportunity to unleash your imagination and showcase your personal creativity. With a vast array of options available, you’re sure to find designs that excite and inspire you.
In the next section, we will explore the process of importing your chosen design into XYZware, the software provided by Da Vinci, to prepare it for printing.
Importing the Design to XYZware
Now that you have chosen a 3D design to print, it’s time to import it into XYZware, the software provided by Da Vinci, to prepare the design for printing. Follow the steps below to import your chosen design:
- Launch XYZware: Open the XYZware software on your computer. If you haven’t installed it yet, download it from the manufacturer’s website and follow the installation instructions.
- Create a New Project: In XYZware, create a new project by selecting the appropriate option or navigating to the file menu. This will open a blank canvas where you can import and prepare your 3D design.
- Import the Design File: Locate the 3D design file you downloaded or created earlier. Use the import function in XYZware to select and load the file into your project. The software should support common file formats like .STL or .OBJ.
- Manipulate the Design: Depending on your preferences and requirements, you can use XYZware’s tools to manipulate and optimize the design. This includes resizing, rotating, or scaling the design to fit the print bed or to achieve the desired orientation.
- Position the Design on the Print Bed: Arrange the design on the virtual print bed within XYZware. Make sure it is positioned correctly and that it does not exceed the printing limits of your Da Vinci Jr. 3D Printer.
- Apply Print Settings: XYZware provides various options to customize the print settings according to your preferences. Adjust parameters such as layer height, printing speed, infill density, and support structures, if needed. These settings affect the final print quality and durability.
- Slice the Model: Once satisfied with the design and print settings, use XYZware’s slicing function to convert the digital model into a set of instructions that the 3D printer can understand. This process breaks down the design into layers and generates the toolpath for the printer to follow.
- Transfer the Sliced File to the Printer: Save the sliced model as a printable file format, such as .3w or .gcode, and transfer it to your Da Vinci Jr. 3D Printer. You can use an SD card, USB connection, or Wi-Fi capabilities, depending on your printer model.
By following these steps, you can import, optimize, and prepare your chosen 3D design for printing using XYZware. The software provides essential tools and settings to ensure that your design is ready to be transformed into a physical object.
In the next section, we will explore the process of adjusting print settings, allowing you to fine-tune the parameters to achieve the desired print results.
Adjusting Print Settings
When preparing to print your chosen design on the Da Vinci Jr. 3D Printer, it is important to adjust the print settings to achieve the desired results. Fine-tuning these parameters can significantly impact the quality, speed, and durability of your prints. Follow the steps below to adjust the print settings:
- Layer Height: One of the most critical settings is the layer height, which determines the thickness of each printed layer. Choosing a smaller layer height generally results in higher print quality but can increase print time. Consider the level of detail required for your design and adjust the layer height accordingly.
- Printing Speed: Adjusting the printing speed can impact both print quality and print time. Higher speeds may sacrifice some quality but may be appropriate for less complex designs or quick prototypes. Slower speeds can improve accuracy and reduce the risk of errors, especially for intricate designs.
- Infill Density: The infill density determines the amount of material used to fill the inside of the printed object. A higher infill density provides more strength and durability, but it also increases print time and material usage. Consider the intended purpose of your print and adjust the infill density accordingly.
- Support Structures: Some designs may require support structures to ensure successful printing. Support structures provide temporary scaffolding to hold up overhanging or unsupported parts during the printing process. Enable support structures when necessary to achieve accurate prints, and remember to remove them once the print is complete.
- Printing Temperature: The recommended printing temperature may vary depending on the filament material used. It is crucial to set the temperature according to the manufacturer’s guidelines to achieve successful prints. Make sure to monitor the temperature during the print process to avoid any issues or melting filament.
- Other Advanced Settings: Depending on your printer model and the specifics of your design, there may be additional advanced settings available. These settings can include print bed temperature, cooling fan speed, retraction settings, and more. Experiment with these settings to achieve the best results for your specific project.
It is important to note that finding the optimal print settings may require some trial and error. Don’t hesitate to make adjustments and test print small sections to evaluate the results before committing to a full-scale print.
By adjusting these print settings, you can optimize your print job for quality, speed, and functionality. Remember to strike a balance between these factors to achieve the desired outcome within a reasonable printing time.
In the next section, we will explore the process of printing the design on your Da Vinci Jr. 3D Printer, bringing your creation to life in physical form.
Printing the Design
After adjusting the print settings to your satisfaction, it’s time to bring your design to life by printing it on your Da Vinci Jr. 3D Printer. Follow the steps below to successfully print your design:
- Prepare the Printer: Ensure that the printer is powered on and that the print bed is clean and properly leveled. Make sure that the filament is loaded and ready for printing.
- Transfer the Print File: If you saved the sliced model to an external storage device, such as an SD card, insert it into the appropriate slot on your printer. Alternatively, if your printer is connected to your computer via USB or Wi-Fi, transfer the print file directly to the printer.
- Select the Print File: On the printer’s control panel, navigate to the print jobs or print file menu. Select the desired print file that corresponds to your design.
- Adjust Additional Settings: If necessary, make any final adjustments to the printing temperature, speed, or other specific settings directly on the printer’s control panel.
- Start the Print: Once you have confirmed the print settings, initiate the printing process by pressing the print button on the control panel. The printer will begin the printing process by heating the print head and extruding the filament.
- Monitor the Print: While the printer is in operation, it is essential to monitor the progress to ensure that everything is going smoothly. Check for any signs of filament jams, layer misalignments, or other issues that may arise.
- Allow the Print to Finish: Depending on the complexity and size of your design, the printing process can take varying amounts of time. It is important to let the printer complete the entire print job without interruption. Avoid opening the printer or removing the object until it has completely cooled down.
- Remove the Print: Once the print is finished and the object has cooled down, carefully remove it from the print bed. Use a spatula or other appropriate tools to gently detach the print from the bed, taking care not to damage the object or the printer.
Congratulations! You have successfully printed your design using the Da Vinci Jr. 3D Printer. Take a moment to admire your creation and evaluate the print quality. If it meets your expectations, you can proceed to post-processing or using the object for its intended purpose.
If the print didn’t turn out as expected, don’t be discouraged. 3D printing is a continual learning process, and adjustments may be required for optimal results. Take note of any issues or imperfections and revisit the design or print settings to refine your future prints.
In the next section, we will address common troubleshooting issues that you may encounter during the 3D printing process and provide solutions to help overcome them.
Troubleshooting Common Issues
While 3D printing can be a rewarding experience, it is not uncommon to encounter certain issues along the way. Here are some common problems that you may face during the printing process and their possible solutions:
- Poor Adhesion: If your print does not stick properly to the print bed, ensure that the bed is leveled correctly. Additionally, consider applying adhesive solutions like hairspray or glue stick to improve bed adhesion. Adjusting the print bed temperature or using a different print surface, such as a heated bed or specialized adhesion sheets, can also help.
- Extrusion Issues: If you notice inconsistent extrusion or gaps in your print, check your filament feed tube and nozzle for any obstructions. Clean them thoroughly and ensure that the filament is properly loaded and feeding smoothly. Adjusting the extrusion temperature and flow rate settings can also help in resolving extrusion issues.
- Warped Prints: Warping occurs when the edges or corners of your print lift or curl during the printing process. To minimize warping, ensure that your print bed is clean and properly leveled. Applying a heated bed and/or using a brim or raft can also help improve adhesion and prevent warping.
- Stringing and Overhangs: Stringing refers to thin strands of filament appearing between sections of your print. To lessen this issue, consider adjusting the retraction settings in your printer software. Additionally, enabling support structures for overhangs can improve print quality by providing temporary scaffolding.
- Layer Misalignment: If you notice visible gaps or shifts between layers, check that your printer’s belts and pulleys are properly tensioned. Additionally, ensure that all of the printer’s components are securely fastened. Calibrating the printer and adjusting the print speed or acceleration settings may also help in reducing layer misalignment.
- Print Quality: If you’re not satisfied with the overall print quality, consider adjusting the print settings such as layer height, printing speed, temperature, and infill density. Experimenting with different settings and optimizing them for your specific model and filament type can lead to superior print results.
Remember, troubleshooting is often a process of trial and error. Take note of the specific issue you’re facing and try one solution at a time. Make gradual adjustments and test prints to evaluate the impact of each change on the final outcome.
If you encounter persistent or complex issues, consult the manufacturer’s documentation, online support communities, or seek assistance from experienced users. They can provide valuable insights and suggestions specific to your printer model and situation.
In the next section, we will provide some maintenance and cleaning tips to help you keep your Da Vinci Jr. 3D Printer in optimal condition.
Maintenance and Cleaning Tips
Maintaining and cleaning your Da Vinci Jr. 3D Printer regularly is essential for its longevity and optimal performance. Here are some maintenance and cleaning tips to keep your printer in top condition:
- Regularly Clean the Print Bed: After each print, clean the print bed thoroughly to remove any debris or residual filament. Use isopropyl alcohol or a mild detergent to clean the surface, ensuring it is free from any adhesive residue or dirt that may affect print quality and bed adhesion.
- Clean the Nozzle and Extruder: Over time, the nozzle and extruder may accumulate filament residues or clogs. Heat the nozzle to the recommended temperature and carefully remove any accumulated debris using a small brush or needle. Be cautious not to damage the nozzle or other delicate components in the process.
- Inspect and Tighten Components: Regularly inspect all components of your printer, including screws, belts, pulleys, and connectors. Ensure that they are securely fastened and in good condition. Loose components can impact print quality and accuracy.
- Firmware and Software Updates: Check for firmware and software updates regularly from the manufacturer’s website or official sources. Installing the latest updates can provide performance improvements, bug fixes, and additional features for your printer.
- Keep Filament Stored Properly: Proper storage of filament is crucial to maintain its quality and prevent moisture absorption. Store filament in sealed containers with desiccant packets to keep it dry and free from humidity. Avoid exposure to direct sunlight or extreme temperature fluctuations.
- Grease Moving Parts: Apply a small amount of lubricant or grease to the moving parts of your printer, such as rods, bearings, and gears. This helps to reduce friction and ensures smooth and accurate movements during the printing process.
- Keep the Printer Dust-Free: Regularly clean the exterior of your printer to remove any dust or dirt that may accumulate. Use a soft, lint-free cloth or compressed air to gently wipe or blow away any debris. This helps prevent dust from entering the printer and potentially affecting print quality and performance.
- Follow Usage Guidelines: Adhere to the manufacturer’s guidelines and recommendations for operating your printer. Avoid exceeding the recommended print speed, temperature range, or other specified limits. Operating the printer within its designated parameters helps ensure reliable and safe operation.
By following these maintenance and cleaning tips, you can extend the lifespan of your Da Vinci Jr. 3D Printer and maintain consistent print quality. Regular upkeep and care contribute to a smooth and reliable printing experience for years to come.
In the next section, we will conclude this guide with a summary of the key points covered and encourage you to unleash your creativity and enjoy the exciting world of 3D printing!
Conclusion
Congratulations on completing this comprehensive guide on how to use the Da Vinci Jr. 3D Printer! Throughout this manual, we have covered the essential steps, tips, and troubleshooting methods to help you get started with 3D printing and achieve successful prints.
We began by unpacking the printer and setting it up, ensuring that all components were in good condition and correctly installed. We then explored the control panel and its functions, allowing you to navigate through the printer’s settings with ease.
Loading filament and leveling the print bed were vital steps in preparing for successful prints. By following the provided instructions, you can ensure proper adhesion and accurate layering in your prints.
We then delved into the process of choosing a 3D design, importing it into XYZware, and adjusting print settings to achieve the desired results. These steps allowed you to personalize and optimize your prints according to your preferences and project requirements.
Additionally, we discussed common troubleshooting issues that you may encounter during the printing process and provided solutions to help overcome them. It is essential to remain patient and persistent when troubleshooting to achieve the best possible results.
To maintain the longevity and optimal performance of your printer, we provided maintenance and cleaning tips. Regular cleaning, inspection, and proper storage of filament can contribute to a smooth and reliable printing experience.
With the knowledge and skills acquired from this guide, you are now empowered to unleash your creativity and embark on exciting 3D printing projects. Whether you are a hobbyist, educator, or small business owner, the Da Vinci Jr. 3D Printer offers endless possibilities.
Remember, 3D printing is a continual learning process. Every print is an opportunity to refine your skills, explore new designs, and push the boundaries of your imagination. Don’t be afraid to experiment, adapt, and learn from each experience.
Thank you for taking the time to read this guide, and we wish you many enjoyable and successful 3D printing adventures with your Da Vinci Jr. 3D Printer!