Introduction
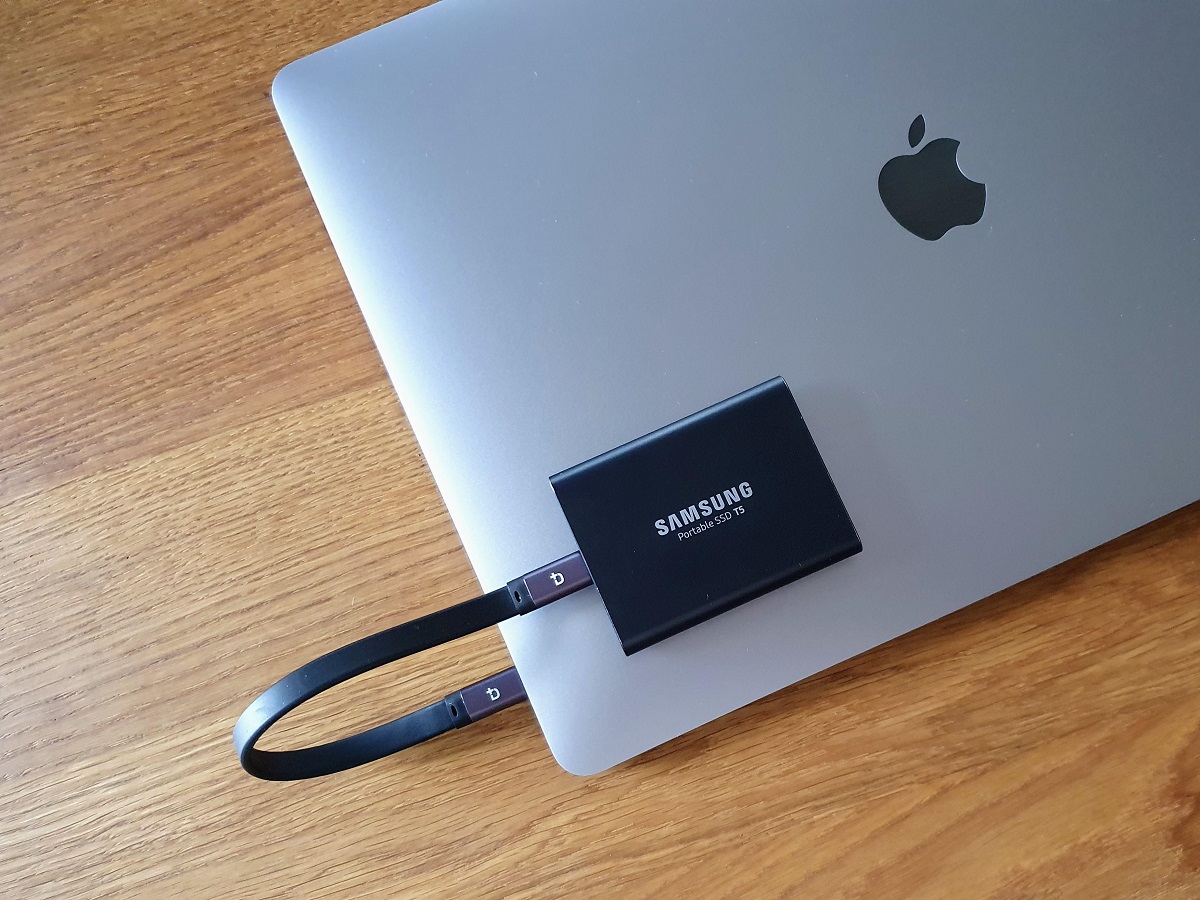
Using a Solid State Drive (SSD) as external storage is an excellent way to enhance your data storage capabilities and improve the performance of your devices. Whether you want to store large media files or create backups of important documents, an SSD can provide fast and reliable storage with a compact form factor. In this article, we will explore the benefits of using an SSD as external storage, discuss important factors to consider before making a purchase, and provide a step-by-step guide on how to set up and use an SSD as external storage.
Gone are the days when mechanical hard drives were the predominant choice for external storage. With the advancement in technology, SSDs have become more affordable and accessible, offering numerous advantages over traditional hard drives. One of the key benefits of SSDs is their speed. Unlike mechanical drives, SSDs have no moving parts, resulting in lightning-fast read and write speeds. This means that you can transfer files quickly and experience smoother performance when accessing data stored on the SSD.
Another advantage of using an SSD as external storage is its durability. Mechanical drives are susceptible to damage from physical impact, but SSDs are built to withstand shocks and vibrations without compromising data integrity. Additionally, SSDs consume less power, generate less heat, and produce minimal noise compared to their mechanical counterparts.
When considering using an SSD as external storage, it’s crucial to evaluate your specific needs and requirements. Factors such as storage capacity, compatibility with your device, and budget should be taken into account. Additionally, deciding between an internal or external SSD will depend on whether you are looking for a permanent storage solution or the flexibility to transfer your data across multiple devices.
In the following sections, we will guide you through the process of setting up an SSD as external storage. We will cover important steps such as choosing the right SSD, connecting it to your device, formatting the drive, transferring files, and safely ejecting the SSD. By the end of this article, you will have all the necessary information to unleash the full potential of your SSD as external storage.
Benefits of using an SSD as external storage
Using an SSD as external storage offers several compelling benefits that make it an attractive option for individuals and businesses alike. Let’s explore some of the advantages that come with harnessing the power of an SSD for your external storage needs.
1. Speed: One of the standout advantages of SSDs is their blazing-fast speed. Unlike traditional mechanical hard drives, which rely on spinning disks and moving parts, SSDs use flash memory to store data. This results in significantly faster read and write speeds, allowing for quick file transfers and rapid access to your stored data. Whether you’re transferring large media files, running software applications, or accessing documents, the speed of an SSD will greatly enhance your overall computing experience.
2. Reliability: SSDs are known for their exceptional reliability. Since they have no moving parts, there is less risk of mechanical failure or damage caused by physical shock or vibrations. This makes SSDs an ideal choice for portable external storage solutions that may be subject to frequent movement or transportation. With an SSD, you can have peace of mind knowing that your valuable data is safe and secure.
3. Durability: Built to withstand rugged conditions, SSDs are more durable than mechanical hard drives. Unlike traditional drives, which are prone to damage from drops or impacts, SSDs can better withstand physical shocks and vibrations. This resilience makes SSDs a reliable choice for individuals who need external storage in environments that may be more challenging or unpredictable.
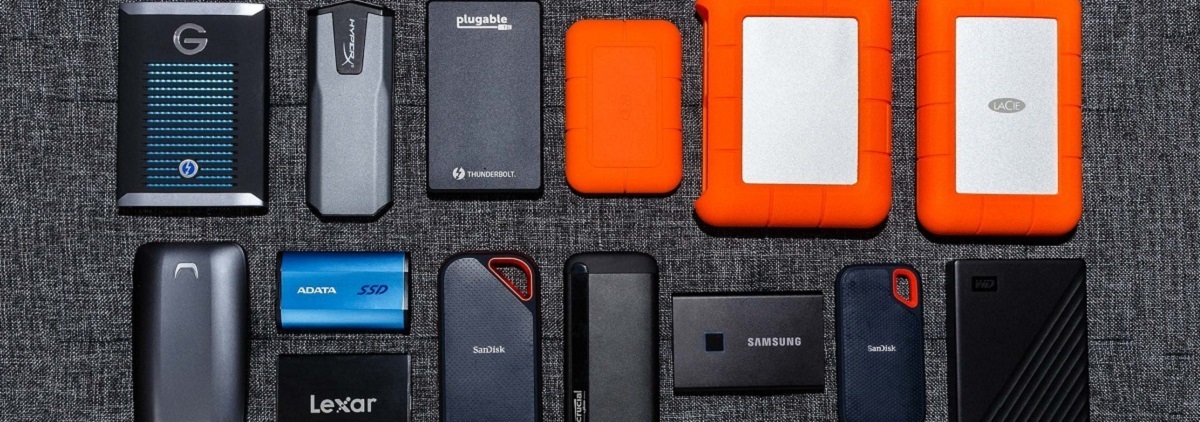
4. Compact Size: SSDs are incredibly compact and lightweight compared to mechanical hard drives. This portability makes them an excellent choice for individuals who frequently travel or need to carry their data with them. You can easily slip an SSD into your pocket or bag without adding bulk or weight, ensuring that your important files are always within reach.
5. Energy Efficiency: Another advantage of SSDs is their energy efficiency. They consume less power and generate less heat compared to traditional hard drives. This means that using an SSD as external storage will have minimal impact on the battery life of your device and help maintain cooler operating temperatures. Whether you’re using the SSD with a laptop, desktop, or other portable devices, this energy efficiency can extend the overall lifespan of your device.
In summary, using an SSD as external storage provides notable benefits, including incredible speed, reliability, durability, portability, and energy efficiency. Whether you’re a creative professional, a gamer, or a business user, incorporating an SSD into your external storage setup will greatly enhance your data management, file transfers, and overall computing experience.
Things to consider before using an SSD as external storage
Before diving into using an SSD as external storage, there are a few important factors to consider. These considerations will help you make an informed decision and ensure that the SSD meets your specific needs. Let’s explore these key factors together.
1. Storage Capacity: Determine how much storage capacity you require for your external storage needs. SSDs come in different sizes, ranging from a few hundred gigabytes (GB) to multiple terabytes (TB) of storage. Consider the types of files you plan to store, such as documents, videos, or games, and estimate your storage needs accordingly. It’s always a good idea to choose an SSD with more capacity than you currently require to accommodate future data growth.
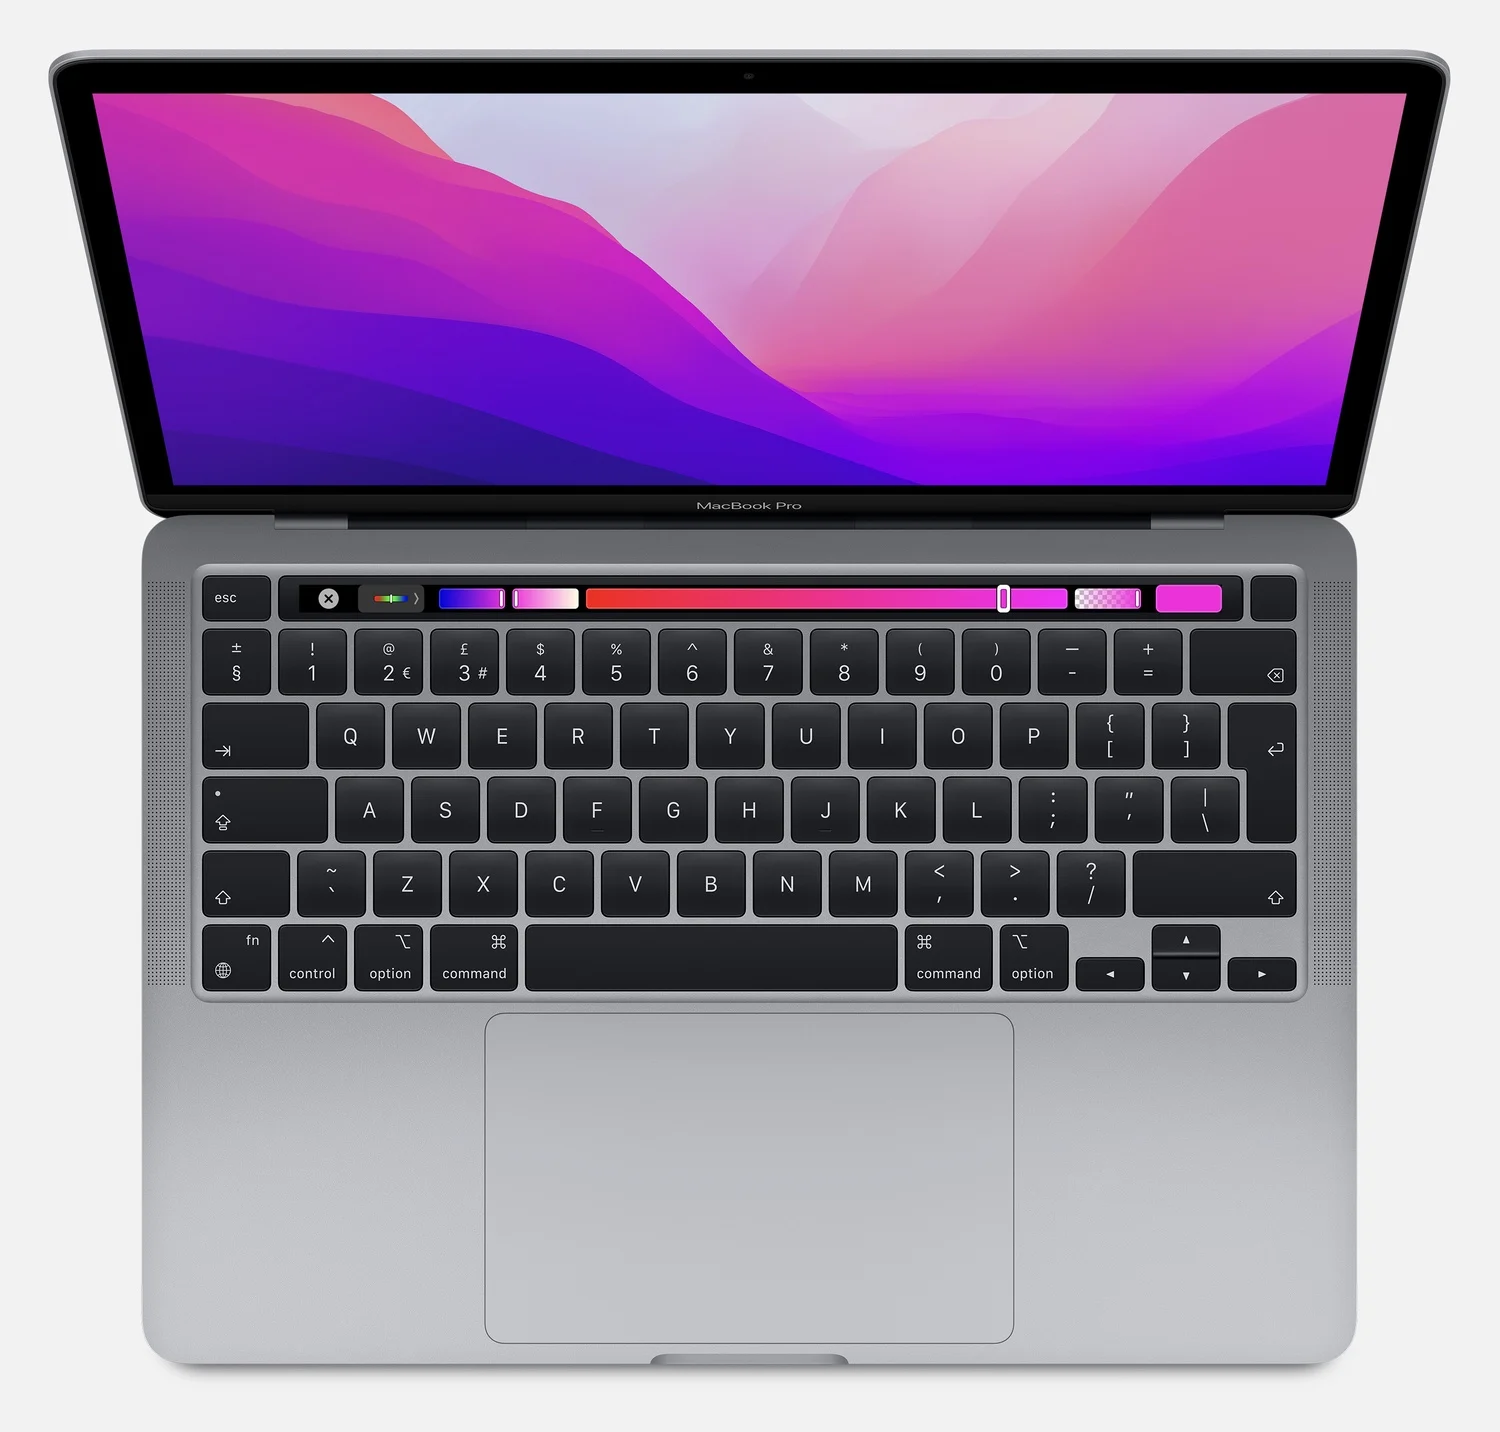
2. Connection Type: Check the connection type supported by your device and ensure compatibility with the SSD you choose. Common connection types for external storage include USB-C, Thunderbolt, and USB 3.0. Depending on your device’s capabilities, you may want to opt for an SSD that offers a compatible connection and supports faster data transfer speeds for optimal performance.
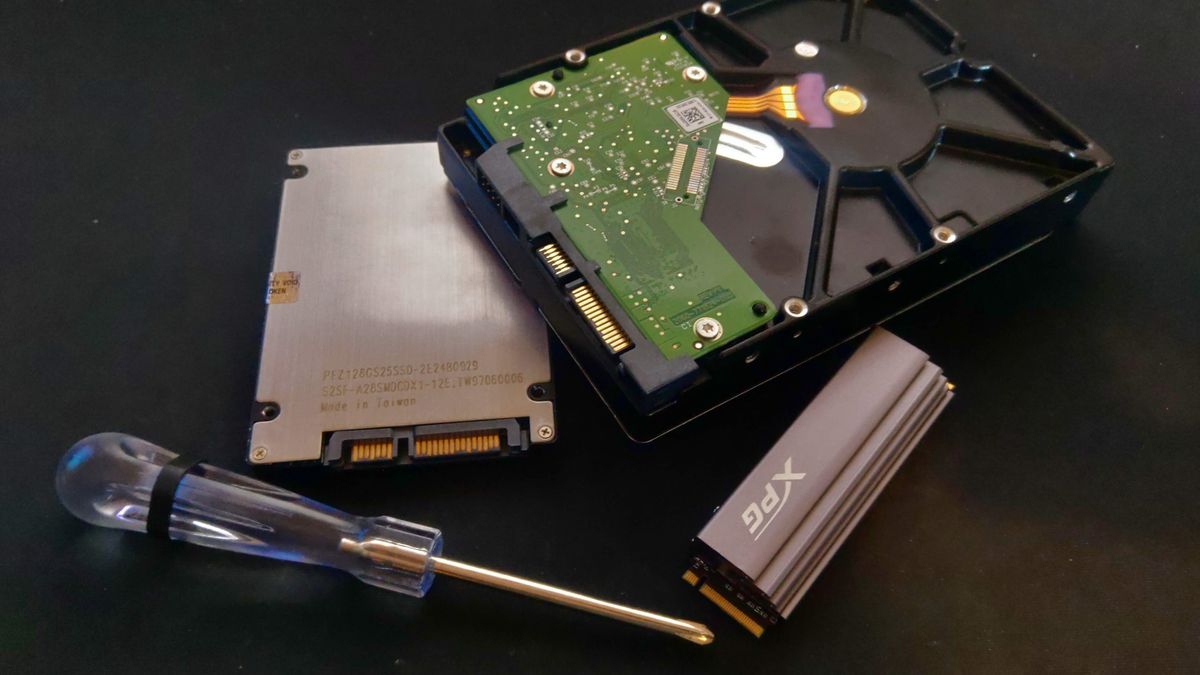
3. Form Factor: Consider the physical size and shape of the SSD, especially if you require portable storage. SSDs are available in different form factors, such as 2.5-inch drives that resemble traditional hard drives or compact M.2 drives that are smaller and more suitable for slim devices like laptops. Ensure that the SSD’s form factor aligns with your device’s compatibility and your specific use case.
4. Budget: Determine your budget for purchasing an external SSD. SSDs generally have a higher price point compared to mechanical hard drives, but their advantages in speed and durability make them a worthwhile investment. Consider your budget constraints and balance them with the desired storage capacity and performance, keeping in mind that the cost per gigabyte may decrease as the SSD’s capacity increases.
5. Data Security: Evaluate the importance of data security for your external storage needs. If data privacy and protection are a priority, look for SSDs that offer built-in encryption features or support software-based encryption. These security measures will help safeguard your sensitive information and prevent unauthorized access to your data.
By considering these factors, you can select the right SSD to fulfill your external storage requirements. Remember to perform thorough research, read customer reviews, and compare different SSD models to make an informed decision that aligns with your needs, budget, and device compatibility.
Step-by-step guide on how to use an SSD as external storage
Setting up an SSD as external storage is a straightforward process that requires a few simple steps. With this step-by-step guide, you’ll be able to start using your SSD as external storage in no time.
- Choosing the right SSD: Select an SSD that meets your storage capacity, connection type, and budget requirements. Consider factors such as storage capacity, compatibility with your device, and desired performance.
- Connecting the SSD to your device: Connect the SSD to your device using the appropriate cable or adapter. Ensure a secure connection and make sure both ends are firmly plugged in.
- Formatting the SSD: If the SSD is new or hasn’t been used with your device before, it may need to be formatted. Formatting prepares the SSD to be recognized by your operating system. Consult the user manual or manufacturer’s instructions for specific steps on formatting the SSD.
- Transferring files to the SSD: Once your SSD is connected and formatted, you can start transferring files to it. You can drag and drop files from your computer’s internal storage to the SSD or use file transfer software for larger amounts of data.
- Safely ejecting the SSD: Properly eject your SSD before disconnecting it from your device to avoid data corruption. On Windows, click the “Safely Remove Hardware and Eject Media” icon in the taskbar and select your SSD. On macOS, click the eject icon next to the SSD in the Finder sidebar.
Following these steps will ensure a smooth setup process for using your SSD as external storage. Remember to always handle your SSD with care and protect it from physical damage or extreme temperatures to maintain its longevity and performance.
Choosing the right SSD
Selecting the right SSD for your external storage needs is crucial to ensure optimal performance and compatibility. Consider the following factors when choosing an SSD:
1. Storage Capacity: Determine the amount of storage you require for your external storage needs. SSDs come in various capacities, ranging from a few hundred gigabytes (GB) to multiple terabytes (TB). Consider the types of files you plan to store, such as documents, photos, videos, or games, and estimate your storage needs accordingly. It’s advisable to choose an SSD with a capacity that exceeds your current requirements to allow for future data growth.
2. Connection Type: Check the connection types supported by your device and ensure compatibility with the SSD you choose. Common connection types for external storage include USB-C, Thunderbolt, and USB 3.0. Consider the speed and convenience offered by different connection types, as it can affect data transfer speeds and overall performance.
3. Form Factor: The physical size and shape of the SSD are important factors to consider, especially if you require portable storage. SSDs are available in different form factors, such as 2.5-inch drives that resemble traditional hard drives, or M.2 drives that are smaller and more suitable for slim devices like laptops. Ensure that the SSD’s form factor aligns with your device’s compatibility and your specific use case.
4. Performance: Consider the performance specifications of the SSD, such as read and write speeds. Faster read and write speeds will result in quicker file transfers and improved overall performance. Look for SSDs with high data transfer rates for a smoother user experience, especially when dealing with large media files or running resource-intensive applications.
5. Budget: Determine your budget for purchasing an external SSD. SSDs generally have a higher price compared to traditional hard drives, but the advantages in speed and durability make them a worthwhile investment. Set a budget that aligns with your storage capacity needs and select the SSD that offers the best value for your money.
6. Brand and Reliability: Consider the reputation of the brand and the reliability of the SSD. Research customer reviews and ratings to ensure that you choose a reliable SSD that has a low failure rate and offers good customer support in case of any issues.
By considering these factors, you can make an informed decision when choosing the right SSD for your external storage needs. It’s always a good idea to perform thorough research, read customer reviews, and compare different models to find the SSD that meets your specific requirements and offers the best performance and value for your investment.
Connecting the SSD to your device
After selecting the right SSD for your external storage needs, the next step is to connect it to your device. Follow the steps below to ensure a proper connection:
1. Check the Connection: Identify the appropriate connection type for your SSD and the corresponding port on your device. Common connection types include USB-C, Thunderbolt, or USB 3.0. Ensure that your device has the necessary port and that it is in working condition.
2. Use the Correct Cable or Adapter: Select the proper cable or adapter to connect the SSD to your device. Some SSDs may come with their own cable, while others require a separate purchase. Ensure that the cable or adapter matches the connection type of both your SSD and device. Additionally, use high-quality cables and adapters to ensure a stable and reliable connection.
3. Connect the SSD: Plug one end of the cable into the appropriate port on your SSD and the other end into the corresponding port on your device. Ensure a secure connection by firmly inserting the connectors. For USB connections, you should hear a click when the cable is properly inserted. Confirm that the SSD is securely connected and that there are no loose connections.
4. Power On the SSD (if required): Some SSDs may require power from an external source, such as a power adapter or USB power supply. In such cases, connect the power source to the SSD as well, following the manufacturer’s instructions. Ensure that the SSD receives sufficient power to operate correctly.
5. Device Recognition: Once the SSD is connected, your device should automatically detect it. Wait for a few moments to allow the device to recognize the SSD. The SSD should appear as a new storage device in your device’s file explorer or disk management utility.
6. Troubleshooting (if necessary): If your device does not detect the SSD, try the following troubleshooting steps:
- Confirm that the cable or adapter is working properly by using it with another device or trying a different cable/adapter.
- Ensure that the SSD is properly powered on (if required) and that the power source is functioning correctly.
- Restart your device and try connecting the SSD again.
- If the SSD is not recognized, consult the manufacturer’s documentation or support for further assistance.
By following these steps, you can ensure a proper and secure connection between your SSD and your device. Once connected, you will be ready to unlock the benefits of using an SSD as external storage, such as fast data transfers and improved performance for your files and applications.
Formatting the SSD
Once you have connected your SSD to your device, the next step is to format the SSD. Formatting prepares the SSD to be recognized by your operating system and allows you to use it for storing files. Follow these steps to format your SSD:
1. Open Disk Management (Windows) or Disk Utility (Mac): On Windows, right-click “This PC” or “My Computer” and select “Manage.” In the Computer Management window, click on “Disk Management” under the “Storage” section. On macOS, go to “Applications” > “Utilities” > “Disk Utility.”
2. Identify the SSD: In the Disk Management or Disk Utility window, locate your SSD from the list of drives. The SSD should be labeled with its capacity and the manufacturer’s name.
3. Check if the SSD is Initialized: If the SSD is shown as “Not Initialized” in Disk Management (Windows) or has a greyed-out volume name in Disk Utility (Mac), you will need to initialize or format the SSD. Right-click on the SSD in Disk Management (Windows) or click on the SSD in Disk Utility (Mac) and select the Initialize/Format option.
4. Select the File System: When prompted with the formatting options, choose the file system that you want to use for the SSD. For Windows, the recommended file system is NTFS, while macOS typically uses the APFS or Mac OS Extended (Journaled) file system. Ensure that you choose the appropriate file system based on your operating system and compatibility needs.
5. Assign the Drive Letter (Windows): In Disk Management (Windows), you may be prompted to assign a drive letter to the SSD. Choose an available drive letter from the dropdown menu. This letter will be used to identify the SSD in the file explorer.
6. Start the Formatting Process: Click “Format” or “Start” to begin the formatting process. This will erase all data on the SSD, so ensure that you have made a backup of any important files beforehand.
7. Wait for the Formatting to Complete: The formatting process may take a few minutes to complete, depending on the size of the SSD. Once finished, you will see a message indicating that the formatting was successful.
8. Verify the SSD: After formatting, check the file explorer or Disk Utility to verify that the SSD is now listed as a formatted drive with the assigned drive letter or name. The SSD is now ready to be used for storing files.
It is important to note that formatting an SSD will erase all existing data, so ensure that you have backed up any important files before proceeding. Additionally, if your SSD comes pre-formatted or is already recognized by your operating system, you can skip the formatting process and start using the SSD directly.
By following these steps, you can successfully format your SSD, ensuring that it is recognized and ready for use as external storage on your device.
Transferring files to the SSD
Once you have successfully connected and formatted your SSD, you can start transferring files to it. Here’s a step-by-step guide on how to transfer files to your SSD:
1. Open File Explorer or Finder: Open the file explorer on Windows or Finder on macOS to access your files.
2. Locate the files you want to transfer: Navigate to the location where your files are currently stored. This could be on your computer’s internal storage or another external storage device.
3. Select the files: Click and drag your mouse cursor to select the files you want to transfer. You can select multiple files or entire folders by holding down the Ctrl (Windows) or Command (macOS) key while making your selections.
4. Start the transfer: Once you have selected the files, simply drag and drop them onto the SSD icon in your file explorer or Finder. Alternatively, you can right-click on the selected files and choose the “Copy” option, then navigate to the SSD location and right-click again to choose “Paste”.
5. Monitor the transfer progress: Depending on the size of the files and the transfer speed of your SSD, the transfer process may take some time. You can monitor the progress in your file explorer or Finder, which will display a progress bar or percentage indicating how much of the transfer is completed.
6. Confirm the successful transfer: Once the transfer is complete, you can verify that the files have been successfully transferred to your SSD by navigating to the SSD location in your file explorer or Finder. Check that the transferred files are present and accessible on the SSD.
It’s important to note that during the transfer process, it’s best to avoid interrupting the transfer by disconnecting the SSD or shutting down your computer. Interruptions can lead to incomplete or corrupt file transfers. If you’re transferring a large number of files or files with large sizes, it’s recommended to ensure that your computer is plugged into a power source to avoid draining the battery during the transfer.
With these steps, you can easily transfer files to your SSD, allowing you to free up space on your internal storage and take advantage of the fast and reliable performance offered by the SSD as your external storage solution.
Safely ejecting the SSD
Safely ejecting your SSD before disconnecting it from your device is essential to prevent data corruption and ensure the longevity of your storage device. Follow these steps to safely eject your SSD:
1. Save and close any open files: Before ejecting the SSD, make sure to save and close any files or applications that are currently being accessed from the SSD. This ensures that all data is written to the SSD and prevents any potential data loss or corruption.
2. Locate the eject icon: On Windows, look for the “Safely Remove Hardware and Eject Media” icon in the taskbar, usually located in the bottom-right corner of the screen. On macOS, find the SSD icon in the Finder sidebar, and click on the eject icon (typically an upward-pointing arrow).
3. Safely eject on Windows: Click on the “Safely Remove Hardware and Eject Media” icon in the taskbar. A list of removable devices, including your SSD, will appear. Select the SSD from the list, and wait until you see a notification that it is safe to remove the device. Once confirmed, you can safely disconnect the SSD from your device.
4. Safely eject on macOS: In the Finder sidebar, locate the SSD icon, then click on the eject icon next to it. Alternatively, you can right-click on the SSD icon and choose “Eject” from the dropdown menu. Wait until the icon disappears from the Finder sidebar before disconnecting the SSD.
5. Disconnect the SSD: Once you have safely ejected the SSD, you can disconnect it from your device. Carefully unplug the cable or remove the adapter, ensuring that you hold onto the connector itself and not just the cable. Gently remove the SSD from the port, taking care not to apply excessive force.
6. Store the SSD safely: After disconnecting the SSD, store it in a safe place to protect it from physical damage or exposure to extreme temperatures. Consider using a protective case or sleeve to keep the SSD protected during transport or when not in use.
It’s important to note that abruptly disconnecting the SSD without properly ejecting it can lead to data corruption or damage to the file system. By following these steps and safely ejecting the SSD, you ensure the integrity of your stored data and maintain the overall health of your SSD as external storage.
Remember to always follow the manufacturer’s guidelines and recommendations for safely ejecting the SSD, as the process may vary slightly depending on the specific model or device you are using.
Tips for maximizing SSD performance as external storage
To get the most out of your SSD as external storage, it’s important to optimize its performance and ensure its longevity. Here are some tips to maximize the performance of your SSD:
1. Enable TRIM (Windows): TRIM is a feature that helps maintain SSD performance by allowing the operating system to inform the SSD about unused blocks of data. To enable TRIM on Windows, open the Command Prompt as an administrator and type in the command “fsutil behavior set DisableDeleteNotify 0”. Press Enter to execute the command.
2. Enable TRIM (Mac): TRIM is enabled by default on macOS for most modern SSDs. To verify or enable TRIM, go to “System Preferences” > “Security & Privacy” > “FileVault” > “Unlock” > “Preferences”. Ensure that the checkbox for “Enable TRIM” is selected.
3. Keep your SSD firmware up to date: Manufacturers often release firmware updates that can enhance performance, reliability, and compatibility. Visit the manufacturer’s website to check for any available firmware updates for your SSD and follow their instructions to update the firmware if necessary.
4. Avoid filling to maximum capacity: Keep a reasonable amount of free space on your SSD to maintain optimal performance. As the drive fills up, the performance may start to degrade. Aim to keep at least 20% of the SSD capacity free to ensure smooth operation and allow for efficient garbage collection and wear leveling algorithms.
5. Use the correct file system: Make sure to use the appropriate file system for your operating system. NTFS is the recommended file system for Windows, while macOS typically uses APFS or Mac OS Extended (Journaled). Using the correct file system ensures compatibility and maximizes performance.
6. Avoid excessive fragmentation: While SSDs are not as susceptible to file fragmentation as traditional hard drives, excessive fragmentation can still impact performance. To minimize fragmentation, consider using the built-in defragmentation tools provided by your operating system or utilize third-party defragmentation software designed specifically for SSDs.
7. Regularly back up your data: Although SSDs are known for their reliability, it’s still important to back up your data regularly. This ensures that you have a copy of your files in case of any unexpected failures or accidents. Utilize cloud storage, external hard drives, or online backup services to create backups of your important files.
8. Protect your SSD from physical damage: To ensure the longevity and performance of your SSD, handle it with care and protect it from physical damage. Avoid dropping or bumping the SSD, and store it in a safe and secure location when not in use.
By following these tips, you can maximize the performance, reliability, and lifespan of your SSD as external storage. These practices will help ensure that your SSD continues to provide fast and efficient storage for your files and applications, enhancing your overall computing experience.
Conclusion
Using an SSD as external storage can greatly enhance your data management capabilities and improve the performance of your devices. With its speed, reliability, durability, and compact form factor, an SSD offers numerous advantages over traditional hard drives for external storage needs.
In this article, we explored the benefits of using an SSD as external storage, including its faster read and write speeds, enhanced reliability, and energy efficiency. We also discussed important factors to consider before using an SSD as external storage, such as storage capacity, connection type, form factor, budget, and data security.
We provided a step-by-step guide on how to use an SSD as external storage, covering the process of choosing the right SSD, connecting it to your device, formatting it, transferring files, and safely ejecting it. Following these steps will ensure a seamless setup process and optimal performance.
Additionally, we shared tips for maximizing SSD performance as external storage, such as enabling TRIM, keeping firmware up to date, avoiding maximum capacity usage, using the correct file system, and protecting the SSD from physical damage.
By taking advantage of the benefits of an SSD as external storage and implementing the recommended practices, you can enjoy faster data transfers, improved reliability, and efficient file management. Whether you are a professional seeking high-performance storage for creative projects, a gamer requiring fast loading times, or a business user in need of reliable data storage, utilizing an SSD as external storage is a smart choice.
So, go ahead and select the right SSD for your needs, connect it to your device, format it, transfer your files, and enjoy the benefits of using an SSD as your external storage solution. Unlock the full potential of your data storage and elevate your computing experience with the speed, reliability, and durability of an SSD.