Introduction
Welcome to the world of Point of Sale (POS) systems! If you own or manage a retail business, you’re probably familiar with the daily challenges of managing sales, inventory, and customer information. Thankfully, a robust POS system can streamline these tasks and help you improve efficiency, customer service, and profitability.
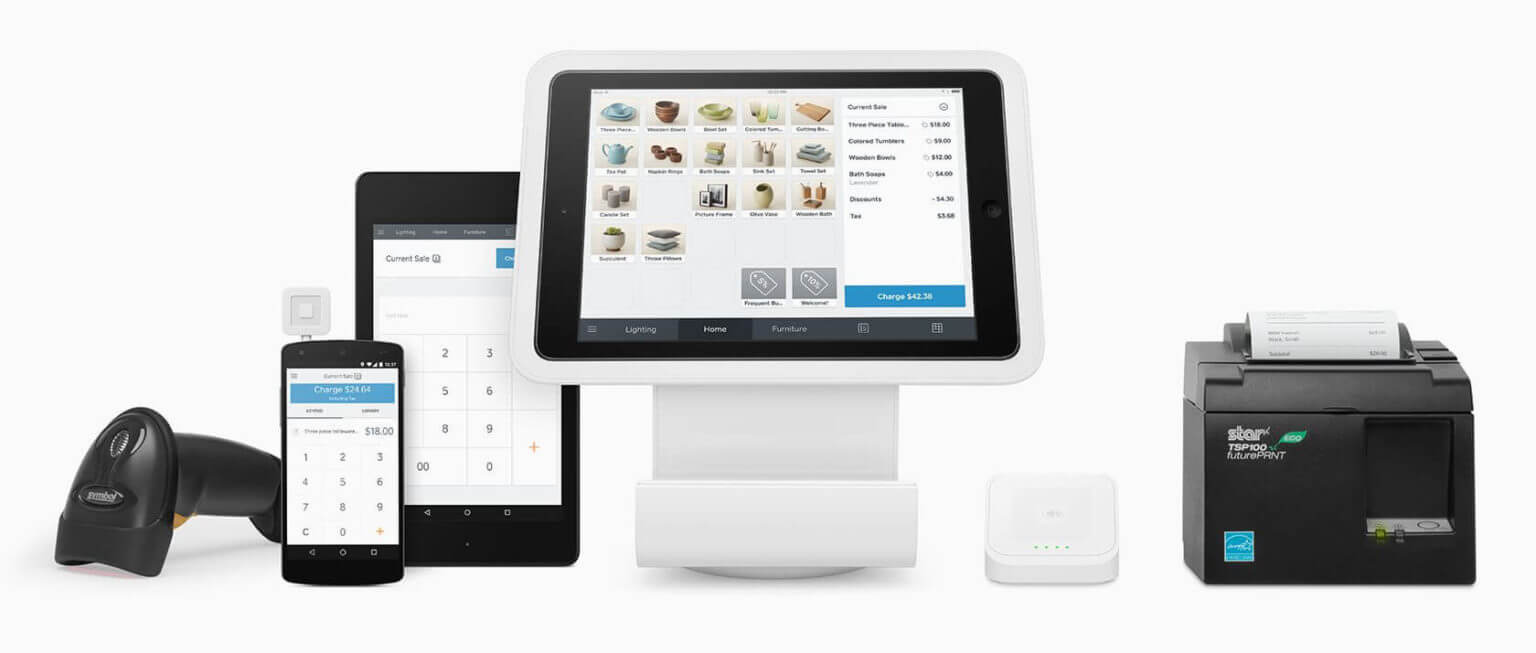
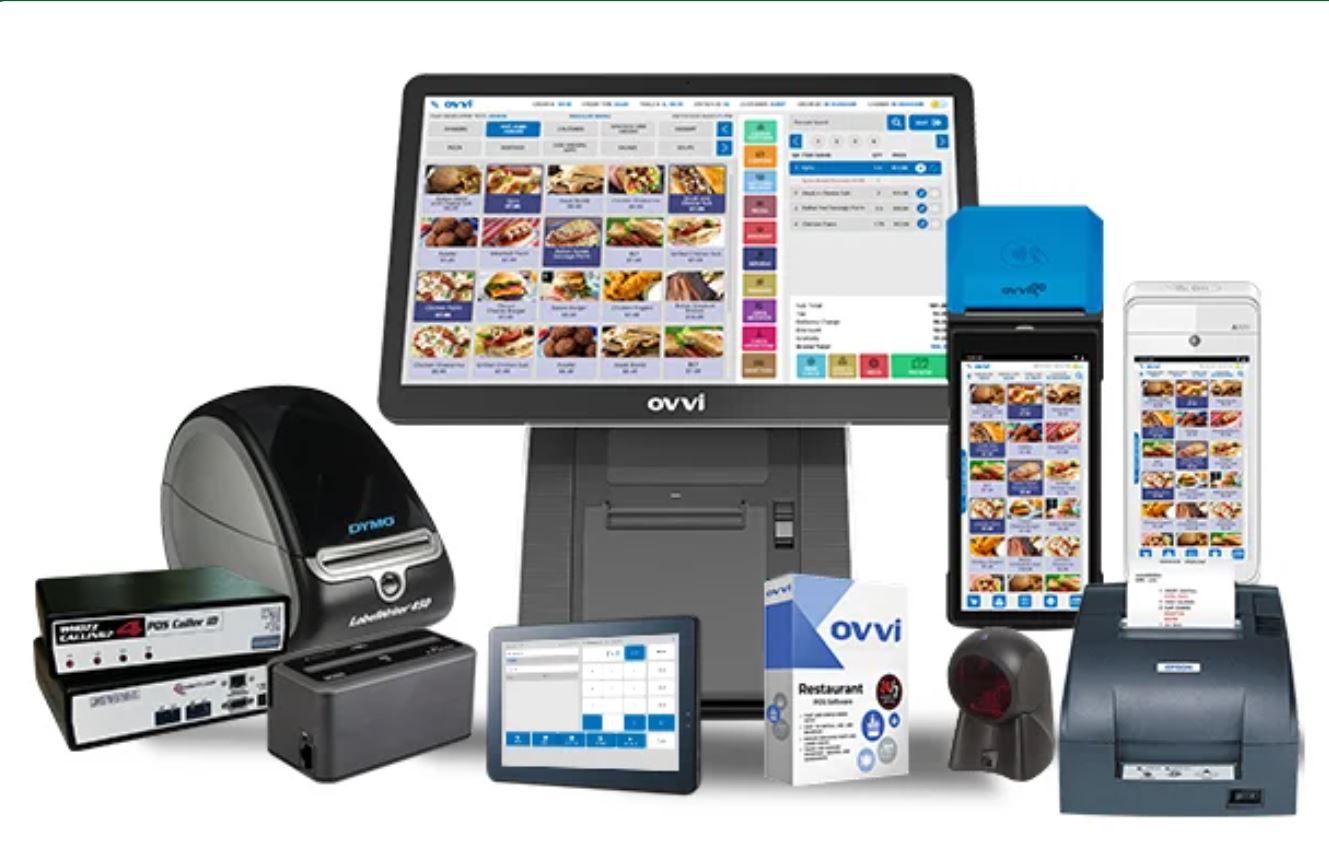
A POS system is a combination of hardware and software designed to facilitate sales transactions by processing payments, managing inventory, and generating reports. It acts as the central hub that connects your cash register, barcode scanner, receipt printer, and other peripherals. The software component provides functionality for various tasks such as inventory management, employee tracking, and customer relationship management.
One of the key benefits of using a POS system is that it automates many manual tasks, freeing up your time and resources to focus on other aspects of your business. It eliminates the need for manual calculation of sales totals, reduces the risk of errors, and speeds up the checkout process.
Furthermore, a POS system provides valuable insights into your business operations through real-time reporting and analytics. You can track sales trends, monitor inventory levels, measure employee performance, and gain a deeper understanding of your customers’ preferences.
With so many POS systems available on the market, it’s important to choose the right one that suits your unique business needs. Factors to consider include the size of your business, the industry you operate in, the complexity of your product offerings, and the specific features you require.
Installing and setting up a POS system can be a straightforward process, especially if you opt for cloud-based solutions that require minimal hardware installation. However, it’s important to familiarize yourself with the user interface of the software to ensure a smooth transition for both you and your employees.
Once your system is up and running, you’ll need to add your products to the database, configure inventory management settings, and set up payment processing options. Additionally, you’ll want to create customer profiles, implement discounts and promotions, and generate reports to monitor the performance of your business.
Training your staff on how to use the POS system is crucial for a successful implementation. Ensure that they understand the basics of processing sales, handling payments, and accessing customer information. Offering ongoing support and troubleshooting assistance will also help address any issues that may arise.
In the following sections, we’ll dive deeper into each of these topics, providing you with practical tips and guidance on how to make the most of your POS system. So let’s get started on this exciting journey towards streamlining your business operations and taking your customer experience to the next level!
Benefits of Using a POS System
Implementing a POS system in your business can bring about numerous benefits that will positively impact your operations and bottom line. Here are several key advantages:
- Efficient and Accurate Sales Processing: With a POS system, you can process sales quickly and accurately, reducing the chances of human error. It automates calculations, taxes, and discounts, ensuring that customers are charged correctly. This efficiency leads to shorter wait times at the checkout, improving the overall customer experience.
- Inventory Management: Keeping track of inventory is essential for any business and a POS system simplifies the process. It allows you to monitor stock levels in real-time, receive alerts for low inventory, and generate reports on sales and inventory turnover. By knowing what products are selling well and what needs restocking, you can optimize your purchasing decisions and avoid stockouts or overstocking.
- Enhanced Customer Relationship Management: A POS system enables you to create and maintain customer profiles, capturing important information such as contact details, purchase history, and preferences. Personalized interactions and targeted marketing campaigns can be implemented based on this data, fostering stronger customer relationships and increasing customer loyalty.
- Detailed Reporting and Analytics: POS systems provide comprehensive reporting capabilities, allowing you to analyze sales trends, review employee performance, and track profitability. These insights help you make informed business decisions, identify areas for improvement, and adapt your strategies to maximize profits.
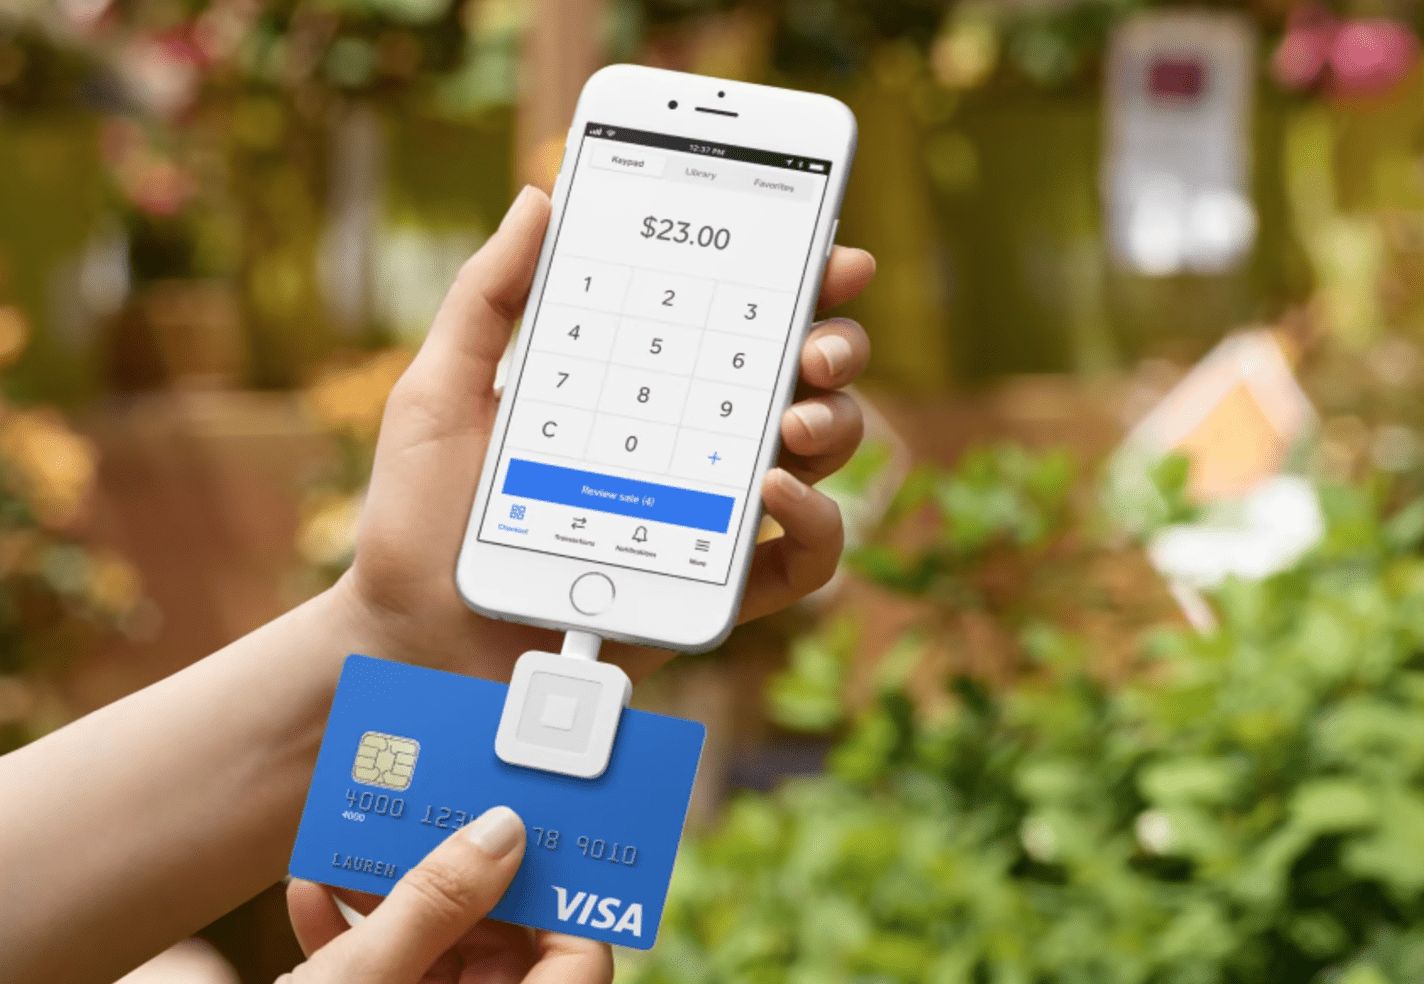
- Streamlined Payment Processing: Integrating payment processing with your POS system simplifies the payment experience for both your staff and customers. Whether it’s accepting cash, credit cards, or digital wallets, a POS system securely processes transactions, reducing the risk of fraud or errors in payment processing.
- Time and Cost Savings: By automating manual tasks, such as inventory management, sales calculations, and reporting, a POS system saves you valuable time and resources. It eliminates the need for manual spreadsheets and paperwork, allowing you to focus on other aspects of your business. Moreover, the insights gained from the system help you optimize operations, minimizing costs and maximizing profits.
- Improved Employee Management: POS systems enable you to track employee sales, monitor shifts, and manage schedules more efficiently. Access controls can restrict certain functions based on employee roles, ensuring security and accountability. By streamlining employee management, you can foster a more productive and motivated workforce.
In summary, implementing a POS system offers a myriad of advantages that streamline operations, enhance customer service, improve inventory management, and drive profitability. By optimizing sales processing, inventory tracking, customer management, and reporting, you can gain a competitive edge while saving time and resources. Remember, choosing the right POS system that meets your business needs is crucial to unlocking these benefits and aligning your business for success.
Choosing the Right POS System for Your Business
When it comes to selecting a POS system for your business, it’s essential to consider several factors to ensure you choose the right solution. Here are key considerations to keep in mind:
- Business Type and Size: Different industries have unique requirements, so it’s important to choose a POS system that caters specifically to your business type. Whether you run a retail store, restaurant, or service-based business, look for industry-specific features and functionalities that will support your operations. Additionally, consider the size of your business and whether the system can handle your transaction volume and inventory management needs.
- Scalability and Customization: As your business grows, your POS system should be able to accommodate your expanding needs. Look for a system that offers scalability, allowing you to add more registers or locations seamlessly. Additionally, consider the ability to customize the solution to match your branding and unique requirements.
- Integration: Evaluate the compatibility of the POS system with other software applications you currently use, such as accounting software, e-commerce platforms, or customer relationship management (CRM) systems. Integration can streamline your operations by eliminating manual data entry and ensuring seamless data flow between different systems.
- User-Friendliness: A POS system should be intuitive and easy for both you and your employees to use. Look for a clean and organized user interface that minimizes the learning curve. Ideally, the system should support touchscreen functionality and provide clear instructions for common tasks.
- Hardware and Software Requirements: Consider the hardware and software specifications needed to run the POS system. Evaluate compatibility with your existing devices, such as cash registers, barcode scanners, and receipt printers. Additionally, determine if the system requires an on-premise server or operates in the cloud, as this may affect your IT infrastructure and ongoing maintenance needs.
- Support and Training: A reliable POS system should come with comprehensive support and training resources. Explore the provider’s customer support options, such as phone, email, or live chat. Additionally, check if they offer training materials, tutorials, or on-site assistance to ensure a smooth implementation and ongoing support.
- Cost and Pricing Structure: Analyze the pricing structure of the POS system, considering factors such as upfront costs, monthly fees, transaction fees, and additional charges for add-on features. Compare different providers and their pricing models to determine the best value for your business while staying within your budget.
By carefully evaluating these considerations, you can select the right POS system that aligns with your business needs, improving efficiency and enabling growth. Make a list of your requirements and prioritize the features that are most important to you. Research different providers, read reviews, and request demos or trials to get a firsthand experience of the system’s capabilities. Taking the time to choose the right POS system will pay off in the long run, empowering you to streamline your operations and provide exceptional customer service.
Installing and Setting Up Your POS System
Installing and setting up your POS system is a crucial step in getting your business up and running smoothly. Here are some key steps to guide you through the process:
- Choose the Right Hardware: Ensure that you have all the necessary hardware components required for your POS system, such as a cash register, barcode scanner, receipt printer, and any other peripherals specified by your chosen solution. If you opt for a cloud-based system, you may require minimal hardware, relying more on tablets or smartphones.
- Ensure Internet Connectivity: For cloud-based POS systems, a stable internet connection is essential for seamless operations. Make sure you have a reliable internet service provider (ISP) with sufficient bandwidth to support your business needs. If you choose an on-premise system, ensure you have a network setup that connects all necessary devices.
- Install and Update Software: Follow the instructions provided by your POS system provider to install the necessary software on your devices. Ensure that you download the latest version to benefit from bug fixes and new features. Some cloud-based solutions may not require installation and can be accessed through a web browser.
- Create User Accounts: Set up user accounts for yourself and your employees, assigning roles and permissions based on their responsibilities. This step ensures that each user has access to the appropriate features and data within the POS system.
- Configure Settings: Take the time to configure important settings within the POS system, such as tax rates, currency, language, and receipt preferences. These settings ensure accurate sales calculations and adherence to local regulations.
- Set Up Product Database: Add your products to the POS system by creating entries that include pricing, descriptions, and any variations (such as size or color). Consider using barcode scanning or bulk import features to expedite this process and ensure accuracy.
- Integrate Payment Processors: If you plan to accept various payment methods, such as credit cards or mobile wallets, integrate your chosen payment processors with the POS system. Follow the instructions provided by your payment processor to link your accounts and ensure secure transactions.
- Test and Train: Before launching your POS system, conduct thorough testing to ensure that all hardware and software components are functioning correctly. Test different scenarios, such as processing sales, printing receipts, and handling returns. Once you are confident in the system’s functionality, provide comprehensive training to your staff, ensuring they understand how to navigate the user interface and perform common tasks.
- Monitor and Update: Regularly monitor the performance of your POS system and promptly install any software updates or security patches. Keep an eye on inventory levels, sales reports, and customer data to identify any issues or areas for improvement. Additionally, stay informed about any new features or updates released by your POS system provider to leverage the latest tools and functionalities available.
By carefully following these steps and ensuring that your POS system is properly installed and set up, you can confidently start processing sales and managing transactions efficiently. Remember to seek assistance from your POS system provider if you encounter any difficulties during the installation or setup process. With a fully functional system in place, you can focus on providing top-notch service to your customers and driving your business forward.
Understanding the User Interface of Your POS System
The user interface (UI) of your POS system plays a crucial role in ensuring a seamless and efficient experience for both you and your staff. Familiarizing yourself with the UI will help you navigate through the system and perform tasks effectively. Here are some key elements to understand:
- Main Dashboard: The main dashboard is the center of your POS system’s UI. It provides an overview of key information, such as sales summaries, current inventory levels, and notifications. The dashboard may also offer quick access to commonly used features, allowing you to quickly navigate to different areas of the system.
- Menu and Navigation: The menu or navigation bar is typically located on the side or top of the screen. It contains various categories and subcategories that organize the different functions of your POS system. Familiarize yourself with the menu structure so you can easily find the features you need, such as sales, inventory, customers, or reports.
- Sales Processing: The sales processing interface is where you can initiate and complete transactions. This interface may include a search bar to quickly find products by name or SKU, along with options for adding products to the sale, applying discounts or promotions, and selecting payment methods. Understand how to navigate through this interface to process sales efficiently and accurately.
- Inventory Management: The inventory management section allows you to view, update, and manage your product inventory. You should be able to search for specific products, view their current stock levels, and make adjustments such as adding or subtracting quantities. Understanding how to access and use this interface will help you keep track of your stock and prevent inventory issues.
- Customer Relationship Management (CRM): If your POS system has CRM features, familiarize yourself with the customer management interface. This will enable you to view and update customer information, create customer profiles, track purchase histories, and apply discounts or loyalty rewards. Utilizing the CRM functionality effectively can help you provide personalized service and build strong customer relationships.
- Reporting and Analytics: The reporting and analytics section provides valuable insights into your business performance. Understand how to generate reports on sales, inventory, employee performance, and other metrics relevant to your business. Analyzing these reports can help you make informed decisions, identify trends, and take action to optimize your operations.
- Settings and Configuration: The settings and configuration interface allows you to customize various aspects of your POS system. This includes options such as tax rates, currency settings, receipt preferences, user permissions, and integration with other software or hardware. Take the time to understand how to access and modify these settings to tailor the POS system to your business needs.
- Help and Support: Remember to explore the help and support resources provided by your POS system provider. This may include online documentation, tutorials, or contact information for customer support. Being aware of these resources will be beneficial when you need assistance or want to learn more about specific features or functionalities.
By gaining a comprehensive understanding of the user interface of your POS system, you will be able to navigate through different sections, perform tasks efficiently, and leverage the full potential of the system’s capabilities. Take the time to explore each interface, experiment with different features, and seek assistance from your POS system provider if needed. With a solid grasp of the UI, you’ll be well-equipped to manage your business effectively and optimize your operations.
Adding Products to Your POS System
Adding products to your POS system is a crucial step in setting up your inventory and ensuring smooth sales transactions. Here are the key steps to follow when adding products:
- Product Information: Gather all the necessary information about your products, including names, descriptions, SKUs (Stock Keeping Units), prices, and any variations such as size or color. This information will be used to create accurate product listings in your POS system.
- Product Categories: Organize your products into logical categories and subcategories within the POS system. This categorization will help with easier navigation, inventory management, and reporting. For example, if you run a clothing store, you might have categories like “Men’s Clothing,” “Women’s Clothing,” and “Accessories.”
- Create Product Listings: Access the product management section of your POS system and create individual listings for each product. Enter the relevant details such as name, description, SKU, price, and variations. Some systems may also provide options to upload images for visual representation. Aim for clear and concise descriptions that accurately represent the product.
- Barcode Scanning: If your POS system supports barcode scanning, it can greatly simplify the process of adding products. Use a barcode scanner to scan the barcode or SKU of each product, and the system will automatically populate the product details for you. This method saves time and minimizes the risk of manual entry errors.
- Pricing and Discounts: Set appropriate prices for your products and determine any discounts or promotions that may apply. POS systems often provide options to apply fixed or percentage-based discounts for specific products or categories. Utilize these features to manage sales and attract customers with special offers.
- Inventory Tracking: Enable inventory tracking for each product in your POS system. This ensures that your system deducts the sold quantities from available stock levels automatically. Regularly update the inventory count and make adjustments when necessary to maintain accurate stock information.
- Importing Products: If you have a large number of products, consider using the import feature provided by your POS system. This allows you to import product data from a spreadsheet or CSV file directly into the system, saving time and effort compared to manual entry. Ensure that the imported data is accurate and well-formatted to avoid any issues with the product listings.
- Regular Maintenance: As your inventory changes over time, it is important to regularly review and update your product listings in the POS system. Add new products, remove discontinued items, and adjust prices or descriptions as necessary. This periodic maintenance ensures that your POS system reflects the current state of your inventory accurately.
By following these steps, you can effectively add your products to the POS system, ensuring that your inventory is accurately represented and ready for sales transactions. Be thorough and meticulous when entering product information, utilize barcode scanning for efficiency, and regularly update your product listings for accurate inventory management. A well-maintained and organized product database within your POS system sets the foundation for smooth sales operations and better customer service.
Configuring Inventory Management
Configuring inventory management settings in your POS system is essential for effectively tracking and managing your stock levels. Proper configuration ensures that you have accurate and up-to-date information about your inventory. Here are the key steps for configuring inventory management:
- Stock Tracking Method: Determine the stock tracking method that best suits your business needs. Two common methods are “FIFO” (First-In, First-Out) and “LIFO” (Last-In, First-Out). FIFO assumes that the oldest items in your inventory are sold first, while LIFO assumes that the most recent items are sold first. Choose the method that aligns with your industry standards and inventory management practices.
- Reorder Points: Set reorder points for your products to ensure timely restocking. Reorder points are predetermined stock levels that trigger a purchase order when reached. By setting reorder points, you can avoid stockouts and maintain sufficient inventory levels to meet customer demand. Consider factors such as lead time and sales velocity when establishing these points.
- Low Stock Alerts: Configure low stock alerts in your POS system to receive notifications when products reach a specified quantity. This feature helps you proactively manage your inventory and restock before running out of popular items. By being alerted in advance, you can maintain smooth operations and avoid disappointing customers.
- Automatic Stock Deduction: Ensure that your POS system is configured to deduct stock automatically when a sale is made. This feature helps maintain accurate stock levels in real-time, minimizing the risk of overselling or misrepresenting available inventory. With each completed sale, the system should deduct the corresponding quantities from your stock automatically.
- Return Management: If your business accepts product returns, configure the return management settings in your POS system. Determine how returns will affect your inventory count and whether returned items can be resold or if they should be marked as damaged or non-sellable. This ensures that your stock levels accurately reflect the availability of products for resale.
- Batch or Serial Number Tracking: Depending on your business needs, configure any batch or serial number tracking features in your POS system. This is particularly relevant for businesses dealing with perishable goods, electronics, or high-value items. Batch or serial number tracking allows you to trace specific items, monitor expiration dates, and provide accurate product information to customers.
- Inventory Reporting: Explore the various inventory reporting options provided by your POS system. These reports provide insights into your stock levels, performance, and trends. Utilize reports such as stock movement, inventory valuation, or out-of-stock analysis to make informed decisions about purchasing, pricing, and inventory optimization.
- Barcode Scanning and Labeling: Ensure that your POS system is set up to support barcode scanning and labeling. Barcode scanning streamlines inventory management by allowing you to quickly update stock quantities, conduct accurate stocktakes, and track product movement. This feature greatly reduces manual entry errors and improves efficiency.
- Regular Audits: Schedule regular audits of your inventory to verify the accuracy of stock levels in your POS system. Periodically reconcile physical counts with the counts recorded in your system. Identify any discrepancies and take corrective action to maintain accurate inventory records.
By properly configuring inventory management settings in your POS system, you can effectively monitor, track, and optimize your stock levels. Implementing the appropriate settings ensures accurate stock deductions, proactive restocking, and streamlined inventory reporting. Regularly review and fine-tune your configuration to align with your business needs and changing industry trends. With proper inventory management in place, you’ll be better equipped to meet customer demands, prevent stockouts, and maintain a healthy balance between supply and demand.
Setting Up Payment Processing
Setting up payment processing in your POS system is crucial for facilitating seamless and secure transactions with your customers. Here are the key steps to successfully configure payment processing:
- Select Payment Processors: Choose the payment processors that best suit your business needs. Consider factors such as transaction fees, security measures, integration capabilities, and supported payment methods (e.g., credit cards, mobile wallets). Research different providers, compare their offerings, and select processors trusted by your target market.
- Establish Merchant Accounts: Set up merchant accounts with the chosen payment processors. This involves providing your business information, such as business name, address, tax ID, and bank account details, as required by the processors. Be prepared to undergo a verification process before your accounts are activated.
- Integrate Payment Processors: Integrate the selected payment processors with your POS system. Follow the instructions provided by your POS system provider to link your merchant accounts and enable payment processing functionality. This integration allows for seamless communication between your POS system and the payment processors, ensuring smooth transactions.
- Set Up Payment Types: Configure the accepted payment types in your POS system. This includes cash, credit cards, debit cards, mobile wallets, and any other payment methods you choose. Specify whether you accept contactless payments, chip and pin, or swipe transactions. Make sure to comply with the security requirements and standards set by the payment processors.
- Authorize Payments: Specify the authorization settings within your POS system. Decide whether payments should be authorized manually or automatically when a sale is made. Automatic authorization allows for quick and efficient transaction processing, while manual authorization gives you more control over the approval process.
- Configure Receipts: Customize your receipts to include payment details, such as the payment method used, transaction ID, and any applicable discounts or taxes. Ensure that your receipts comply with legal requirements and reflect your brand identity. Test the printing or digital delivery of receipts to ensure accuracy and professionalism.
- Ensure Security: Implement strong security measures to protect payment data and customer information. Ensure that your POS system complies with Payment Card Industry Data Security Standard (PCI DSS) requirements. Use encryption technologies, secure password policies, and firewalls to safeguard sensitive data from potential threats.
- Train Staff: Provide comprehensive training to your staff on how to process payments using the POS system. Cover topics such as selecting payment methods, handling refunds or exchanges, and troubleshooting any payment-related issues. Emphasize the importance of adhering to security protocols and maintaining customer confidentiality.
- Regularly Update: Stay current with any updates or new features released by your payment processors and POS system provider. Regularly update your POS system with the latest software patches and security enhancements to ensure smooth payment processing without interruptions.
By following these steps, you can effectively set up payment processing in your POS system, enabling secure and convenient transactions with your customers. Ensure a seamless integration with trusted payment processors, configure accepted payment types, and establish robust security measures. Providing proper training to your staff and staying up-to-date with the latest developments in payment processing technology will help you maintain smooth operations and provide excellent service to your customers.
Managing Customer Profiles
Managing customer profiles in your POS system is a valuable tool for building stronger relationships with your customers and enhancing their overall experience. Here are the key steps to effectively manage customer profiles:
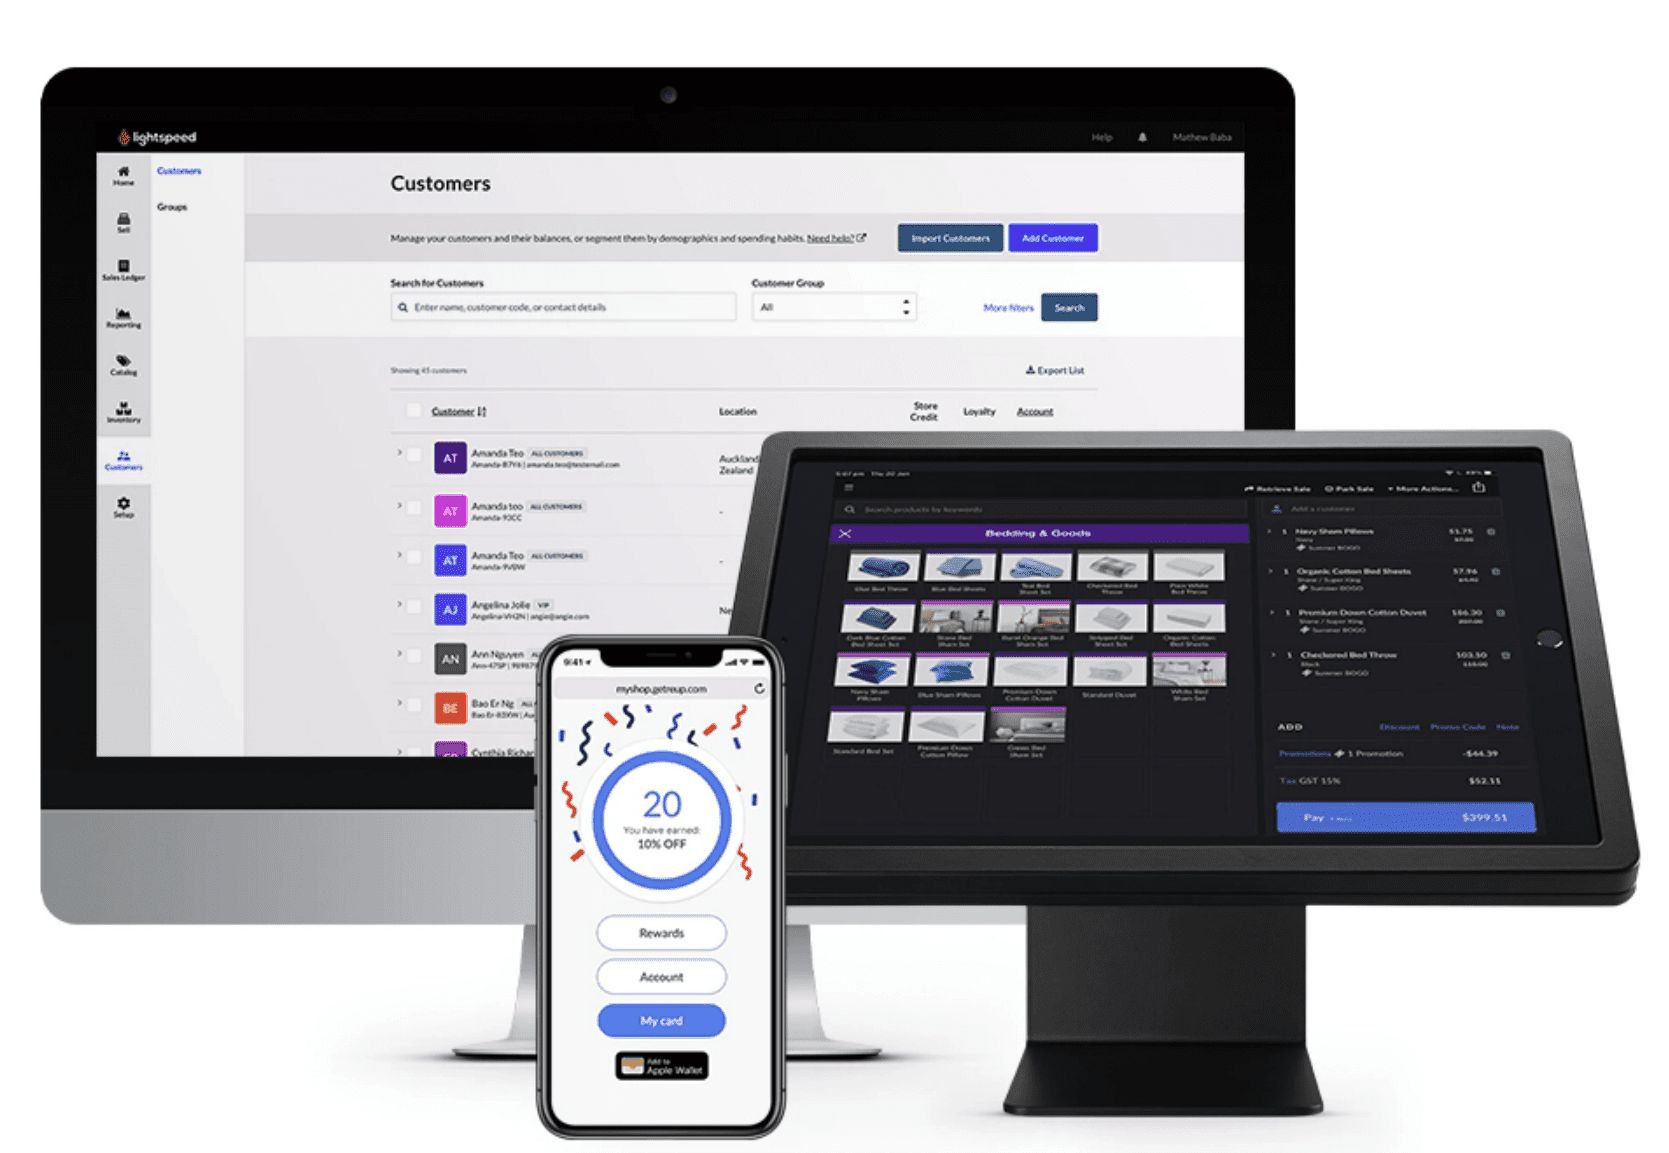
- Create Customer Profiles: In your POS system, set up customer profiles to capture essential information such as name, contact details, purchase history, and any relevant notes. This data will serve as a centralized database for managing customer interactions and personalizing their experience.
- Collect Customer Information: When interacting with customers, encourage them to provide their contact information and preferences. Offer loyalty programs or incentives for customers to join your mailing list or register within your POS system. Remember to adhere to data privacy regulations and ensure customers’ consent when collecting their information.
- Update Customer Profiles: Keep customer profiles up-to-date by regularly updating information. Record changes in contact details, preferences, or any other relevant data. This ensures accurate customer communication and personalized marketing efforts.
- Track Purchase History: Utilize your POS system to track customers’ purchase history. This information helps discover their preferences, popular products, and average spending, enabling you to tailor offers and recommendations based on their behavior and increase customer loyalty.
- Segment Customers: Categorize your customers into segments based on characteristics and behaviors such as purchase history, preferences, demographics, or loyalty status. This segmentation allows you to target specific customer groups with personalized marketing campaigns and promotions.
- Personalize Interactions: Leverage customer profiles to provide personalized and tailored experiences. Use the information you have gathered to customize communication, recommend relevant products, or offer exclusive discounts or promotions. This personal touch enhances customer satisfaction and builds loyalty.
- Targeted Marketing Campaigns: Use customer profiles to create targeted marketing campaigns. Send personalized emails, SMS messages, or notifications to inform customers about special offers, new products, or upcoming events based on their preferences and purchase history. This targeted approach increases engagement and drives repeat business.
- Use Loyalty Programs: Implement loyalty programs or reward systems within your POS system. Use customer profiles to track loyalty points, rewards, or membership levels. Recognize loyal customers by providing exclusive benefits, discounts, or early access to new products.
- Customer Feedback: Encourage customers to provide feedback and reviews within your POS system. Use this feedback to improve your products or services and make informed business decisions. Respond to customer inquiries or complaints promptly to demonstrate exceptional customer service.
- Data Analysis: Regularly analyze customer data within your POS system to gain insights into buying patterns, preferences, and overall customer satisfaction. Identify opportunities for improvement, areas of growth, and emerging trends to strengthen your business strategies.
By managing customer profiles effectively within your POS system, you can personalize customer interactions, foster loyalty, and optimize marketing efforts. Collecting and updating customer information, tracking purchase history, and leveraging segmentation allows you to tailor offerings and provide excellent customer service. Stay attentive to customer needs, analyze data insights, and continuously refine your customer management strategies to enhance the overall experience and drive long-term success.
Creating Discounts and Promotions
Creating discounts and promotions within your POS system is an effective way to attract customers, increase sales, and promote customer loyalty. Here are the key steps to successfully create and manage discounts and promotions:
- Define Objectives: Clarify the objectives for your discounts and promotions. Are you aiming to attract new customers, boost sales during specific periods, sell slow-moving products, or reward loyal customers? Clearly defining your goals will help shape your discount and promotion strategies.
- Select Discount Types: Determine the types of discounts you want to offer, such as percentage-based discounts, fixed amount discounts, or buy-one-get-one (BOGO) offers. Each discount type has its own impact on customer behavior and profit margins, so choose the ones that align with your goals and target audience.
- Set Discount Parameters: Define the parameters of your discounts, including the eligible products or services, duration, and any restrictions or limitations. Consider whether the discount applies to specific categories, brands, or customer segments. Ensure that the parameters are clear and easy to understand.
- Create Promotion Codes: If applicable, generate unique promotion codes for your discounts. These codes can be used during the checkout process to redeem the discount. Promotion codes provide a sense of exclusivity and can be shared via email, social media, or other marketing channels.
- Implement Bundle Offers: Bundle offers allow you to combine multiple products or services at a discounted price. This strategy encourages customers to purchase complementary items, increases average order value, and provides a perceived value for customers.
- Leverage Seasonal Promotions: Take advantage of seasonal events, holidays, or special occasions by offering exclusive promotions. Tailor the discounts and promotions to the theme or sentiment of the season, tapping into customer desires and enhancing the overall shopping experience.
- Reward Loyalty: Implement loyalty programs or exclusive offers for your repeat customers. Provide discounts, special access to new products, or personalized promotions to show appreciation for their continued support. This strategy encourages customer retention and fosters long-term loyalty.
- Advertise Promotions: Effectively communicate your discounts and promotions to your target audience using various marketing channels. Utilize social media, email marketing, in-store signage, or your website to promote and raise awareness of your offers. Make sure to highlight the value and benefits customers will receive.
- Monitor and Evaluate: Regularly monitor the performance of your discounts and promotions using the reporting and analytics tools in your POS system. Track the impact on sales, customer acquisition, customer satisfaction, and overall profitability. Evaluate the effectiveness of each promotion and adjust your strategies accordingly.
- Continuously Improve: Learn from the outcomes of your discounts and promotions. Analyze customer responses, gather feedback, and assess the success of each campaign. Use these insights to refine your future promotions and optimize their impact on your business goals.
By effectively creating and managing discounts and promotions within your POS system, you can drive customer engagement, increase sales, and foster customer loyalty. Clearly define your objectives, select appropriate discount types, set clear parameters, and leverage seasonal or loyalty-based offers. Regularly monitor and evaluate the performance of your promotions to ensure their effectiveness and make necessary adjustments. Strive to continuously improve your strategies to provide value to your customers and achieve your business goals.
Generating Reports and Analytics
Generating reports and analyzing data within your POS system provides valuable insights into your business performance, customer behavior, and overall trends. Here are the key steps for generating reports and utilizing analytics effectively:
- Identify Key Metrics: Determine the key metrics and performance indicators that are relevant to your business. These could include sales revenue, average order value, top-selling products, customer acquisition cost, or employee productivity. Identifying these metrics will help you track and evaluate the success of your business.
- Select Appropriate Reports: Explore the variety of reports available in your POS system. Select reports that align with your key metrics and objectives. These reports could include sales reports, inventory reports, customer reports, employee performance reports, or financial reports. Choose reports that provide actionable insights for better decision-making.
- Customize Reports: Tailor reports to capture the specific information you need. Modify report parameters such as date ranges, filters, or sorting options to focus on the data relevant to your analysis. Customization enables you to gain targeted insights and answer specific business questions.
- Generate Regularly: Regularly generate reports to track your business performance. Set a schedule to run reports daily, weekly, or monthly, depending on your needs. Consistent reporting allows for trend analysis, identification of patterns, and timely response to market changes.
- Analyze Trends and Patterns: Dive deeper into your reports and analyze trends and patterns over time. Identify sales trends, popular products, customer preferences, or seasonal fluctuations. These insights will help you make informed decisions about inventory management, pricing strategies, and marketing initiatives.
- Monitor Inventory: Utilize inventory reports to track stock levels, turnover rates, and identify slow-moving or out-of-stock items. This information helps you optimize inventory management, streamline purchasing decisions, and prevent stockouts or overstocking.
- Measure Employee Performance: Evaluate employee performance using reports that track sales by employee, conversion rates, or average transaction value per employee. Identify top performers and areas where additional training or coaching may be beneficial. This data helps you optimize your workforce and incentivize high performance.
- Gauge Customer Behavior: Utilize customer reports to gain insights into customer demographics, purchase histories, and preferences. Identify your most valuable customers, their buying patterns, and the effectiveness of your marketing strategies. This information guides targeted marketing campaigns and enhances customer satisfaction.
- Compare Periods: Compare reports from different time periods to identify growth, seasonal variations, or the impact of specific marketing initiatives. Analyzing data over time reveals trends and provides a better understanding of your business’s performance and profitability.
- Utilize Data Visualization: Make use of data visualization tools provided by your POS system to present reports in a visually appealing format. Charts, graphs, and visual representations help in understanding complex data and making data-driven decisions.
- Take Action: Act on the insights gained from your reports and analytics. Use the data to inform business strategies, set achievable goals, and make improvements to your product offerings, marketing campaigns, or operational processes. Continuously monitor the impact of these actions and adjust your strategies accordingly.
By generating reports and analyzing data effectively within your POS system, you gain valuable insights into your business performance, optimize operations, and make informed decisions. Identify key metrics, select appropriate reports, and customize them as needed. Analyze trends, monitor inventory, measure employee performance, and understand customer behavior. Act on the insights gained to drive growth and continually improve your business strategies.
Training Your Staff on Using the POS System
Properly training your staff on using the POS system is essential to ensuring smooth operations and efficient customer service. Here are the key steps to effectively train your staff on using the POS system:
- Define Training Objectives: Clearly define the training objectives and outcomes you want to achieve. Determine the specific functions and tasks your staff members need to perform using the POS system, such as processing sales, managing inventory, or generating reports.
- Create Training Resources: Develop comprehensive training resources, including user manuals, video tutorials, or step-by-step guides. These resources should cover all functionalities of the POS system, from basic operations to more advanced features. Make sure the resources are easily accessible and user-friendly.
- Interactive and Hands-On Training: Provide hands-on training sessions for your staff where they can practice using the POS system in a controlled environment. Encourage interaction, ask and answer questions, and address any concerns or challenges they may encounter. Practical application is key to effective learning.
- Role-Based Training: Tailor the training to different roles within your business. Each staff member may have different responsibilities and access levels within the POS system. Provide focused training specific to their role, ensuring they understand the tasks and permissions related to their job.
- Emphasize Key Functions: Highlight the most frequently used functions of the POS system during training. Teach your staff how to process sales, handle returns or exchanges, apply discounts or promotions, and perform basic inventory management tasks. These key functions are essential for day-to-day operations.
- Security Best Practices: Educate your staff on security best practices while using the POS system. Emphasize the importance of strong passwords, secure login procedures, and protecting customer information. Ensure they understand the consequences of not adhering to security protocols.
- Continued Education: Plan for continued education and ongoing training sessions to keep your staff up-to-date with any system updates, new features, or process changes. Regularly share new training materials or conduct refresher sessions to reinforce their knowledge and skills.
- Encourage Questions and Feedback: Create an environment where your staff feels comfortable asking questions and providing feedback about the POS system. Address their concerns promptly and ensure they have the necessary support to use the system effectively.
- Simulate Common Scenarios: Develop scenarios that simulate common situations your staff may encounter while using the POS system. This can include handling discounts, returns, or inventory management tasks. Practice these scenarios during training to provide your staff with practical experience and build their confidence.
- On-the-Job Training: Provide on-the-job training by allowing your staff to use the POS system as part of their daily tasks. Offer guidance and assistance as needed, ensuring they have continuous support during the initial stages of using the system.
- Monitor Progress and Provide Feedback: Regularly monitor your staff’s progress in using the POS system and provide constructive feedback. Offer praise for accomplishments and address any areas for improvement. This ongoing evaluation encourages continuous growth and helps ensure they are using the system effectively.
By following these steps, you can effectively train your staff on using the POS system, empowering them to confidently perform their tasks and provide exceptional customer service. With proper training, your staff will be equipped to handle day-to-day operations, process sales efficiently, and utilize all the relevant features of the POS system to enhance the overall customer experience.
Troubleshooting Common Issues
While using a POS system, it’s common to encounter occasional issues that can disrupt operations. To minimize downtime and ensure a smooth customer experience, it’s important to be prepared to troubleshoot common issues that may arise. Here are some key troubleshooting steps you can take:
- No Power: If your POS system is not turning on, check the power source. Ensure that all cables are securely connected and that the power outlet is functioning properly. If necessary, try plugging the system into a different outlet or using a different power cord.
- Connectivity Issues: If your system is experiencing network connectivity problems, check your internet connection. Ensure that your router is working correctly and that you have a stable internet connection. If using a wireless connection, move closer to the router or consider troubleshooting Wi-Fi settings.
- Printer Issues: If your receipt printer is not functioning, first check that it is properly connected to the POS system. Ensure that the printer has paper and that it has enough ink or thermal paper. If issues persist, try power cycling the printer or reinstalling the printer drivers.
- Software Freezing or Crashing: If your POS software freezes or crashes, close the program and restart the system. Check for any software updates or patches that may need to be installed. If the issue persists, contact your POS system provider for further assistance.
- Barcode Scanner Problems: If your barcode scanner is not reading barcodes properly, ensure that the scanner is connected correctly to the POS system. Check that the scanner lens is clean, and the barcode you are scanning is not damaged. If issues persist, try resetting the scanner or replacing the batteries.
- Payment Processing Errors: If you experience errors during payment processing, check that your payment terminal is properly connected and powered on. Ensure that you have stable internet connectivity and that the payment processing settings in your POS system are configured correctly. If issues persist, contact your payment processor for assistance.
- Inventory Discrepancies: If your inventory counts do not match the actual stock levels, first verify that all sales, returns, and adjustments have been properly recorded in the POS system. Conduct a physical inventory count to confirm the stock levels and compare them with the POS system records. If discrepancies persist, investigate potential issues with employee theft, system glitches, or administrative errors.
- Employee Access Issues: If an employee is unable to access the POS system or encounters access restrictions, check their user permissions and role settings within the system. Ensure that they are using the correct login credentials and that their account is active. If issues persist, review the system’s access controls, or contact your POS system provider for assistance.
- Slow Performance: If your POS system is running slower than usual, check for any background processes or applications that may be consuming system resources. Clear unnecessary data or files that may be clogging up the system’s memory. If the issue persists, consider upgrading hardware components or contact your POS system provider for further guidance.
- System Error Messages: If you encounter error messages on your POS system, note the exact error message or code and consult the system’s user manual, online resources, or contact your POS system provider for assistance. They will be able to provide guidance specific to the error message you are experiencing.
By being prepared to troubleshoot common issues that may arise with your POS system, you can minimize disruptions to your operations and ensure that your staff can provide efficient customer service. It’s important to regularly maintain and update your POS system to prevent issues from occurring in the first place. When troubleshooting, consult the documentation provided with your POS system, or reach out to your POS system provider’s support team for assistance.
Conclusion
Implementing and effectively utilizing a POS system can greatly benefit your business by streamlining operations, improving customer service, and providing valuable insights into your business performance. By following the steps outlined in this guide, you can navigate through various aspects of using a POS system with ease.
Choosing the right POS system for your business is crucial. Consider your business type, size, and specific requirements when selecting a system. Once you have chosen a system, take the time to properly install and configure it, ensuring that you understand the user interface and how to add products, manage inventory, process payments, and create discounts and promotions.
Managing customer profiles and generating reports and analytics are key steps in understanding your customers and and gaining insights into your business performance. By leveraging the data available in your POS system, you can personalize interactions, create targeted marketing campaigns, and make informed business decisions.
Training your staff on using the POS system and troubleshooting common issues are essential to ensure smooth operations and efficient customer service. By providing comprehensive training and ongoing support, you empower your staff to maximize the benefits of the POS system and deliver exceptional experiences to your customers.
Remember, the world of POS systems is constantly evolving. Stay informed about updates and new features, and continuously evaluate and refine your strategies to adapt to changing business needs. With proper implementation, training, and utilization of a POS system, you can optimize your business operations, drive customer satisfaction, and position your business for success in the digital age.