Introduction
Welcome to the world of homemade ice cream! The Pampered Chef Ice Cream Maker is a fantastic tool that allows you to create delicious frozen treats right in the comfort of your own home. Whether you’re an ice cream aficionado or a newbie looking to try something new, this handy device will revolutionize your dessert-making experience.
Gone are the days of standing in long lines at the ice cream shop or settling for store-bought options that just don’t hit the mark. With the Pampered Chef Ice Cream Maker, you have the freedom to customize your flavors and ingredients, ensuring a truly personalized and mouthwatering indulgence.
The process is simple yet incredibly rewarding. With just a few basic steps, you can churn out velvety-smooth ice cream, delightful sorbets, or refreshing gelatos. Plus, the intuitive design of the ice cream maker makes it easy to use, even for those who are new to the world of homemade frozen desserts.
Not only does making your own ice cream give you control over the ingredients, but it also lets you experiment with a wide range of flavors and mix-ins. From classic vanilla and chocolate to exotic combinations like mint chocolate chip or salted caramel swirl, the possibilities are endless. Get ready to unleash your creativity and satisfy your sweet tooth in the most delicious way.
So, whether you’re hosting a summer gathering, planning a romantic date night at home, or simply craving a sweet treat on a lazy afternoon, the Pampered Chef Ice Cream Maker is your ticket to frozen dessert bliss. In this guide, we’ll walk you through everything you need to know to use this fantastic device, from getting started to cleaning and maintenance. So, let’s dive in and embark on this delightful ice cream-making journey together!
Getting Started
Before you start churning out delicious homemade ice cream, it’s important to familiarize yourself with the Pampered Chef Ice Cream Maker and gather all the necessary tools and ingredients. Follow these steps to ensure a smooth and enjoyable ice cream-making experience:
- Unpack the Ice Cream Maker: Begin by removing the ice cream maker from its packaging and ensuring that all parts are intact.
- Read the Instruction Manual: Take a few minutes to read through the instruction manual provided with the ice cream maker. Familiarize yourself with the different components and their functions to ensure proper usage.
- Wash the Ice Cream Maker: Before your first use, wash all the parts of the ice cream maker. These parts may include the freezer bowl, paddle, lid, and any additional accessories. Use warm soapy water and a soft cloth to clean them thoroughly.
- Freeze the Freezer Bowl: The freezer bowl is a crucial component of the ice cream maker. It needs to be frozen in advance to ensure the proper freezing of the ice cream mixture. Place the freezer bowl in the freezer for at least 24 hours before you plan to make ice cream.
- Gather your Ingredients: While waiting for the freezer bowl to freeze, gather all the ingredients you’ll need for your ice cream masterpiece. This will typically include milk, cream, sugar, and any flavorings or mix-ins of your choice.
- Set up your Workspace: Create a clean and clutter-free workspace for your ice cream-making adventure. Make sure you have enough counter space and access to electrical outlets.
Now that you’re all set up and ready to go, it’s time to dive into the exciting world of homemade ice cream. In the next sections, we’ll guide you through the process of preparing the ice cream maker, choosing and preparing ingredients, using the ice cream maker, and more. Get ready to embark on a delightful journey of sweet, frozen goodness!
Preparing the Ice Cream Maker
Before you start creating your delicious frozen treats, it’s essential to properly prepare the Pampered Chef Ice Cream Maker for use. Follow these steps to ensure that your ice cream maker is ready for action:
- Assemble the Ice Cream Maker: If you haven’t done so already, assemble the ice cream maker by attaching the paddle to the lid and ensuring that it is securely in place.
- Remove the Freezer Bowl from the Freezer: Carefully take the freezer bowl out of the freezer. The bowl should be completely frozen at this point, with no liquid sloshing around.
- Place the Freezer Bowl in the Base: Insert the frozen freezer bowl into the base of the ice cream maker. Ensure that it is aligned properly and sits securely.
- Attach the Lid: Fit the lid onto the base, ensuring that the paddle is inserted into the freezer bowl. The lid should fit snugly and securely.
- Plug in the Ice Cream Maker: Connect the ice cream maker to a power source using the provided power cord. Make sure the outlet is easily accessible and suitable for the device.
- Pre-Chill the Ice Cream Maker: Allow the ice cream maker to pre-chill for a few minutes before adding your ice cream mixture. This helps to maintain the cold temperature and aids in the proper freezing of the ice cream.
With the ice cream maker properly prepared, you’re now ready to move on to the exciting step of choosing and preparing your ingredients. In the next section, we’ll explore how to select the perfect flavors and mix-ins for your homemade ice cream and how to prepare the ingredients for the best results. Get ready to tantalize your taste buds!
Choosing and Preparing Ingredients
The key to crafting mouthwatering homemade ice cream lies in selecting high-quality ingredients and preparing them with care. Here’s what you need to know about choosing and preparing the ingredients for your ice cream creations:
1. Base Ingredients: The base of your ice cream typically consists of milk, cream, sugar, and a pinch of salt. Opt for full-fat dairy products like whole milk and heavy cream to achieve a rich and creamy texture. The sugar adds sweetness, while the salt enhances the flavor.
2. Flavorings: To infuse your ice cream with delightful flavors, you can use ingredients like vanilla extract, cocoa powder, fruit purees, coffee, or even extracts like mint or almond. Experiment with different flavor combinations to find your favorites.
3. Mix-ins: Add an extra element of texture and taste to your ice cream by incorporating mix-ins. Chopped nuts, chocolate chips, crushed cookies, fruit chunks, or caramel swirls are just a few examples of mix-ins that can take your ice cream to the next level.
4. Preparing the Ingredients: Before adding the ingredients to the ice cream maker, it’s important to prepare them properly. For instance, if you’re using fruits, ensure they are washed, peeled, and cut into small pieces. If you’re using chocolate or nuts, chop or crush them to the desired size. This will ensure even distribution and a balanced texture in your ice cream.
5. Chilling the Mixture: For best results, it’s recommended to chill your ice cream mixture before pouring it into the ice cream maker. This pre-chilling step allows the flavors to meld together and promotes a smoother consistency in the final product. Transfer the mixture to a covered container and refrigerate for at least an hour or as indicated in your recipe.
By carefully selecting and preparing your ingredients, you can fully customize the flavors and textures of your homemade ice cream. In the next section, we’ll delve into the exciting process of using the Pampered Chef Ice Cream Maker to transform your prepared ingredients into a luscious frozen delight. Get ready to indulge your senses!
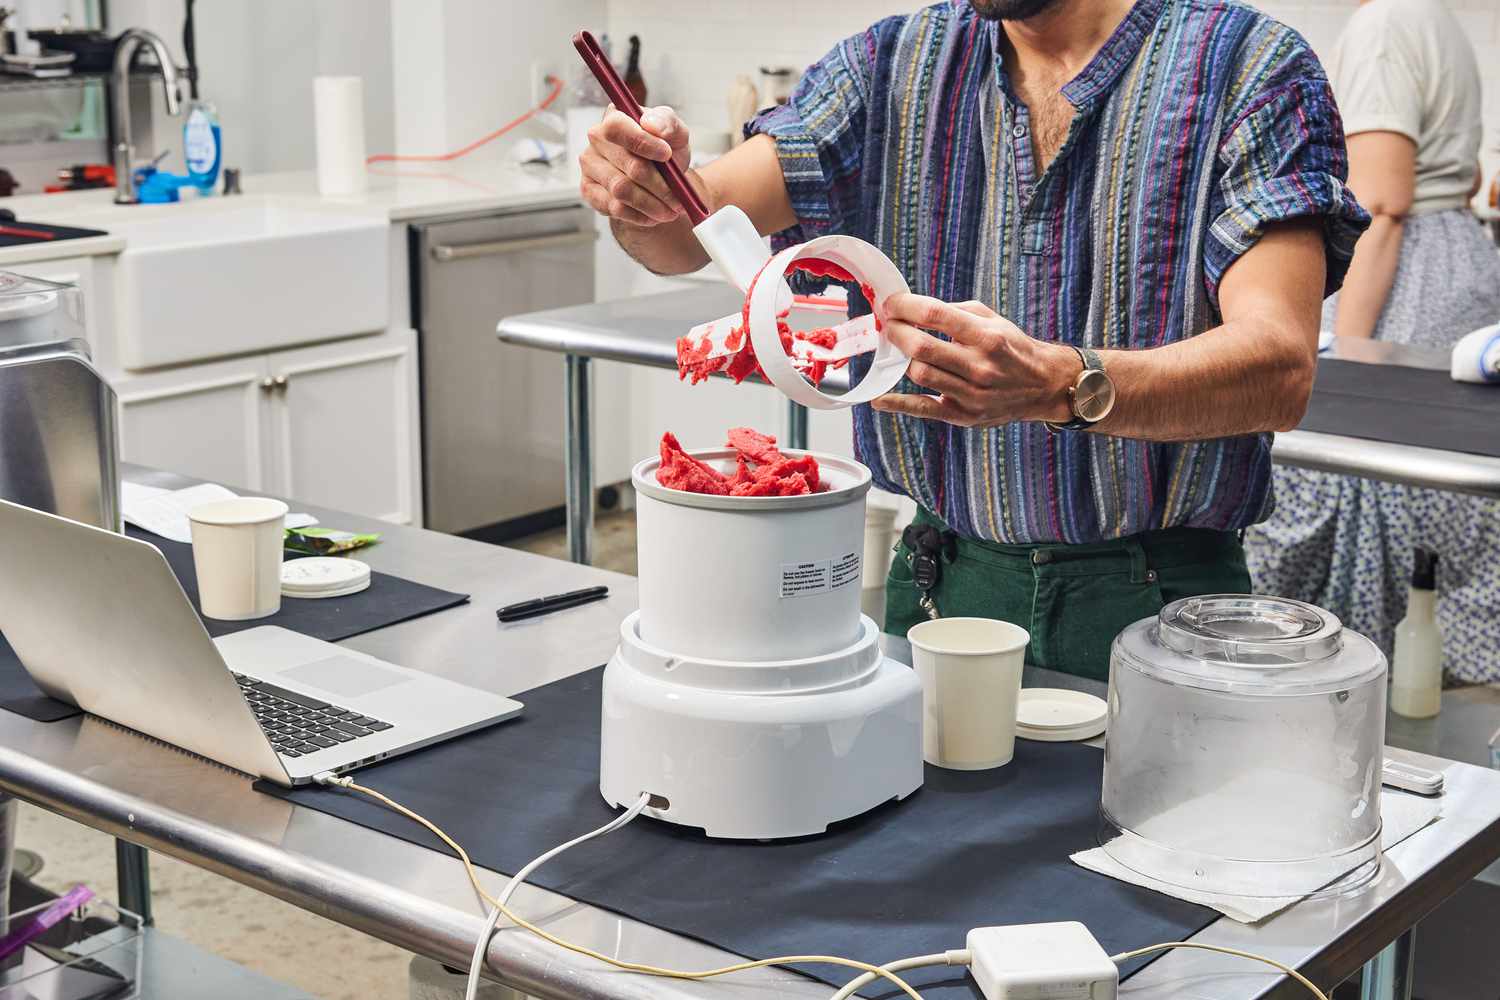
Using the Ice Cream Maker
Now comes the exciting part – using the Pampered Chef Ice Cream Maker to turn your prepared ingredients into a delectable frozen treat. Follow these simple steps to create your very own homemade ice cream:
- Ensure the Ice Cream Maker is Assembled and Plugged In: Confirm that the ice cream maker is properly assembled with the frozen freezer bowl in place and securely attached to the base. Plug in the ice cream maker and make sure it is connected to a power source.
- Pour the Chilled Mixture into the Freezer Bowl: Take your chilled ice cream mixture and pour it into the assembled ice cream maker’s freezer bowl. Ensure that the mixture fills the bowl while leaving enough space for expansion as it freezes.
- Insert the Paddle and Close the Lid: Place the paddle attachment into the ice cream mixture in the freezer bowl. Ensure the lid is closed tightly to prevent any leaks or spills during the freezing process.
- Switch on the Ice Cream Maker: Turn on the ice cream maker by selecting the appropriate settings according to the manufacturer’s instructions. Most models have a power switch or a dial to control the operation.
- Allow the Ice Cream Maker to Work its Magic: Let the ice cream maker churn the mixture for the specified amount of time, usually around 20-30 minutes. The paddle will continuously churn the mixture, incorporating air and preventing ice crystals from forming.
- Monitor the Texture of the Ice Cream: Keep an eye on the texture of the ice cream as it churns. The mixture will start off liquidy, but as it freezes, it will gradually thicken and become more scoopable.
- Check for Desired Consistency: After the recommended time is up, check the consistency of the ice cream. If it has reached your desired thickness, turn off the ice cream maker. If not, continue churning until you achieve the desired texture.
- Transfer the Ice Cream to a Freezer-Safe Container: Once the ice cream is ready, use a spatula or spoon to transfer it from the freezer bowl to a freezer-safe container. Make sure the container has an airtight lid to keep the ice cream fresh.
- Place the Ice Cream in the Freezer: Put the container of freshly churned ice cream into the freezer for a couple of hours to further firm up and reach the perfect scooping consistency.
And there you have it – homemade ice cream made with the Pampered Chef Ice Cream Maker! Enjoy your creamy, flavorful creation straight from the freezer or use it as a base for adding more mix-ins and toppings. In the next section, we’ll explore the best practices for freezing and storing your homemade ice cream. Let’s make sure every spoonful is as delicious as the first!
Freezing and Storing Ice Cream
Once you’ve made your homemade ice cream using the Pampered Chef Ice Cream Maker, it’s important to properly freeze and store it to maintain its flavor and texture. Follow these guidelines to ensure your ice cream stays fresh and delicious:
- Allow the Ice Cream to Harden: After transferring your freshly churned ice cream to a freezer-safe container, let it harden in the freezer for at least 2-4 hours. This step helps the ice cream achieve a scoopable consistency.
- Use an Airtight Container: When selecting a container for storing your ice cream, opt for one with an airtight lid. This prevents air from reaching the ice cream, which can cause freezer burn and negatively impact its taste and texture.
- Press Plastic Wrap on the Surface: Before sealing the container, place a piece of plastic wrap directly on the surface of the ice cream. This creates a barrier against air and further protects against freezer burn.
- Store in the Back of the Freezer: The back of the freezer is generally the coldest area. Store your ice cream container there to ensure it remains at a consistent and optimal temperature, minimizing the risk of melting or developing ice crystals.
- Avoid Frequent Thawing and Refreezing: Repeatedly thawing and refreezing ice cream can lead to a loss of quality and texture. Try to consume the ice cream within a few weeks to enjoy it at its best.
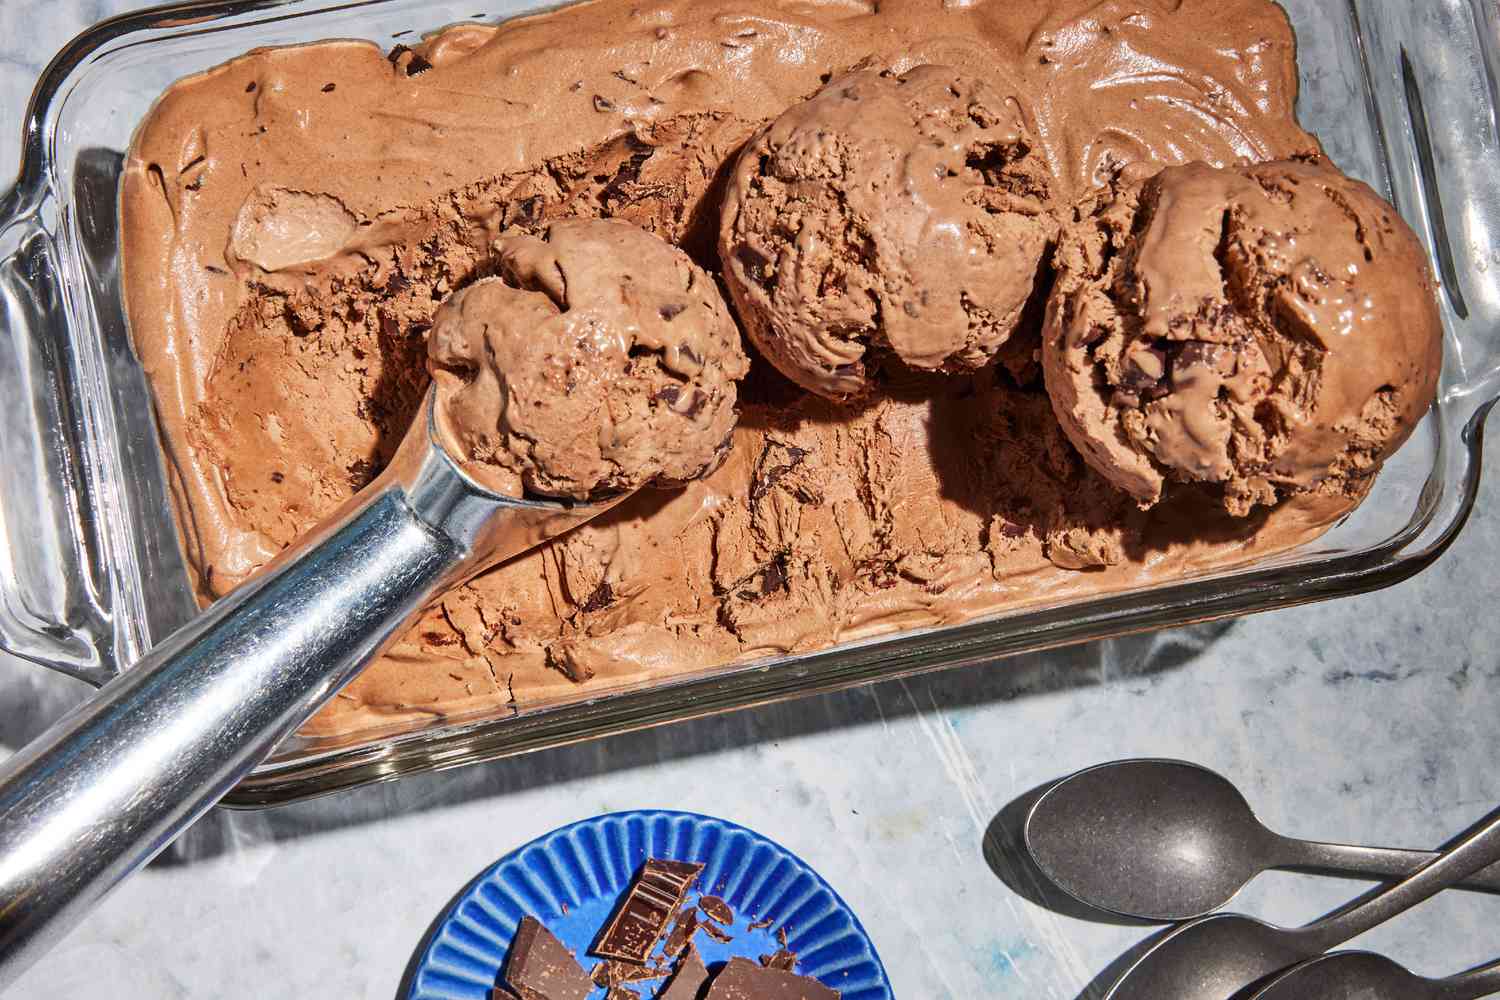
- Serve and Enjoy: When it’s time to serve your homemade ice cream, remove the container from the freezer and allow it to sit at room temperature for a few minutes to soften slightly. This will make scooping easier and ensure a smooth, creamy texture.
By following these tips for freezing and storing your ice cream, you can enjoy the delightful flavors and creamy texture of your homemade treat for days to come. In the next section, we’ll explore the cleaning and maintenance of the Pampered Chef Ice Cream Maker, ensuring it stays in top-notch condition for many ice cream-making adventures. Let’s keep the deliciousness going!
Cleaning and Maintenance of the Ice Cream Maker
To keep your Pampered Chef Ice Cream Maker in optimal condition and ready for your next ice cream-making session, it’s important to clean and maintain it properly. Follow these guidelines to ensure your ice cream maker stays clean and functional:
- Unplug the Ice Cream Maker: Before you begin the cleaning process, make sure the ice cream maker is unplugged and disconnected from the power source.
- Disassemble the Ice Cream Maker: Carefully disassemble the ice cream maker by removing the freezer bowl, lid, and paddle. Refer to the instruction manual for any specific disassembly instructions.
- Wash the Removable Parts: Wash the freezer bowl, lid, and paddle with warm soapy water. Use a gentle dish detergent and a non-abrasive sponge or cloth to avoid scratching the surfaces.
- Rinse Thoroughly: After washing the removable parts, rinse them thoroughly with clean water to remove any soap residue.
- Dry Completely: Before reassembling the ice cream maker, make sure all the parts are completely dry. Use a clean towel or air dry them to prevent any moisture buildup.
- Wipe the Base: Use a damp cloth to wipe down the base of the ice cream maker. This will remove any spills or drips that may have occurred during the ice cream-making process.
- Store in a Clean and Dry Space: Once completely dry, store the ice cream maker in a clean and dry space. Avoid storing it with other items that may cause damage, such as sharp utensils or heavy objects.
- Regular Maintenance: It’s recommended to follow the manufacturer’s guidelines for regular maintenance tasks. This may include deep cleaning the freezer bowl or lubricating any moving parts if required.
By cleaning and maintaining your ice cream maker after each use, you can ensure its longevity and continued performance. Regular maintenance and proper storage will keep your ice cream maker ready for whenever the craving for homemade frozen delights strikes. In the next section, we’ll share some tips and tricks to help you create the most delicious and flavorful ice cream using your Pampered Chef Ice Cream Maker. Get ready to elevate your ice cream game!
Tips and Tricks for Making Delicious Ice Cream
Creating homemade ice cream with the Pampered Chef Ice Cream Maker is not only fun but also allows you to experiment with flavors and textures. Here are some tips and tricks to take your ice cream game to the next level:
- Chill Ingredients: Ensure that all your ingredients, including the base, mix-ins, and flavorings, are properly chilled before adding them to the ice cream maker. This will result in a smoother and creamier texture.
- Experiment with Ratios: Adjusting the ratio of milk to cream in the base can alter the richness of your ice cream. More cream will result in a denser and creamier texture, while a higher proportion of milk will create a lighter and softer texture.
- Infuse Flavors: Don’t be afraid to infuse your ice cream base with flavors. Consider using ingredients like tea leaves, spices, or herbs to add a unique twist to your creations.
- Layer in Mix-ins: For added texture and flavor, layer in your mix-ins while transferring the churned ice cream to the storage container. This ensures even distribution and avoids overmixing.
- Add Textural Contrast: Incorporate ingredients with varying textures to create a pleasurable mouthfeel. For example, add crunchy nuts to a smooth ice cream base or swirl in a ribbon of fudgy sauce for a delightful contrast.
- Experiment with Sweeteners: While sugar is the traditional sweetener, you can experiment with alternatives like honey, maple syrup, or agave nectar to impart unique flavors to your ice cream.
- Allow for Flavor Development: Give your ice cream flavors time to develop by allowing the mixture to sit in the refrigerator for a few hours or overnight before churning. This enhances the overall taste of the ice cream.
- Get Creative with Toppings: Once you’ve scooped your ice cream into bowls or cones, don’t forget to get creative with toppings. Crushed cookies, caramel drizzle, sprinkles, or a dollop of whipped cream can take your ice cream from delicious to extraordinary.
- Take Notes: Keep a journal of your ice cream-making adventures, noting the ingredients, ratios, and flavor combinations you used. This way, you can replicate your favorite recipes and make adjustments for future experiments.
Remember, making homemade ice cream is all about having fun and exploring your creativity. Don’t be afraid to think outside the box and try new flavor combinations. With these tips and tricks, you’ll be well on your way to crafting delicious and unique homemade ice cream masterpieces using your Pampered Chef Ice Cream Maker.
Frequently Asked Questions
Here are some frequently asked questions about using the Pampered Chef Ice Cream Maker:
Q: How long does it take to churn ice cream with the Pampered Chef Ice Cream Maker?
A: The churning time can vary depending on the recipe and desired consistency. In general, it takes about 20-30 minutes of churning to achieve a creamy and scoopable texture.
Q: Can I use the ice cream maker to make dairy-free or vegan ice cream?
A: Absolutely! The Pampered Chef Ice Cream Maker can be used to make dairy-free or vegan ice cream. Simply substitute dairy-free milk or cream alternatives and use ingredients like coconut milk, almond milk, or cashew milk to achieve a creamy texture.
Q: Can I make frozen yogurt or sorbet in the ice cream maker?
A: Yes! The ice cream maker can be used to make a variety of frozen treats, including frozen yogurt and sorbet. Simply use different recipes and ingredients to create your desired flavors.
Q: Can I add mix-ins while the ice cream is churning?
A: It’s recommended to add mix-ins, such as chocolate chips or nuts, in the last few minutes of churning. This ensures even distribution without overmixing.
Q: How should I clean the ice cream maker?
A: The removable parts of the ice cream maker, including the freezer bowl, lid, and paddle, can be washed with warm soapy water and a non-abrasive sponge or cloth.
Q: Can I make multiple batches of ice cream without refreezing the freezer bowl?
A: The freezer bowl needs to be refrozen for at least 24 hours between each batch to ensure proper freezing of the ice cream mixture.
Q: Can I use the ice cream maker without freezing the freezer bowl in advance?
A: No, the freezer bowl needs to be frozen in advance for at least 24 hours to achieve the desired freezing temperature for the ice cream mixture.
These are just a few commonly asked questions about using the Pampered Chef Ice Cream Maker. If you have any additional inquiries, consult the instruction manual or reach out to the manufacturer for further assistance.
Conclusion
Creating homemade ice cream with the Pampered Chef Ice Cream Maker is a delightful experience that allows you to indulge in personalized frozen creations. Whether you’re a beginner or a seasoned ice cream enthusiast, this handy tool opens up a world of possibilities to satisfy your sweet tooth.
We started our journey by introducing the Pampered Chef Ice Cream Maker and highlighting its user-friendly features. From there, we delved into the steps of getting started, preparing the ice cream maker, choosing and preparing ingredients, using the ice cream maker, freezing and storing the ice cream, and cleaning and maintaining the device.
Throughout this guide, we provided tips and tricks to help you elevate your ice cream-making game, from experimenting with flavors and mix-ins to achieving the perfect consistency and texture. We also answered some commonly asked questions to address any concerns you may have had.
By following the instructions and employing the provided tips and tricks, you can create mouthwatering homemade ice cream that will impress family and friends. So, grab your favorite ingredients, unleash your creativity, and embark on a delightful ice cream-making adventure with the Pampered Chef Ice Cream Maker!