Introduction
Welcome to the world of modern technology where our devices have become more versatile than ever before. If you own a camera and are tired of the grainy quality of your computer’s webcam, you’ll be glad to know that you can now use your camera as a webcam for video chats, streaming, and online meetings. By utilizing this feature, you can enjoy higher image quality, enhanced control over settings, and the ability to use different lenses for a more professional-looking appearance.
In this guide, we will walk you through the steps of using your camera as a webcam and provide you with helpful tips and tricks to ensure a seamless experience. But before we dive into the nitty-gritty details, it’s essential to check your camera’s compatibility with this functionality and make sure you have the necessary equipment and software.
Note that the instructions in this guide may vary depending on the brand and model of your camera, as well as the operating system of your computer. We recommend consulting your camera’s user manual and the manufacturer’s website for specific instructions tailored to your camera.
Now, let’s get started on this exciting journey to elevate your video communication to a whole new level!
Checking Camera Compatibility
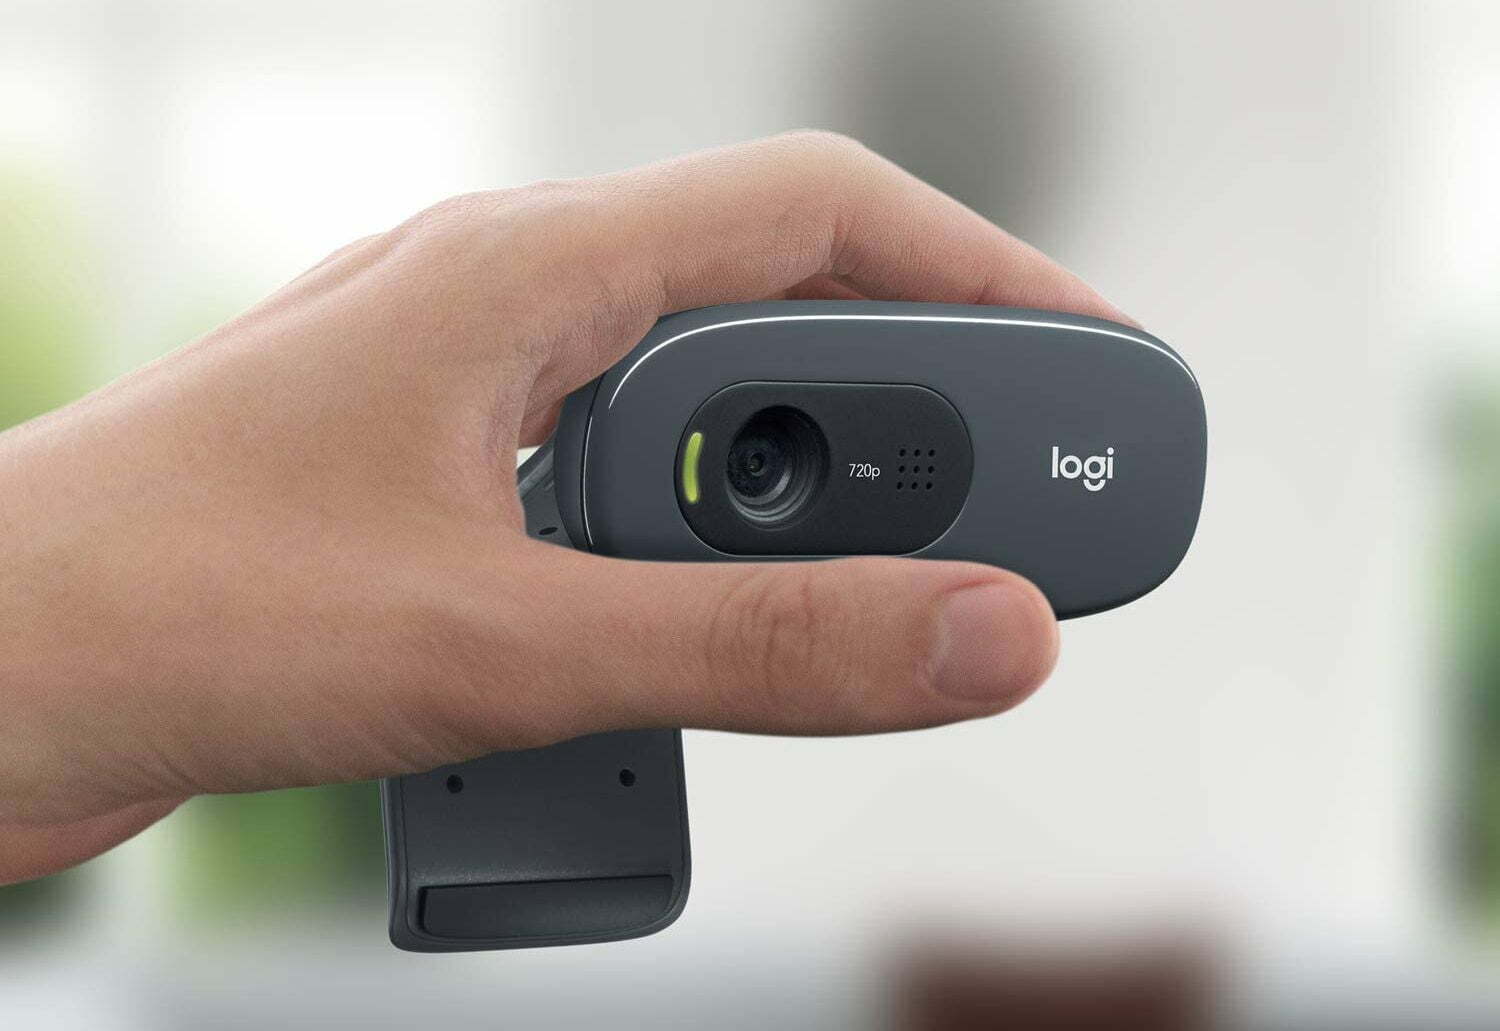
Before you begin using your camera as a webcam, it is crucial to ensure that your camera supports this function. Not all cameras have the capability to be used as webcams, so it’s important to verify compatibility.
The first step is to determine if your camera has a “clean HDMI” output. Clean HDMI means that the camera can output a video signal through its HDMI port without any on-screen display overlays. This is essential for a streamlined and professional-looking webcam feed. Consult your camera’s user manual or the manufacturer’s website to find out if your camera supports clean HDMI output.
Next, check if your camera has a USB output or if it can be connected to a USB capture device. This is necessary to connect your camera to your computer and use it as a webcam. Some cameras come with a USB cable for this purpose, while others may require an additional USB-C to USB adapter. Confirm the requirements for your specific camera model.
Furthermore, ensure that your computer has the necessary ports and compatibility to connect with your camera. Most cameras use HDMI or USB connections, so make sure your computer has the corresponding ports available. If not, you may need to use an adapter or purchase an external capture card to facilitate the connection.
Lastly, consider the compatibility of your camera with the software you plan to use for video conferencing or streaming. Popular video conferencing platforms like Zoom, Microsoft Teams, and Skype have specific requirements for using external cameras. Check the official documentation of the software to confirm compatibility and any additional steps that might be needed to make the camera work seamlessly.
By verifying the compatibility of your camera with HDMI output, USB connectivity, computer ports, and video conferencing software, you will ensure a smooth setup process and avoid any disappointments. Once you have confirmed compatibility, you can move on to the next steps involved in using your camera as a webcam.
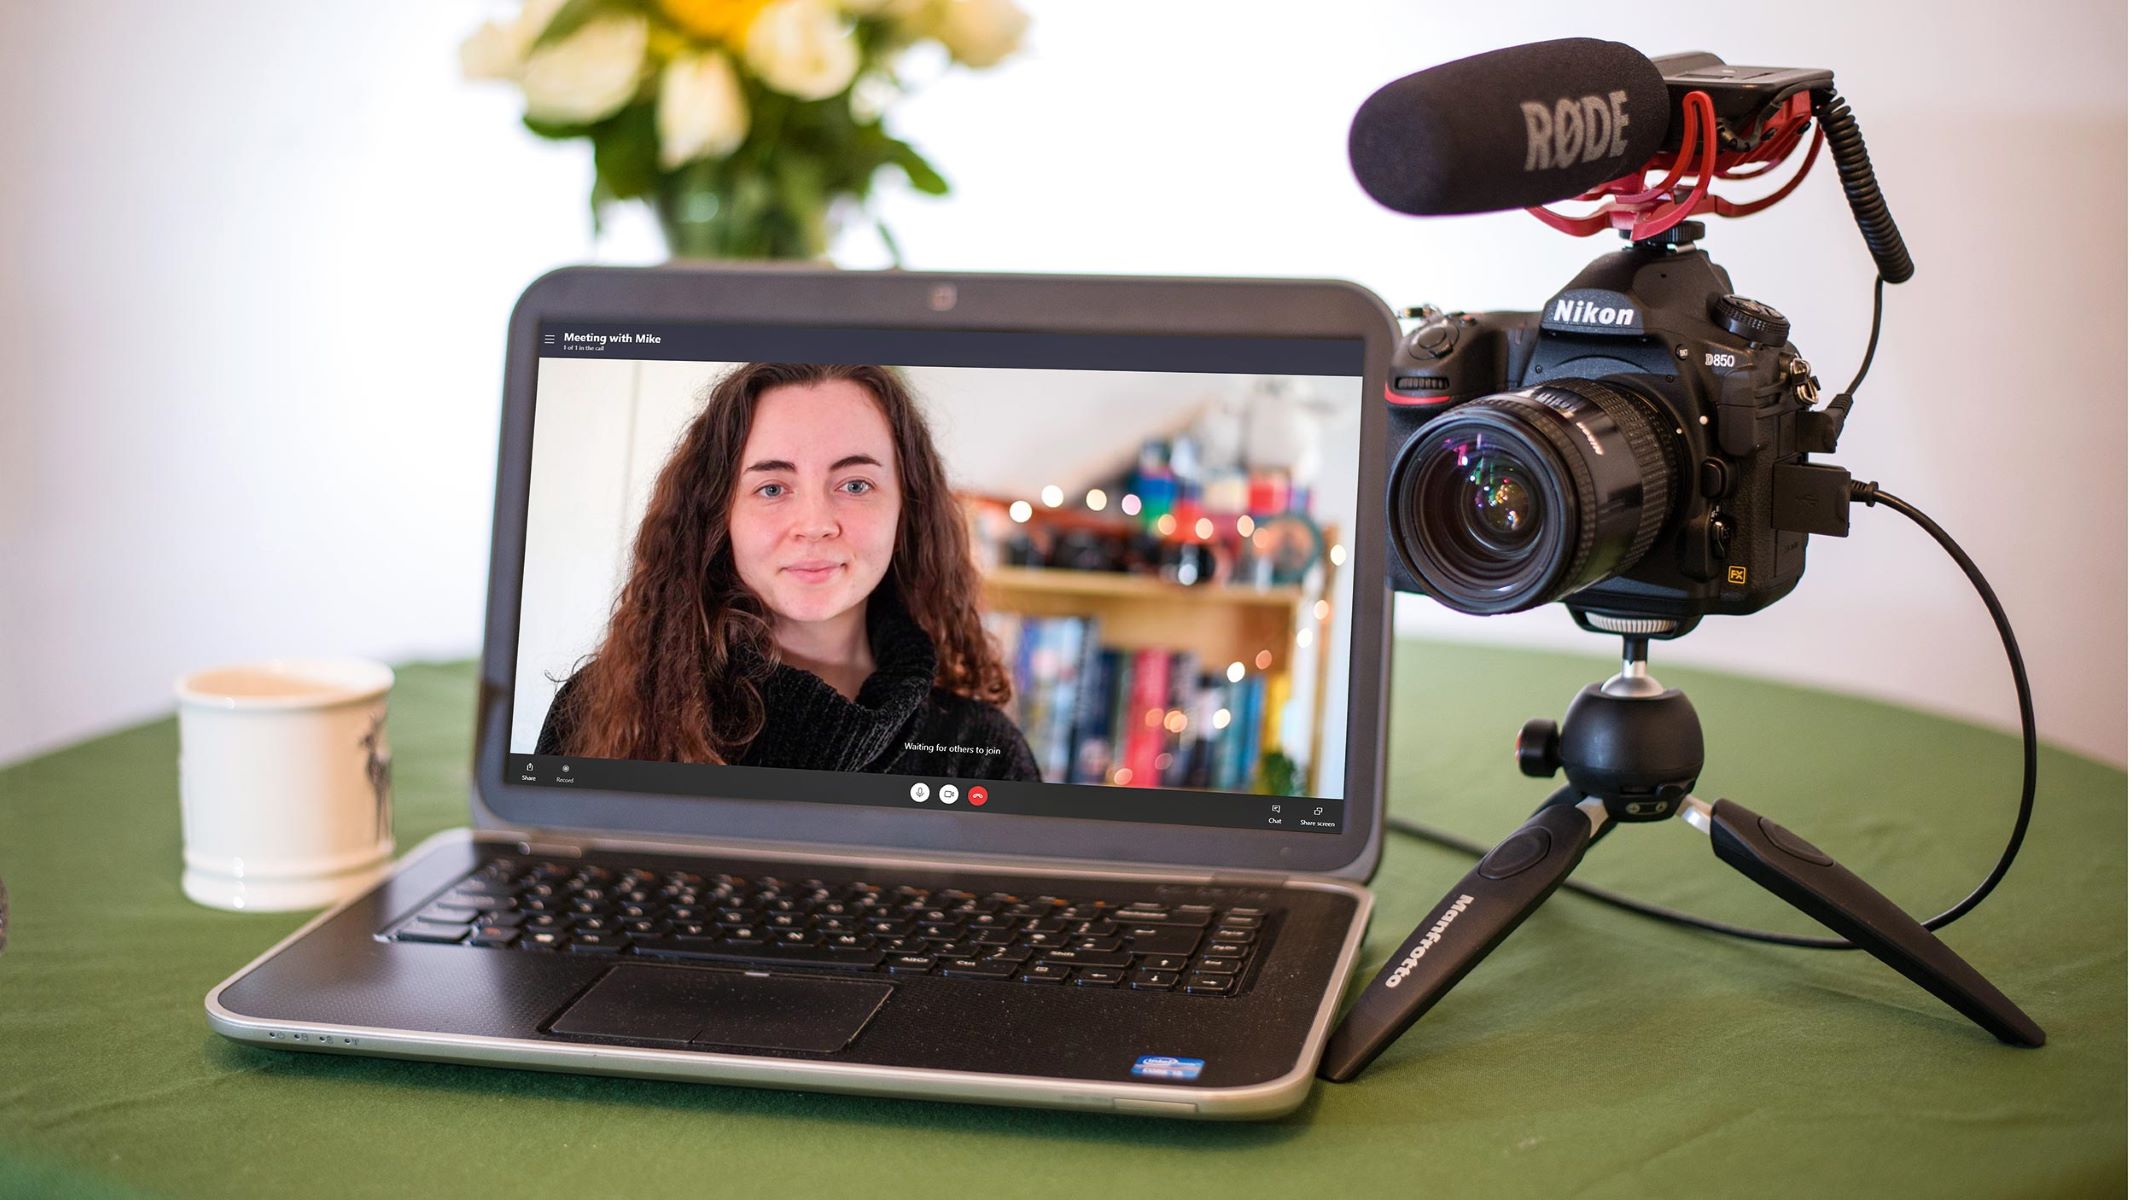
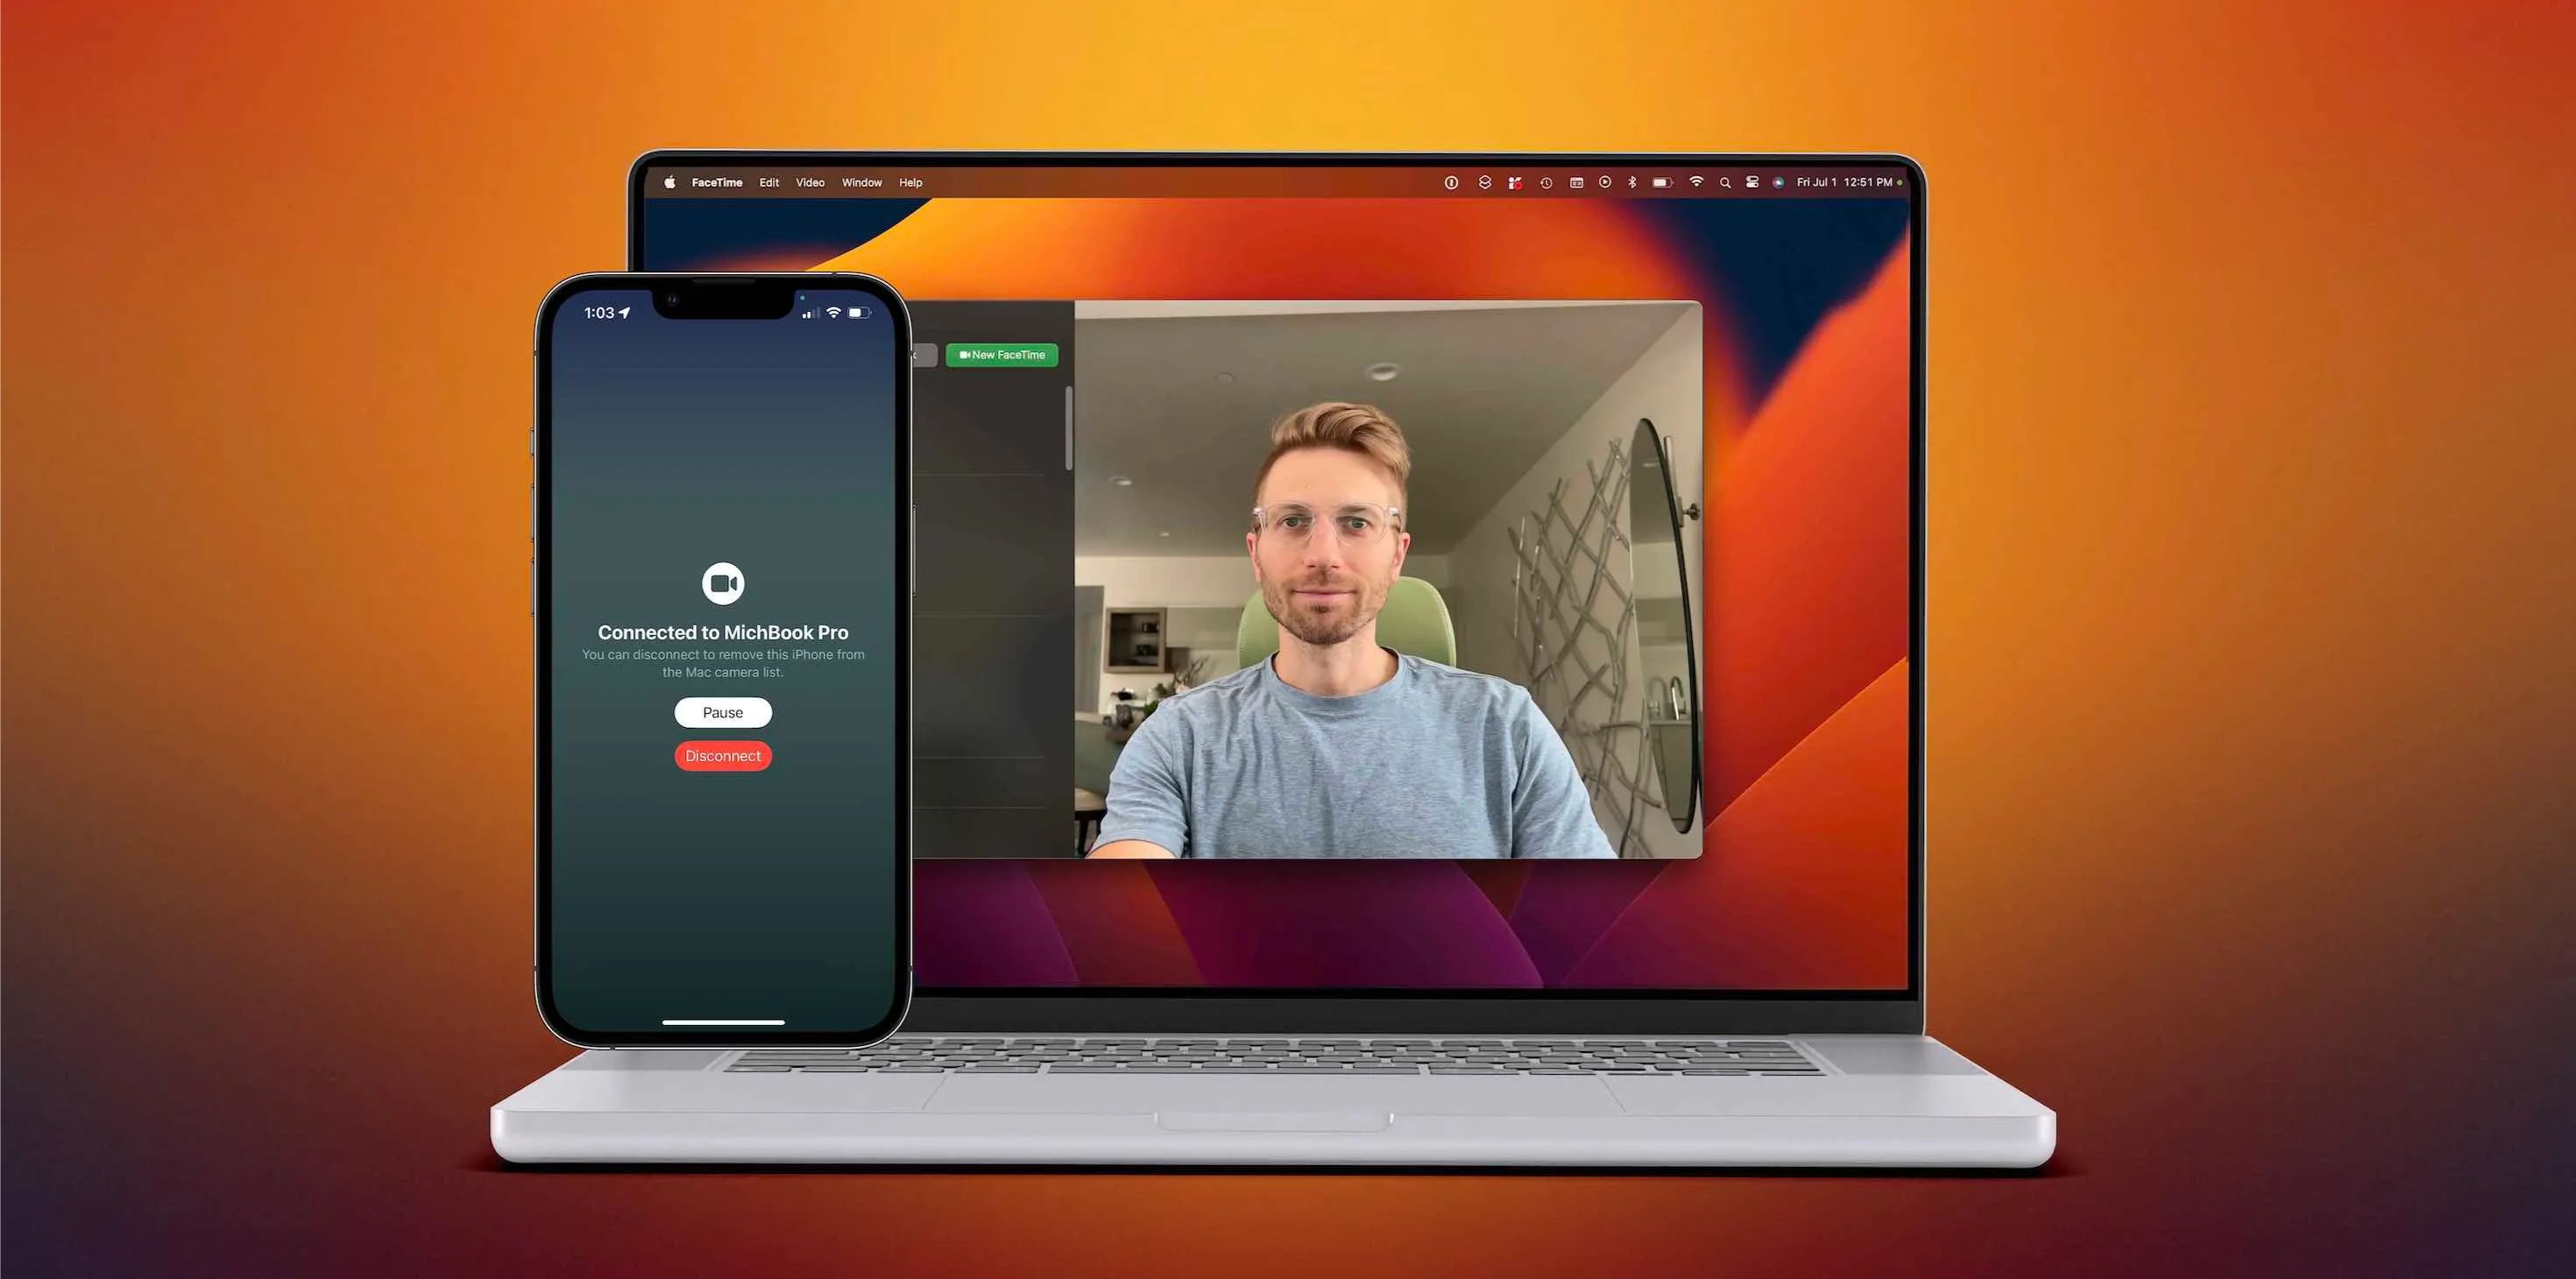
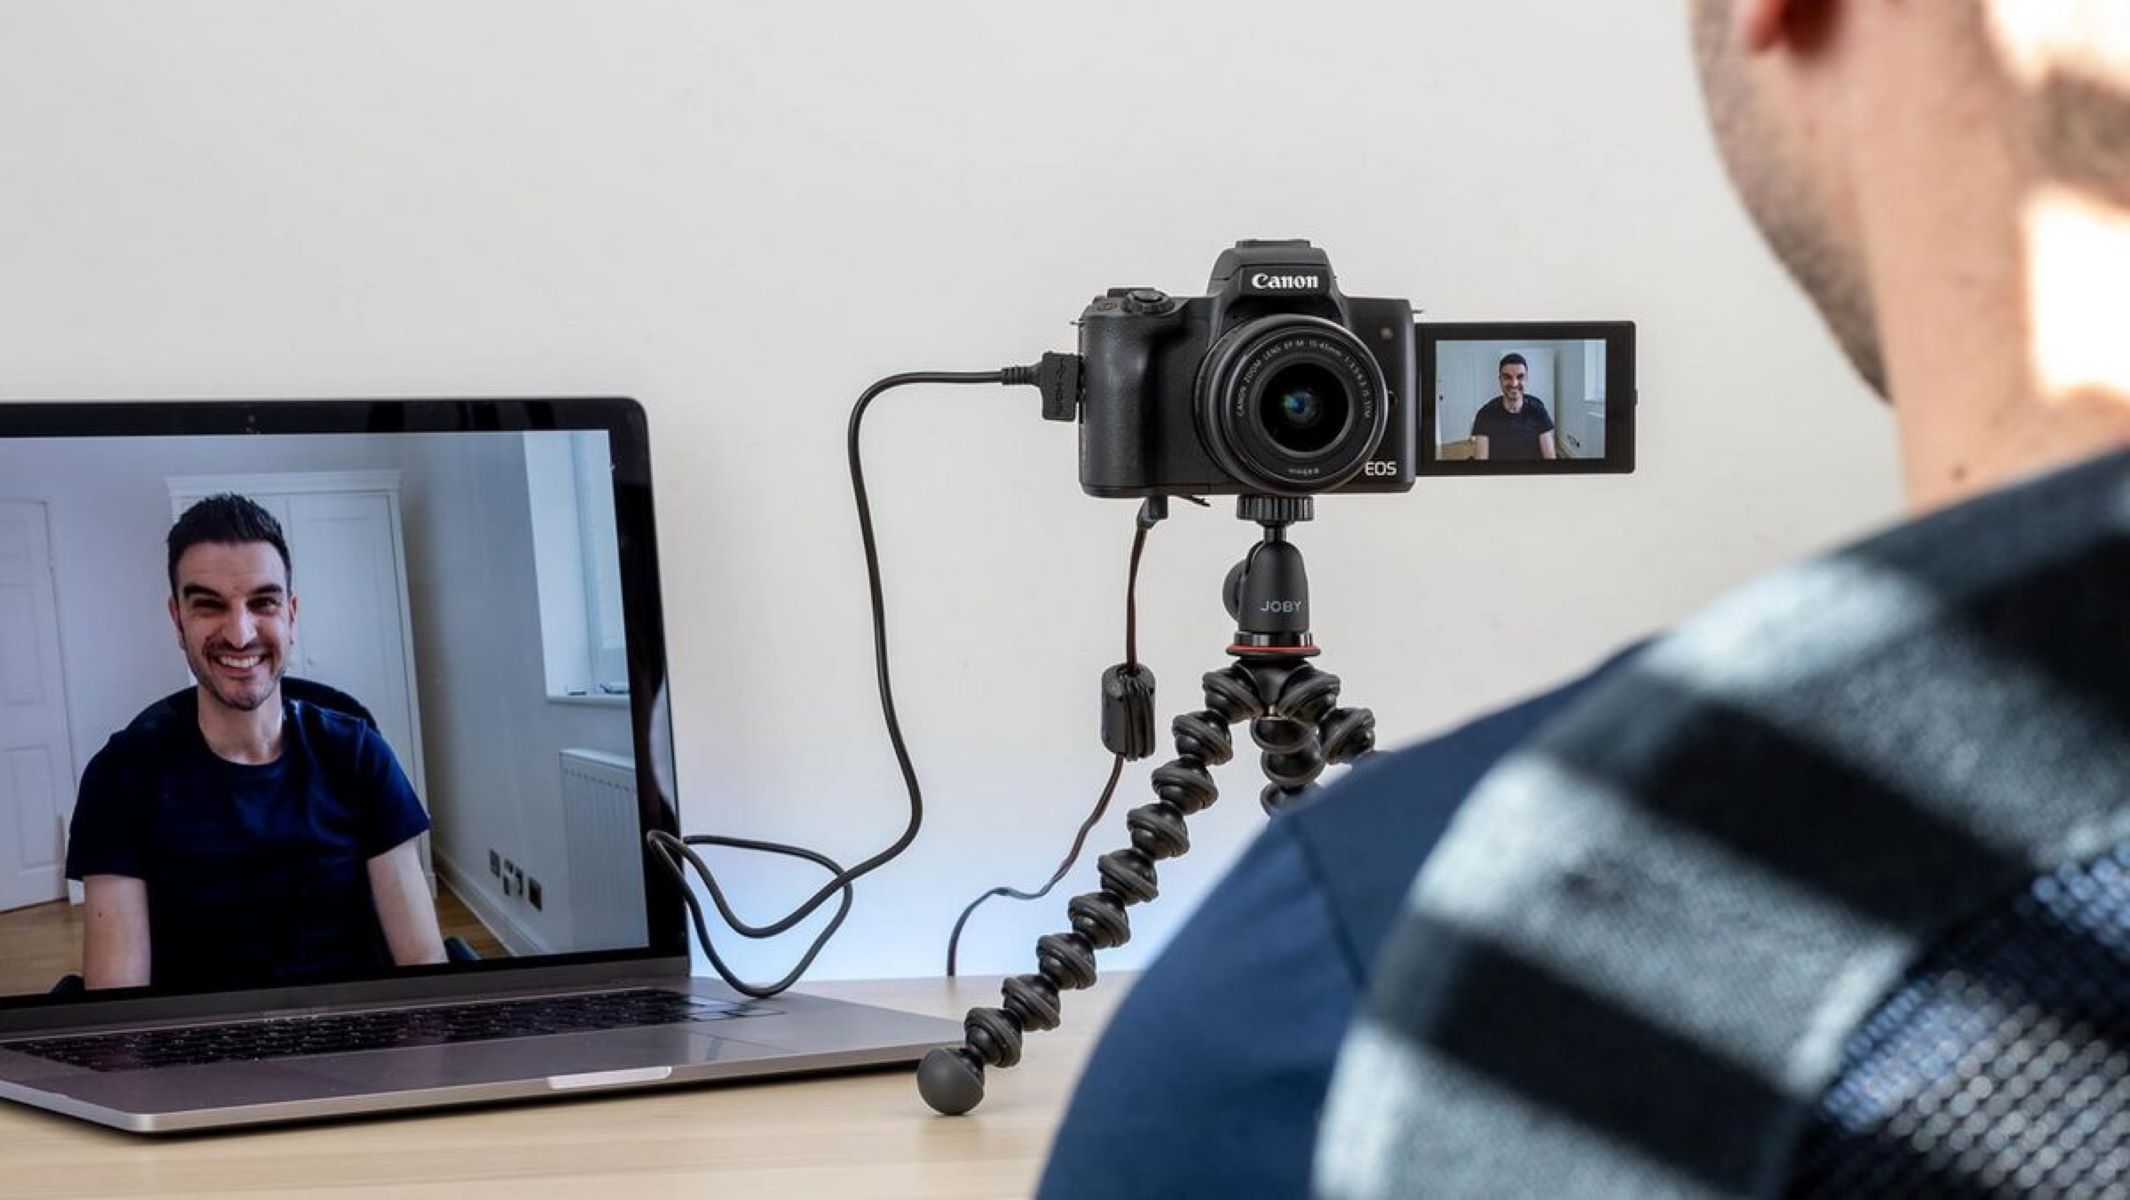
Connecting Camera to Computer
Now that you have confirmed the compatibility of your camera, it’s time to connect it to your computer. The connection process may vary depending on the type of camera and the available ports on your computer. Here are the general steps to connect your camera to your computer:
- Power off your camera and computer before making any connections.
- If your camera has a clean HDMI output, connect one end of the HDMI cable to the camera’s HDMI port and the other end to your computer’s HDMI input or through an HDMI capture card.
- If your camera uses a USB connection, connect one end of the USB cable to the camera and the other end to an available USB port on your computer. Use any necessary adapters or converters if your camera has a USB-C or mini-USB port.
- Power on your camera and computer.
Once the physical connection is established, your computer should recognize the camera as an external device. It may automatically install the necessary drivers, or you may need to download and install them manually from the camera manufacturer’s website.
It’s important to note that some cameras require specific modes or settings to be enabled to function as a webcam. Consult your camera’s user manual to determine if there are any special settings or modes that need to be activated. For example, Canon cameras have a “Webcam Utility” software that needs to be installed and enabled to use the camera as a webcam.
After the camera is connected and the appropriate settings are enabled, you are ready to proceed to the next steps of installing the necessary software and configuring camera settings.
Installing Necessary Software
Once your camera is connected to your computer, the next step is to install the necessary software to use your camera as a webcam. The required software may vary depending on the camera brand and model, as well as the operating system of your computer. Here are the general steps to install the necessary software:
- Visit the official website of your camera manufacturer and navigate to the support or downloads section.
- Search for the software or drivers specific to your camera model and download them onto your computer.
- Run the downloaded software installer and follow the on-screen instructions to complete the installation process.
- Once the software is installed, restart your computer to ensure it recognizes the camera as a webcam.
- If your camera requires additional drivers or software plugins for specific video conferencing platforms, such as Zoom or Microsoft Teams, visit the respective platform’s website and follow their instructions for camera setup.
It’s important to keep your camera’s software and drivers up to date. Visit the manufacturer’s website regularly for any firmware updates or software releases that may enhance the camera’s functionality or compatibility with video conferencing software.
Some camera manufacturers also provide dedicated webcam software or utilities that offer additional features and customization options. Explore the software provided by your camera manufacturer to take full advantage of its capabilities.
By installing the necessary software and drivers, you are one step closer to transforming your camera into a fully functional webcam.
Configuring Camera Settings
Once the necessary software is installed and your camera is recognized as a webcam by your computer, it’s time to configure the camera settings to optimize your video quality. Here are some essential settings to consider:
- Resolution: Set the resolution of your camera to match the desired video output. Higher resolutions generally provide better video quality but require more bandwidth and processing power. Choose a resolution that is suitable for your needs and the capabilities of your computer.
- Frame rate: Adjust the frame rate of your camera to ensure smooth and fluid video playback. A higher frame rate, such as 30 or 60 frames per second, is recommended for a more realistic and lifelike video experience.
- Focus and exposure: Use the autofocus or manual focus feature of your camera to ensure that you are in sharp focus during video calls. Adjust the exposure settings to avoid overexposed or underexposed video footage. Experiment with different settings to find the right balance.
- White balance: Set the white balance of your camera to accurately capture colors. This prevents your video from appearing too warm (yellowish) or too cool (bluish). Utilize preset white balance modes or adjust manually based on the lighting conditions of your environment.
- Audio input: Consider using an external microphone for better audio quality. Check the audio settings of your camera or video conferencing software to ensure that the correct microphone is selected as the audio input source.
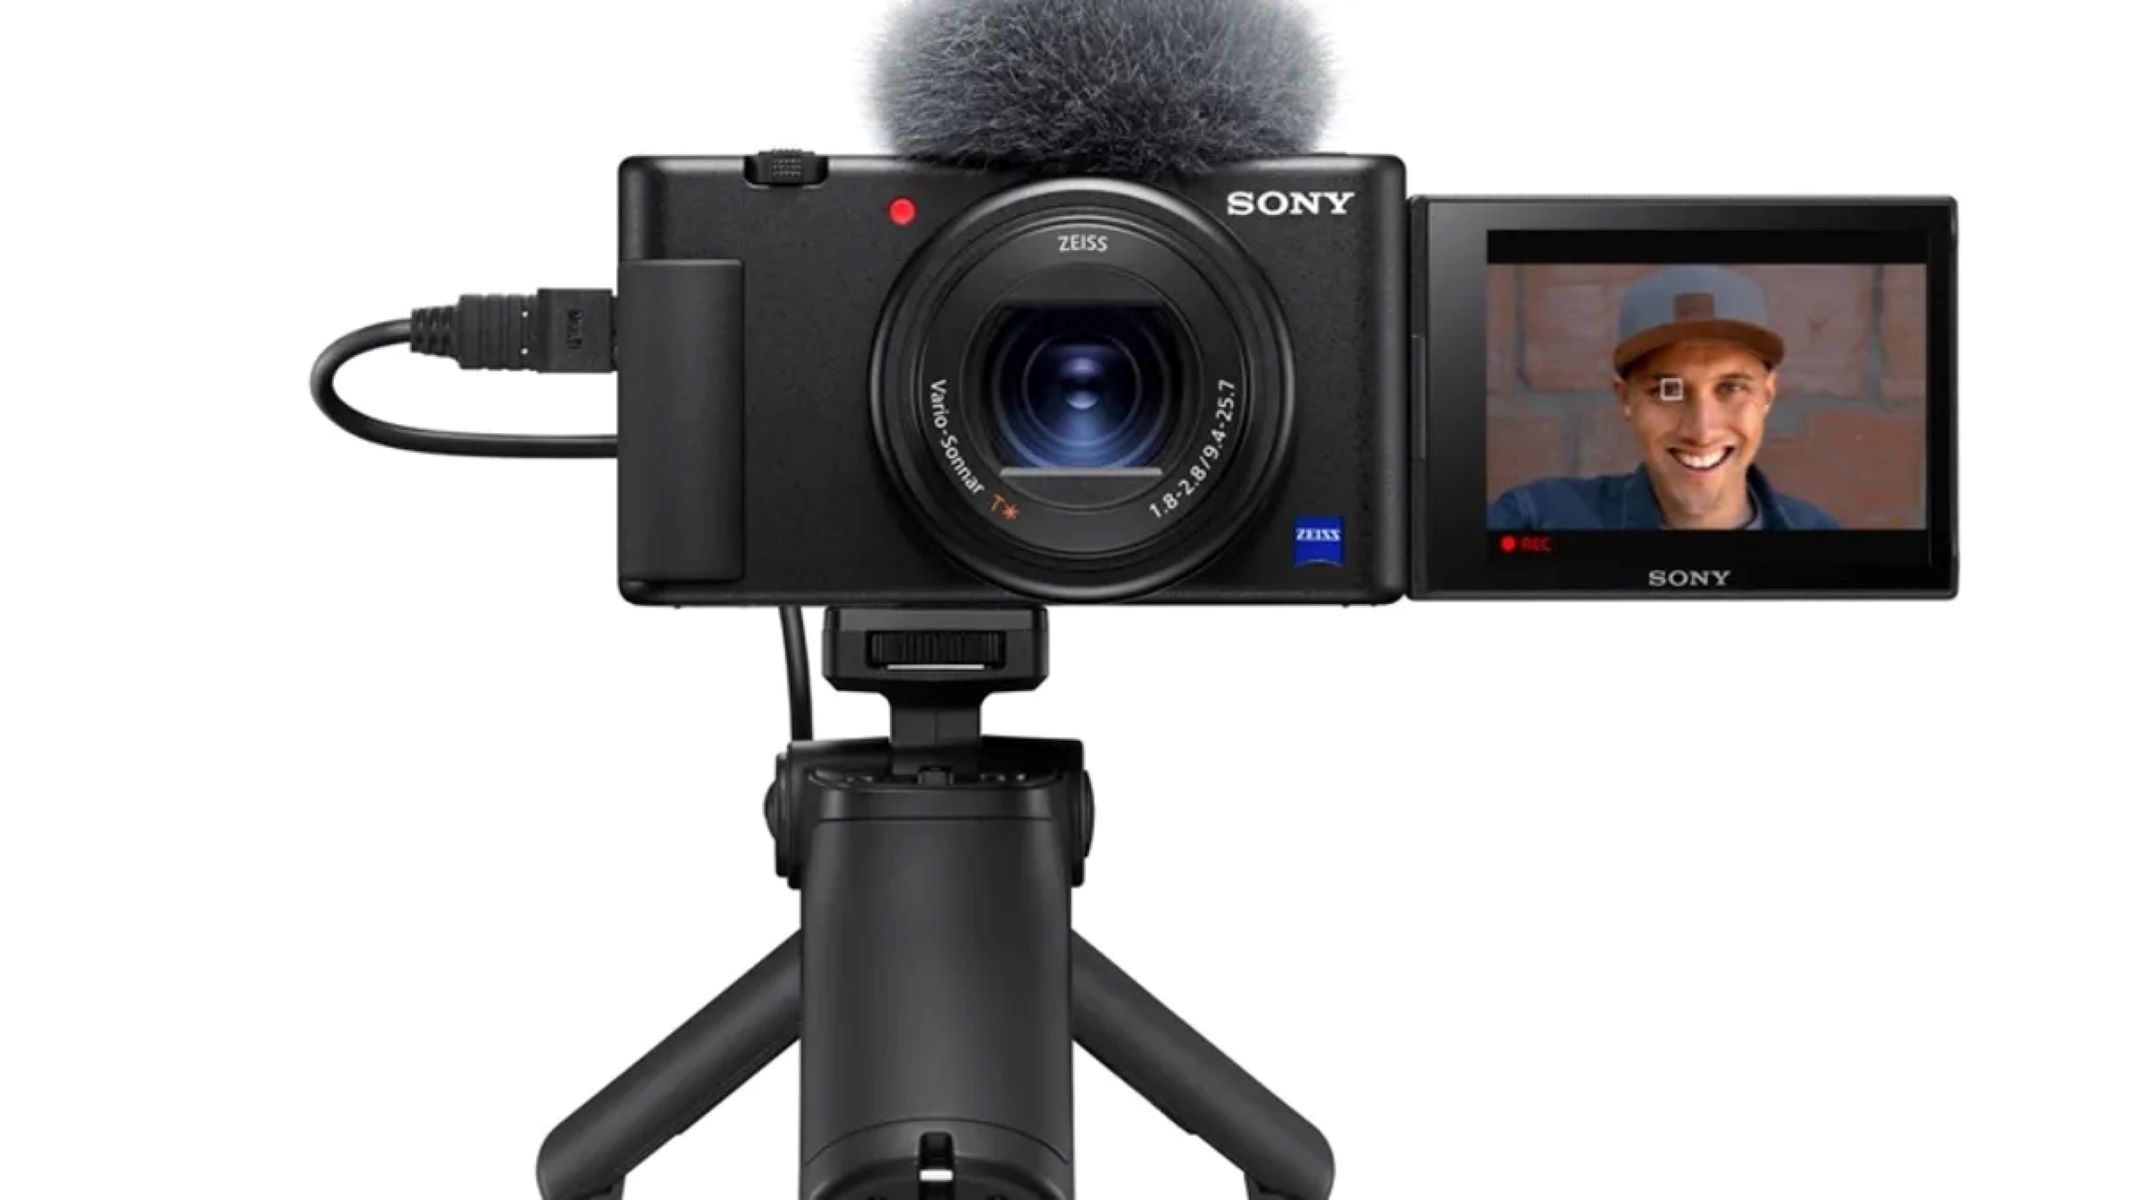
- Live view display: Some cameras allow you to preview your video feed on the camera’s LCD screen. Use this feature to check your framing, composition, and lighting before starting a video call or recording.
Each camera brand and model may have different menus and options for configuring settings. Refer to your camera’s user manual or the manufacturer’s website for detailed instructions on accessing and adjusting these settings.
Furthermore, explore the camera software or utilities provided by your camera manufacturer. They may offer additional features, such as face tracking, filters, and effects, that can enhance your video communication experience.
Take the time to experiment and find the optimal camera settings that suit your preferences and requirements. With the right configuration, you’ll be able to present yourself professionally and confidently in your video calls.
Positioning the Camera
Now that your camera is connected, the software is installed, and the settings are configured, it’s time to position your camera for optimal video quality and framing. The positioning of your camera can greatly impact how you are perceived during video calls or recordings. Here are some tips for positioning your camera:
- Eye-level placement: Position your camera at eye-level or slightly above for a natural look. This helps create a more engaging and comfortable visual experience for the viewers on the other end of the video call.
- Centered frame: Ensure you are centered within the camera frame. This allows others to focus on you without any distractions. Leave some space above your head and avoid placing important elements too close to the edges of the frame.
- Stable setup: Use a tripod or stable surface to keep the camera steady during video calls. This helps avoid shaky footage that can be distracting for viewers.
- Background: Pay attention to the background behind you. Choose a location with a clean and clutter-free background, or use virtual backgrounds available in some video conferencing software. Avoid busy or distracting backgrounds that can take the focus away from you.
- Lighting: Consider the lighting in your environment. Natural light is often the most flattering, so position yourself facing a window or use soft lighting sources. Avoid harsh backlighting or unflattering shadows on your face.
- Distance: Find an appropriate distance between you and the camera. Too close can distort your features, while too far can make it difficult for others to see you clearly. Experiment with different distances to find what works best for you.
- External monitor: If you prefer to look directly at your interviewers or colleagues during video calls, consider using an external monitor positioned above or beside your camera. This way, you can maintain eye contact while still maintaining a professional appearance.
Take some time to test different positioning options and evaluate the results. Ask for feedback from friends or colleagues to ensure that you are presenting yourself in the best possible way.
Remember, the goal is to create a polished and professional visual presence during video calls. By paying attention to the positioning, framing, stability, background, lighting, and distance of your camera, you can elevate your video communication to the next level.
Troubleshooting Tips
While using your camera as a webcam, you may encounter some issues or challenges along the way. Don’t worry; we’ve got you covered. Here are some troubleshooting tips to help you overcome common problems:
- No video or audio: If you’re not getting any video or audio output from your camera, double-check the connections. Ensure that the cables are properly connected, and the camera is powered on. Restart your computer and camera if necessary.
- Poor video quality: If your video appears blurry or pixelated, check your camera’s resolution settings. Select a higher resolution if available, but keep in mind that it may require more bandwidth and processing power. Additionally, ensure you have adequate lighting and that there are no obstacles obstructing the camera’s view.
- Audio problems: If you’re experiencing audio issues, make sure the correct microphone is selected as the input device in your camera or video conferencing software settings. Check the microphone volume and mute settings. Consider using an external microphone for better audio quality.
- Software conflicts: If you’re encountering conflicts between the camera software and other applications, try closing unnecessary programs or updating the camera software to the latest version. You might also need to disable or adjust any conflicting settings within the software.
- Camera freezes or disconnects: If your camera freezes or disconnects during use, verify that you have the latest firmware and drivers installed. Ensure your camera’s battery is fully charged, or connect it to a power source. Experiment with different USB ports or cables to eliminate potential connectivity issues.
- Compatibility issues: If your camera is not working with a specific video conferencing software, check the software’s documentation for specific compatibility requirements. Some applications only support certain camera brands or models. Consider using alternative software or researching if there are any plugins or workarounds available.
- Resource limitations: If your computer is struggling to handle the camera as a webcam, close unnecessary applications and processes that consume system resources. Lowering the camera resolution may also help alleviate the strain on your computer’s performance.
If you’re unable to resolve the issues on your own, don’t hesitate to reach out to the camera manufacturer’s customer support or consult online forums for further assistance. Remember that troubleshooting is a natural part of using any new technology, and with a bit of persistence, you’ll be able to overcome any challenges that come your way.
Conclusion
Congratulations! You have learned how to use your camera as a webcam, taking your video communication to the next level. By following the steps outlined in this guide, you can enjoy enhanced video quality, improved control over settings, and a more professional appearance during video calls, streaming, and online meetings.
Remember to check your camera’s compatibility, connect it properly to your computer, install the necessary software, and configure the camera settings to optimize your video quality. Pay attention to the positioning of your camera, ensuring it is at eye level and centered within the frame. Troubleshoot any issues you may encounter along the way and don’t hesitate to seek further support if needed.
Using your camera as a webcam opens up a world of possibilities, allowing you to unleash your creativity and present yourself in a more professional manner in virtual settings. Whether you’re attending business meetings, conducting interviews, or connecting with friends and family, your camera’s high-quality output will make a positive impact.
Now, gather your equipment, follow the steps outlined in this guide, and start enjoying the benefits of using your camera as a webcam. Experiment with different settings, lighting conditions, and backgrounds to find your ideal setup. With a little practice, you’ll become a pro at utilizing your camera for all your video communication needs.
Embrace this opportunity to elevate your video presence and make a lasting impression in your virtual interactions. Now, go forth and connect with confidence using your camera as a webcam!