Introduction
Welcome to our guide on how to use the Meer Mini Projector! In this article, we will walk you through the process of unboxing, connecting, and setting up the Meer Mini Projector, as well as provide some helpful tips for getting the best projection quality. Whether you’re looking to enjoy a movie night at home or create a professional presentation, the Meer Mini Projector is a versatile and portable device that can meet your needs.
The Meer Mini Projector is a compact and lightweight projector that allows you to turn any blank wall or screen into a home theater or presentation display. With its advanced features and user-friendly interface, this projector is suitable for both personal and professional use. Whether you want to watch your favorite movies, share photos with friends and family, or deliver a captivating presentation, the Meer Mini Projector is a reliable choice.
By following our step-by-step instructions and tips, you’ll be able to set up and use the Meer Mini Projector with ease. We’ll cover everything from unboxing the projector to connecting it to your devices and adjusting the settings for optimal performance. Whether you’re a tech-savvy individual or a beginner, this guide will provide you with the necessary information to make the most out of your Meer Mini Projector.
So, if you’re ready to explore the world of projection and take your entertainment or presentations to the next level, let’s get started with unboxing the Meer Mini Projector!
What is the Meer Mini Projector?
The Meer Mini Projector is a compact and portable device that allows you to project images and videos onto a larger screen or wall. It is designed to be user-friendly and versatile, making it suitable for a variety of uses, including home entertainment, presentations, and outdoor movie nights.
With its small size and lightweight design, the Meer Mini Projector is highly portable, allowing you to take it wherever you go. Whether you’re hosting a movie night at a friend’s house or delivering a presentation at a client’s office, this projector is easy to transport and set up.
One of the key features of the Meer Mini Projector is its ability to connect to a wide range of devices. It supports HDMI, USB, AV, and SD card inputs, making it compatible with laptops, smartphones, gaming consoles, DVD players, and more. This versatility ensures that you can easily play your favorite content from various sources without any hassle.
The Meer Mini Projector offers impressive image and video quality, with a native resolution of 1080p and a maximum projection size of 100 inches. Whether you’re watching movies, playing video games, or showcasing presentations, you can enjoy clear and vibrant visuals with sharp details.
Additionally, the Meer Mini Projector features built-in speakers, eliminating the need for external audio devices. However, if you prefer a more immersive audio experience, you can also connect external speakers or headphones to the projector for enhanced sound quality.
Overall, the Meer Mini Projector is a versatile and user-friendly device that provides an immersive and enjoyable viewing experience. Whether you’re a movie enthusiast, a presenter, or someone who simply wants to upgrade their entertainment setup, the Meer Mini Projector offers a convenient and high-quality solution.
Now that you know what the Meer Mini Projector is, it’s time to unbox this device and explore its features!
Unboxing the Meer Mini Projector
When you first receive your Meer Mini Projector, unboxing it is the exciting first step towards setting up your projection experience. Here’s a step-by-step guide on how to unbox your Meer Mini Projector:
- Remove the outer packaging: Start by carefully removing the protective outer packaging of the projector. Make sure to handle it with care to avoid any damage.
- Open the box: Lift the top flap of the box to reveal the contents inside. The Meer Mini Projector is securely packed to ensure its safety during transportation.
- Take out the Meer Mini Projector: Carefully lift the projector out of the box, making sure to hold it by its sides or use the provided handles if available. Avoid touching the lens to prevent any fingerprints or smudges.
- Check the included accessories: Set the projector aside and inspect the box for any additional accessories. The Meer Mini Projector typically comes with a power adapter, remote control, HDMI cable, AV cable, and user manual. Ensure that all the accessories are present and in good condition.
- Read the user manual: Take a moment to read the user manual provided. It will provide you with important information on how to operate and set up your Meer Mini Projector.
Unboxing the Meer Mini Projector is a straightforward process that should only take a few minutes. It’s important to take your time and handle the equipment with care to avoid any accidental damage.
Now that you have unboxed your Meer Mini Projector and familiarized yourself with the included accessories, it’s time to move on to the next step: connecting the projector to your devices.
Connecting the Meer Mini Projector to your Devices
Once you have unboxed the Meer Mini Projector, the next step is to connect it to your devices. The Meer Mini Projector offers various connectivity options, allowing you to connect it to laptops, smartphones, gaming consoles, and more. Here’s a step-by-step guide on how to connect the Meer Mini Projector:
- Identify the available ports: Examine the back or side of the Meer Mini Projector to locate the available ports. Common ports include HDMI, USB, and AV.
- Choose the appropriate cable: Depending on the device you want to connect, select the appropriate cable. For example, if you’re connecting a laptop, you’ll likely need an HDMI cable.
- Connect the cable to your device: Plug one end of the cable into the respective port on your device (HDMI, USB, or AV). If using an HDMI cable, make sure to match the HDMI port numbers on both the projector and the device.
- Connect the other end to the Meer Mini Projector: Plug the other end of the cable into the corresponding port on the back or side of the projector.
- Power on the Meer Mini Projector: Connect the power adapter to the projector and plug it into a power outlet. Press the power button to turn on the projector.
- Select the correct input source: Use the remote control or the control buttons on the projector to navigate to the input source. Choose the input source that matches the port you used to connect your device.
Once connected, the Meer Mini Projector should display the content from your device. You may need to adjust the display settings on your device to ensure that the output is compatible with the projector. Refer to your device’s user manual for more information on adjusting display settings.
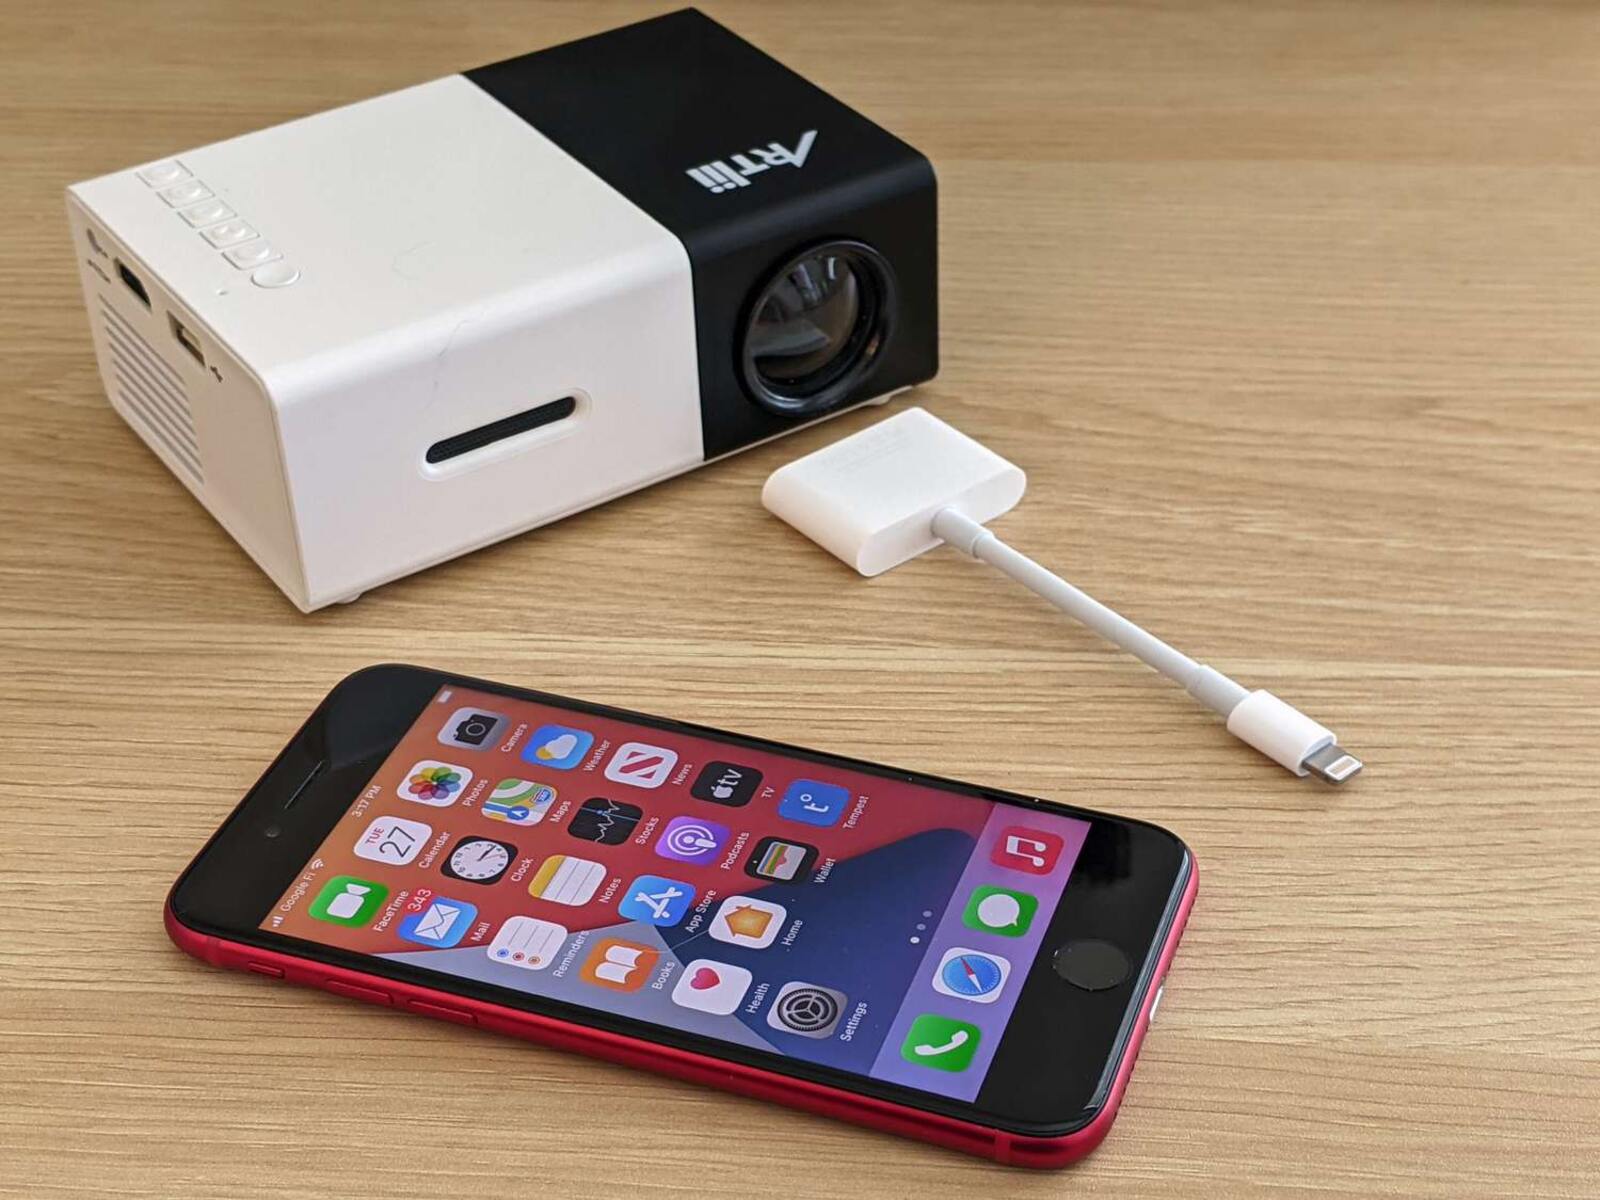
It’s important to note that some devices may require additional adapters or cables to connect to the Meer Mini Projector. For example, iPhones may require a lightning-to-HDMI adapter. Make sure to check the compatibility of your devices and have the necessary adapters or cables on hand.
Now that you have successfully connected the Meer Mini Projector to your devices, the next step is to adjust the settings to optimize your viewing experience. We will cover this in the upcoming section.
Adjusting the Settings on the Meer Mini Projector
After connecting your devices to the Meer Mini Projector, it’s important to adjust the settings to ensure optimal image and video quality. By making a few adjustments, you can enhance the clarity, brightness, and color accuracy of the projected content. Here’s a step-by-step guide on how to adjust the settings on the Meer Mini Projector:
- Access the projector settings: On the remote control or the control buttons on the projector, look for a “Menu” button or a similar option to access the settings menu.
- Navigate to the image settings: In the settings menu, locate the option for image settings. This may be labeled as “Picture,” “Image,” or something similar.
- Adjust brightness and contrast: Once in the image settings, you will typically find options to adjust the brightness and contrast levels. Increase or decrease these settings based on your preference and the ambient lighting conditions.
- Set the aspect ratio: Depending on the content you are projecting, you may need to adjust the aspect ratio to match the source. Common aspect ratios include 16:9 (widescreen) and 4:3 (standard). Select the appropriate option for your content.
- Calibrate color and saturation: To achieve accurate color representation, you can calibrate the color and saturation settings. Use the provided sliders or options to find the balance that suits your preference.
- Enable keystone correction: If the projector is not positioned perpendicular to the projection surface, you may notice distortion. The Meer Mini Projector typically offers keystone correction, which allows you to correct this distortion. Access the keystone correction option and adjust it until the projected image appears rectangular and aligned.
- Audio settings: If you prefer to use external speakers or headphones for audio playback, make sure to configure the audio settings accordingly. Select the appropriate audio output option in the settings menu.
As you make adjustments, take some time to test the projected image and make fine-tuned tweaks until you are satisfied with the results. Keep in mind that the ideal settings may vary based on the content you are projecting and the surrounding environment.
By adjusting the settings on the Meer Mini Projector, you can maximize your viewing experience and ensure that the projected content looks its best. Now that you have adjusted the settings, let’s move on to the next step: setting up the screen and projector placement.
Setting Up the Screen and Projector Placement
Once you have connected and adjusted the settings on your Meer Mini Projector, the next step is to set up the screen and determine the optimal placement for the projector. Proper screen setup and projector placement play a crucial role in achieving the best viewing experience. Here’s a step-by-step guide on how to set up the screen and place your projector:
- Choose the projection surface: Select a suitable surface for projection, such as a blank wall, projector screen, or a white sheet. The surface should be flat, smooth, and free from any creases or wrinkles.
- Clean the projection surface: Before projecting, ensure that the surface is clean and free from dirt or dust. This helps to maintain better image quality and prevents any obstructions or distortion.
- Calculate the projection distance: Determine the desired size of the projected image and the throw distance of your Meer Mini Projector. Refer to the projector’s user manual or specifications to find the recommended throw distance for your desired image size.
- Position the projector: Place the projector at the appropriate distance from the projection surface. Use a tripod, shelf, or any stable surface to support the projector and ensure it is level and secure. Adjust the angle of the projector to align the projected image with the screen.
- Resize and focus the projection: Use the focus ring or settings on your Meer Mini Projector to adjust the sharpness and clarity of the projected image. Rotate the focus ring until the image appears clear and in focus.
- Adjust the image size: Move the projector closer or farther from the projection surface to adjust the size of the projected image. Experiment with different distances until you achieve your desired image size.
- Ensure proper ventilation: To prevent overheating, make sure the projector has proper ventilation. Keep the surrounding area clear and ensure there is enough space for air circulation.
It’s important to consider the ambient lighting in the room where you’re setting up the projector. Dimming the lights or using blackout curtains can help enhance the image quality and contrast. Additionally, avoid placing the projector in direct sunlight or bright light sources to avoid washed-out images.
Take your time to carefully position and adjust the Meer Mini Projector for the best viewing experience. Once you are satisfied with the screen setup and projector placement, you are ready to enjoy your favorite movies, presentations, or any other content on the big screen!
Playing Content on the Meer Mini Projector
Now that you have set up the screen and placed your Meer Mini Projector, it’s time to start playing your favorite content. Whether you want to enjoy a movie, share photos with friends and family, or deliver a presentation, the Meer Mini Projector offers multiple ways to play your desired content. Here’s a step-by-step guide on how to play content on the Meer Mini Projector:
- Choose your content source: Determine the source of the content you want to play. It could be a laptop, smartphone, gaming console, DVD player, or any other device with video and audio output capabilities.
- Connect your device: Connect your chosen device to the Meer Mini Projector using the appropriate cable, such as HDMI, USB, or AV. Ensure that both the projector and the device are powered on.
- Select the input source: On the Meer Mini Projector, navigate to the input source and choose the corresponding input option that matches the port you used to connect your device.
- Open your content: On your connected device, open the desired content that you want to play. This could be a movie file, a presentation, a photo slideshow, or any other compatible media format.
- Adjust the settings: Use the projector’s control buttons or remote control to adjust settings such as volume, brightness, and aspect ratio to suit your preference.
- Start playing: Once everything is set up and your content is ready, press the play button on your device or use any media control options available on the projector’s remote control to start playing the content.
- Sit back and enjoy: With your content playing on the Meer Mini Projector, sit back and enjoy the immersive and larger-than-life experience it offers. Adjust the volume and other settings as needed during playback.
Keep in mind that the Meer Mini Projector supports a wide range of formats for video, audio, and image playback. However, if you encounter any issues playing a specific file format, ensure that it is compatible with the projector or consider converting it to a compatible format.
The Meer Mini Projector also allows you to connect external speakers or headphones for enhanced audio quality, especially if you’re looking for a more immersive sound experience. Simply connect your preferred audio devices to the projector’s audio output port.
Now that you know how to play content on the Meer Mini Projector, it’s time to relax and enjoy your favorite movies, presentations, and more on the big screen!
Tips for Getting the Best Projection Quality
To ensure that you get the best projection quality with your Meer Mini Projector, here are some helpful tips and tricks:
- Optimize the lighting conditions: For the best image quality, dim the lights in the room and reduce ambient light. This helps to enhance contrast and prevent washed-out images.
- Select the right screen or surface: Choose a flat, smooth, and white screen or wall for projection. This ensures a clear and vibrant display.
- Adjust the screen size and distance: Experiment with the distance between the projector and the screen to achieve your desired image size. It’s important to follow the recommended projection distance specified by the manufacturer.
- Focus and fine-tune the image: Use the focus ring or settings on your Meer Mini Projector to adjust the sharpness and clarity of the projected image. Make sure the image is in focus and not blurry.
- Use a projector stand or mount: Consider using a tripod or a projector mount to stabilize the position of the projector. This helps to achieve a steady and accurate projection.
- Keep the projector cool: Ensure proper ventilation around the projector to prevent overheating. Avoid blocking the vents to maintain optimal performance.
- Clean the projector lens: Regularly clean the projector lens with a soft cloth to remove any dust or smudges. This improves image clarity and prevents distortion.
- Adjust the projector settings: Use the projector’s settings menu to adjust brightness, contrast, color, and other settings to match your preferences and the content being projected.
- Upgrade your cables: Invest in high-quality cables, such as HDMI cables, for better signal transmission and improved image quality.
- Calibrate color settings: If needed, use calibration tools or the projector’s color settings to achieve accurate color representation. This ensures that the projected images appear realistic and vibrant.
By following these tips, you can optimize the projection quality of your Meer Mini Projector and enjoy a stunning visual experience. Experiment with different settings and configurations to find the perfect combination that suits your needs and preferences.
Now that you know how to get the best projection quality, you’re ready to elevate your entertainment and presentations to a whole new level!
Troubleshooting Common Issues with the Meer Mini Projector
While the Meer Mini Projector is designed to provide a seamless projection experience, you may encounter some common issues along the way. Here are some troubleshooting tips to help you resolve these issues:
- No power or projector not turning on: Ensure that the power adapter is properly connected to both the projector and a power source. Try a different power outlet or check if the power adapter is faulty.
- No image or blank screen: Make sure that the input source is correctly selected on the projector. Check that the cables are securely connected to both the projector and the source device. Also, ensure that the device you are using to play content is powered on.
- Poor image quality or no clarity: Adjust the focus ring on the projector to achieve a sharp and clear image. If the screen appears blurry, clean the projector lens with a soft cloth to remove any dirt or smudges.
- No sound or low audio volume: Check the audio cables to ensure they are properly connected to both the projector and external speakers, if used. Additionally, make sure that the volume on both the projector and the source device is turned up and not muted.
- Overheating and automatic shutdown: Ensure that the projector has proper ventilation and is not placed in a confined space. Clean the vents and avoid blocking them to allow for proper air circulation.
- Color issues or inaccurate color representation: Adjust the color settings in the projector’s settings menu to calibrate and achieve accurate color representation. Refer to the user manual for specific instructions on color calibration.
- Keystone distortion: If you notice keystone distortion, access the keystone correction option in the settings menu and adjust it to correct the image shape. Ensure that the projector is positioned perpendicular to the projection surface.
- Content compatibility issues: If you encounter issues playing specific file formats or content, ensure that they are compatible with the Meer Mini Projector. Consider converting the file to a compatible format or using a different playback device.
- Remote control not working: Check if the batteries in the remote control are properly inserted and have sufficient charge. Make sure there are no obstructions between the remote control and the projector.
- Software/firmware updates: Periodically check for software or firmware updates for the Meer Mini Projector. Installing the latest updates can resolve bugs or add new features to improve performance.
If you have followed these troubleshooting tips and are still experiencing issues with your Meer Mini Projector, refer to the user manual or contact customer support for further assistance specific to your device.
Remember that troubleshooting can vary depending on the specific issue and device, so always consult the manufacturer’s instructions and guidelines for the best resolution.
With these troubleshooting tips in mind, you can easily overcome common issues and enjoy a smooth and uninterrupted projection experience with your Meer Mini Projector.
Conclusion
Congratulations, you have now reached the end of our guide on how to use the Meer Mini Projector! We have covered everything from unboxing the projector to connecting it to your devices, adjusting the settings, setting up the screen and projector placement, playing content, troubleshooting common issues, and optimizing projection quality.
The Meer Mini Projector offers a convenient and versatile solution for home entertainment and professional presentations. Its compact size, portability, and compatibility with various devices make it a great choice for on-the-go viewing experiences. With its advanced features and user-friendly interface, you can easily unlock a world of immersive projection possibilities.
By following our step-by-step instructions and utilizing the provided tips, you can achieve the best projection quality and enjoy stunning visuals on any screen or wall. Whether you’re hosting a movie night, sharing memorable photos, or delivering a captivating presentation, the Meer Mini Projector is designed to enhance your viewing experience.
Remember to refer to the user manual for specific instructions and guidelines tailored to your Meer Mini Projector model. If you encounter any issues along the way, don’t hesitate to consult the troubleshooting section or reach out to customer support for further assistance.
We hope that this guide has been informative and valuable in helping you make the most out of your Meer Mini Projector. Now, it’s time to sit back, relax, and enjoy your favorite content on the big screen!