To use a DJI Mic, power on the transmitters and receiver, connect the receiver to your phone, camera, or computer via the appropriate cable or adapter, and start recording. The transmitters and receiver come pre-linked from the factory, so your first setup takes under a minute once you know which port to plug into.
How to use DJI Mic: what comes in the box and first power-up
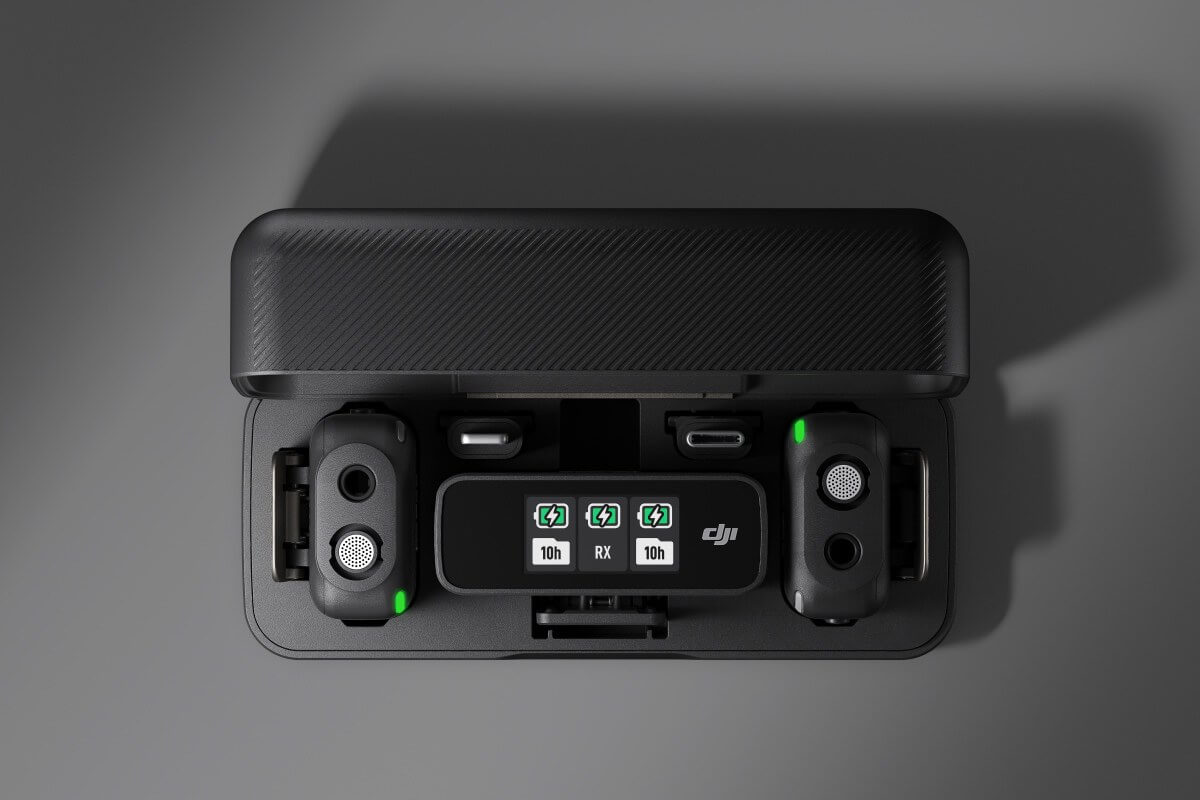
The out-of-box experience is designed for speed: the two transmitters and the receiver are linked by default, so you don't need to pair anything before your first recording. To power them on, either press the power button on each unit individually or simply open the Charging Case, the case automatically wakes all three devices. Once the screens light up and the transmitter LED shows solid green, you're ready to connect to your recording device.
Linking DJI Mic transmitters to the receiver
If your units ever lose their connection, relinking is straightforward. The easiest method is to place the transmitters and receiver into the Charging Case together, they will link automatically within a few seconds of the case closing.
For manual relinking, follow these steps:
- Turn on the receiver and the transmitter(s) you want to pair.
- On the receiver screen, scroll down to open the control center.
- Swipe left to find the "Settings" icon and tap it.
- Swipe left again to locate the "Link" option and tap it, the receiver enters linking mode.
- Press and hold the link button on the side of the transmitter until its green light flashes.
Once the light turns solid green, the link is established. This manual method is useful when the Charging Case isn't handy or when you're pairing a replacement transmitter.
Connecting the DJI Mic receiver to your smartphone
For smartphone recording, use the standard phone adapter that ships with the DJI Mic. Insert the adapter into the pogo-pin port at the bottom of the receiver, this is the small magnetic connector, not the 3.5mm jack. Then plug the adapter into your phone's charging port (USB-C or Lightning, depending on your model).
- Attach the phone adapter to the receiver's pogo-pin port until it clicks.
- Plug the adapter into your phone.
- Open your camera app or any recording app, the DJI Mic should be recognized automatically as the audio input.
- Start recording and speak into the transmitter to verify audio levels on the receiver screen.
If your phone doesn't recognize the mic, check that the adapter is fully seated and that your phone's USB settings allow external audio input (some Android phones require enabling "USB audio" in developer options).
Connecting the DJI Mic receiver to a camera
Cameras require the 3.5mm camera connection cable, which has a TRS jack on both ends.
- Connect the 3.5mm cable from the camera's mic port to the receiver's audio output.
- Power on the camera and the DJI Mic receiver.
Setting all three gain stages correctly prevents distortion, if the transmitter gain is too high, even a low camera level won't fix the clipped signal. Start with transmitter gain at 0 dB, receiver output at 0 dB, and camera level at about 50%, then adjust while monitoring headphones.
Connecting the DJI Mic receiver to a computer
For computer recording, use the same 3.5mm camera connection cable. Plug one end into the computer's microphone input port (usually a pink or labeled 3.5mm jack on desktops, or a combo headset jack on laptops) and the other end into the receiver's audio output.
- Power on the receiver and transmitters.
- Start recording in your preferred software (Audacity, QuickTime, OBS, etc.) and speak into the transmitter to confirm levels.
Note that the DJI Mic receiver outputs an analog signal, so your computer's sound card handles the analog-to-digital conversion. For best quality, keep the receiver's output level moderate (around 75%) to avoid clipping the computer's input stage.
Additional settings for DJI Mic 2 and later models
Newer models like the DJI Mic 2, DJI Mic 3, and DJI Mic Mini include a "Mono with Safety Track" mode that records a backup audio track at -6 dB lower to prevent clipping. This is a lifesaver when you're recording unpredictable sound sources, if your main track peaks into distortion, the safety track gives you clean audio to fall back on in post-production.
To enable it:
- On the receiver, go to Settings (via the control center as described earlier).
- Find "Mono with Safety Track" and toggle it on.
- Record normally, the receiver stores both the main track and the -6 dB safety track.
The DJI Mic 2 receiver also offers automatic camera power sync when connected via a 3.5mm TRS cable. Enable "Power On/Off with Camera Simultaneously" in Receiver Settings, and the receiver will turn on when your camera powers on and shut down when the camera turns off, saving battery and ensuring you never forget to power down.
DJI Mic range, compatibility notes, and troubleshooting
The DJI Mic transmits up to 250 meters in open, unobstructed environments without interference, using a stable 2.4GHz frequency band.
One critical compatibility warning: the DJI Mic receiver is not compatible with devices that transmit audio through an XLR connector. If your camera or recorder only has XLR inputs, you'll need a separate XLR adapter or a different wireless system. The 3.5mm TRS output is the only analog connection the receiver provides.
Most connection issues are resolved by relinking. If you experience dropouts, static, or no audio:
- Place the transmitter and receiver in the Charging Case for automatic relinking.
- If that fails, perform the manual link procedure described above.
- Check for physical obstructions or move closer to the receiver.
- Verify all cables are fully seated and not damaged.
For persistent issues, try a different cable, the 3.5mm TRS cables are the most common failure point. If the problem continues, contact DJI support with your firmware version and a description of the exact symptom.
\nRelated reading: What Frequency Do DJI Drones Use, How To Use DJI Osmo Pocket As Webcam, and How To Connect DJI Controller To Wi-Fi.