Introduction
With the advancement of smartphone technology, recording high-quality audio has become easier than ever before. While built-in smartphone microphones can produce decent sound, they often lack the professional-grade audio quality needed for professional recordings. This is where condenser microphones come in.
A condenser microphone is a popular choice among audio enthusiasts and professionals due to its ability to capture clear and detailed sound. It is widely used in various applications such as podcasting, voice-over work, music production, and live performances. The great news is that you can connect a condenser microphone to your smartphone and elevate your audio recording capabilities to a whole new level.
In this guide, we will walk you through the process of using a condenser microphone with your smartphone. We will cover everything from understanding the different types of condenser microphones to setting up and recording with the microphone. Whether you are a content creator, musician, or simply looking to improve your audio quality for personal use, this guide will provide you with the knowledge you need to get started.
Before we dive into the details, it is important to note that not all smartphones are compatible with condenser microphones. Make sure to check if your smartphone has a compatible audio input, such as a 3.5mm microphone jack or USB-C port, before proceeding with the setup.
Now, let’s embark on this journey of unleashing the true potential of your smartphone by harnessing the power of a condenser microphone.
Understanding Condenser Microphones
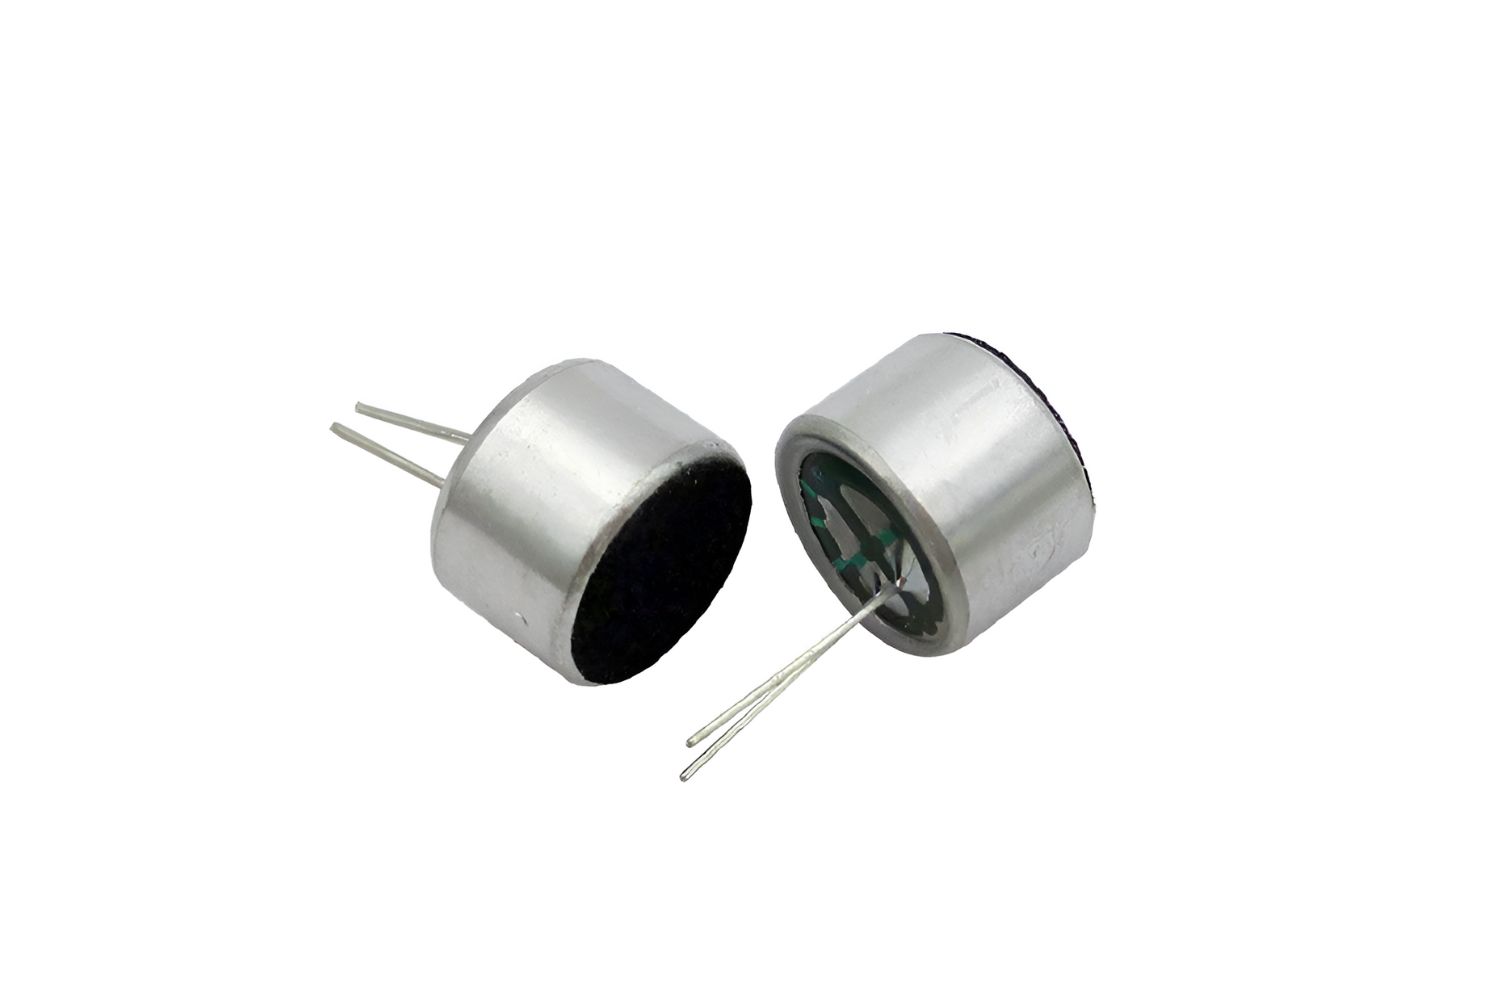
Condenser microphones, also known as capacitor microphones, are a type of microphone that use an electrostatic capsule to convert sound waves into electrical signals. They are highly sensitive and can capture audio with exceptional clarity and detail, making them ideal for professional recording applications.
One of the key features of condenser microphones is their diaphragm. The diaphragm of a condenser microphone is a thin and lightweight membrane that vibrates in response to sound waves. This vibration creates changes in capacitance, which are converted into electrical signals by the microphone’s internal circuitry.
Condenser microphones require an external power source to operate, usually supplied through batteries or phantom power provided by an audio interface or mixer. The power is used to charge the internal components and to polarize the diaphragm, allowing it to accurately capture sound.
There are two main types of condenser microphones: large diaphragm and small diaphragm. Large diaphragm condenser microphones are commonly used in studio settings for recording vocals and instruments. They have a wider frequency response and can capture more low-frequency detail. Small diaphragm condenser microphones, on the other hand, excel at capturing fast transients and are often used for recording acoustic instruments and overhead drums.
It is important to note that condenser microphones are more sensitive to sound pressure levels compared to dynamic microphones. While this sensitivity allows them to capture more detail, it also means that they can be more prone to distortion if exposed to high sound levels. It is important to use proper gain staging and positioning techniques to prevent clipping and distortion.
Additionally, condenser microphones typically have a wider frequency response compared to dynamic microphones. This means that they can capture a broader range of frequencies, resulting in more accurate and detailed recordings.
Understanding the basics of condenser microphones is crucial before using them with your smartphone. In the next section, we will discuss how to choose a suitable condenser microphone that is compatible with your smartphone.
Choosing a Suitable Condenser Microphone for a Smartphone
When it comes to choosing a condenser microphone for your smartphone, there are a few factors to consider to ensure compatibility and optimal performance. Here are some key points to keep in mind:
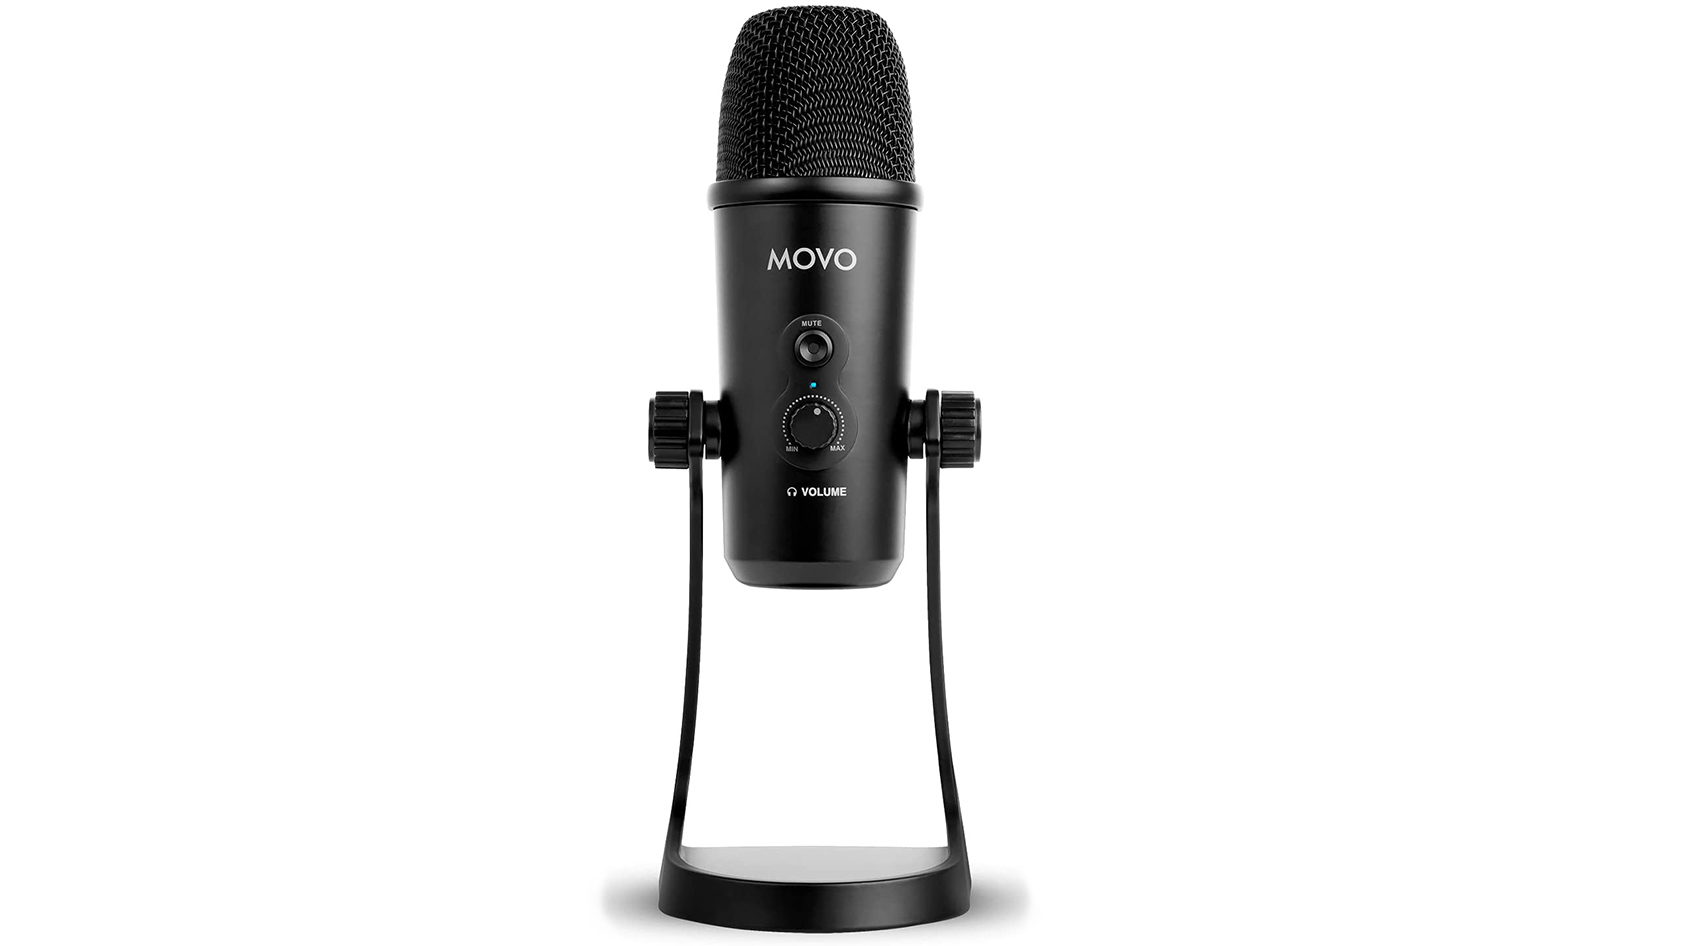
- Connection Type: Determine the connection type supported by your smartphone. Most smartphones have either a 3.5mm microphone jack or a USB-C port. Make sure the condenser microphone you choose has the corresponding connection option.
- Polar Pattern: Consider the polar pattern that best suits your recording needs. The polar pattern determines the microphone’s sensitivity to sound coming from different directions. Common polar patterns include cardioid (ideal for solo recordings), omnidirectional (captures sound from all directions), and figure-8 (captures sound from the front and back).
- Power Requirements: Check the power requirements of the condenser microphone. Some microphones are powered by batteries, while others require phantom power. Ensure your smartphone or audio interface can provide the necessary power.
- Build Quality: Look for a condenser microphone with a durable and sturdy build. This ensures longevity and protects the microphone during transportation and regular use.
- Frequency Response: Consider the frequency response range of the microphone. A wider frequency response allows for capturing a broader range of frequencies, resulting in more accurate and detailed recordings.
- Budget: Determine your budget and research condenser microphones within that range. There are options available for different budget levels, so find one that meets your needs without breaking the bank.
It’s also worth mentioning that some condenser microphones come bundled with accessories such as shock mounts, pop filters, and carrying cases. These additional components can enhance your recording experience and protect your investment.
Before making a purchase, read product reviews, compare specifications, and consider consulting with audio professionals or knowledgeable individuals who can provide guidance based on your specific requirements.
Now that you have an understanding of what to look for when choosing a condenser microphone for your smartphone, let’s move on to the next section to learn how to set up the microphone for optimal performance.
Setting Up the Condenser Microphone
Setting up your condenser microphone properly is key to ensuring optimal performance and audio quality. Here are the steps to follow to set up your condenser microphone for use with your smartphone:
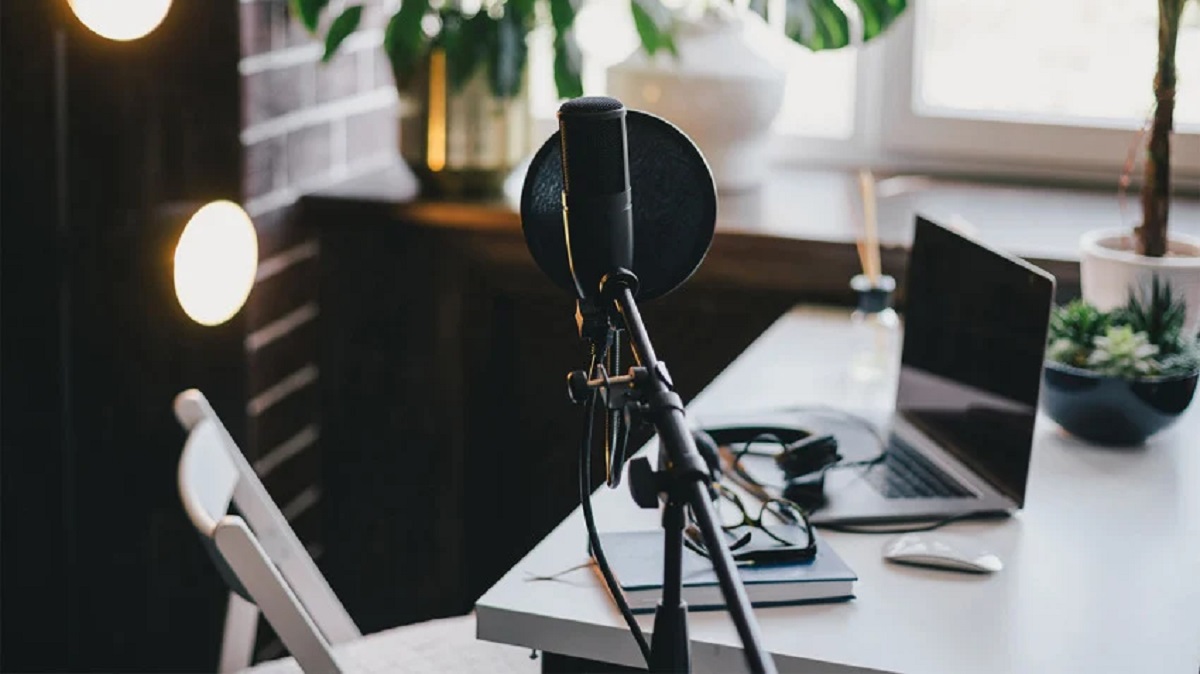
- Choose a suitable location: Find a quiet and well-controlled environment for your recording. Minimize background noise and echo by recording in a room with soft furnishings or using acoustic treatment if possible.
- Position the microphone: Place the condenser microphone on a stable surface or use a microphone stand. Position it at an optimal distance from the sound source, taking into consideration the microphone’s recommended distance and its desired pickup pattern.
- Use a shock mount: If your condenser microphone comes with a shock mount, attach it to the microphone stand. A shock mount helps isolate the microphone from vibrations and handling noise, resulting in cleaner recordings.
- Attach a pop filter: Consider using a pop filter in front of the microphone to minimize plosive sounds (such as “p” and “b” sounds) that can cause distortion. A pop filter helps to diffuse the air from your mouth and prevents it from hitting the microphone directly.
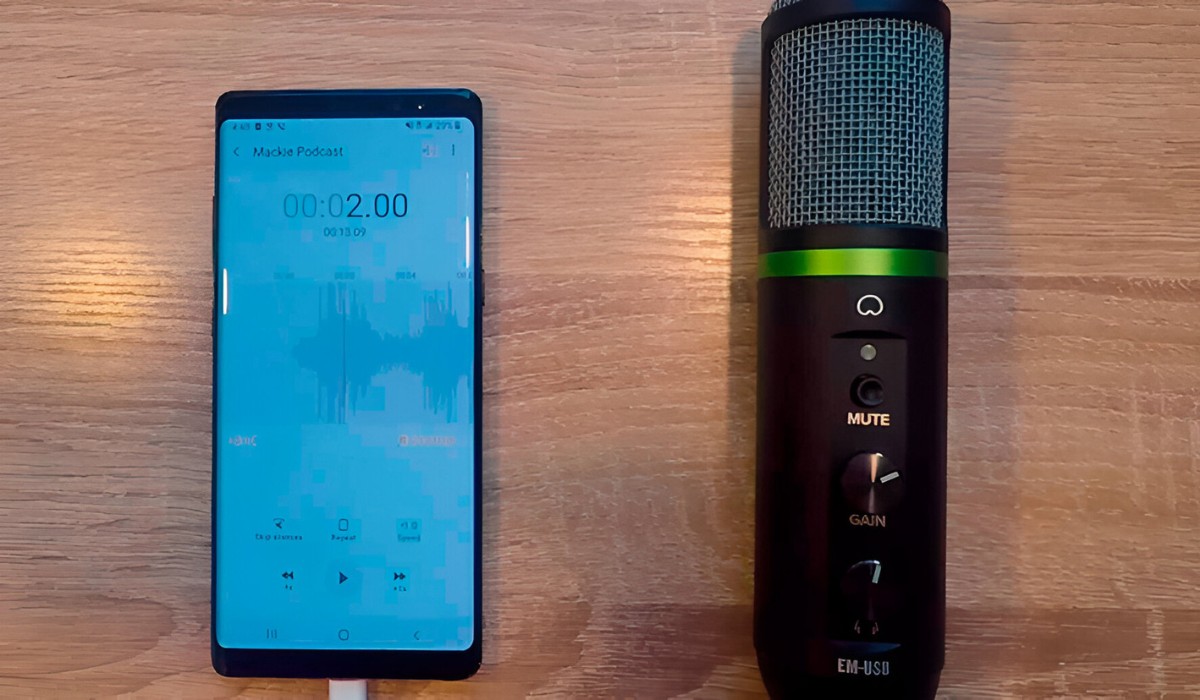
- Connect the microphone to your smartphone: Use the appropriate cable (3.5mm or USB-C) to connect the condenser microphone to your smartphone. Ensure a secure connection between the microphone and the smartphone’s audio input. If your microphone requires phantom power, make sure it is activated if using an audio interface or mixer.
- Check the microphone settings: Access the settings on your smartphone to make sure the microphone is selected as the audio input source. Adjust the input gain to an appropriate level to prevent clipping and distortion.
- Test the microphone: Open a recording app on your smartphone and do a quick test recording. Speak or sing into the microphone at your desired volume and distance to check the audio levels and quality. Make any necessary adjustments to the microphone placement or settings if needed.
By following these steps, you can set up your condenser microphone correctly and ensure optimal performance and audio quality for your smartphone recordings.
Now that we have covered the setup process, the next section will guide you through connecting the condenser microphone to your smartphone.
Connecting the Condenser Microphone to the Smartphone
Connecting your condenser microphone to your smartphone is a straightforward process, but it may vary slightly depending on the specific microphone and smartphone models. Here is a general guide on connecting the condenser microphone to your smartphone:
- Check the microphone connection: Ensure that the condenser microphone you have chosen has the proper connector for your smartphone. If your smartphone has a 3.5mm microphone jack, you can use a compatible cable with a 3.5mm plug. If your smartphone has a USB-C port, you will need a condenser microphone with a USB-C connector or an appropriate adapter.
- Plug in the microphone: Insert the microphone cable or the microphone itself into the appropriate port on your smartphone. Ensure a secure connection to establish proper audio transfer.
- Check the microphone compatibility: Some condenser microphones may require additional external power, such as batteries or phantom power. Make sure to check the power requirements of your condenser microphone and verify if your smartphone or any additional device you are using can provide the necessary power.
- Confirm input settings: Open the settings on your smartphone and navigate to the audio or recording settings. Choose the condenser microphone as the input device or audio source. If there are options for input gain or sensitivity, adjust them accordingly to achieve the desired levels without any distortion.
- Test the connection: Open a recording app on your smartphone and speak into the microphone to check if the audio is being captured properly. Monitor the recorded audio to ensure the microphone is functioning correctly and there are no issues with the connection.
- Make necessary adjustments: Depending on the recording scenario and the specific condenser microphone you are using, you may need to adjust the microphone’s positioning or settings to achieve optimal sound quality. Experiment with distance and angle to find the best sound capture for your desired recording.
By following these steps, you can successfully connect your condenser microphone to your smartphone and start recording with enhanced audio quality.
Now that we have covered the connection process, in the next section, we will explore how to adjust the settings on your smartphone for optimal recording with the condenser microphone.
Adjusting Settings on the Smartphone
To ensure optimal recording with your condenser microphone, you may need to make some adjustments in the settings of your smartphone. Here are some key settings to consider:
- Audio Input Source: Access the audio or recording settings on your smartphone and select the condenser microphone as the audio input source. This ensures that the smartphone recognizes the microphone and uses it for recording.
- Input Gain/Sensitivity: Adjust the input gain or sensitivity setting to control the microphone’s volume level. Set it to an appropriate level that captures the desired sound without causing distortion or clipping. Keep in mind that different recording scenarios may require different gain levels, so make adjustments and test the sound before recording.
- Monitoring and Playback: Enable or disable the option for monitoring your audio while recording. Monitoring allows you to listen to the sound being captured in real-time through headphones or the smartphone’s speakers. Additionally, ensure that the playback settings are set to play audio through the desired output devices.
- Format and Quality: Depending on your preferences and recording requirements, you may need to adjust the format and quality settings for your recordings. You can choose between formats like WAV, MP3, or others, as well as different sample rates and bit depths. Keep in mind that higher quality settings might result in larger file sizes.
- Other App-Specific Settings: Some recording apps may have additional settings and features that can enhance your recording experience. Explore the settings within the recording app you are using and experiment with options like EQ, effects, noise reduction, or compression to further refine your audio recordings.
It’s important to note that the specific steps and options may vary depending on your smartphone model and the recording app you are using. Take the time to explore and familiarize yourself with the settings on your device and recording app to make the necessary adjustments for high-quality audio capture.
Now that you have adjusted the settings on your smartphone, you are ready to start recording with your condenser microphone. In the next section, we will provide some tips to help you achieve better audio quality with your setup.
Recording Audio with the Condenser Microphone
Now that you have your condenser microphone connected and the settings adjusted on your smartphone, it’s time to start recording with enhanced audio quality. Here are some tips to help you get the best results:
- Positioning: Pay attention to the positioning of the microphone and the audio source. Experiment with the distance and angle between the microphone and the sound source to achieve the desired sound capture. Keep in mind that different recording scenarios may require different positioning techniques.
- Pop Filter Usage: If you experience any unwanted plosive sounds (such as “p” and “b” sounds), make sure to use a pop filter. The pop filter helps diffuse the air from your mouth and minimizes those sounds, resulting in cleaner and clearer recordings.
- Pronunciation and Diction: Pay attention to your pronunciation and diction while recording. Speak clearly and enunciate your words to ensure that your voice comes out crisp and easily understood.
- Environment Control: Record in a quiet environment and minimize background noise as much as possible. Use soundproofing techniques or choose a location with minimal ambient noise to avoid distractions and interference in your recordings.
- Monitor the Audio: Use headphones or the built-in monitoring option in your recording app to listen to the audio while you are recording. This allows you to detect any issues or unwanted noises in real-time and make adjustments as needed.
- Avoid Distortion: Pay attention to the input gain setting on your smartphone. Ensure that the audio levels are not peaking or causing distortion. It is better to have a slightly lower volume and make adjustments in post-production if necessary.
- Take Breaks and Experiment: If you are recording for an extended period, make sure to take breaks to rest your voice and prevent fatigue. It’s also a good idea to experiment with different microphone positions, settings, and techniques to find what works best for your specific recording needs.
By following these tips, you can make the most out of your condenser microphone setup and achieve professional-grade audio recordings using your smartphone.
In the next section, we will address common issues you may encounter while using a condenser microphone with your smartphone and provide troubleshooting tips to help overcome them.
Tips for Better Audio Quality
To ensure optimal audio quality when using a condenser microphone with your smartphone, consider implementing the following tips:
- Use a quiet recording environment: Find a quiet location free from background noise and echo. If necessary, use soundproofing materials or record in a room with soft furnishings to minimize unwanted sounds.
- Position the microphone correctly: Experiment with microphone placement to find the optimal position for capturing the desired sound. Adjust the distance and angle to achieve the best balance between clarity and proximity.
- Ensure proper microphone technique: Maintain a consistent distance from the microphone while speaking or singing to avoid volume inconsistencies or plosive sounds. Avoid tapping or bumping the microphone during recording to prevent unwanted noise from being picked up.
- Monitor audio levels: Keep an eye on the input gain levels on your smartphone. Aim for a level that is loud enough to be heard clearly but not so high that it causes distortion or clipping. Adjust as necessary to find the sweet spot.
- Be aware of proximity effect: Condenser microphones, particularly large-diaphragm ones, can experience proximity effect, where the bass frequencies become more pronounced as the sound source gets closer to the microphone. Use this effect deliberately for a fuller sound or adjust your distance accordingly to maintain a balanced audio capture.
- Edit and process your recordings: Once you’ve finished recording, take the time to edit and process your recordings. Use audio editing software to remove any unwanted noise, adjust levels, apply EQ and compression, and enhance the overall sound quality.
- Practice microphone hygiene: Clean the microphone and its windscreen or pop filter regularly to remove any dirt, dust, or debris that could impact audio quality. Protect your microphone from physical damage and store it in a proper case or bag when not in use.
- Experiment with different techniques: Don’t be afraid to try different recording techniques and settings. Test out different microphone polar patterns, try different angles, or experiment with various room acoustics to find the best setup that suits your recording needs.
By implementing these tips, you can elevate the audio quality of your recordings and ensure that your condenser microphone captures the best sound possible with your smartphone setup.
In the next section, we will address common issues that may arise while using a condenser microphone with a smartphone and provide troubleshooting suggestions to help resolve them.
Troubleshooting Common Issues
While using a condenser microphone with your smartphone can greatly enhance your audio quality, you may encounter some common issues along the way. Here are some troubleshooting tips to help you address these problems:
- No sound or low volume: Check the microphone connection to ensure it is securely plugged into your smartphone. Ensure that the input gain on your smartphone is set appropriately. Also, verify that the microphone requires power and that it is receiving the necessary power.
- Background noise or interference: Make sure you are recording in a quiet environment and minimize any potential sources of interference. If you still experience background noise, consider using noise reduction features in your recording app or post-processing software.
- Plosive sounds or sibilance: If you notice excessive plosive sounds (such as “p”, “b”, or “t”) or sibilance (harsh “s” or “sh” sounds), use a pop filter or adjust your microphone placement and angle to minimize their impact.
- Distortion or clipping: If your recordings sound distorted or clipped, reduce the input gain on your smartphone to avoid overloading the microphone. Also, ensure there are no physical obstructions or objects too close to the microphone that could cause distortion.
- Echo or reverb: Echo and reverb can occur if you are recording in a room with reflective surfaces. To minimize this, consider using acoustic treatment like acoustic panels or rugs, or record in a different environment with less echo-inducing surfaces.
- Compatibility issues: Ensure that your condenser microphone is compatible with your specific smartphone model. Check for any known compatibility issues or firmware updates for your microphone or smartphone, and make sure you have the correct cables and adapters if required.
- Interference from electronics: Avoid recording near any electronic devices that may cause interference, such as Wi-Fi routers, mobile phones, or fluorescent lights. If necessary, try moving away from these devices or use shielded cables to minimize interference.
- Software or app issues: If you are experiencing issues with your recording app or software, make sure it is up to date. Consider trying a different recording app to see if the issue persists. If the problem continues, contact the app or software developer for further assistance.
If you encounter persistent issues that you cannot resolve, consider seeking help from audio professionals or reaching out to the manufacturer’s customer support for guidance specific to your condenser microphone and smartphone model.
By troubleshooting common issues, you can overcome technical challenges and ensure a smooth recording experience with your condenser microphone and smartphone setup.
Now that we have discussed troubleshooting tips, let’s conclude with a summary of the information covered in this guide.
Conclusion
In this guide, we have explored the world of using a condenser microphone with a smartphone to achieve high-quality audio recordings. We started by understanding the basics of condenser microphones, including their diaphragm, sensitivity, and different types.
We then delved into choosing a suitable condenser microphone for your smartphone, considering factors such as connection type, polar pattern, power requirements, build quality, frequency response, and budget. Selecting the right microphone ensures compatibility and optimal performance with your smartphone.
Next, we discussed the importance of setting up the condenser microphone correctly, including finding a suitable location, positioning the microphone, using a shock mount and pop filter, connecting it to your smartphone, and checking the microphone settings. Proper setup guarantees the best audio capture for your recordings.
We then moved on to adjusting the settings on your smartphone to optimize the recording process with a condenser microphone. We explored settings such as audio input source, input gain/sensitivity, monitoring and playback options, format and quality, and app-specific settings for an enhanced recording experience.
Furthermore, we provided tips for better audio quality, including suggestions on positioning, pop filter usage, pronunciation and diction, environment control, monitoring audio levels, avoiding distortion, and experimenting with different techniques. Implementing these tips ensures outstanding audio quality in your recordings.
To help you troubleshoot common issues, we offered guidance for problems such as no sound or low volume, background noise or interference, plosive sounds or sibilance, distortion or clipping, echo or reverb, compatibility issues, interference from electronics, and software or app issues. These troubleshooting suggestions help overcome technical challenges and ensure smooth recording sessions.
By following the information and tips provided in this guide, you are well-equipped to use a condenser microphone with your smartphone and elevate your audio recording capabilities to professional levels. Whether you are a content creator, musician, or simply seeking better audio quality, this guide serves as your roadmap to success.
So go ahead, unleash the power of your smartphone, and capture stunning audio recordings with a condenser microphone. Happy recording!