Introduction
Are you experiencing sluggish performance on your MacBook Pro? One of the simplest and most effective ways to boost its speed and responsiveness is by upgrading the RAM. Upgrading the RAM (Random Access Memory) allows your MacBook Pro to handle more data at once, resulting in improved multitasking capabilities and faster overall performance.
In this guide, we will walk you through the process of upgrading the RAM on your MacBook Pro. Whether you’re a tech-savvy user or a beginner, we’ll provide easy-to-follow instructions to ensure a successful upgrade.
Before we dive into the details, it’s important to note that upgrading the RAM may void your warranty. If your MacBook Pro is still covered by AppleCare or any other warranty, consider contacting Apple or an authorized service provider to perform the upgrade. However, if your warranty has expired, or if you’re confident in your technical abilities, read on to learn how to upgrade the RAM on your own.
Before diving into the RAM upgrade process, let’s take a quick look at what RAM is and how it affects your MacBook Pro’s performance. RAM is a type of computer memory that stores data that is actively being used by the operating system and applications. The more RAM your MacBook Pro has, the more data it can store for immediate access, reducing the need to retrieve information from other, slower storage devices like the hard drive or solid-state drive (SSD).
Upgrading the RAM on your MacBook Pro can significantly speed up tasks such as opening multiple applications, running virtual machines, editing videos, and working with large files. By increasing the amount of RAM available, you can give your MacBook Pro the resources it needs to handle these demanding tasks more efficiently.
In the following sections, we’ll guide you through the steps necessary to upgrade the RAM on your MacBook Pro, from checking system requirements to installing the new RAM modules. So, grab your toolkit and let’s get started!
Preparing for the Upgrade
Before diving into the RAM upgrade process, it’s essential to make some preparations to ensure a smooth and successful upgrade. Taking the necessary steps beforehand will help minimize any risks and ensure that you have all the tools and resources you need. Here’s what you need to do:
- Check System Requirements: Firstly, you need to verify whether your MacBook Pro is capable of supporting a RAM upgrade. Check the official Apple website or your MacBook Pro’s technical specifications to determine the maximum amount of RAM that your specific model can handle.
- Choose the Right RAM: Once you know the maximum amount of RAM your MacBook Pro can support, it’s time to choose the right RAM modules to purchase. Make sure to buy RAM that is compatible with your MacBook Pro model and meets the specifications provided by Apple.
- Gather Required Tools: To perform the RAM upgrade, you’ll need a few tools. These typically include a set of precision screwdrivers, an antistatic wristband, and a clean and flat workspace. Gather these tools in advance to have them ready when you start the upgrade process.
It’s worth mentioning that the steps involved in upgrading the RAM on a MacBook Pro may vary slightly depending on the model and year of your device. It’s always a good idea to consult the official Apple support documentation or user manual specific to your MacBook Pro model for any specific instructions or precautions.
Lastly, it’s crucial to create a complete backup of your data before proceeding with the upgrade. Although the chances of data loss during a RAM upgrade are relatively low, it’s always better to be safe than sorry. Use Time Machine or any other backup solution to create a full system backup or backup important files and documents separately.
By taking the time to prepare and gather the necessary resources, you’re setting yourself up for a successful RAM upgrade process. In the next section, we’ll guide you through the steps required to check the system requirements for your MacBook Pro and select the right RAM modules for the upgrade.
Checking System Requirements
Before proceeding with the RAM upgrade on your MacBook Pro, it’s essential to ensure that your device meets the necessary system requirements. By checking these requirements, you can confirm whether your MacBook Pro can support the desired amount of RAM and avoid compatibility issues. Here’s what you need to do:
- Check the Official Apple Documentation: Start by visiting the official Apple website or consulting the user manual for your specific MacBook Pro model. Look for the maximum supported RAM capacity and the type of RAM modules compatible with your device. Apple provides detailed information for each MacBook Pro model, making it easy to determine the appropriate RAM upgrade options.
- Identify Your MacBook Pro Model: If you’re unsure about the exact model and specifications of your MacBook Pro, you can find this information by clicking on the Apple menu in the top-left corner of your screen and selecting “About This Mac.” A window will appear displaying your Mac’s basic information, including the model name and year.
- Verify the Current RAM Configuration: In the same “About This Mac” window, click on the “Memory” tab to view the current RAM configuration of your MacBook Pro. Take note of the total amount of RAM installed and the number of available slots for upgrades. This information will help you determine how much additional RAM you can add.
It’s important to note that some MacBook Pro models have soldered RAM, which means the RAM modules are permanently attached to the logic board and cannot be upgraded. In such cases, you won’t be able to add or replace the RAM modules yourself. You can still consider other options, such as external storage or other means of optimization, to improve performance.
Once you have gathered the necessary information about your MacBook Pro model, including the maximum supported RAM capacity, compatible RAM types, and your current RAM configuration, you can proceed to the next step: choosing the appropriate RAM modules for your upgrade. We’ll cover that in the next section.
Choosing the Right RAM
When it comes to upgrading the RAM on your MacBook Pro, selecting the right RAM modules is crucial for compatibility and optimal performance. Here are some key factors to consider when choosing the right RAM for your MacBook Pro:
- Compatibility: Ensure that the RAM modules you choose are compatible with your MacBook Pro model. Consult the official Apple documentation or use an online compatibility tool to find the appropriate RAM options for your specific MacBook Pro model and year.
- Type and Speed: Consider the type and speed of the RAM modules. Make sure to choose RAM that matches the specifications provided by Apple. Common types of RAM used in MacBook Pro models include DDR3, DDR4, or LPDDR3, depending on the model and generation.
- Capacity: Determine the capacity of RAM you need. Assess your usage requirements and consider how much additional RAM will meet your needs. Do you frequently work with resource-intensive applications or multitask heavily? The answer will help you decide whether to upgrade to a higher capacity, such as 16GB or 32GB.
- Brand and Quality: Opt for reliable and reputable brands when purchasing RAM modules. Reliable brands ensure better performance, compatibility, and reliability. Read customer reviews and recommendations to get an understanding of the quality of the RAM modules you’re considering.
Remember that mixing different brands or speeds of RAM modules might cause compatibility issues or impact performance. It’s generally recommended to stick with a single brand and type of RAM to ensure optimal compatibility and stability.
Once you have determined the RAM specifications, you can purchase the RAM modules from authorized retailers, online marketplaces, or directly from Apple. Ensure that you are purchasing genuine and certified RAM modules to avoid compatibility or warranty issues.
Now that you have selected the right RAM modules for your MacBook Pro, it’s time to gather the necessary tools and prepare for the actual RAM upgrade process. In the next section, we’ll discuss the tools you’ll need and the importance of backing up your data before proceeding with the upgrade.
Tools Needed for the Upgrade
Before you begin upgrading the RAM on your MacBook Pro, it’s important to ensure that you have the necessary tools to perform the task effectively and safely. Here are the essential tools you’ll need:
- Precision Screwdrivers: MacBook Pro models often require specific types of screws, such as pentalobe or Phillips screws. Ensure that you have a set of precision screwdrivers that includes the required size and type of screw heads to open and close your MacBook Pro.
- Antistatic Wristband: Static electricity can cause damage to sensitive electronic components while working on your MacBook Pro. To prevent static discharge, it’s recommended to use an antistatic wristband. This wristband will keep you grounded and reduce the risk of damaging any internal components of your MacBook Pro.
- Clean and Flat Workspace: Find a clean and flat surface to work on during the RAM upgrade. This will provide enough space to lay out your MacBook Pro and the necessary tools without any risk of accidental damage or losing small components.
- Soft Cloth or Microfiber Cloth: Having a soft cloth or microfiber cloth will come in handy for cleaning the MacBook Pro’s internals and display, ensuring that everything is free of dust and debris before and after the upgrade process.
- Container for Screws: As you disassemble your MacBook Pro, keeping track of the screws is vital. Use a small container or magnetic mat to hold the screws and keep them organized. This will make it easier to identify and reinstall them correctly during the reassembly process.
It’s important to note that not all MacBook Pro models have user-upgradable RAM. Some models have RAM that is soldered onto the logic board, making it impossible to upgrade without professional assistance. If you’re unsure, refer to the official Apple documentation for your specific MacBook Pro model to determine whether the RAM is upgradeable or not.
By having these tools prepared and readily available, you’ll be well-equipped to perform the RAM upgrade on your MacBook Pro. In the next section, we’ll discuss the importance of backing up your data before proceeding with the upgrade process to ensure its safety.
Backing Up Your Data
Before you embark on the process of upgrading the RAM on your MacBook Pro, it’s crucial to back up your data to ensure its safety. While the chances of data loss during a RAM upgrade are minimal, it’s always better to be safe than sorry. Here’s how you can back up your data:
- Time Machine Backup: If you have been regularly using Time Machine, this is one of the easiest and most convenient ways to back up your entire system. Connect an external hard drive to your MacBook Pro and let Time Machine handle the backup process. This way, you can restore your system and files effortlessly if anything goes wrong during the RAM upgrade.
- Selective Data Backup: Alternatively, if you don’t want to back up your entire system, you can manually select and back up specific important files, folders, or documents to an external storage device. Copy them to an external hard drive or upload them to a cloud storage service like iCloud, Google Drive, or Dropbox.
- Cloud Backup Services: Consider using cloud backup services like Backblaze, Carbonite, or CrashPlan to create an online backup of your data. These services automatically sync and store your files securely in the cloud, ensuring that your data is protected and accessible from anywhere.
Backing up your data is not only important for the RAM upgrade process, but it’s also a good practice to regularly back up your files to protect against unforeseen events or hardware failures. It provides peace of mind knowing that your important data is safe and easily recoverable.
Once your data is securely backed up, you can proceed with confidence to the next steps of the RAM upgrade process. In the following sections, we’ll guide you through shutting down your MacBook Pro, opening it, locating the RAM slots, and the actual steps to remove the old RAM and install the new RAM.
Shutting Down the MacBook Pro
Before you begin the RAM upgrade process on your MacBook Pro, it’s important to shut down your device properly. Here are the steps to follow:
- Save your work: Make sure to save any open documents or files you’re working on and close all applications. This will ensure that you don’t lose any unsaved data during the shutdown process.
- Eject external devices: Disconnect any external devices such as hard drives, USB drives, or SD cards from your MacBook Pro. This will prevent any potential data transfer issues or conflicts during the shutdown process.
- Save your settings: If you have any specific settings or preferences that you want to preserve, such as custom keyboard shortcuts or display settings, take note of them or take screenshots for reference later.
- Shut down your MacBook Pro: To shut down your MacBook Pro, click on the Apple menu in the top-left corner of the screen and select “Shut Down.” Alternatively, you can press and hold the power button until the power options appear, and then select “Shut Down.”
Make sure that your MacBook Pro is completely powered off before proceeding with the RAM upgrade process.
It’s important to note that handling electronic components, such as RAM modules, can be sensitive to static electricity. To minimize the risk of damaging your MacBook Pro or its internal components, it’s highly recommended to use an antistatic wristband and work on a static-free workspace.
Now that your MacBook Pro is safely shut down, you’re ready to proceed to the next section: opening your MacBook Pro to access the RAM slots.
Opening the MacBook Pro
Now that your MacBook Pro is shut down, it’s time to open the device to access the RAM slots. Here’s a step-by-step guide on how to do this:
- Gather your tools: Ensure that you have your precision screwdrivers and a clean workspace ready.
- Flip over your MacBook Pro: Turn your MacBook Pro over so that the bottom side is facing up.
- Locate the screws: Take note of the screws that secure the bottom panel of your MacBook Pro. They are usually located along the edges and corners of the device.
- Remove the screws: Use the appropriate screwdriver to carefully remove the screws from their respective positions. Keep them in a safe place or use a magnetic mat or container for storage to prevent them from getting lost.
- Remove the bottom panel: Once all the screws are removed, gently lift off the bottom panel of your MacBook Pro. You may need to apply a slight amount of pressure to release any adhesive or clips holding the panel in place. Take care not to force it or damage any connections or components.
- Ensure a clean workspace: Now that the bottom panel is removed, check the inside of your MacBook Pro for any dust or debris. Use a soft cloth or microfiber cloth to clean any visible dirt or particles gently.
Once the bottom panel of your MacBook Pro is removed, you’ll be able to access the internal components, including the RAM slots. In the next section, we’ll guide you on how to locate the RAM slots and safely remove the old RAM modules.
Locating the RAM Slots
After opening your MacBook Pro, it’s important to locate the RAM slots so that you can proceed with the upgrade process smoothly. Here are the steps to help you find the RAM slots in your MacBook Pro:
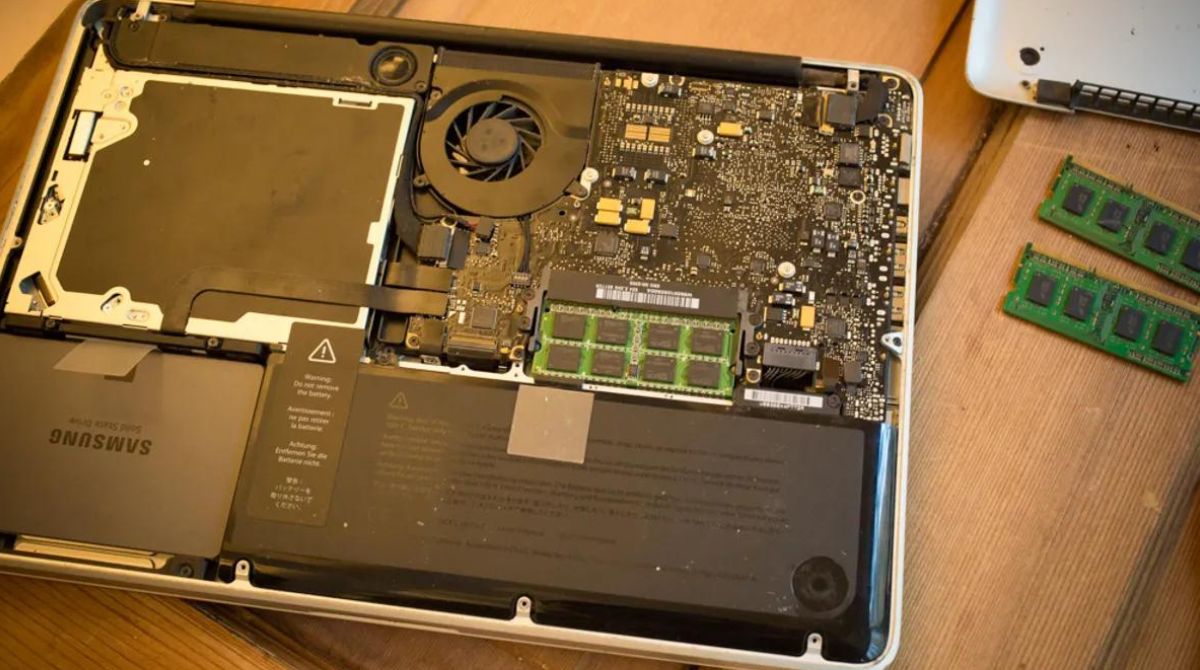
- Identify the logic board: With the bottom panel removed, locate the main circuit board inside your MacBook Pro. This circuit board is known as the logic board and is the primary component that houses various internal parts of your device.
- Look for the RAM slots: Once you’ve identified the logic board, carefully examine it for the RAM slots. The RAM slots are rectangular slots usually located near the center or one of the sides of the logic board. They are small in size and typically have small clips or locking mechanisms to secure the RAM modules in place.
- Refer to the user manual: If you’re unsure about the exact location of the RAM slots on your specific MacBook Pro model, consult the user manual or official Apple documentation. These resources will provide detailed diagrams or instructions specific to your model that can help you locate the RAM slots accurately.
It’s crucial to handle the internal components of your MacBook Pro with care and avoid touching any exposed circuitry or delicate parts. The RAM slots may be labeled or color-coded to indicate their position and provide guidance during the upgrade process.
By properly identifying the RAM slots, you’ll be ready to remove the old RAM modules and install the new ones. In the next section, we’ll guide you through the steps to remove the old RAM modules before proceeding further with the upgrade process.
Removing the Old RAM
Now that you have located the RAM slots in your MacBook Pro, it’s time to remove the old RAM modules. Follow these steps to safely remove the old RAM:
- Ensure proper grounding: Before proceeding, put on an antistatic wristband and make sure you’re working on a static-free surface to avoid any damage to your MacBook Pro components.
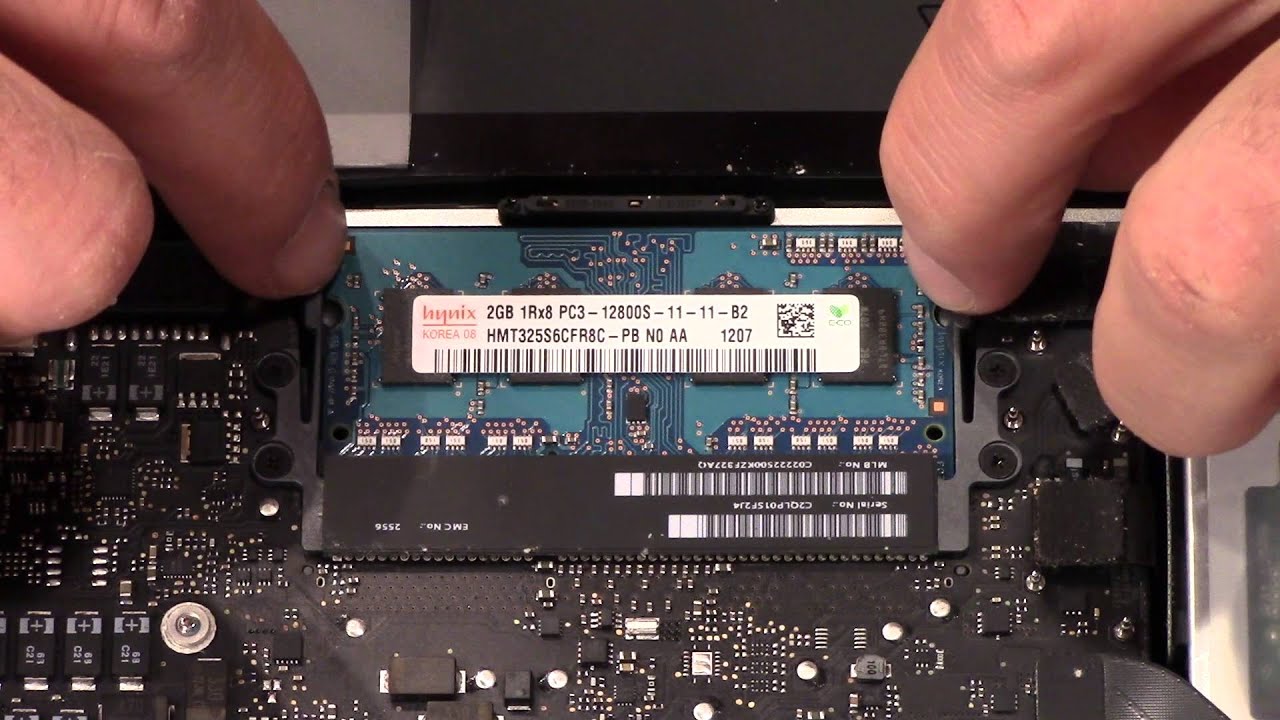
- Release the clips or locking mechanism: Most RAM slots have clips or locking mechanisms on either side of the module. Gently push the clips outward or release the locking mechanism to free the RAM module from its position. The module should pop up at a slight angle.
- Remove the old RAM module: Once the clips or locking mechanism is released, carefully pull the old RAM module out of the slot by holding the module’s edges. Be gentle and avoid pulling forcefully to prevent any damage.
- Set aside the removed RAM module: Place the removed RAM module on an antistatic surface or in a safe and clean container to prevent any damage or electrostatic discharge.
- Repeat for additional RAM modules: If your MacBook Pro has multiple RAM modules, repeat the above steps for each module one at a time until all the old RAM modules are removed.
Remember to handle the RAM modules with care and avoid touching the gold contacts or any other exposed components. It’s essential to keep the RAM modules safe and avoid any physical damage or exposure to static electricity.
By safely removing the old RAM modules, you’ve completed a crucial step in the RAM upgrade process. In the next section, we’ll guide you through the process of installing the new RAM modules into your MacBook Pro.
Installing the New RAM
After removing the old RAM modules from your MacBook Pro, it’s time to install the new RAM modules. Follow these steps to ensure a successful installation:
- Check the orientation: Examine the new RAM modules and take note of the notches or keys on the module. These notches align with the RAM slots to ensure proper insertion. Make sure the module is correctly oriented before proceeding.
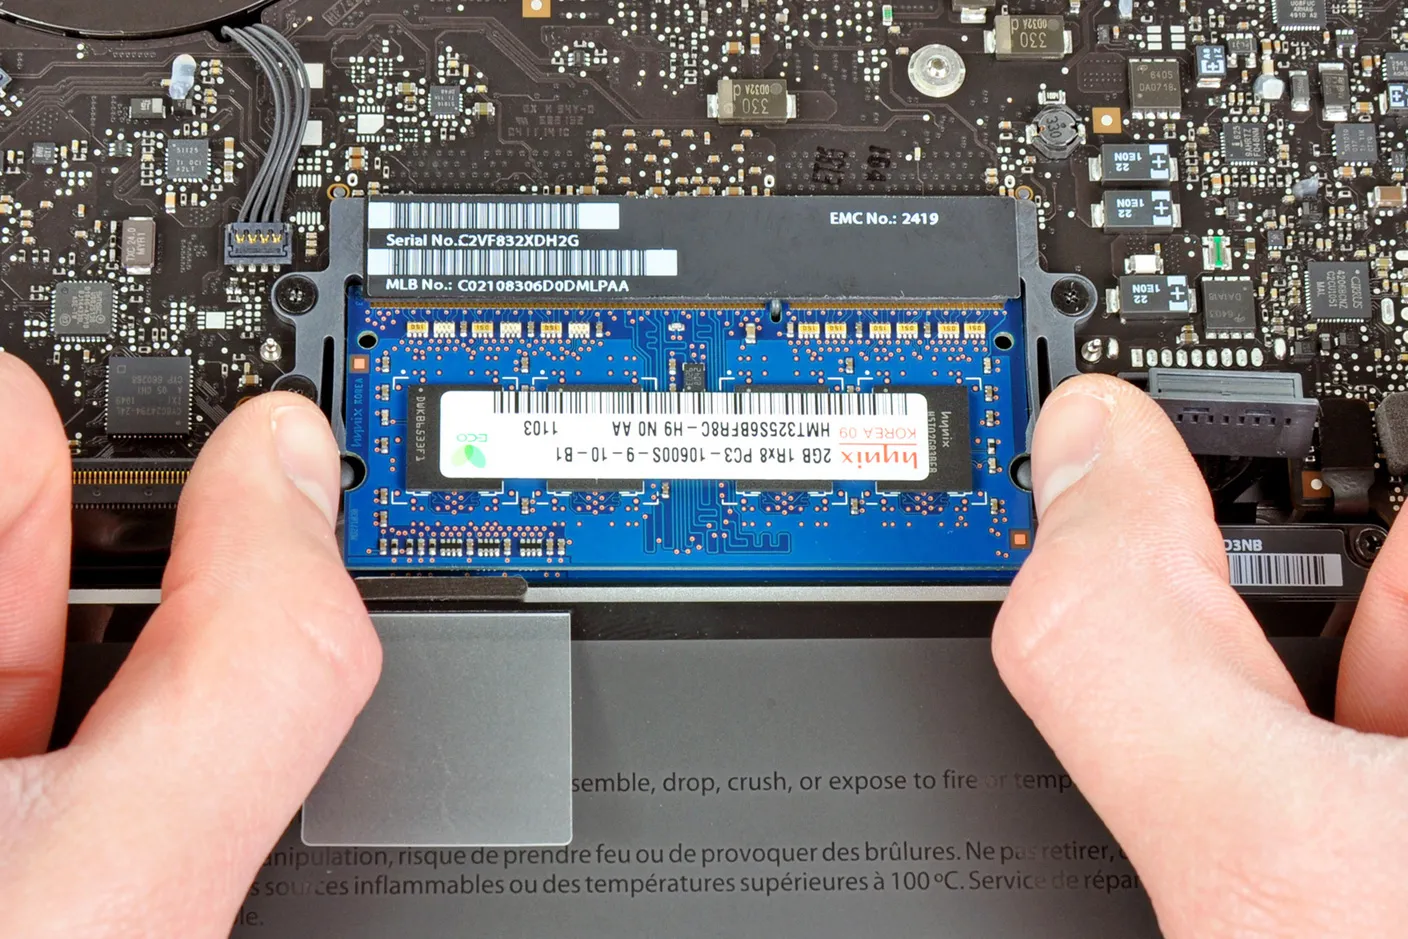
- Align the module with the slot: Align the new RAM module with the corresponding slot on the logic board. Make sure the notches on the module match the keys on the slot to ensure proper alignment.
- Insert the module at a slight angle: Insert the RAM module at a slight angle into the slot, ensuring that the gold contacts are facing downward and the module is correctly aligned. Gently press down on the module until you hear a click or feel it snap into place.
- Secure the module: If the RAM slot has clips or a locking mechanism, push them into place until they clip or lock securely onto the module, holding it in place.
- Repeat for additional RAM modules: If you are installing multiple RAM modules, repeat the above steps for each module, ensuring proper alignment and secure insertion.
It’s important to note that the process for inserting RAM modules may vary slightly depending on your MacBook Pro model. Refer to the user manual or official Apple documentation specific to your MacBook Pro model for any additional instructions or guidelines.
Once all the new RAM modules are securely installed, you’re ready to proceed to the next steps of closing your MacBook Pro and powering it back on. In the following sections, we’ll guide you through these final steps and verify the successful installation of the new RAM.
Closing the MacBook Pro
After successfully installing the new RAM modules in your MacBook Pro, it’s time to close the device and secure everything back in place. Follow these steps to properly close your MacBook Pro:
- Ensure the RAM modules are securely in place: Before closing your MacBook Pro, double-check that all the new RAM modules are properly inserted and securely seated in their respective slots.
- Align the bottom panel: Take the bottom panel that you removed earlier and position it carefully over the back of your MacBook Pro. Ensure that all the screw holes line up with the screws on the chassis.
- Press down and apply gentle pressure: Once the bottom panel is aligned, apply gentle pressure evenly across the panel to secure it in place. You should hear a series of clicks as the small clips reattach the panel to the MacBook Pro.
- Secure the screws: Using your precision screwdriver, reinsert and tighten all the screws into their original positions. Make sure not to overtighten as it may damage the screw threads or strip them.
It’s important to note that while closing your MacBook Pro, you should exercise caution to prevent any damage to the internal components. Avoid applying excessive force or pressure, as this may cause delicate connections to become loose or cables to be pinched.
Once you’ve closed and secured the bottom panel, your MacBook Pro is ready to be powered back on. In the following section, we’ll guide you through the process of turning on your MacBook Pro and verifying the successful RAM upgrade.
Turning on the MacBook Pro
After closing your MacBook Pro, it’s time to power it back on and verify the successful RAM upgrade. Follow these steps to turn on your MacBook Pro:
- Connect the power adapter: Ensure that your MacBook Pro is connected to a power source using the power adapter. This ensures that your device has sufficient power to boot up.
- Press the power button: Locate the power button on your MacBook Pro and press it. The power button is usually located at the top-right corner of the keyboard. Pressing the button will initiate the startup process.
- Observe the startup process: As your MacBook Pro boots up, you’ll see the Apple logo appear on the screen, and the startup progress bar may appear. Wait patiently for your MacBook Pro to complete the startup process.
- Check the system information: Once your MacBook Pro has successfully booted up, click on the Apple menu in the top-left corner of the screen and select “About This Mac”. In the new window, navigate to the “Memory” tab. Here, you should see the updated RAM information, displaying the total amount of new RAM installed.
If the system information displays the correct updated RAM information, congratulations! You have successfully upgraded the RAM on your MacBook Pro. Your device should now be equipped with improved performance and increased multitasking capabilities.
If, for any reason, your MacBook Pro does not start up or you encounter any errors during the startup process, double-check the RAM modules’ installation. Ensure they are properly seated in the slots and try restarting your MacBook Pro again.
If the issue persists, it’s recommended to seek expert assistance or consult Apple’s support for further troubleshooting steps.
Now that your MacBook Pro is up and running with the upgraded RAM, you can enjoy the benefits of improved performance and responsiveness for your everyday tasks and demanding applications.
In the next section, we’ll provide some helpful tips and troubleshooting suggestions to ensure you get the most out of your RAM upgrade and address any potential issues that may arise.
Verifying the New RAM
Once you’ve successfully turned on your MacBook Pro with the upgraded RAM, it’s important to verify that the new RAM is recognized and functioning as expected. Here are some steps to help you verify the new RAM:
- Check system information: Open the “About This Mac” window by clicking on the Apple menu in the top-left corner of the screen and selecting “About This Mac”. Navigate to the “Memory” tab and ensure that the total amount of RAM displayed matches the capacity of the new RAM modules you installed.
- Run a memory test: To further confirm the stability and performance of the new RAM, you can run a memory test. There are several third-party applications available, such as Memtest86 or TechTool Pro, that can help you assess the functionality of your RAM by performing comprehensive memory tests.
- Monitor system performance: Pay close attention to the overall performance of your MacBook Pro after the RAM upgrade. Observe whether there is a noticeable improvement in multitasking capabilities, application responsiveness, and overall system speed. If you experience significantly smoother performance and reduced lag, it’s a good indication that your new RAM is functioning properly.
- Watch for any error messages or system instability: Keep an eye out for any error messages, system crashes, or unusual behavior that may indicate a problem with the new RAM. If you encounter any issues, it’s advised to recheck the RAM installation and ensure it is properly seated in the slots.
If you encounter any issues or concerns during the verification process, it’s worth consulting the official Apple support documentation or reaching out to Apple’s support for further assistance. They can provide specific guidance based on your MacBook Pro model and help diagnose any potential issues.
Remember that upgrading the RAM can significantly improve your MacBook Pro’s performance, allowing you to handle more demanding tasks with ease. However, it’s important to ensure that the new RAM is functioning correctly to reap the full benefits of the upgrade.
Now that you have verified the new RAM, you can enjoy a more powerful and responsive MacBook Pro. In the final section, we’ll provide you with some useful tips and troubleshooting suggestions to help you make the most out of your upgraded RAM.
Tips and Troubleshooting
Here are some helpful tips and troubleshooting suggestions to ensure a smooth experience with your upgraded RAM on your MacBook Pro:
- Properly maintain your MacBook Pro: Regularly clean the internals and keyboard of your MacBook Pro to prevent dust buildup, which can affect performance. Use compressed air or a soft brush to clean the vents and remove any accumulated debris.
- Keep your macOS up to date: Regularly update your macOS to the latest version available. Apple releases updates that improve performance, stability, and compatibility with different hardware configurations, including RAM upgrades.
- Consider optimizing your MacBook Pro: In addition to the RAM upgrade, explore other optimization techniques to maximize overall performance. These include managing startup items, clearing cache files, and optimizing storage space by removing unnecessary files and apps.
- Monitor temperature and manage heat: Keep an eye on your MacBook Pro’s temperature, especially during resource-intensive tasks. Elevated temperatures can affect performance and potentially damage components. Use apps like iStat Menus or Macs Fan Control to monitor temperature and adjust fan speeds if necessary.
- Run regular system maintenance: Perform regular system maintenance tasks such as disk verification and repair using Disk Utility, resetting the System Management Controller (SMC), and resetting the NVRAM or PRAM if needed. These maintenance routines can help resolve potential issues and improve system stability.
- Double-check RAM compatibility: If you experience any issues after the RAM upgrade, double-check the compatibility of the RAM modules with your MacBook Pro model. Ensure that they meet the specifications provided by Apple and are correctly inserted into the appropriate RAM slots.
- Consult professional assistance if needed: If you encounter persistent issues or are unsure about any aspect of the RAM upgrade process, consider seeking professional assistance from an authorized service provider or an Apple store. They can diagnose any hardware or software-related problems and provide further guidance.
By following these tips and troubleshooting suggestions, you can optimize the performance of your MacBook Pro and address any potential issues that may arise after the RAM upgrade.
Congratulations on successfully upgrading the RAM on your MacBook Pro! Enjoy the enhanced performance and multitasking capabilities that the new RAM brings to your device.
Conclusion
Upgrading the RAM on your MacBook Pro is an effective way to improve its overall performance and enhance multitasking capabilities. By following the steps outlined in this guide, you can successfully upgrade the RAM on your own and experience a faster and more responsive MacBook Pro.
Throughout the upgrade process, we covered important aspects such as checking system requirements, choosing the right RAM modules, preparing the necessary tools, backing up your data, and safely removing the old RAM modules. We also provided guidance on installing the new RAM, closing your MacBook Pro, and verifying the successful upgrade.
Remember to properly maintain your MacBook Pro, keep your macOS up to date, and consider other optimization techniques to get the most out of your upgraded RAM. Monitor the temperature of your device, run regular system maintenance, and consult professional assistance if you encounter persistent issues.
By following these tips and troubleshooting suggestions, you can optimize the performance and longevity of your MacBook Pro, ensuring that the RAM upgrade continues to provide a significant boost to your computing experience.
Enjoy the improved speed, responsiveness, and enhanced multitasking abilities of your upgraded MacBook Pro, and make the most out of your newfound performance capabilities.