Introduction
The DJI controller is a vital component of any DJI drone setup, allowing pilots to have full control over their aircraft. It is crucial to regularly update the firmware of the DJI controller to ensure optimum performance and compatibility with the latest features and technologies. Firmware updates often include bug fixes, improved stability, and enhanced functionality, making it essential to keep your DJI controller up to date.
Updating the firmware of your DJI controller may seem like a daunting task, but it is a straightforward process that can be done with just a few steps. In this guide, we will walk you through the process of updating your DJI controller to help you ensure that you are always flying with the latest firmware.
Before diving into the steps, it’s important to note that you will need a computer to perform the firmware update. Additionally, make sure that you have a stable internet connection and enough battery life on both your DJI controller and the computer you will be using. Without further ado, let’s get started with the firmware update process for your DJI controller.
Step 1: Checking the current firmware version
Before updating the firmware of your DJI controller, it is crucial to check the current firmware version installed on the device. This will allow you to determine if an update is necessary and ensure that you are using the most up-to-date firmware available. Here’s how you can check the firmware version:
- Power on your DJI controller and ensure that it is connected to your drone, either wirelessly or via a USB cable.
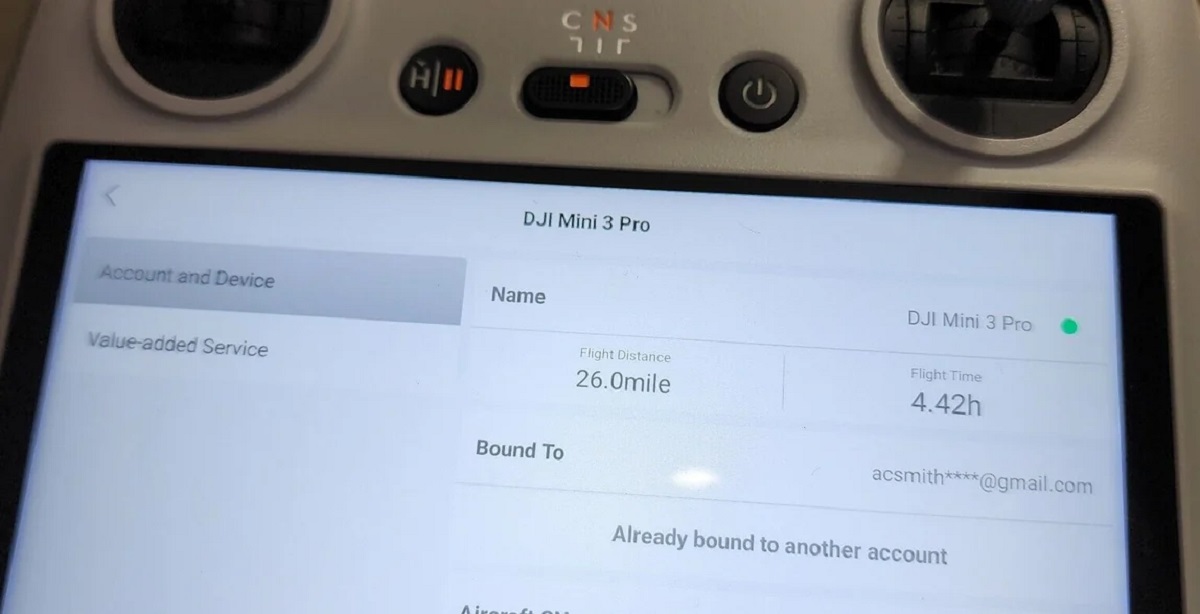
- Navigate through the controller’s menu and locate the settings or system information tab. The exact location may vary depending on the controller model, so refer to the user manual or online resources if needed.
- Once you have accessed the settings or system information, look for the firmware version. It is usually displayed as a series of numbers and letters, such as “v1.2.3” or “FW: 02.04.0500”.
- Compare the firmware version you see on your controller with the latest firmware version available on the DJI website or through the DJI Assistant software. If your firmware version is older, it’s time to update!
Checking the current firmware version is an essential first step to ensure that you are aware of any updates available for your DJI controller. It is recommended to keep your firmware updated regularly to take advantage of new features, improvements, and bug fixes provided by DJI. Now that you know your current firmware version, let’s move on to step two – connecting the DJI controller to a computer.
Step 2: Connecting the DJI controller to a computer
To update the firmware of your DJI controller, you will need to connect it to a computer. This will allow you to access the DJI Assistant software and perform the necessary updates. Follow these steps to establish a connection between your DJI controller and the computer:
- Power off your DJI controller and your drone to ensure a safe connection.
- Locate the USB port on your DJI controller. Depending on the model, it may be located on the side or underneath the controller.
- Connect one end of the USB cable to the USB port of the DJI controller.
- Connect the other end of the USB cable to an available USB port on your computer. Make sure the computer is powered on and running.
- Power on your DJI controller.
Once the connection is established, your DJI controller should be recognized by the computer as an external device. You will now be ready to proceed to the next step of the firmware update process. In the following section, we will discuss how to download the DJI Assistant software, which is vital for performing the firmware update.
Step 3: Downloading the DJI Assistant software
To update the firmware of your DJI controller, you will need to download the DJI Assistant software. This software acts as a bridge between your DJI controller and your computer, allowing you to access and install firmware updates. Here’s how you can download the DJI Assistant software:
- Open a web browser on your computer and navigate to the official DJI website.
- Search for the support or downloads section on the DJI website, where you can find the DJI Assistant software.
- Once you have located the software, click on the download link to initiate the download process.
- Follow the on-screen instructions to complete the download. Make sure to choose the appropriate version of the software for your computer’s operating system (Windows or Mac).
- Once the download is complete, locate the downloaded file on your computer and run the installation process.
- Follow the prompts to install the DJI Assistant software on your computer.
Once the installation is complete, you will have the DJI Assistant software ready to use. In the next step, we will guide you through launching the DJI Assistant and selecting your DJI controller for firmware updates. Stay tuned!
Step 4: Launching the DJI Assistant and selecting the controller
After downloading and installing the DJI Assistant software, you are now ready to launch the application and select your DJI controller for firmware updates. Follow these steps to get started:
- Locate the DJI Assistant software on your computer and double-click on its icon to launch it.
- Once the DJI Assistant software is open, connect your DJI controller to the computer using the USB cable as mentioned in Step 2.
- Wait for a few moments as the DJI Assistant software detects and establishes a connection with your DJI controller. You should see the controller’s name or model displayed in the software interface.
- If the DJI Assistant software fails to recognize your DJI controller, ensure that the USB connection is secure and try reconnecting the cable.
- Once your DJI controller is successfully recognized, click on its name or model in the DJI Assistant software to select it.
By selecting your DJI controller in the DJI Assistant software, you gain access to various settings and options related to firmware updates. It is important to ensure that you have established a proper connection and that the software has detected your DJI controller before proceeding to the next step. Let’s move on to Step 5 – checking for available updates.
Step 5: Checking for available updates
Once you have successfully launched the DJI Assistant software and selected your DJI controller, it’s time to check for any available firmware updates. Here’s how you can do it:
- Within the DJI Assistant software, look for a tab or menu option that is related to firmware updates. It could be labeled as “Firmware Update” or something similar.
- Click on the appropriate tab or menu option to access the firmware update section.
- Once you are in the firmware update section, the DJI Assistant software will begin searching for available updates for your DJI controller. This process may take a few moments.
- After the search is complete, the software will display a list of available firmware updates, along with any accompanying release notes or descriptions.
- Carefully review the available updates and their descriptions to identify the latest and most suitable firmware for your DJI controller.
It is important to note that not all firmware updates are mandatory. Some updates may offer minor bug fixes, while others may introduce new features or enhancements. Consider your specific needs and requirements before deciding which firmware update to install.
Once you have reviewed the available updates and made your selection, it’s time to move on to the next step – updating the firmware of your DJI controller.
Step 6: Updating the DJI controller firmware
After reviewing and selecting the desired firmware update in the DJI Assistant software, you are now ready to proceed with updating the firmware of your DJI controller. Follow these steps to ensure a smooth firmware update process:
- Make sure that your DJI controller has a stable power source and is not at risk of losing power during the update process. A sudden loss of power can cause errors or corruption in the firmware update.
- Within the firmware update section of the DJI Assistant software, locate the “Update” or “Install” button, usually located adjacent to the selected firmware update.
- Click on the “Update” or “Install” button to initiate the firmware update process.
- Follow the on-screen instructions that appear in the DJI Assistant software. These instructions will guide you through the firmware update process, including any necessary steps or prompts.
- During the firmware update process, it is crucial not to disconnect the DJI controller from the computer or interrupt the update. Doing so can result in a failed update or an incomplete installation.
- Wait patiently as the DJI Assistant software updates the firmware of your DJI controller. The duration of the update process will depend on the size of the firmware and the speed of your computer.
- Once the firmware update is complete, the DJI Assistant software will display a success message or prompt. Take note of any additional instructions or recommendations provided by the software.
Congratulations! You have successfully updated the firmware of your DJI controller. It is now equipped with the latest features, bug fixes, and performance improvements offered by DJI. Keep in mind that it is good practice to periodically check for firmware updates and apply them to ensure your DJI controller is always up to date and functioning optimally. Now, let’s move on to the final step of disconnecting the DJI controller from the computer.
Step 7: Disconnecting the DJI controller from the computer
After successfully updating the firmware of your DJI controller, it is important to properly disconnect it from the computer to avoid any potential issues or data corruption. Follow these steps to safely disconnect your DJI controller from the computer:
- Ensure that the firmware update process is complete and that the DJI Assistant software displays a success message or prompt.
- If there are any additional instructions or recommendations provided by the DJI Assistant software, make sure to follow them accordingly.
- Close the DJI Assistant software on your computer to prevent any conflicts or errors.
- Gently unplug the USB cable from your DJI controller’s USB port.
- Verify that the DJI controller has powered off or entered standby mode.
- If you plan to continue using your DJI controller, power it on and make sure it functions as expected.
By following these steps, you have safely disconnected your DJI controller from the computer. Your DJI controller is now ready to be used with your drone for an enhanced flying experience. It is always a good idea to store the USB cable and any other accessories properly, ensuring they are kept in a safe and easily accessible location for future use.
Remember, periodically checking for firmware updates and keeping your DJI controller up-to-date is essential for optimal performance and compatibility with new features and technologies. By staying on top of firmware updates, you can make the most out of your DJI controller and enjoy a seamless flying experience.
Conclusion
Updating the firmware of your DJI controller is an essential task to ensure optimal performance, compatibility, and access to the latest features and improvements. By following the step-by-step guide outlined in this article, you can confidently update the firmware of your DJI controller without any hassle. Here is a quick recap of the steps involved:
- Check the current firmware version of your DJI controller.
- Connect the DJI controller to a computer using a USB cable.
- Download and install the DJI Assistant software.
- Launch the DJI Assistant and select the controller.
- Check for available firmware updates.
- Update the DJI controller firmware using the DJI Assistant software.
- Properly disconnect the DJI controller from the computer.
By regularly updating the firmware of your DJI controller, you can enjoy improved stability, enhanced functionality, and access to new features. It is recommended to periodically check for firmware updates and stay up to date with the latest releases from DJI. Additionally, make sure to follow all instructions carefully and ensure a stable power source during the update process to avoid any mishaps.
Now that you have the knowledge and understanding of how to update the firmware of your DJI controller, you can confidently keep your controller in top-notch condition for an exceptional drone flying experience. Fly safely and enjoy exploring the skies with the cutting-edge technology provided by DJI.


