Introduction
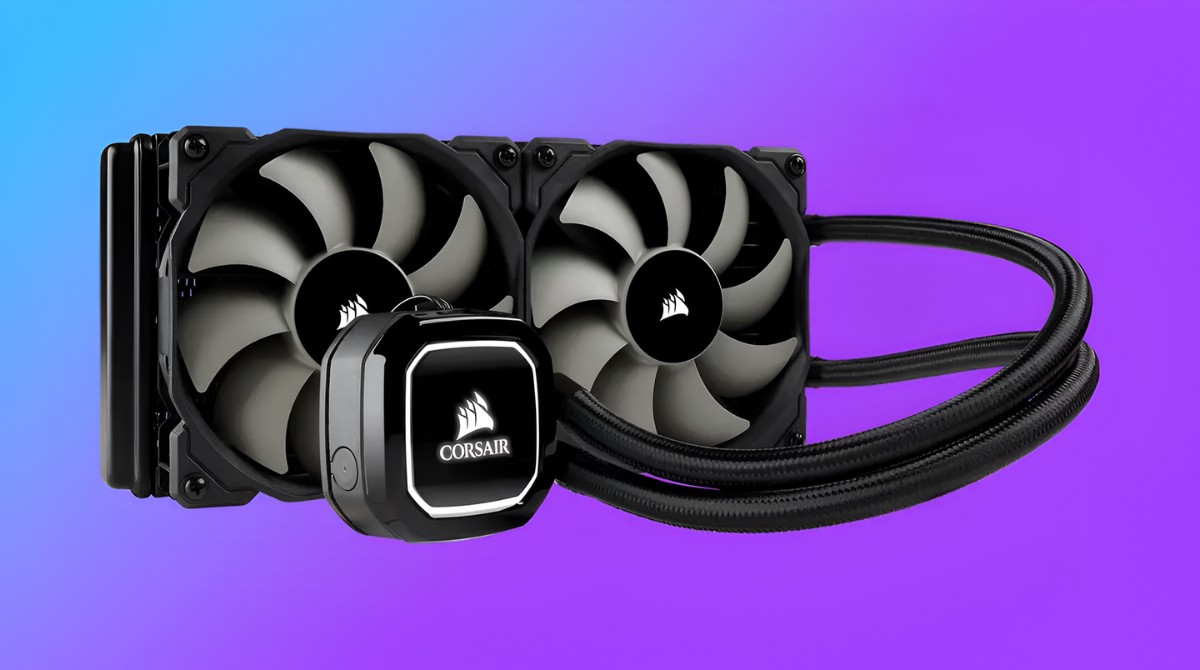
Welcome to the guide on how to uninstall the Corsair 240mm CPU cooler. The CPU cooler is an essential component in keeping your computer’s processor cool and running smoothly. Whether you’re looking to upgrade to a new cooler or need to remove the Corsair 240mm CPU cooler for maintenance purposes, this step-by-step guide will walk you through the process.
Before we dive into the steps, it’s important to note that handling computer components requires caution and care. Ensure you have a basic understanding of computer hardware and take necessary precautions to prevent any damage to your equipment. If you’re unsure or uncomfortable with the process, it’s always best to seek professional assistance.
In this guide, we’ll cover the tools you’ll need, how to properly power down your computer, removing the side panel of your computer case, disconnecting the CPU fan cable, loosening the screws securing the CPU cooler, removing the CPU cooler from the motherboard, cleaning the CPU and applying fresh thermal paste, installing a new cooler or re-installing the Corsair 240mm CPU cooler, reconnecting the CPU fan cable, and finally, putting the side panel back on and powering up your computer.
By following these steps carefully, you will be able to safely remove the Corsair 240mm CPU cooler and either upgrade to a new cooler or perform any necessary maintenance. Let’s get started!
Step 1: Gather the necessary tools
Before you begin the process of uninstalling the Corsair 240mm CPU cooler, it’s essential to gather all the necessary tools. Having the right tools on hand will make the process smoother and ensure you have everything you need to complete the task successfully.
Here are the tools you will need:
- A screwdriver set: You’ll need a screwdriver to remove the screws holding the CPU cooler in place.
- Rubbing alcohol and lint-free cloth: You’ll need these to clean the CPU surface and remove any residual thermal paste.
- Thermal paste: If you plan to reinstall the Corsair 240mm CPU cooler or install a new one, you’ll need new thermal paste to ensure proper heat transfer.
- An antistatic wrist strap (optional): While not necessary, wearing an antistatic wrist strap can provide an extra level of protection against static electricity damage.
Make sure you have all these tools readily available before you proceed. Double-check that you have the correct screwdriver types and sizes to remove the screws from your computer case and CPU cooler.
By gathering all the necessary tools beforehand, you’ll be prepared to tackle the uninstallation process with ease and efficiency.
Step 2: Power down your computer
Before you begin uninstalling the Corsair 240mm CPU cooler, it is crucial to power down your computer properly. Turning off your computer will prevent any potential damage to the components and ensure your safety during the process.
To power down your computer, follow these steps:
- Save any open documents or files and close all running programs.
- Click on the “Start” menu in the bottom left corner of your screen.
- Select the “Power” option and choose “Shut Down.”
- Allow your computer to shut down completely before proceeding to the next step. You can verify if your computer has powered down by ensuring that the fans have stopped spinning and the lights on the computer case have turned off.
It’s important to wait for your computer to fully shut down before proceeding to avoid any potential risks. This step ensures that all power to the components has been cut off and reduces the risk of electrical shock.
Remember, safety should always be a top priority when working with computer hardware. By correctly powering down your computer, you’re taking the necessary precautions to protect yourself and your equipment during the uninstallation process.
Step 3: Remove the side panel of your computer case
With your computer powered off, it’s time to remove the side panel of your computer case. This step will give you access to the internal components, including the Corsair 240mm CPU cooler.
Follow these steps to remove the side panel:
- Locate the screws securing the side panel on the back of your computer case. They are typically located on the rear edge of the case.
- Using a screwdriver, carefully remove the screws holding the side panel in place. Set the screws aside in a safe place to avoid losing them.
- Once the screws are removed, gently slide the side panel towards the back of the case to disengage it from the case structure.
- Remove the side panel from the case and set it aside in a safe and clean location.
Some computer cases may have different mechanisms for removing the side panel, such as latches or thumbscrews. Refer to the user manual or manufacturer’s guide for your specific computer case if you encounter any difficulties.
Removing the side panel will give you easy access to the internal components, allowing you to proceed with the uninstallation process smoothly. Remember to handle the side panel with care, as it is often made of delicate materials like metal or tempered glass.
Now that you have removed the side panel, you are ready to move on to the next step of disconnecting the CPU fan cable.
Step 4: Disconnect the CPU fan cable
Now that you have removed the side panel, it’s time to disconnect the CPU fan cable. The CPU fan cable connects the CPU cooler to the motherboard, providing power and control for the fan’s operation.
To disconnect the CPU fan cable, follow these steps:
- Locate the CPU fan header on the motherboard. It is usually located near the CPU socket and labeled as “CPU_FAN” or similar.
- Gently grasp the connector attached to the CPU fan cable and carefully unplug it from the CPU fan header. Apply even pressure and avoid pulling on the cable itself to prevent any damage.
Once the CPU fan cable is disconnected, set it aside in a safe place, ensuring that it does not get tangled or damaged.
Disconnecting the CPU fan cable is an important step as it allows you to remove the CPU cooler without any interference. However, be cautious not to apply excessive force or twist the cable, as this can cause damage to the delicate connectors.
With the CPU fan cable successfully disconnected, you are now prepared to move on to the next step of loosening the screws securing the CPU cooler.
Step 5: Loosen the screws securing the CPU cooler
After disconnecting the CPU fan cable, the next step is to loosen the screws that secure the Corsair 240mm CPU cooler to the motherboard. Loosening these screws will allow you to remove the CPU cooler from its mounting bracket and ultimately uninstall it.
Follow these steps to loosen the screws:
- Identify the screws that secure the CPU cooler to the mounting bracket. There are typically four screws, one at each corner of the cooler.
- Using a screwdriver, turn each screw counterclockwise to loosen it. Start with one screw and gradually loosen the others in a diagonal pattern to ensure equal pressure is applied.
- Loosen the screws just enough to release the CPU cooler from its mounting bracket. Avoid fully removing the screws at this stage.
It’s important to loosen the screws gradually and evenly to prevent any damage to the CPU cooler or motherboard. Applying excessive force or over-tightening the screws can lead to hardware damage.
By loosening the screws, you are preparing the CPU cooler for removal in the next step. Once all the screws are loosened, you’re ready to proceed to the next step of removing the CPU cooler from the motherboard.
Step 6: Remove the CPU cooler from the motherboard
Now that the screws securing the Corsair 240mm CPU cooler to the motherboard have been loosened, it’s time to remove the CPU cooler from its mounting bracket. This step requires careful handling to avoid any damage to the CPU, motherboard, or cooler.
Follow these steps to remove the CPU cooler:
- Gently lift the CPU cooler straight up, using equal pressure on each side.
- Be cautious of any resistance as you lift the cooler. If it feels stuck, double-check that all the screws have been properly loosened.
- Slowly and carefully remove the CPU cooler from the motherboard, keeping it level to prevent any excess thermal paste from dripping onto other components.
As you remove the CPU cooler, be mindful of the thermal paste that is applied between the cooler and the CPU. Excess force or tilting the cooler too much can cause the paste to spread, which may result in poor heat transfer when reinstalling the cooler.
Set the removed CPU cooler aside in a safe place, taking care not to place it on any conductive surfaces or expose it to excessive dust or dirt.
With the CPU cooler now removed from the motherboard, you’re ready to move on to the next step of cleaning the CPU and applying fresh thermal paste.
Step 7: Clean the CPU and apply fresh thermal paste
Now that the CPU cooler has been removed, it’s essential to clean the CPU surface and apply fresh thermal paste before installing a new cooler or re-installing the Corsair 240mm CPU cooler.
Follow these steps to clean the CPU and apply thermal paste:
- Using a lint-free cloth lightly dampened with rubbing alcohol, gently clean the surface of the CPU. Wipe away any residual thermal paste, being careful not to leave any lint or residue behind.
- Inspect the CPU socket for any dust or debris and clean it with a can of compressed air if necessary.
- Apply a small amount of fresh thermal paste onto the center of the CPU. The recommended amount is a pea-sized drop or a thin line, depending on the type of thermal paste being used. Avoid applying too much, as it can lead to excessive heat buildup.
- Spread the thermal paste evenly and thinly across the CPU surface using a plastic card, thermal paste spreader, or the included applicator (if provided with the thermal paste).
Ensure that the thermal paste is evenly spread to promote efficient heat transfer between the CPU and the cooler. This helps prevent overheating and ensures optimal performance of your processor.
Remember to handle the CPU with care, avoiding any unnecessary pressure or contact with the sensitive pins on the socket. Take your time during this step to ensure a clean CPU surface and proper application of the thermal paste.
With the CPU cleaned and fresh thermal paste applied, you’re now ready to install a new cooler or re-install the Corsair 240mm CPU cooler in the following step.
Step 8: Install a new cooler or re-install the Corsair 240mm CPU cooler
After cleaning the CPU and applying fresh thermal paste, it’s time to install a new cooler or re-install the Corsair 240mm CPU cooler on the motherboard. This step requires careful alignment and secure attachment to ensure proper cooling and performance.
Follow these steps to install a new cooler or re-install the Corsair 240mm CPU cooler:
- Align the mounting brackets on the cooler with the corresponding holes on the motherboard. Ensure that the brackets are securely in place.
- Lower the CPU cooler onto the CPU, guiding the screws through the holes in the mounting brackets.
- Once aligned, begin tightening the screws diagonally, applying even pressure to each screw. Gradually tighten the screws in a cross pattern to ensure equal tension.
- Continue tightening the screws until the CPU cooler is securely in place. Be careful not to overtighten, as this can damage the CPU or motherboard.
If you’re installing a new cooler, make sure to follow the manufacturer’s instructions regarding specific mounting instructions or additional components needed.
When re-installing the Corsair 240mm CPU cooler, ensure that the cooler is properly aligned with the mounting brackets and that the screws are tightened securely. This will ensure optimal heat dissipation and cooling efficiency.
Take your time during this step to ensure that the cooler is correctly installed. Double-check that the cooler is firmly attached and aligned, as any misalignment or loose screws may result in inadequate cooling performance or potential damage to the CPU.
With the new cooler installed or the Corsair 240mm CPU cooler re-installed, you’re ready to move on to the next step of reconnecting the CPU fan cable.
Step 9: Reconnect the CPU fan cable
After installing a new cooler or re-installing the Corsair 240mm CPU cooler, it’s time to reconnect the CPU fan cable. This step is crucial for providing power and control to the fan, ensuring proper cooling and operation of the CPU.
Follow these steps to reconnect the CPU fan cable:
- Locate the CPU fan header on the motherboard, which is typically labeled as “CPU_FAN” or something similar.
- Take the CPU fan cable from the cooler and align the connector with the CPU fan header on the motherboard.
- Gently push the connector onto the CPU fan header, ensuring that it is secure and fully inserted. It should click into place.
Make sure that the CPU fan cable is securely connected to the CPU fan header. This will ensure that the fan receives power and allows you to monitor and control the fan’s speed through the motherboard’s BIOS or software.
By reconnecting the CPU fan cable, you’re enabling proper cooling functionality for the newly installed or re-installed cooler. It’s essential to double-check that the connection is secure and fully inserted to prevent any potential issues.
With the CPU fan cable successfully reconnected, you’re ready to move on to the final step of putting the side panel back on and powering up your computer.
Step 10: Put the side panel back on and power up your computer
Now that you have completed the installation of the new cooler or re-installed the Corsair 240mm CPU cooler, it’s time to put the side panel back on your computer case and power it up. This final step ensures that your computer is properly sealed and ready to operate.
Follow these steps to put the side panel back on and power up your computer:
- Align the side panel with the case, ensuring that any tabs or hooks are properly aligned with the corresponding slots or openings on the computer case.
- Gently slide the side panel back into place, towards the front of the case, until it is securely attached.
- Once the side panel is in place, use the screws that you had previously removed to secure the panel back onto the computer case. Tighten the screws just enough to hold the panel securely but avoid over-tightening.
- With the side panel securely in place, it’s time to power up your computer. Locate the power button on your computer case and press it to turn your computer on.
As your computer powers up, listen for any unusual noises that may indicate an issue with the cooler or other components. Monitor the temperatures of your CPU to ensure that the new cooler or re-installed Corsair 240mm CPU cooler is functioning correctly.
If you notice any abnormalities or high temperatures, shut down your computer immediately and double-check the installation of the cooler. It’s also recommended to monitor the temperatures and performance of the CPU using software utilities or the BIOS.
With the side panel back on and your computer successfully powered up, you have completed the process of uninstalling and re-installing the Corsair 240mm CPU cooler. Enjoy the improved cooling performance and continue to monitor your CPU’s temperatures to ensure optimal performance and longevity.
Conclusion
Congratulations! You have successfully completed the process of uninstalling and re-installing the Corsair 240mm CPU cooler. By following the step-by-step guide, you have gained the knowledge and skills necessary to safely remove and install CPU coolers in your computer system.
Remember, when working with computer hardware, it is essential to practice caution and take necessary precautions to prevent any damage. Make sure to power down your computer and disconnect the CPU fan cable before removing the side panel of your computer case. Take your time to clean the CPU, apply fresh thermal paste, and securely install a new cooler or re-install the Corsair 240mm CPU cooler.
Throughout the process, always prioritize safety and ensure that all connections are secure. Monitor your CPU temperatures and performance to verify that the cooler is functioning correctly. If you encounter any issues or notice abnormal temperatures, consider seeking professional assistance.
By properly maintaining and upgrading your CPU cooler, you can improve the cooling efficiency of your computer system, allowing for better performance and longevity of your processor. Whether you choose to install a new cooler or stick with the reliable Corsair 240mm CPU cooler, you can now enjoy a well-cooled and optimized computing experience.
Thank you for following this guide, and happy computing!