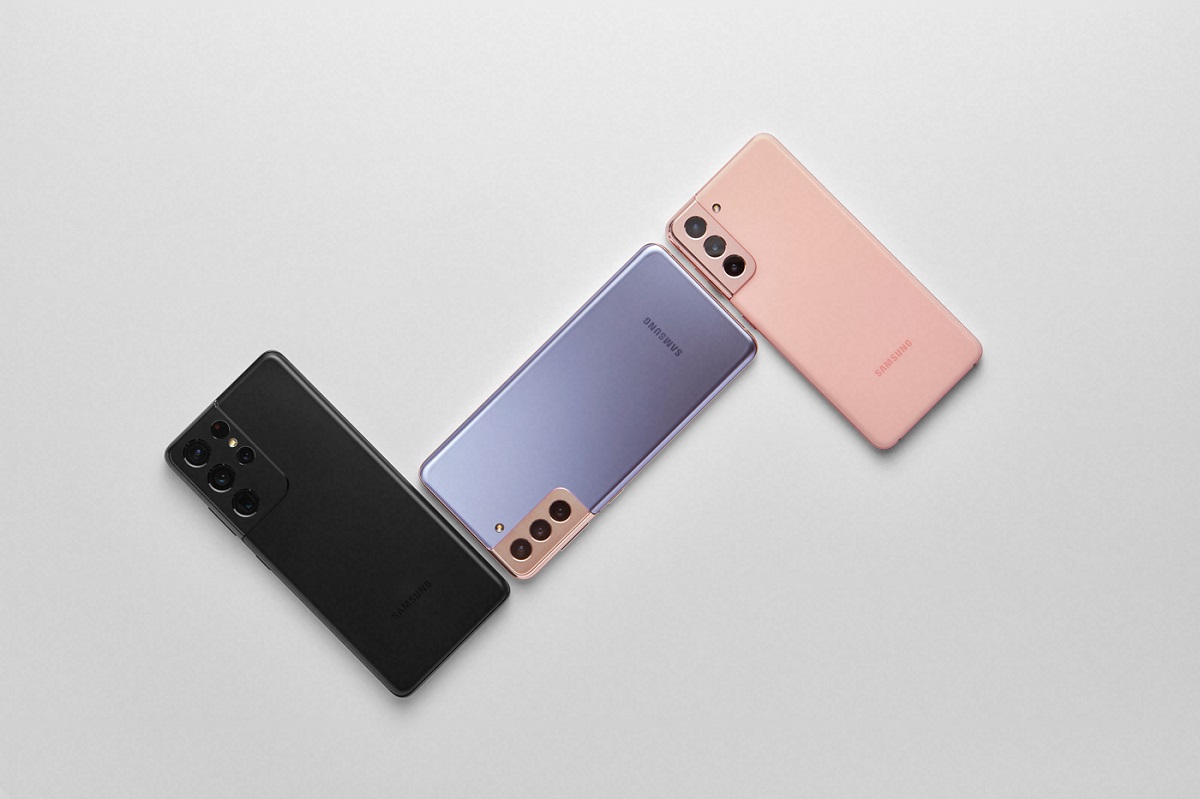
Preparing Your Samsung Galaxy S21
Before you embark on your moon photography journey with your Samsung Galaxy S21, there are a few essential steps you need to take to ensure the best possible results. By preparing your smartphone and familiarizing yourself with its features, you’ll be able to capture stunning images of the moon.
Clean your lens: Start by gently wiping the camera lens with a microfiber cloth to remove any smudges or fingerprints. A clean lens will prevent unwanted blurriness or distortion in your moon photos.
Charge your device: Make sure your Samsung Galaxy S21 is fully charged before heading out to shoot the moon. You don’t want your battery dying just when you’re about to capture the perfect shot.
Free up storage space: Moon photography can require a lot of storage space due to the high-quality images captured by the phone’s camera. Ensure you have enough free storage by deleting unnecessary files or transferring them to a computer or cloud storage.
Update your camera app: Regularly check for software updates for your camera app to ensure you have the latest features and improvements. This will optimize your overall photography experience and give you access to advanced settings.
Disable noise reduction: Moon photography often involves shooting in low-light conditions, and enabling noise reduction can result in loss of detail and sharpness. Go to your camera app settings and turn off noise reduction to capture clearer moon images.
Enable gridlines: To compose your moon shots more effectively, enable gridlines in your camera settings. These lines will help you align the moon and other elements in your composition using the rule of thirds.
Disable flash: The moon is already well-illuminated, and using the flash will only overexpose the image. Make sure the flash is turned off to capture the natural beauty of the moon.
By following these preparation steps, you’re setting yourself up for success in capturing spectacular moon photos. Now that you’ve prepared your Samsung Galaxy S21, it’s time to explore the ideal conditions for moon photography.
Understanding the Ideal Conditions for Moon Photography
When it comes to moon photography, getting familiar with the ideal conditions can greatly enhance the quality of your shots. While it’s possible to capture the moon in various lighting situations, certain conditions can provide better opportunities for stunning moon photos.
Clear skies: Ideally, you’ll want clear skies without any heavy cloud cover. Clouds can obscure the moon and diminish the clarity of your photos. Keep an eye on the weather forecast and plan your moon photography session on nights when the sky is clear.
Minimal light pollution: Light pollution from artificial sources can significantly impact the quality of your moon photos. Try to find a location away from city lights and light pollution to capture the moon’s brilliance without any interference.
Timing is everything: The moon’s phase and position in the sky play a crucial role in moon photography. The best times to capture the moon are during the waxing or waning crescent, first quarter, or last quarter phases. These phases provide a good balance of lighting and shadow on the moon’s surface.
Golden hour and blue hour: Take advantage of the golden hour, which occurs shortly after sunrise or before sunset, to capture warm and soft lighting. The blue hour refers to the period before sunrise or after sunset when the sky takes on a blue hue. These times of the day can add a magical touch to your moon photos.
Contrast with the surroundings: Look for interesting landscapes or structures that can add context and contrast to your moon photos. Incorporating elements such as trees, buildings, or mountains can create a visually striking composition.
Experiment with different weather conditions: Don’t be afraid to explore moon photography opportunities in different weather conditions. For instance, shooting the moon in mist, fog, or during a light rain can add a unique and mystical atmosphere to your photos.
Consider lunar events: Keep an eye on lunar events like full moons, supermoons, or eclipses. These events offer excellent opportunities to capture extraordinary moon photos with added visual interest
By understanding and considering these ideal conditions, you’ll be better prepared to capture breathtaking moon photos with your Samsung Galaxy S21. Now that you have a grasp on the conditions, it’s time to explore how to adjust your camera settings for moon photography.
Adjusting Camera Settings for Moon Photography
When it comes to moon photography with your Samsung Galaxy S21, knowing how to adjust the camera settings can make a significant difference in the outcome of your photos. By understanding and utilizing the right settings, you can capture the moon’s beauty in all its glory.
ISO: Start by setting the ISO to the lowest value possible (usually ISO 50 or 100) to reduce the amount of noise in your images. This will help maintain sharpness and clarity in your moon photos.
Exposure compensation: Adjust the exposure compensation to avoid overexposing the moon. Since the moon reflects a lot of light, your camera might inadvertently adjust the exposure setting. Reduce the exposure compensation to keep the moon properly exposed.
Focus mode: Switch your camera to manual focus mode and adjust the focus manually. The moon is a distant object, and auto-focus might struggle to accurately focus on it. Fine-tune the focus until the moon is sharp and clear in your viewfinder.
Shutter speed: For moon photography, a faster shutter speed is essential to freeze the moon’s motion and capture its details. Experiment with shutter speeds ranging from 1/125th of a second to 1/500th of a second to find the optimal setting for your shot.
White balance: Set the white balance to “Daylight” or “Auto” to ensure accurate color representation. This will prevent any unwanted color casts in your moon photos.
HDR mode: High Dynamic Range (HDR) mode can be helpful in capturing details in both the brighter and darker areas of the moon. Enable HDR mode if you want to enhance the dynamic range in your photos.
RAW format: If your Samsung Galaxy S21 supports it, shoot in RAW format for moon photography. RAW images retain more detail and provide greater flexibility for post-processing, allowing you to tweak the exposure, contrast, and other settings without losing quality.
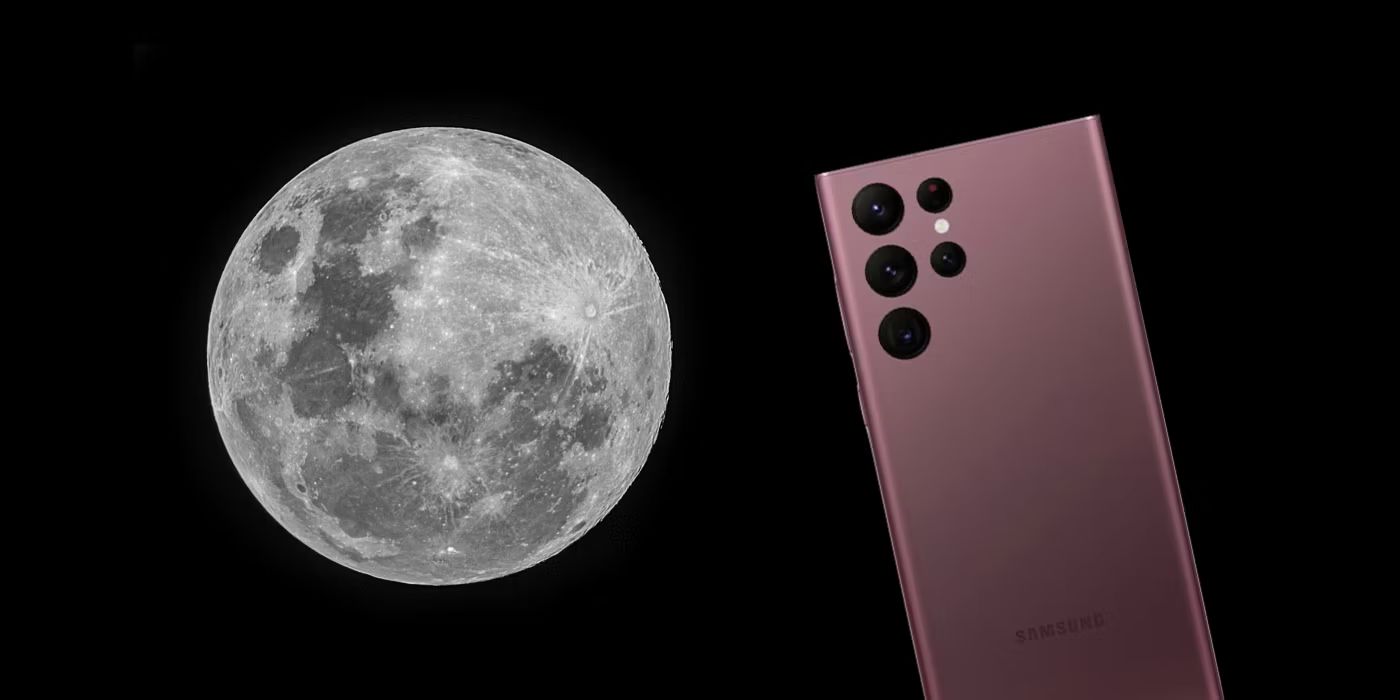
Zoom: Use the zoom function on your smartphone to get closer to the moon. The Samsung Galaxy S21 offers impressive zoom capabilities, allowing you to capture stunning close-up shots of the moon’s surface details.
By adjusting these camera settings, you’ll be able to capture the moon in all its celestial beauty. However, there are additional techniques you can employ to further enhance your moon photography experience. Let’s explore the use of manual mode and tripods for stability.
Using Manual Mode on Your Galaxy S21
One of the advantages of the Samsung Galaxy S21 is its Manual mode, which gives you full control over your camera settings. By utilizing Manual mode, you can fine-tune your camera settings and capture stunning moon photos with precision and creative control.
To access Manual mode on your Galaxy S21, open the camera app and swipe to the left until you reach the “Pro” or “Manual” mode. Here, you will have the ability to adjust various settings:
Shutter speed: In Manual mode, you can manually set the shutter speed to freeze the moon’s motion or create intentional motion blur effects. Experiment with different shutter speeds to achieve your desired results.
Aperture: While the Samsung Galaxy S21 does not have a physical aperture, you can simulate different aperture values in Manual mode. Adjusting the aperture will affect the depth of field in your moon photos, allowing you to either keep the moon sharp or create a softer background.
ISO: Adjusting the ISO in Manual mode allows you to control the sensitivity of the camera sensor. Lower ISO values (e.g., ISO 50 or 100) reduce noise but require longer shutter speeds, while higher ISO values (e.g., ISO 400 or 800) increase sensitivity but may introduce more noise.
Focus: Manual mode enables precise control over the focus. Use the focus ring or tap on the screen to adjust the focus manually until the moon appears sharp and clear in your viewfinder.
White balance: In Manual mode, you can set the white balance manually to achieve accurate color representation. Experiment with different white balance settings to find the one that best captures the moon’s natural colors.
Exposure compensation: Adjust the exposure compensation in Manual mode to fine-tune the exposure of your moon photos. This is particularly useful when you want to prevent overexposure and retain detail in the moon’s brighter areas.
By using Manual mode on your Samsung Galaxy S21, you have complete control over your camera settings. This allows you to adapt to different lighting and shooting conditions and capture the moon exactly as you envision it. However, even with the best settings, camera stability is crucial in moon photography. Let’s explore the use of tripods for achieving stable shots.
Using a Tripod for Stability
When it comes to capturing sharp and clear moon photos with your Samsung Galaxy S21, having a stable camera is essential. Even the slightest camera shake can result in blurry images, especially when shooting with slower shutter speeds. That’s where a tripod comes in.
A tripod is a three-legged stand that provides stability and support for your smartphone while shooting. Here’s how using a tripod can enhance your moon photography:
Eliminate camera shake: Mounting your Samsung Galaxy S21 on a tripod eliminates the risk of camera shake, ensuring crisp and sharp images. With a stable setup, your shots will be free from blur caused by hand movements, resulting in better overall image quality.
Longer exposure times: When shooting the moon, you may need to use longer exposure times to capture its details and texture. A tripod keeps your camera steady during these long exposures, preventing any unwanted blurriness that can occur when hand-holding the device.
Capturing multiple exposures: Creating a composite image or capturing multiple exposures of the moon for stacking requires precise alignment. A tripod provides the stability needed to ensure each shot is in the right position, making post-processing techniques more seamless and effortless.
Freedom in composition: Using a tripod allows you to compose your shot with precision and take the time to adjust your camera settings without worrying about holding the device steady. You can experiment with different angles, framing, and compositions while keeping your camera securely mounted.
Remote shutter release: To further avoid any camera shake, you can use a remote shutter release or the built-in self-timer function on your Samsung Galaxy S21. This allows you to trigger the camera without touching it directly, preventing any potential vibrations that could affect image sharpness.
Longer shooting sessions: Moon photography often involves waiting for the perfect moment or capturing a specific lunar phase. With a tripod, you can comfortably set up your Samsung Galaxy S21 and extend your shooting sessions, as you won’t have to hold the camera for extended periods, reducing fatigue.
Investing in a sturdy tripod specifically designed for smartphones can significantly improve your moon photography results. Ensure the tripod is compatible with your Samsung Galaxy S21 and easy to set up and adjust. With a stable camera setup, you’ll be ready to find the best composition for your moon photography shots.
Finding the Best Composition for Moon Photography
Composition plays a crucial role in moon photography, allowing you to create visually compelling and captivating images of the moon with your Samsung Galaxy S21. By carefully considering the elements within your frame, you can elevate your moon photos to new heights. Here are some tips for finding the best composition:
Rule of thirds: Apply the rule of thirds to create a well-balanced composition. Imagine your frame divided into a 3×3 grid, and position the moon along one of the gridlines or at the intersection points. This technique adds visual interest and draws the viewer’s eye to the main subject.
Consider foreground elements: Including interesting foreground elements can add depth and context to your moon photos. Look for structures, landscapes, or trees that can serve as compelling elements in the foreground, leading the viewer’s gaze towards the moon.
Balance with negative space: Negative space is the area around the main subject, and using it effectively can create a sense of scale and allow the moon to stand out even more. Experiment with different placements of the moon within the frame, balancing it with ample negative space to create a visually pleasing composition.
Frame within natural surroundings: Capture the moon within the context of its natural surroundings, such as mountains, trees, or bodies of water. These natural elements can provide a sense of scale and add visual interest to your moon photos.
Leading lines: Look for leading lines in the environment that can guide the viewer’s eye towards the moon. Roads, rivers, or even the branches of a tree can be used effectively to create a dynamic composition.
Experiment with angles: Don’t be afraid to try different angles and perspectives to add a unique twist to your moon photography. Shoot from a low angle to capture the moon against a striking skyline, or experiment with shooting from above to create an interesting aerial composition.
Use reflections: If you have access to a body of water, consider capturing the moon’s reflection. The stillness of the water not only adds another element to the composition but also creates a sense of serenity and tranquility in the image.
Keep the moon sharp: While it’s important to consider the composition, ensure the moon remains the focal point. Keep the moon sharp in your frame, and avoid excessive cropping or zooming in, as it can reduce the image quality and clarity.
Remember, composition is a creative choice, and there are no strict rules. Experiment with different compositions, angles, and elements to find your unique style and create compelling moon photos that showcase the beauty of the celestial world. As you explore different compositions, make use of the timer function on your Samsung Galaxy S21 to reduce camera shake and achieve even sharper results.
Using the Timer Function to Reduce Camera Shake
Camera shake can be a persistent challenge when it comes to moon photography. Even the slightest movement when pressing the shutter button can result in blurry images. However, your Samsung Galaxy S21 provides a useful feature that can help minimize camera shake – the timer function.
By using the timer function, you can give your camera a few seconds to stabilize after pressing the shutter button. This eliminates the possibility of introducing camera shake by physically touching the device during the exposure. Here’s how to use the timer function on your Samsung Galaxy S21:
- Open the camera app on your Samsung Galaxy S21.
- Access the shooting mode that you prefer for moon photography, such as Manual mode or Pro mode.
- Locate the timer function icon. It often looks like a clock or a timer, and it can usually be found at the top or bottom of the camera interface.
- Tap on the timer function icon to set the desired delay time. Common options include 2, 5, or 10 seconds.
- Compose and focus your shot as desired.
- Press the shutter button to start the timer countdown.
- Keep your device steady and avoid touching it until the timer reaches zero.
- Your Samsung Galaxy S21 will capture the photo automatically once the timer reaches zero, minimizing the risk of camera shake.
Using the timer function allows you to step away from the camera after pressing the shutter button, ensuring minimal disturbance to the device. This is particularly useful when shooting with longer exposure times to capture the moon’s details, where any slight movement can result in blurriness.
In addition to the timer function, you can further reduce camera shake by using a remote shutter release, if available for your Samsung Galaxy S21, or by using headphones with volume control and using the volume buttons as a remote shutter. Remote shutter releases provide an additional level of stability by allowing you to trigger the camera without physically touching the device.
By employing the timer function or a remote shutter release, you can significantly decrease camera shake in your moon photos, leading to sharper and more professional-looking images. Correctly adjusting camera settings and using stability tools like tripods and timers are crucial, but equally important is the post-processing phase where you can enhance and fine-tune your moon photos. Let’s explore some editing tips and techniques for spectacular results.
Experimenting with Different Angles and Zoom Levels
When it comes to moon photography with your Samsung Galaxy S21, don’t be afraid to experiment with different angles and zoom levels. By exploring these creative options, you can capture unique and visually captivating moon photos that stand out from the crowd.
Change your perspective: Instead of shooting the moon from eye level, consider exploring different perspectives and angles. Get down low to the ground or position yourself on an elevated surface to create a more dynamic and engaging composition.
Shoot through objects: Experiment with shooting the moon through different objects for an interesting and artistic effect. Use trees, branches, or architectural structures to add depth and create an intriguing frame within your composition.
Try wide-angle shots: While the moon may appear small in wide-angle shots, they can provide a broader context and capture stunning landscapes or cityscapes with the moon as a focal point. Play around with different wide-angle compositions to create a sense of scale and awe.
Zoom in for details: Take advantage of the zoom capabilities of your Samsung Galaxy S21 to capture close-up details of the moon’s surface. Zooming in allows you to highlight the craters, textures, and intricate patterns on the moon, resulting in dramatic and impactful images.
Create a moon silhouette: Experiment with capturing the moon as a silhouette against interesting subjects or backgrounds. Position yourself in a way that allows the moon to be backlit by the sun or other light sources, resulting in a striking and captivating image.
Combine the moon with other subjects: Incorporate other elements or subjects in your composition alongside the moon to create compelling visual narratives. Include people, animals, or objects that interact with or are illuminated by the moon, adding a sense of story and emotion to your photos.
Embrace negative space: Use negative space creatively to add visual impact to your moon photos. Allow the moon to occupy a smaller portion of the frame, surrounded by vast empty space. This minimalist approach can evoke a sense of wonder and emphasize the moon’s beauty.
Experiment with different zoom levels: Test out various zoom levels on your Samsung Galaxy S21 to find the balance between capturing the moon’s details and maintaining a pleasing composition. Zooming too much may result in a loss of image quality, so find the optimal zoom level that gives you the desired effect.
Remember, there are no right or wrong angles or zoom levels in moon photography. The beauty of experimentation lies in the opportunity to discover unique perspectives and create personal, artistic interpretations of the moon. Don’t hesitate to explore different angles and zoom in or out to add variety and interest to your moon photography.
Editing Your Moon Photos for Spectacular Results
Editing is a crucial step in the moon photography process as it allows you to enhance and fine-tune your photos for spectacular results. With the powerful editing capabilities of your Samsung Galaxy S21, you can bring out the true beauty of the moon and add your artistic touch to the final images. Here are some editing tips to consider:
Adjust brightness and contrast: Depending on the lighting conditions and the desired mood, you may need to adjust the overall brightness and contrast of your moon photos. Increase the brightness to reveal more details, or decrease it for a more dramatic and moody look. Fine-tune the contrast to enhance the tonal range.
Enhance colors: While the moon may appear predominantly white, there are subtle hues and tones that can be brought out in post-processing. Experiment with color adjustments to make the moon appear bluer or warmer, depending on the desired aesthetic. Be careful not to oversaturate the colors, as keeping a natural and balanced look is often more visually appealing.
Sharpen details: Use the sharpening tool to enhance the fine details of the moon’s surface. Apply it selectively to avoid over-sharpening and introducing unwanted noise. This will help bring out the texture and intricate features of the moon.
Reduce noise: Even with the best camera settings, moon photography in low-light conditions can produce some level of noise. Utilize the noise reduction tool in your editing app to minimize any unwanted graininess or artifacts. Maintain a balance, as excessive noise reduction can lead to loss of detail.
Crop and straighten: Consider cropping your moon photos to improve the composition or remove any distracting elements. Straighten the image if necessary to ensure that the horizon or other reference points are level, resulting in a more visually pleasing photo.
Add vignette or filters: Create a more focused and immersive look by adding a subtle vignette around the edges of your moon photos. This draws the viewer’s attention towards the center and enhances the overall impact. Additionally, experiment with different filters to evoke different moods or enhance the atmosphere of your moon photos.
Experiment with black and white: Convert your moon photos to black and white to create a timeless and monochromatic aesthetic. Removing color can accentuate the textures and details of the moon, providing a unique perspective and adding a sense of drama.
Apply selective adjustments: Utilize selective adjustments to target specific areas of your moon photos. This allows you to make localized enhancements such as brightening the moon, adjusting shadows, or adding clarity to specific parts of the image. Selective adjustments provide greater control and precision in your editing process.
Remember, editing is a subjective process, and it’s important to develop your own editing style and vision. Experiment with different editing techniques, but always aim for a natural and balanced look that reflects the true beauty of the moon. With diligent editing, you can transform your moon photos into stunning works of art that showcase the ethereal charm of our celestial neighbor.
Tips and Tricks for Better Moon Photography with Samsung Galaxy S21
Photographing the moon with your Samsung Galaxy S21 can be an exciting and rewarding experience. To help you capture even better moon photos, here are some tips and tricks to keep in mind:
Plan ahead: Check the moon phase and weather forecast in advance to plan your photography session. Certain moon phases, such as the crescent or quarter moon, offer more details and interesting lighting conditions for captivating shots.
Experiment with exposure settings: Don’t be afraid to adjust your exposure settings to achieve the desired look. Some shots may benefit from slightly underexposing the moon, while others might require slight overexposure to maintain details in the darker areas. Practice and find what works best for each specific lighting situation.
Use burst mode: Take advantage of your Samsung Galaxy S21’s burst mode to capture multiple shots in quick succession. This technique increases your chances of capturing a perfectly sharp image, especially if there is a risk of camera shake.
Shoot in RAW: If your Samsung Galaxy S21 supports it, consider shooting in RAW format. RAW files retain more information and offer greater flexibility during post-processing, allowing you to make adjustments without losing image quality.
Experiment with different lenses: The Samsung Galaxy S21 offers multiple lenses, such as wide-angle and telephoto. Explore the different focal lengths to get creative with your moon photography and capture varied compositions.
Utilize HDR mode: High Dynamic Range (HDR) mode can help retain details in both the bright and dark areas of your moon photos. Enable HDR to achieve a well-balanced exposure and bring out the intricate textures on the moon’s surface.
Pay attention to composition: Composition is key to captivating moon photos. Follow the rule of thirds, incorporate interesting foreground elements, or position the moon against other visually compelling elements to create engaging and well-balanced compositions.
Keep your lens clean: Regularly clean the lens of your Samsung Galaxy S21 to ensure clear and sharp photos. Use a microfiber cloth or lens cleaning solution to remove smudges, fingerprints, or dust particles that can affect image quality.
Embrace post-processing: Don’t be afraid to edit and enhance your moon photos. Post-processing enables you to fine-tune your images, adjust exposure and contrast, and bring out the details in the moon’s surface. However, aim for a natural-looking result that still preserves the inherent beauty of the moon.
Patience is key: Moon photography requires patience and persistence. It may take several attempts to capture that perfect shot. Keep trying, experimenting, and learning from each experience to improve your skills and achieve the desired results.
By applying these tips and tricks, you can elevate your moon photography with your Samsung Galaxy S21. Remember to keep practicing and pushing your creative boundaries to capture truly mesmerizing images of the moon in all its celestial glory.