Overview
Taking apart a PC case is often necessary when performing upgrades, troubleshooting hardware issues, or simply cleaning the components. While it may seem intimidating at first, with the right tools and step-by-step guidance, disassembling a PC case can be a straightforward process. This article will provide you with a comprehensive overview of how to take apart a PC case, allowing you to confidently tackle the task.
Before diving into the disassembly process, it is essential to ensure you have a good understanding of the components and cables inside your PC. Familiarize yourself with the layout and connections to avoid mishaps or damages during the disassembly and reassembly.
To successfully take apart a PC case, you will need a few basic tools. These include a screwdriver (preferably magnetic or with a strong grip), an anti-static wrist strap, cable ties, and a can of compressed air for cleaning. Having these tools ready beforehand will make the process smoother and more efficient.
The disassembly process typically involves removing the side panels, disconnecting cables and components one by one, removing the motherboard, power supply, storage drives, and any additional components such as the processor and cooling system. Each step requires careful attention to avoid causing any damage to the components or the case itself.
Once the disassembly is complete, it is crucial to take advantage of the opportunity to clean each component thoroughly. Dust and debris can build up inside the case, affecting the performance and longevity of your PC. Use the can of compressed air to blow away any dust and use an anti-static brush or cloth to clean the more delicate parts.
Once you have completed the cleaning process, you can begin reassembling the PC case. Follow the disassembly steps in reverse, making sure to reconnect all cables and components securely. Take your time to ensure everything is properly aligned and tightened.
Taking apart a PC case can be an intimidating task, but with the right knowledge and careful execution, it is easily manageable. By following the steps outlined in this article, you will be able to disassemble, clean, and reassemble your PC case confidently, allowing for smooth upgrades, troubleshooting, or maintenance of your computer.
Tools Needed
Before you begin the process of taking apart a PC case, it’s important to gather the necessary tools. Having the right tools on hand will not only make the disassembly process easier but also help ensure that you can safely remove components without causing any damage. Here are the essential tools you will need:
- Screwdriver: A screwdriver is an indispensable tool when it comes to disassembling a PC case. Opt for a screwdriver with a magnetic tip or a strong grip to prevent screws from getting lost inside the case. It’s also a good idea to have multiple sizes of screwdrivers to handle different types of screws.
- Anti-static wrist strap: When working with sensitive electronic components, such as the motherboard or graphics card, it’s crucial to protect them from electrostatic discharge (ESD). An anti-static wrist strap will help to prevent any static electricity from damaging your components. Make sure to attach the strap to a ground source, such as the metal part of the PC case, before beginning the disassembly.
- Cable ties: As you disconnect cables and components, it’s important to keep them organized to avoid confusion during the reassembly process. Cable ties will help you bundle and secure cables effectively, preventing them from getting tangled or snagged when removing other components.
- Compressed air can: Over time, dust and debris can accumulate inside the PC case, affecting airflow and causing components to overheat. Having a can of compressed air will allow you to clean out the dust from hard-to-reach areas. Use short bursts of air to blow away any debris, paying special attention to the fans, heatsinks, and filters.
These are the core tools you’ll need to get started with disassembling a PC case. Depending on your specific hardware and setup, you may also require additional tools such as pliers, an adjustable wrench, or a thermal paste applicator. Make sure to assess your specific needs and gather all the necessary tools before proceeding with the disassembly.
Remember to work in a well-lit and static-free environment, ensuring that you’re grounded and properly prepared. With the right tools at your disposal, you’ll be well-equipped to safely and efficiently take apart your PC case.
Step 1: Preparing for Disassembly
Before you begin the process of disassembling your PC case, it’s important to take some preparatory steps to ensure a smooth and hassle-free disassembly process. Proper preparation will help minimize the risk of damage to your components and make reassembly much more efficient. Here’s what you need to do:
- Gather all necessary tools: Ensure that you have all the tools you will need for the disassembly process, such as a screwdriver, anti-static wrist strap, cable ties, and a can of compressed air for cleaning. Having everything within reach will save you time and effort later on.
- Choose a clean and well-lit workspace: Find a spacious and well-lit area to work in. Clear away any clutter, dust, or liquids that could potentially damage your components. Working in a clean environment will help you keep track of screws and prevent any accidental damage to your PC or its parts.
- Prepare an anti-static surface: Static electricity can harm delicate PC components, so it’s crucial to work on an anti-static surface. Place an anti-static mat or a grounded piece of cardboard on your work area to protect your components from any potential discharge.
- Unplug the computer and disconnect all peripherals: To avoid any electrical accidents or damage to your computer, make sure to turn it off and unplug it from the power source. Additionally, disconnect all peripherals such as monitors, keyboards, and mice from the PC.
- Ground yourself and wear an anti-static wrist strap: Static electricity can build up on your body and discharge onto the sensitive components of your PC, potentially damaging them. To prevent this, wear an anti-static wrist strap and attach it to a grounded source, such as the metal part of the PC case. This will help dissipate any static electricity before it reaches your components.
By following these preparatory steps, you’ll create a safe and organized environment for disassembling your PC case. Taking the time to gather the necessary tools and ensure proper grounding will help protect your components and make the disassembly process smoother. Once you’ve completed these preparations, you’re ready to move on to the next steps in disassembling your PC case.
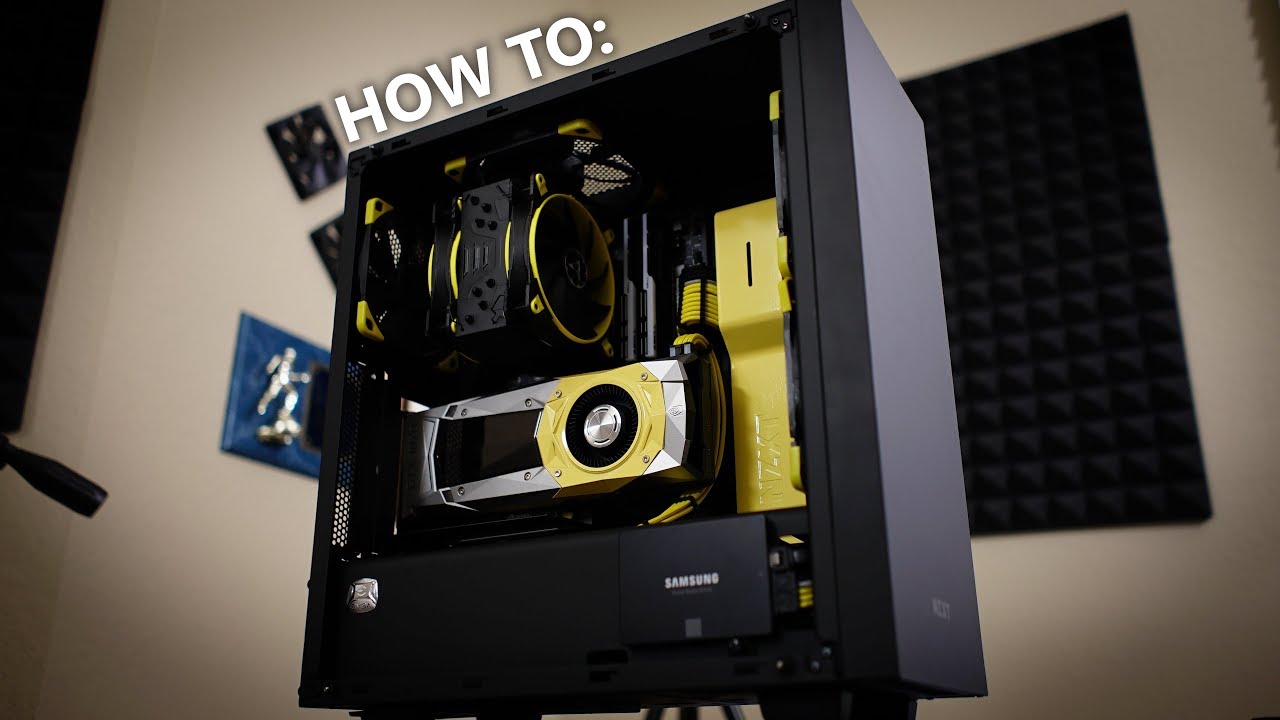
Step 2: Removing the Side Panels
Now that you have prepared your workspace and gathered the necessary tools, it’s time to remove the side panels of your PC case. These panels provide access to the internal components and are usually held in place by screws or latches. Follow these steps to remove the side panels:
- Locate the screws or latches: Examine the sides of your PC case to identify the screws or latches that secure the side panels. They are typically located towards the rear of the case and may require the use of a screwdriver or the release of a latch.
- Unscrew or unlatch the side panels: Using a screwdriver, carefully unscrew the screws that hold the side panel in place. If your case uses latches, release them by pushing or sliding them in the designated direction. Some cases may have a combination of screws and latches.
- Slide or lift off the side panel: Once the screws are fully removed or the latches are released, gently slide the side panel towards the rear of the case. If your case has a hinged panel, lift it upwards instead. Be cautious not to pull forcefully or twist the panel as it may damage the case or its internal components.
- Repeat for the other side panel: Most PC cases have two side panels, so repeat the above steps to remove the panel on the opposite side. Take care to keep track of any screws and store them in a safe place to avoid misplacing them.
With the side panels removed, you now have a clear view and easy access to the internal components of your PC. Remember to set aside the side panels in a safe location where they are less likely to be damaged or interfered with during the rest of the disassembly process.
Removing the side panels is the first significant step in disassembling your PC case. It allows you to proceed with the disassembly process and gain access to the various components necessary for upgrades, maintenance, or troubleshooting. Now that the side panels are off, you’re ready to move on to the next steps in the disassembly process.
Step 3: Disconnecting Cables and Components
Now that the side panels are off, it’s time to start disconnecting the cables and components inside your PC case. This step requires careful attention to ensure that everything is disconnected properly and safely. Follow these steps to disconnect the cables and components:
- Identify the cables and components: Take a moment to familiarize yourself with the cables and components inside your PC case. This will help you understand the connections and make it easier to disconnect them.
- Start with the peripheral cables: Begin by disconnecting the cables attached to peripherals such as the hard drive, DVD drive, or any other storage devices. Gently unplug the cables from their respective connectors, taking note of their orientation to ensure proper reconnection later on.
- Disconnect the power cables: Carefully unplug the power cables from the motherboard, graphics card, and any other components that require power. These cables usually have a latch or clip; press the latch and gently pull the cable out, ensuring not to put excessive force on the connector.
- Remove the expansion cards: If you have any expansion cards installed, such as a graphics card or sound card, remove them by unscrewing the retaining screws and gently pulling the card out from its slot. Be cautious not to damage the card or the slot during this process.
- Disconnect the data cables: Next, disconnect any data cables such as SATA cables or ribbon cables that connect the storage devices or optical drives to the motherboard. Again, take note of the orientation and gently unplug the cables from their connectors.
- Remove any other connected cables and components: Inspect your PC case and check for any remaining cables, connectors, or components that need to be disconnected. This may include CPU cooler cables, fan connectors, or front panel connectors. Refer to your motherboard manual or specific component documentation if needed.
As you disconnect each cable or component, take the time to organize and secure the cables using cable ties. This will prevent them from getting tangled or snagged during the rest of the disassembly process.
Disconnecting the cables and components is a crucial step in the disassembly process. By taking your time and being mindful of the connections, you can ensure a smooth disconnection process. Once you have completed this step, you are ready to move on to the next steps in disassembling your PC case.
Step 4: Removing the Motherboard
After disconnecting the cables and components, the next step is to remove the motherboard from the PC case. Removing the motherboard allows for upgrades, troubleshooting, or cleaning of the components. Follow these steps to safely remove the motherboard:
- Locate the screws securing the motherboard: Identify and locate the screws that secure the motherboard to the case. These screws are typically found around the edges of the motherboard or in specific mounting points.
- Unscrew the motherboard screws: Using a screwdriver, carefully remove the screws securing the motherboard. Take note of the screw types and sizes as they may vary in different areas or for specific components attached to the motherboard.
- Gently lift the motherboard: Once all the screws are removed, gently lift the motherboard by supporting it from underneath. Take caution not to apply excessive force or flex the board too much, as this can cause damage to the components or the motherboard itself.
- Disconnect any remaining cables: While lifting the motherboard, be aware of any cables or connectors that are still connected to it. Carefully unplug any remaining cables, such as the front panel connectors or CPU power cables, making sure to note their locations and orientations for reassembly.
- Set aside the motherboard: Place the motherboard on an anti-static surface or its original packaging to protect it from static electricity and physical damage. Keep it in a safe place where it won’t be disturbed during the rest of the disassembly process.
Removing the motherboard requires patience and careful handling to prevent any damage to the sensitive components. Take your time to ensure that all the cables are disconnected and that you have removed all the screws securing the motherboard to the case.
By following these steps, you have successfully removed the motherboard from your PC case. This opens up opportunities for upgrades, maintenance, or troubleshooting of the motherboard and its associated components. With the motherboard removed, you’re ready to proceed with the next steps in disassembling your PC case.
Step 5: Removing the Power Supply
The power supply unit (PSU) is responsible for providing power to all the components in your PC. When it comes to disassembling your PC case, removing the power supply is an important step. Whether you’re replacing it or simply cleaning the area, follow these steps to safely remove the power supply:
- Power down and unplug the PC: Before working with the power supply, ensure that your PC is powered off and unplugged from the electrical outlet. This prevents any potential electrical accidents during the removal process.
- Locate the power supply: Identify the power supply within your PC case. It’s typically located at the top or bottom of the case, at the rear.
- Unplug the power supply cables: Carefully disconnect all the cables attached to the power supply. This includes the main motherboard power connector, CPU power connector, SATA power connectors, and any other peripherals that are powered by the power supply.
- Unscrew the power supply: Locate the screws securing the power supply to the case. Depending on the case, these screws may be located at the rear or on the side panel. Use a screwdriver to remove the screws and set them aside in a safe place.
- Remove the power supply: Once the screws are removed, gently slide the power supply out of its mounting bracket or bay in the case. Take care not to tug on any cables that may still be connected to the power supply.
- Set aside the power supply: Store the removed power supply in a safe place, away from any potential damage. If you plan on reinstalling it later, keep the screws you removed with the power supply for easy reassembly.
Removing the power supply is an essential step in the disassembly process, allowing you to access other components inside the case. Whether you’re upgrading your power supply or performing maintenance, taking your time and following these steps will ensure a smooth and safe removal process.
With the power supply removed, you can now move on to the next steps in disassembling your PC case.
Step 6: Removing any Additional Storage Drives
After removing the power supply, the next step in disassembling your PC case is to remove any additional storage drives that may be installed. Additional storage drives, such as hard disk drives (HDDs) or solid-state drives (SSDs), are commonly used for storing data and files. Here’s how you can remove them:
- Identify the storage drives: Locate the additional storage drives within your PC case. They are typically mounted in drive bays or brackets, either towards the front or rear of the case.
- Disconnect the cables: Carefully unplug the data and power cables connected to the storage drives. The data cables are usually SATA cables, while the power cables are typically the same as those used for other components, such as the power supply.
- Remove any mounting brackets or screws: Some storage drives may require removing mounting brackets or screws before they can be released from the case. Use a screwdriver to remove any screws or fastenings holding the drives securely in place.
- Slide or gently pull out the drives: With the cables and mounting brackets removed, gently slide or pull out the additional storage drives from their bays or brackets. Take care not to apply excessive force or damage any surrounding components or cables.
- Set aside the drives: Once the drives are removed, place them in a safe and clean location, ensuring they won’t be damaged or scratched. If you plan on reusing the drives or installing new ones, keep the mounting brackets or screws for easy re-assembly.
Removing any additional storage drives is essential when upgrading or replacing them, or if you need to access other components inside the case. By following these steps, you can safely remove the drives without causing any damage to your PC or the drives themselves.
With the additional storage drives removed, you can proceed to the next steps in disassembling your PC case.
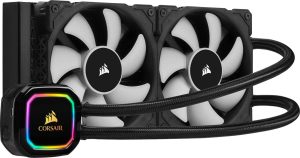
Step 7: Removing the Processor and Cooler
In order to disassemble your PC case thoroughly, you may need to remove the processor (CPU) and its cooler. This step is essential if you plan to upgrade the CPU, replace the cooler, or perform maintenance on these components. Here are the steps to safely remove the processor and cooler:
- Power down and unplug your PC: Before handling any internal components, make sure your PC is powered off and unplugged from the electrical outlet for safety.
- Detach the CPU cooler: Locate the CPU cooler on top of the processor. Depending on the type of cooler, it may be secured with screws, clips, or a locking mechanism. Carefully remove any fastenings or clips to detach the cooler from the motherboard.
- Clean off the thermal paste: Once the cooler is removed, you’ll likely find thermal paste or a thermal pad on top of the processor. Use a lint-free cloth or isopropyl alcohol to gently clean off the old thermal paste. Ensure that the processor is clean and free of any debris.
- Unlock and remove the CPU: Locate the CPU socket latch on the motherboard. Carefully lift the latch to unlock the CPU socket. With the latch in the unlocked position, gently lift the CPU out of the socket. Avoid touching the pins or any sensitive components on the bottom of the CPU.
- Store the CPU and cooler: Place the removed CPU and cooler in protective packaging or a static-free bag to prevent damage from static electricity or physical contact.
Removing the processor and cooler requires careful handling and attention to detail. Take your time to ensure proper detachment of the cooler and delicate removal of the CPU from its socket. This will prevent any damage to these crucial components and allow for future upgrades or maintenance.
With the CPU and cooler removed, you can now proceed to the next steps in disassembling your PC case.
Step 8: Cleaning and Reassembling the PC Case
Now that you have disassembled and removed the necessary components from your PC case, it’s time to clean them and reassemble the case. Cleaning your components and case not only improves their longevity but also helps maintain optimal performance and airflow. Follow these steps to clean and reassemble your PC case:
- Cleaning the components: Use a can of compressed air to remove any dust or debris from the components, such as the motherboard, storage drives, and fans. Pay special attention to the heatsinks, fans, and filters, as these areas tend to accumulate the most dirt. For stubborn dirt or grime, you can also use a soft, anti-static brush or cloth to gently clean the surface.
- Cleaning the case: Wipe down the inside of the PC case with a microfiber cloth or anti-static brush to remove any loose debris. For more thorough cleaning, use a solution of isopropyl alcohol and water (mixed in a 1:1 ratio) to gently wipe the surfaces. Avoid using excessive liquid and make sure the case is completely dry before reassembling.
- Reassembling the case: Start by following the reverse order of the disassembly steps. Begin by reattaching the additional storage drives, ensuring they are securely fastened in their respective bays or brackets. Then, reinsert the processor and lock it into place, being careful not to apply excessive force. Next, reattach the CPU cooler using the appropriate fastenings or clips.
- Connect the cables and components: Carefully reconnect all the cables, ensuring they are properly inserted and secured. Pay special attention to the motherboard connectors, power cables, and data cables. If necessary, consult the motherboard manual or component documentation to ensure correct connectivity.
- Replace the side panels: Once all the components and cables are reattached, slide the side panels back into place. Secure them using the original screws or latches, ensuring they are snug but not overly tight.
By thoroughly cleaning your components and reassembling the PC case, you not only improve its visual appeal but also optimize its performance and minimize potential issues caused by dust and debris accumulation.
With the cleaning and reassembly process complete, you can plug in your PC, power it on, and enjoy your freshly cleaned and reassembled computer.