Introduction
Welcome to this step-by-step guide on how to sync Google Calendar to Zoom. In today’s digital world, where remote work and virtual meetings have become the norm, having a seamless integration between your calendar and video conferencing platform is essential for staying organized and efficient. Google Calendar, with its user-friendly interface and robust features, is a popular choice for managing schedules and appointments. Zoom, on the other hand, is a leading video conferencing platform known for its high-quality audio and video capabilities.
By syncing Google Calendar to Zoom, you can enjoy the convenience of automatically importing your meeting schedules, reminders, and other important events directly into your Zoom account. This integration eliminates the need for manual data entry and ensures that you never miss a meeting or double-book your time slots.
Whether you are working from home, coordinating with a remote team, or simply juggling multiple commitments, the sync between Google Calendar and Zoom can greatly simplify your workflow and help you stay on top of your schedule. In this guide, we will walk you through the step-by-step process of syncing your Google Calendar with Zoom, ensuring that you can seamlessly manage your meetings and appointments from a single interface.
Whether you are a busy professional, a student, or a stay-at-home parent with a packed schedule, this guide is designed to help you make the most of this time-saving integration. So without further ado, let’s dive into the steps required to sync Google Calendar to Zoom. By the end of this guide, you will have a seamless connection between your calendars, making it easier than ever to stay organized and focused.
Why Sync Google Calendar to Zoom?
Syncing your Google Calendar with Zoom offers numerous benefits, making it a valuable integration for individuals and teams. Here are some reasons why you should consider syncing your Google Calendar to Zoom:
- Efficient scheduling: By syncing your Google Calendar with Zoom, you can automatically import all your scheduled meetings and events into your Zoom account. This means you don’t have to manually create meetings in Zoom and can easily keep track of all your appointments.
- Updated information: When you sync Google Calendar with Zoom, any changes or updates made to meeting details in your Google Calendar will automatically reflect in Zoom. This ensures that everyone involved in the meeting has the latest information without the need for manual updates.
- Time-saving: The integration between Google Calendar and Zoom saves you precious time by eliminating the need to switch between multiple platforms to manage your schedule and join meetings. With a centralized view, it becomes easier to plan your day and seamlessly transition between different tasks.
- No double booking: By syncing your calendars, you can avoid the hassle of double booking or overlapping meetings. The integration ensures that your Google Calendar and Zoom are always in sync, preventing any conflicts in your schedule.
- Improved productivity: With your calendars synchronized, you can easily view your meeting details, including the meeting topic, participants, and any attached files, directly from your Zoom interface. This enhances productivity by providing all the necessary information in one place.
- Seamless collaboration: When your team members sync their Google Calendars to Zoom, it becomes easier to schedule and coordinate meetings with everyone’s availability in mind. This fosters better collaboration and ensures that everyone is on the same page.
- Automated reminders: By integrating Google Calendar with Zoom, you can take advantage of automated reminders for your meetings. Zoom can send you notifications and reminders for upcoming meetings, helping you stay organized and prepared.
With all these benefits in mind, it’s clear that syncing Google Calendar to Zoom is a valuable integration that can streamline your workflow, enhance productivity, and save you time.
Step 1: Sign into your Google Account
The first step to sync Google Calendar to Zoom is to sign into your Google Account. To do this, follow the steps below:
- Launch your preferred web browser and visit the Google Calendar website.
- Click on the “Sign In” button located at the top right corner of the page.
- Enter your Google Account email address and click “Next”.
- Enter your password and click “Next” to proceed.
- If you have enabled two-step verification for your Google Account, you will be prompted to enter a verification code sent to your registered phone number or email. Enter the code to proceed.
Once you have successfully signed into your Google Account, you are now ready to proceed to the next step and start syncing your Google Calendar with Zoom.
Note: If you don’t have a Google Account, you can create one by clicking on the “Create account” option on the sign-in page. Follow the on-screen instructions to set up your new Google Account.
Before moving on, it’s important to ensure that you have full access to your Google Calendar and that it contains the events and meetings you want to sync with Zoom. Take a moment to review your calendar and make any necessary additions or changes.
With Step 1 completed, you have successfully signed into your Google Account, which is the first requirement for syncing Google Calendar with Zoom. Now, let’s move on to the next step and configure the necessary settings within Zoom.
Step 2: Open Zoom and go to “Settings”
Now that you have signed into your Google Account, the next step in syncing Google Calendar to Zoom is to open Zoom and access the settings. To do that, follow the instructions below:
- Launch the Zoom application on your computer or open your preferred web browser and visit the Zoom website.
- If you are using the desktop application, click on your profile picture or initials on the top right corner, and then select the “Settings” option from the drop-down menu. If you are using the web browser, sign in to your Zoom account and click on the “Settings” tab located in the left sidebar.
By accessing the settings in Zoom, you can configure the necessary options to enable the synchronization with your Google Calendar.
Note: If you do not have the Zoom application installed on your device, you can download it from the Zoom website. Alternatively, you can also use the web version of Zoom by signing in to your account on the Zoom website.
Once you have accessed the settings page in Zoom, you are ready to proceed to the next step and set up the calendar and contacts integration. Having the settings panel open is crucial for enabling the synchronization between Google Calendar and Zoom.
With Step 2 completed, you have successfully opened Zoom and accessed the settings. Now, let’s move on to the next step and configure the calendar and contacts integration within Zoom to start syncing with Google Calendar.
Step 3: Select “Calendar & Contacts”
After opening the Zoom settings, the next step to sync Google Calendar to Zoom is to navigate to the “Calendar & Contacts” section. Follow the steps below:
- In the settings panel of Zoom, locate the navigation menu on the left side.
- Scroll down the menu and find the “Calendar & Contacts” option. Click on it to access the calendar and contacts integration settings.
By selecting the “Calendar & Contacts” section in Zoom, you will be able to configure the necessary settings to establish a connection between your Google Calendar and Zoom platform.
Note: The exact location and appearance of the “Calendar & Contacts” option may vary slightly depending on the version of Zoom you are using. However, it is generally accessible within the settings panel and can be easily located.
Once you have selected the “Calendar & Contacts” option, you are now ready to proceed to the next step and initiate the synchronization process between Zoom and your Google Calendar.
With Step 3 completed, you have successfully accessed the “Calendar & Contacts” section within Zoom. Now, let’s move on to the next step and proceed with setting up the synchronization between Zoom and your Google Calendar.
Step 4: Click on “Sync Zoom Meetings from your Google Calendar”
In order to sync Google Calendar to Zoom, you will need to select the “Sync Zoom Meetings from your Google Calendar” option within the Zoom settings. Follow the steps below:
- Within the “Calendar & Contacts” section of the Zoom settings, scroll down until you find the “Sync Zoom Meetings from your Google Calendar” option. This option is usually located near the top of the page.
- Click on the checkbox next to the “Sync Zoom Meetings from your Google Calendar” option to enable the synchronization feature.
Enabling this option allows Zoom to access your Google Calendar and import your meeting schedules, reminders, and other important events into your Zoom account. By doing so, you can manage all your meetings directly from the Zoom platform, eliminating the need for manual data entry.
Note: If you don’t see the “Sync Zoom Meetings from your Google Calendar” option, make sure you have properly signed into your Google Account and granted the necessary permissions to access your Google Calendar.
Once you have clicked on the checkbox next to the “Sync Zoom Meetings from your Google Calendar” option, you are now ready to proceed to the next step and grant Zoom permission to access your Google Calendar.
With Step 4 completed, you have successfully enabled the synchronization feature within Zoom. Now, let’s move on to the next step and grant permission to access your Google Calendar.
Step 5: Grant permission to access your Google Calendar
In order to synchronize your Google Calendar with Zoom, you need to grant permission to allow Zoom to access your Google Calendar. Follow the steps below to grant this permission:
- After enabling the “Sync Zoom Meetings from your Google Calendar” option, click on the “Authorize” or “Grant Permission” button that appears next to it.
- A new window or tab will open, displaying the Google Account permissions page. Here, you will be asked to grant permission for Zoom to access your Google Calendar data.
- Read the terms and conditions, and if you agree, click on the “Allow” or “Grant Permission” button to authorize Zoom to access your Google Calendar.
- Depending on your Google Account settings, you may be prompted to enter your password as an additional security measure.
By granting permission to access your Google Calendar, Zoom will be able to import your meeting schedules, reminders, and other important events into your Zoom account. This ensures that all your meetings are synchronized and organized in one place.
Note: It’s important to review the permissions you are granting to Zoom and ensure that you are comfortable with the level of access it has to your Google Calendar data. Zoom only requires access to your calendar information and will not have permission to perform any actions on your behalf.
Once you have granted permission to access your Google Calendar, you are now ready to proceed to the next step and choose which Google Calendar you want to sync with Zoom.
With Step 5 completed, you have successfully granted permission to Zoom to access your Google Calendar. Now, let’s move on to the next step and configure the specific calendar settings within Zoom.
Step 6: Choose which Google Calendar to sync with Zoom
After granting permission to access your Google Calendar, the next step to sync Google Calendar to Zoom is to choose which specific calendar you want to sync with Zoom. Follow the steps below:
- Within the Zoom settings, look for the “Calendar” or “Google Calendar” section. This section is typically located within the “Calendar & Contacts” or “Meetings” settings.
- Click on the “Choose Calendar” or “Select Calendar” option.
- A pop-up window will appear, displaying a list of your available Google Calendars.
- Select the Google Calendar you want to sync with Zoom by clicking on it in the list.
- Click the “Save” or “Apply” button to save your selection.
By choosing a specific Google Calendar, you can ensure that only the events and meetings from that calendar are synced with your Zoom account. This gives you control over which calendar’s data is integrated with Zoom.
Note: If you want to sync multiple Google Calendars with Zoom, you can repeat this step and select each calendar one by one.
Once you have chosen the Google Calendar you want to sync with Zoom, the integration process will begin. Zoom will fetch the events and meetings from the selected calendar and import them into your Zoom account.
With Step 6 completed, you have successfully chosen the Google Calendar that you want to sync with Zoom. Now, let’s move on to the next step and configure any additional settings to customize the integration.
Step 7: Configure additional settings
After choosing the Google Calendar to sync with Zoom, you can further customize the integration by configuring additional settings. Follow the steps below to configure these settings:
- In the Zoom settings, look for the “Calendar” or “Google Calendar” section, which is typically located within the “Calendar & Contacts” or “Meetings” settings.
- Within this section, you may find various options and settings that allow you to tailor the integration according to your preferences.
- Review the available settings and make adjustments as needed. Some common additional settings include:
- Include/exclude event types: You can choose to include or exclude specific types of events from being synced with Zoom. For example, you may want to exclude personal events or recurring meetings that are not relevant to your Zoom meetings.
- Set meeting reminders: You can configure Zoom to send you reminders before your scheduled meetings. Choose the reminder timeframe that suits your needs, such as 5 minutes, 15 minutes, or 30 minutes before the meeting start time.
- Enable meeting notifications: You can choose to receive notifications for upcoming meetings, allowing you to stay updated and prepared for your Zoom meetings.
- Adjust sync frequency: Some settings may allow you to adjust how often the synchronization occurs between Google Calendar and Zoom. You can choose the frequency that best fits your needs, such as syncing every hour or once a day.
Explore the available options and select the settings that align with your preferences and workflow. These additional settings help you customize the integration to suit your specific needs and preferences.
Note: The available additional settings may vary depending on the version of Zoom you are using. It’s always a good idea to explore the available options within the settings panel to determine what features and settings are available to you.
Once you have configured the additional settings, click the “Save” or “Apply” button to save your changes.
With Step 7 completed, you have successfully configured the additional settings for the integration between Google Calendar and Zoom. Now, let’s proceed to the final step and test the integration to ensure everything is working smoothly.
Step 8: Save your settings and test the integration
After configuring the additional settings for the integration between Google Calendar and Zoom, the final step is to save your settings and test the integration to ensure that everything is working smoothly. Follow the steps below:
- Within the Zoom settings, locate the “Save” or “Apply” button.
- Click on the “Save” or “Apply” button to save your configured settings.
By saving your settings, you ensure that all the changes you made to the integration settings are implemented and saved within Zoom.
Now, it’s time to test the integration by creating a meeting or event in your Google Calendar and verifying its synchronization with Zoom.
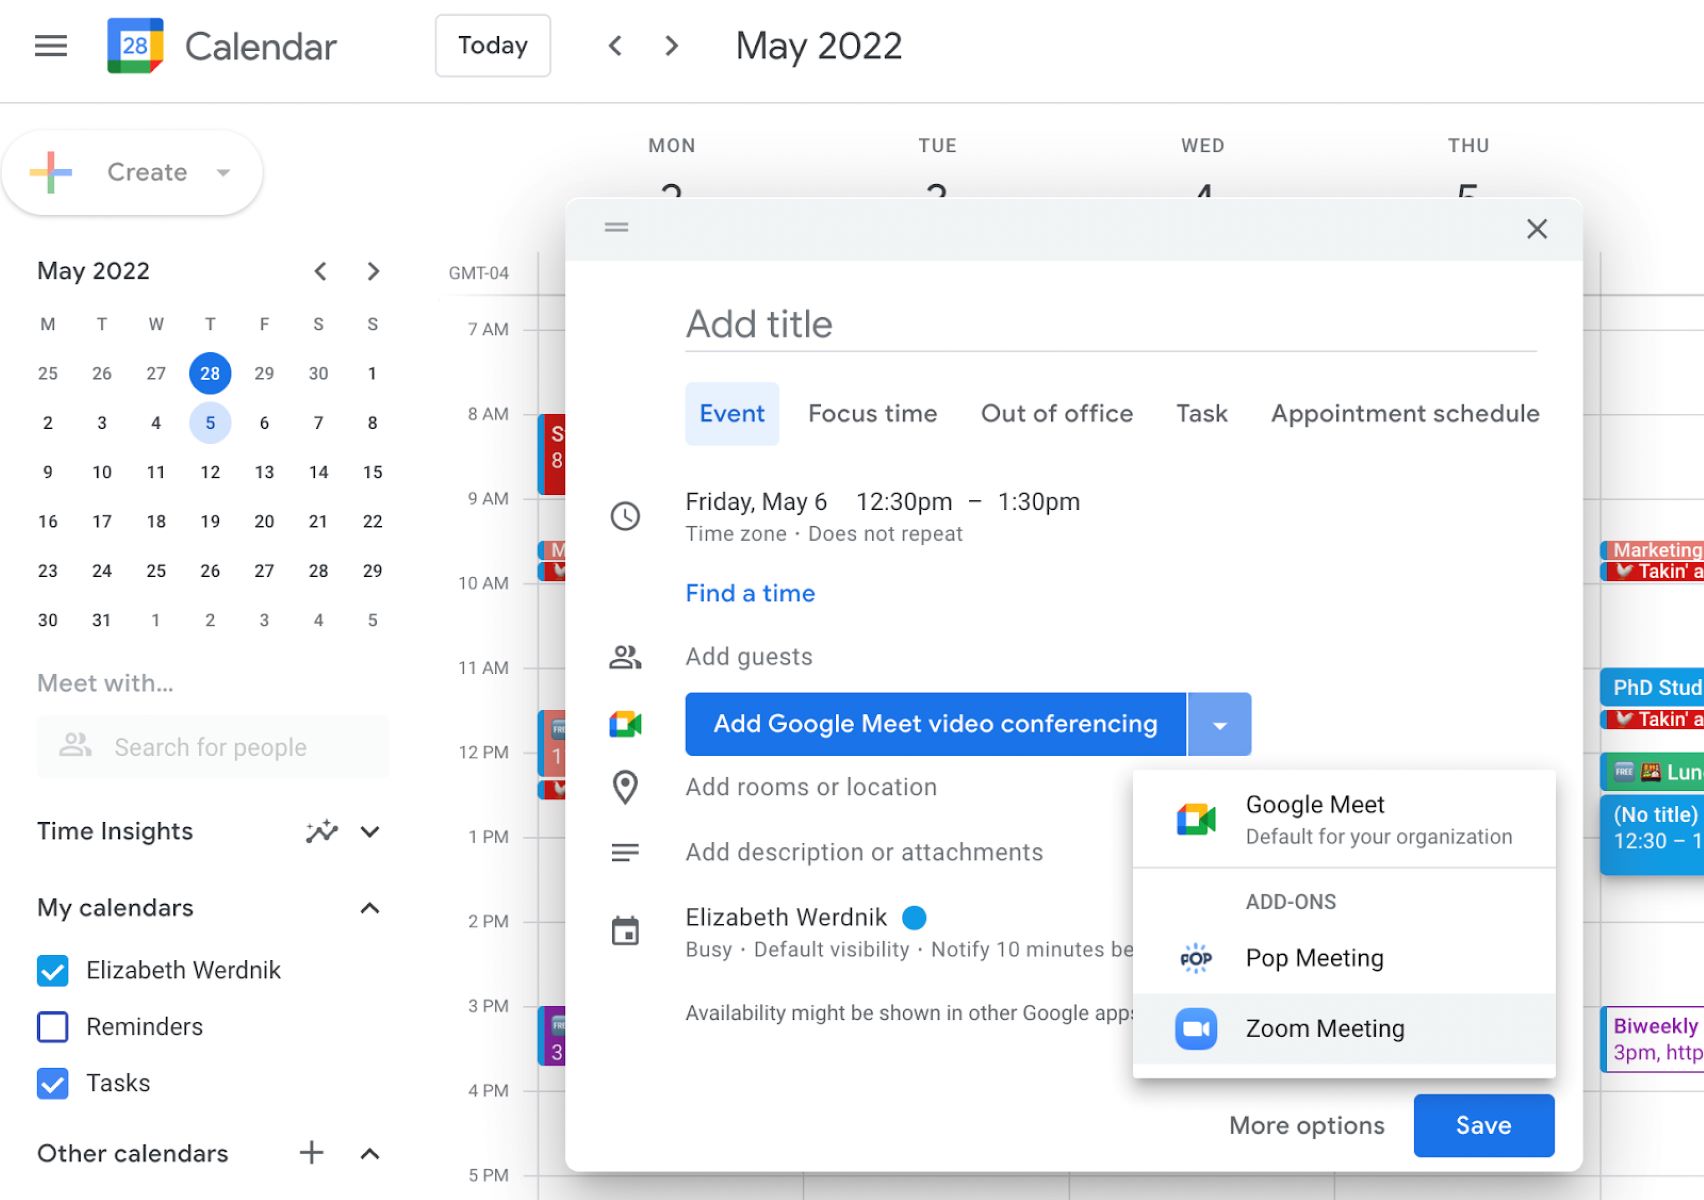
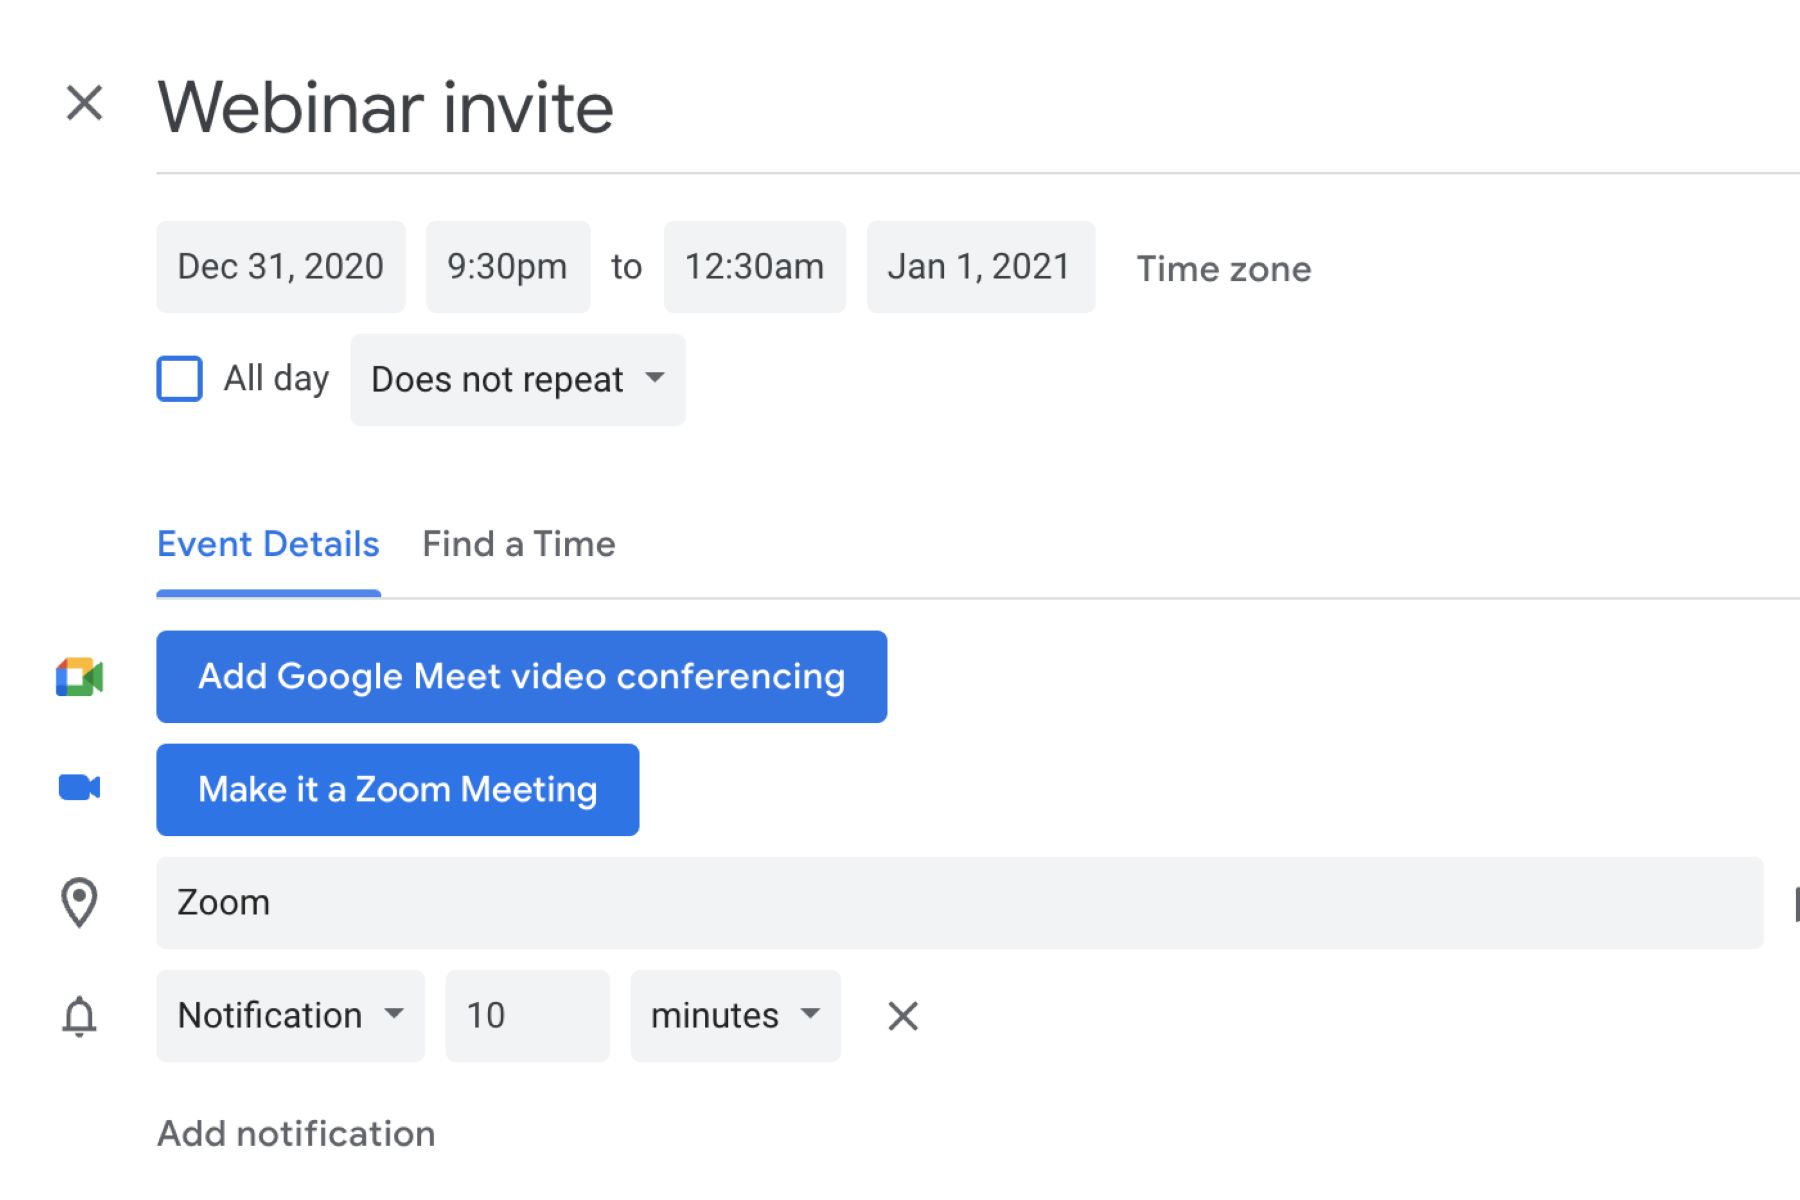
- Open your Google Calendar and create a new meeting or event. Provide all the necessary details such as the title, date, time, and participants.
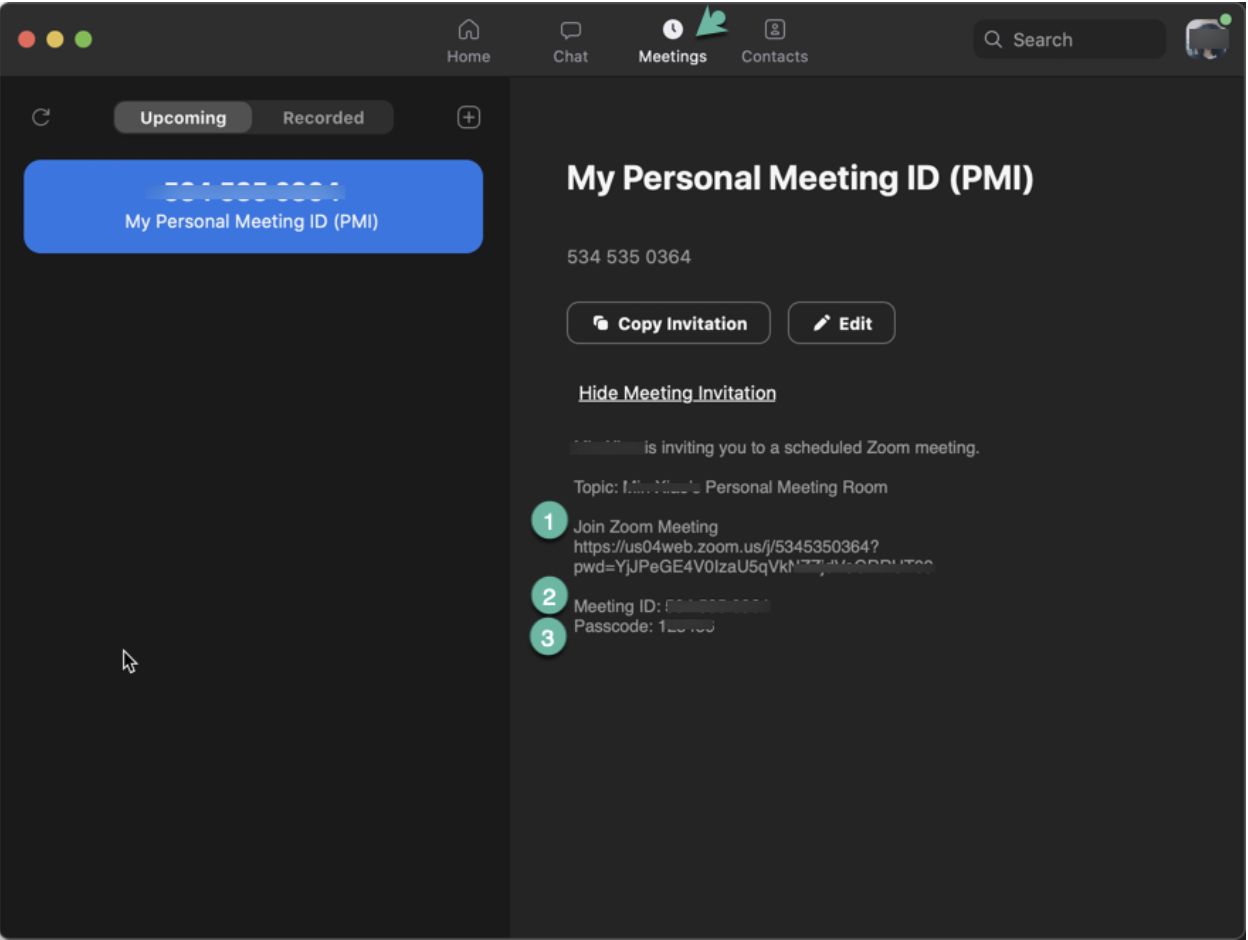
- Once you have saved the meeting or event in your Google Calendar, switch to your Zoom account or application.
- Check your Zoom calendar or meeting list to verify if the newly created meeting or event from Google Calendar appears within Zoom. It should reflect all the details you provided in your Google Calendar.
If the meeting or event appears in Zoom with all the correct details, it indicates that the synchronization between Google Calendar and Zoom is working successfully.
Note: It may take a few moments for the synchronization to occur, so if you don’t see the meeting or event immediately, wait for a brief amount of time and then check again.
With Step 8 completed, you have successfully saved your settings and tested the integration. Congratulations! Now, your Google Calendar and Zoom are synchronized, allowing you to manage your meetings and appointments seamlessly.
Take some time to familiarize yourself with the synced events and explore the features and options within Zoom that enhance your meeting experience.
It’s important to periodically check the synchronization between Zoom and your Google Calendar to ensure that any changes or updates made in one platform are accurately reflected in the other.
By following these steps, you have successfully synced Google Calendar to Zoom and can now enjoy the convenience of managing your meetings and appointments from a centralized platform.
Happy syncing and productive meetings!
Conclusion
Syncing your Google Calendar to Zoom provides a seamless integration between your calendar and video conferencing platform, offering a host of benefits. By following the step-by-step guide outlined in this article, you can easily sync your Google Calendar with Zoom and streamline your schedule management.
Throughout the process, we covered important steps such as signing into your Google Account, accessing the Zoom settings, selecting “Calendar & Contacts”, enabling the synchronization feature, granting permission for accessing Google Calendar, choosing the specific calendar to sync, configuring additional settings, saving your settings, and testing the integration.
By syncing your Google Calendar to Zoom, you can enjoy efficient scheduling, updated information, time-saving convenience, prevention of double bookings, improved productivity, seamless collaboration, and automated reminders.
Remember to periodically review and make any necessary adjustments to ensure that the synchronization between Google Calendar and Zoom continues to work smoothly. This will help you stay organized, efficient, and on top of your schedule.
Now that you have successfully completed the integration, you can manage your meetings and appointments with ease, have all the necessary information at your fingertips, and increase your productivity in both personal and professional settings.
So, don’t wait any longer! Follow the steps outlined in this guide to sync your Google Calendar to Zoom today and experience the benefits of a seamless schedule management system.
Happy calendaring and productive video conferencing!