Introduction
Welcome to our comprehensive guide on how to switch to HDMI on Windows 10. HDMI (High-Definition Multimedia Interface) is a widely-used technology that allows you to connect your PC to an external display or audio device, such as a TV, monitor, or projector. Whether you want to watch videos, play games, or deliver a presentation on a larger screen, knowing how to switch to HDMI can greatly enhance your multimedia experience.
In this article, we will walk you through the step-by-step process of activating HDMI output on your Windows 10 PC. We will also provide troubleshooting tips to help you overcome any potential connection issues that you may encounter along the way.
If you have ever struggled to make the HDMI connection work on your Windows 10 PC, rest assured that we have got you covered. By the end of this guide, you will have the knowledge and confidence to effortlessly switch to HDMI and enjoy your favorite content on a bigger and better display.
Before we dive into the details, let’s first understand the fundamentals of HDMI connections and how they work.
Understanding HDMI Connections
HDMI (High-Definition Multimedia Interface) is a digital interface that allows for the transmission of both high-definition video and audio signals from a source device, such as a computer or Blu-ray player, to a display device, such as a TV or monitor. It has become the industry standard for connecting various devices and has largely replaced older analog technologies like VGA and DVI.
HDMI connections offer several advantages over their analog counterparts. First and foremost, they provide superior video and audio quality, supporting high-resolution displays and multi-channel surround sound. HDMI also simplifies connectivity by using a single cable for both video and audio transmission, eliminating the need for separate audio cables.
Another important feature of HDMI is its support for HDCP (High-bandwidth Digital Content Protection), which ensures secure transmission of copyrighted content, such as movies and TV shows. This means that you can enjoy high-quality, protected content without any loss of quality or compatibility issues.
There are different types of HDMI connectors, including standard HDMI, mini HDMI, and micro HDMI. The type of connector you need to use will depend on the devices you are connecting and the available ports on those devices.
When connecting your Windows 10 PC to an external display via HDMI, it’s essential to ensure that both the PC and the display have HDMI ports. Most modern PCs and monitors come equipped with HDMI ports, but it’s always a good idea to double-check before proceeding.
Now that you have a better understanding of HDMI connections and their benefits, let’s move on to the next section, where we will show you how to check for an HDMI port on your Windows 10 PC.
Checking HDMI Port on Your Windows 10 PC
Before you can switch to HDMI on your Windows 10 PC, it’s important to first ensure that your computer has an HDMI port. Most modern PCs come equipped with at least one HDMI port, but it’s always a good idea to double-check.
To check for an HDMI port on your Windows 10 PC, follow these steps:
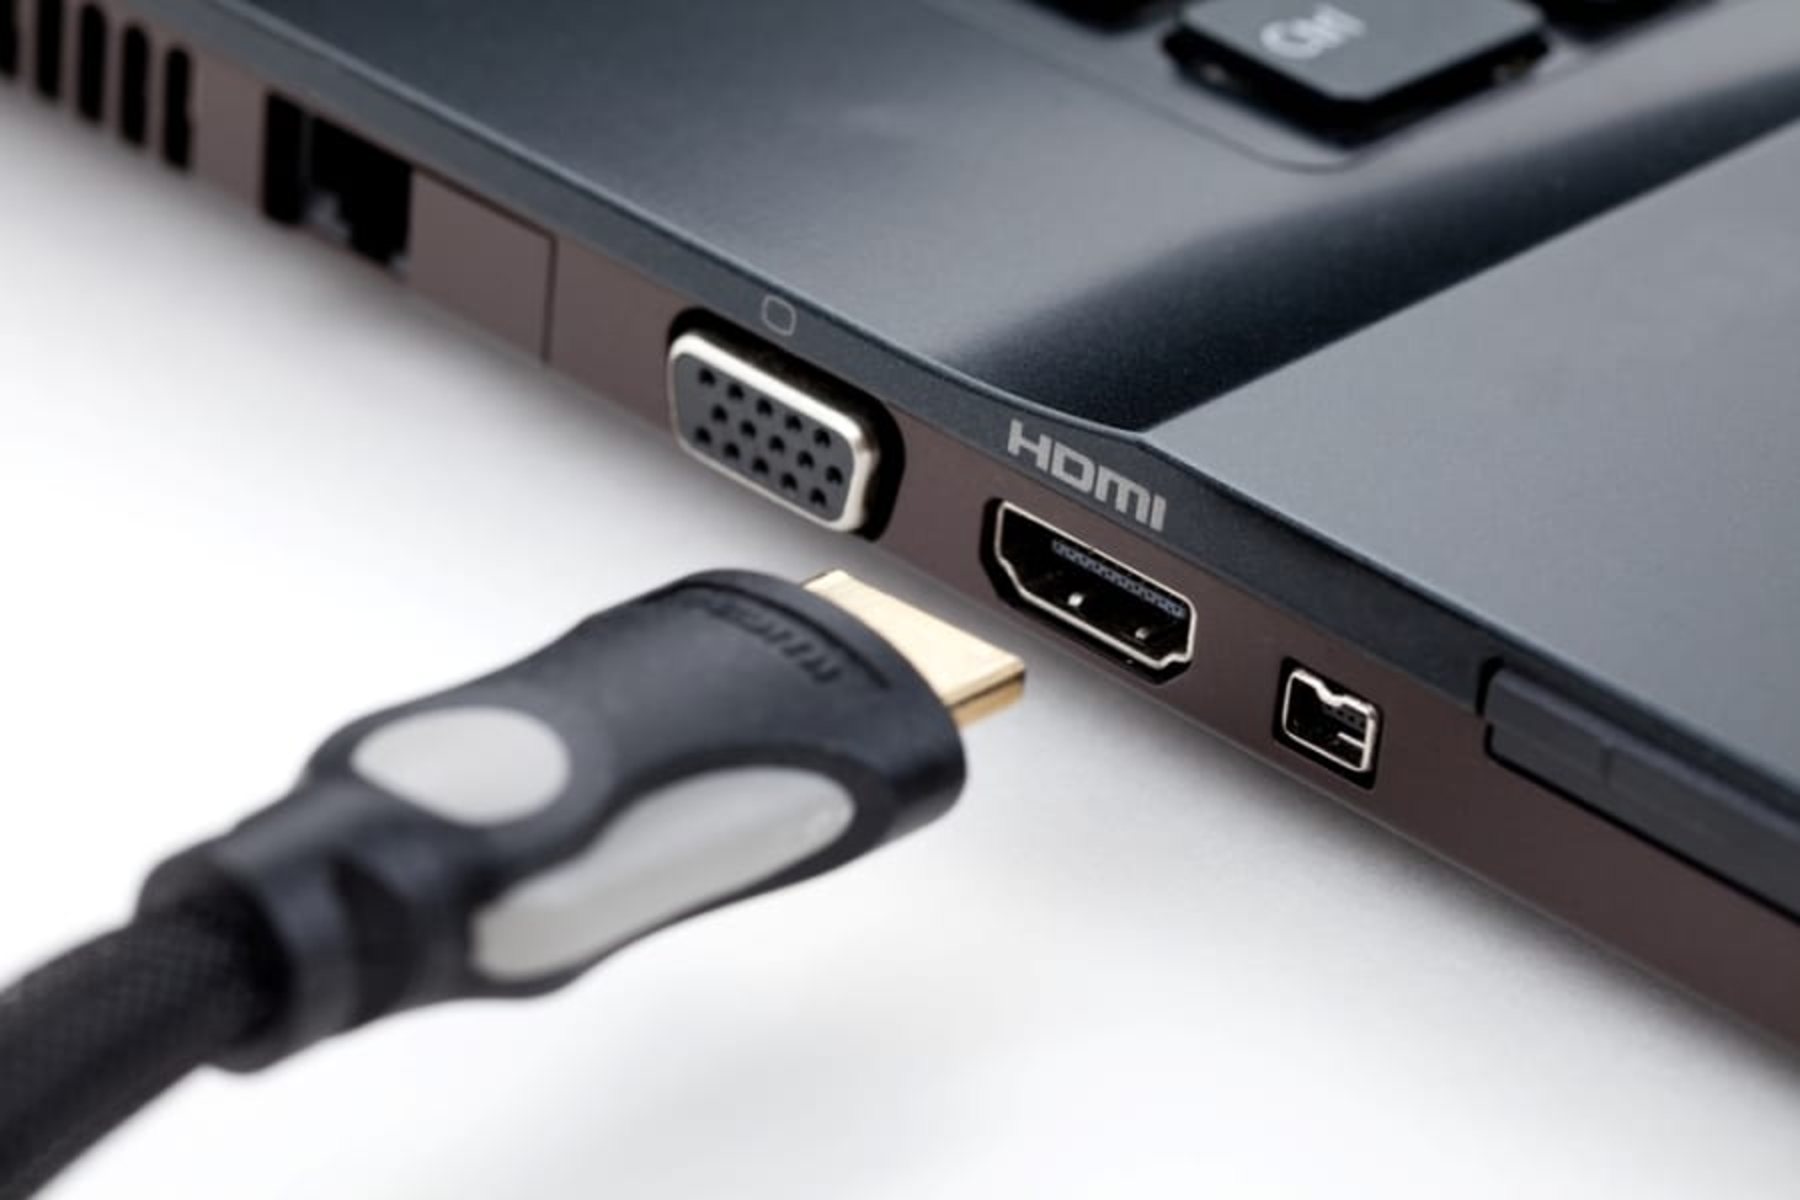
- Locate the ports on your PC: Start by examining the sides and back of your computer. Look for small, rectangular ports with a protruding metal piece and labeled “HDMI.” The HDMI port should be slightly larger than a USB port and have a distinct shape.
- Refer to your PC’s user manual: If you’re having trouble locating the HDMI port, consult your PC’s user manual. It should include detailed information about the ports and their locations.
- Use Windows Device Manager: Another way to confirm the presence of an HDMI port is by using the Windows Device Manager. Simply search for “Device Manager” in the Windows search bar, open the application, and expand the “Display adapters” or “Graphics cards” category. If your PC has an HDMI port, it should be listed there as part of your graphics card or display adapter.
If you have confirmed the presence of an HDMI port on your Windows 10 PC, you’re ready to proceed to the next section, where we will show you how to activate the HDMI output.
Alternatively, if you couldn’t find an HDMI port on your PC, don’t worry. There are other ways to connect external displays, such as using a VGA or DisplayPort connection. Refer to your PC’s user manual or consult with the manufacturer for further guidance.
Activating HDMI Output on Windows 10
Once you have confirmed that your Windows 10 PC has an HDMI port, you can proceed to activate the HDMI output and begin using an external display or audio device. Follow these steps:
- Connect your PC to the external display: Start by connecting one end of the HDMI cable to the HDMI port on your PC and the other end to the HDMI port on the external display device, such as a TV or monitor. Ensure that both devices are powered on.
- Switch the input on the external display: Use the remote control or switches on the display device to change the input source to HDMI. This may involve pressing a button labeled “Input” or using on-screen menus to select the HDMI input.
- Open the Windows 10 settings: Click on the “Start” button in the bottom left corner of your screen and select the “Settings” gear icon, which resembles a gear. Alternatively, you can press the “Windows key + I” keyboard shortcut to directly open the settings app.
- Select the “System” category: In the settings app, select the “System” category to access display settings and other configuration options.
- Go to “Display” settings: Within the “System” category, click on the “Display” tab on the left-hand side of the window. This will display various display-related options and settings.
- Identify the external display: Scroll down and look for the “Multiple displays” section. Click on the drop-down menu under the “Multiple displays” option and select “Extend these displays” to activate the HDMI output. This allows you to use the external display as an extended monitor or as your main display.
Once you have completed these steps, the HDMI output should be activated, and you should see your Windows 10 desktop extended or mirrored on the external display. If you encounter any issues or the display does not appear correctly, refer to the troubleshooting section later in this article.
Now that you have successfully activated the HDMI output on your Windows 10 PC, you can continue to the next section, where we will show you how to change the display settings specifically for HDMI.
Changing Display Settings to HDMI
After activating the HDMI output on your Windows 10 PC, you may need to adjust the display settings to ensure the best experience on the external display. Here are the steps to change the display settings specifically for HDMI:
- Open the Windows 10 settings: Click on the “Start” button in the bottom left corner of your screen and select the “Settings” gear icon, which resembles a gear. Alternatively, you can press the “Windows key + I” keyboard shortcut to directly open the settings app.
- Select the “System” category: In the settings app, select the “System” category to access display settings and other configuration options.
- Go to “Display” settings: Within the “System” category, click on the “Display” tab on the left-hand side of the window. This will display various display-related options and settings.
- Adjust the display resolution: Under the “Scale and layout” section, click on the drop-down menu next to “Display resolution” and select the recommended resolution or the resolution that suits your preferences for the external display. This ensures that the content appears crisp and clear on the HDMI-connected device.
- Arrange the displays: To arrange the displays, scroll down to the “Multiple displays” section. Here, you can choose how your displays are arranged, including the position of the HDMI-connected display in relation to your PC’s primary display. You can click and drag the display icons to reposition them accordingly.
- Additional options and settings: Depending on your specific requirements and the capabilities of your PC and external display, there may be additional options and settings available in the display settings. These may include adjusting the refresh rate, color calibration, and more. Explore these options to further optimize your HDMI experience.
By following these steps, you can customize the display settings to ensure that the HDMI-connected external display delivers the best visual experience for your Windows 10 PC.
If you encounter any issues or the display does not appear correctly, refer to the troubleshooting section later in this article.
Now that you have successfully changed the display settings to HDMI, you can continue to the next section for troubleshooting tips and solutions to common HDMI connection issues.
Troubleshooting HDMI Connection Issues
While connecting your Windows 10 PC to an external display via HDMI is generally a straightforward process, you may encounter some common issues along the way. Here are some troubleshooting tips to help you overcome HDMI connection issues:
- Check the HDMI cable: Ensure that the HDMI cable is securely connected to both your PC and the external display. Try unplugging and reconnecting the cable to ensure a proper connection.
- Test with a different HDMI port or cable: If you have multiple HDMI ports on your PC or if you have another HDMI cable available, try connecting to a different port or using a different cable to confirm whether the issue lies with the port or cable itself.
- Update graphics drivers: Outdated or incompatible graphics drivers can sometimes cause HDMI connection problems. Visit the website of your PC or graphics card manufacturer and download the latest drivers for your specific model.
- Restart your PC and the external display: Sometimes a simple restart can resolve HDMI connection issues. Power off your PC and the external display, then turn them back on after a few seconds.
- Try a different display device: If possible, test the HDMI connection with a different display device, like a TV or another monitor. This can help determine whether the issue is specific to the original display or the PC itself.
- Check for firmware updates: In some cases, the external display may require a firmware update to work properly with your PC. Visit the manufacturer’s website for the display and search for any available updates or troubleshooting guides.
- Disable enhancements: Some PCs have audio enhancements or post-processing features that can interfere with the HDMI audio output. To fix this, right-click on the volume icon in the taskbar, select “Playback devices,” find the HDMI audio device, right-click on it, and choose “Properties.” In the properties window, go to the “Enhancements” tab and check the box next to “Disable all enhancements.”
- Consult customer support: If none of the above troubleshooting steps resolve the HDMI connection issue, reach out to the customer support of your PC or display manufacturer for further assistance. They may be able to provide specific guidance based on your hardware setup.
By following these troubleshooting tips, you should be able to overcome common HDMI connection issues and enjoy your Windows 10 PC on the external display device without any problems.
Now that we have provided the necessary troubleshooting tips, we can conclude this guide on how to switch to HDMI on Windows 10. We hope this article has been helpful in assisting you with setting up and troubleshooting HDMI connections on your PC. Enjoy your expanded multimedia experience on the big screen!
Conclusion
In this comprehensive guide, we have provided you with the step-by-step process to switch to HDMI on your Windows 10 PC. We started by explaining the fundamentals of HDMI connections and their benefits, followed by instructions on how to check for an HDMI port on your PC.
We then walked you through the process of activating the HDMI output on your Windows 10 PC and changing the display settings to optimize your experience on the external display device. Additionally, we provided troubleshooting tips to help you overcome common HDMI connection issues.
Remember, HDMI connections offer superior video and audio quality, allowing you to enjoy high-definition content on larger screens or external audio devices. Whether you want to watch movies, play games, or deliver presentations, knowing how to switch to HDMI on Windows 10 can greatly enhance your multimedia experience.
If you encounter any difficulties or have further questions, consult your PC or display device’s user manual or reach out to the manufacturer’s customer support for assistance specific to your hardware setup.
We hope that this guide has been helpful in empowering you to successfully connect your Windows 10 PC to an external display via HDMI. Enjoy the benefits of a larger, high-quality display and immerse yourself in your favorite content like never before!