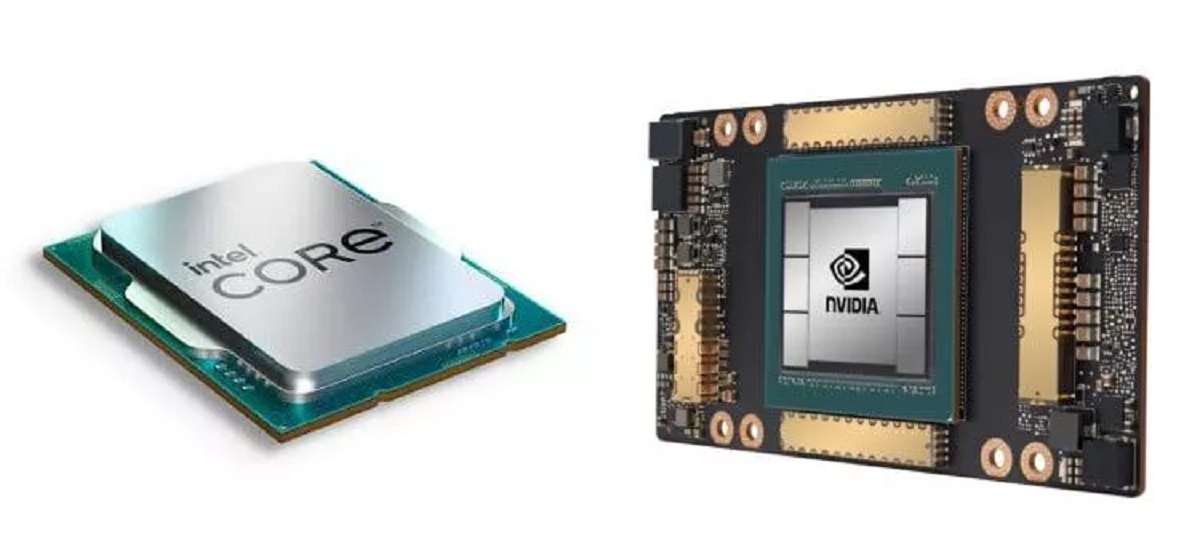
Reasons to Switch from CPU Graphics to GPU
Are you using the built-in graphics processing unit (GPU) on your CPU and wondering if it’s time to switch to a dedicated GPU? While integrated CPU graphics have come a long way in recent years, there are several compelling reasons to consider making the switch:
- Enhanced Performance: One of the main advantages of using a dedicated GPU is the significant boost in performance it offers. Dedicated graphics cards are equipped with more processing power and memory, allowing for smoother and faster graphics rendering. This is particularly beneficial for tasks like gaming, graphic design, video editing, and 3D modeling.
- Advanced Graphics Features: Integrated graphics solutions often lack the advanced features found in dedicated GPUs. With a dedicated GPU, you can take advantage of technologies like real-time ray tracing, which greatly improves the realism of lighting and reflections in games and creative applications.
- Multi-Monitor Support: If you’re looking to expand your workspace to multiple monitors, a dedicated GPU is essential. Integrated graphics may have limitations when it comes to supporting multiple displays and could lead to reduced performance or compatibility issues.
- Higher Resolution and Refresh Rates: Integrated graphics may struggle to deliver smooth performance at higher resolutions or when using high refresh-rate monitors. A dedicated GPU can handle these demands with ease, providing a crisp and responsive visual experience.
- Optimized Video Encoding and Decoding: Dedicated GPUs come with hardware acceleration for video encoding and decoding. This means faster and more efficient processing of video files, resulting in smoother playback and shorter rendering times.
- Support for Virtual Reality (VR): Virtual reality has gained significant popularity in recent years, and a dedicated GPU is a must-have for a seamless VR experience. Integrated graphics may struggle to provide the necessary performance and compatibility for VR applications.
These are just a few reasons why you might consider switching from CPU graphics to a dedicated GPU. The benefits in terms of performance, features, and compatibility are well worth the investment, especially if you engage in tasks that require heavy graphics processing. So, if you’re serious about gaming, creative work, or just want to enhance your overall visual experience, it’s time to make the switch to a dedicated GPU!
Preparing Your System for GPU Graphics
Before installing a dedicated GPU, there are a few steps you should take to ensure a smooth transition and optimal performance. Follow these guidelines to prepare your system for GPU graphics:
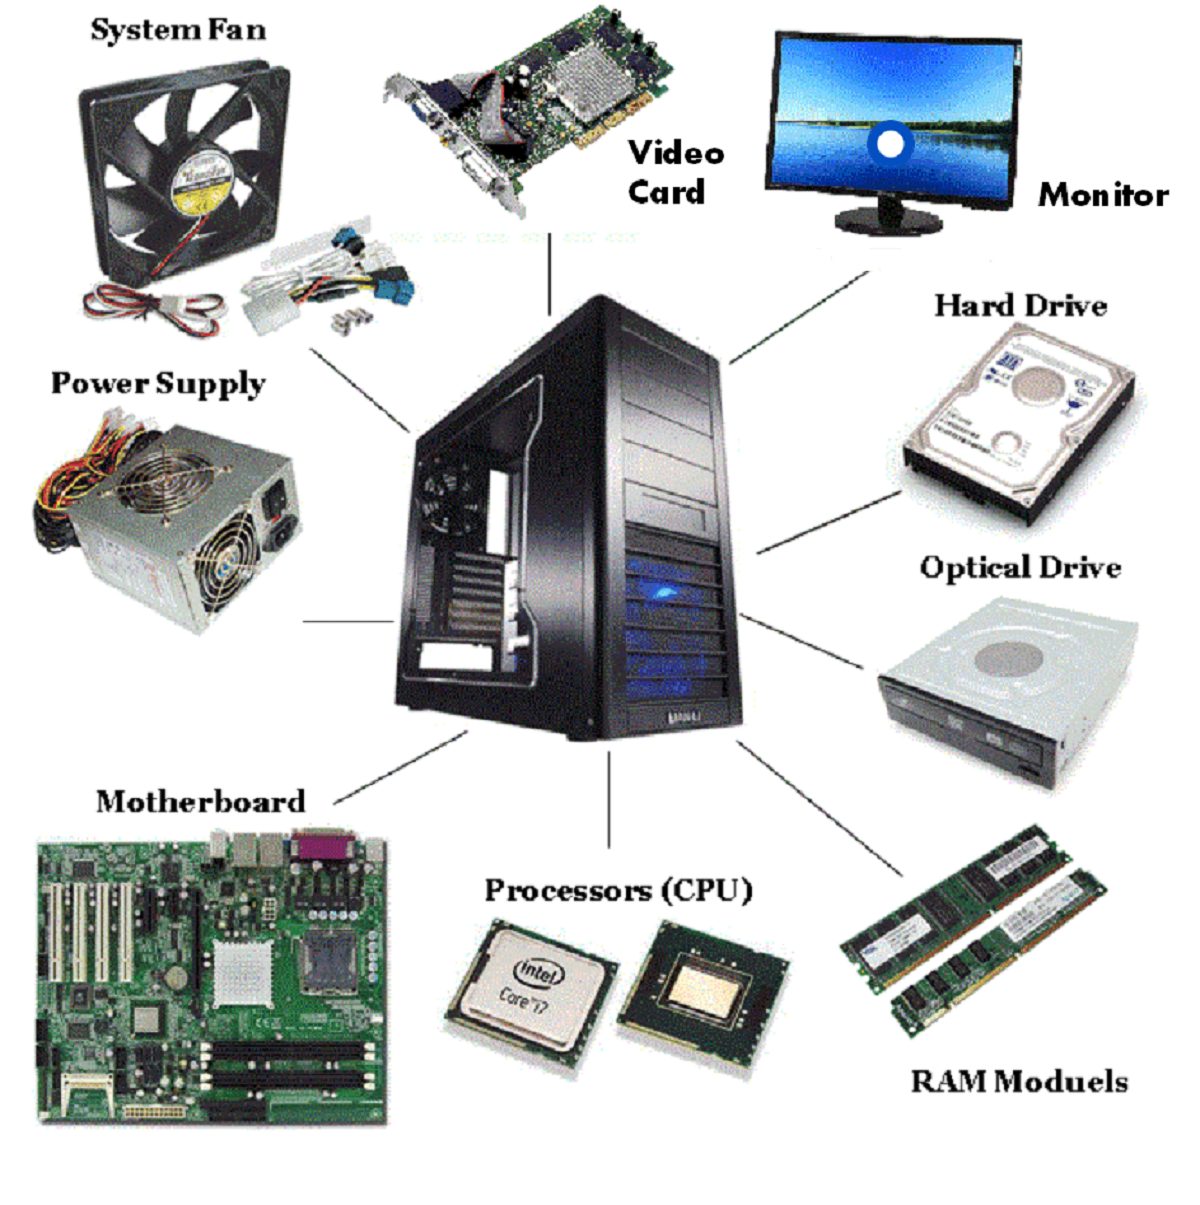
- Check System Compatibility: Verify that your computer’s motherboard is compatible with the GPU you intend to install. Ensure that the motherboard has an available PCIe slot and sufficient power supply connectors.
- Power Supply Considerations: Dedicated GPUs require additional power compared to integrated graphics. Make sure your power supply unit (PSU) has enough wattage to support the new GPU and all other components in your system. Consult the GPU manufacturer’s recommendations for the minimum PSU requirement.
- Physical Space: Check the physical dimensions of the GPU and ensure that your computer case has enough space to accommodate it. Some high-performance GPUs are larger and may require specific case sizes or additional cooling solutions.
- Remove Old Drivers: If you have previously used integrated graphics or a different GPU, uninstall the old drivers from your system. Use a driver uninstallation tool or the manufacturer’s provided software to ensure a clean removal.
- Backup Important Data: Before making any system changes, it’s always a good idea to back up your important files and documents. While installing a new GPU shouldn’t affect your data, unexpected issues can occur, and a backup ensures you won’t lose any valuable information.
By following these steps, you can ensure that your system is ready for the installation of a dedicated GPU. Taking the necessary precautions will minimize potential compatibility issues and allow for a smooth integration of the new hardware. In the next section, we will guide you through the process of installing the GPU and updating the drivers.
Installing the GPU Hardware
Once you have prepared your system for a dedicated GPU, it’s time to install the hardware. Follow these step-by-step instructions to install your GPU:
- Power Off and Unplug: Turn off your computer and unplug the power cable from the wall outlet. This will ensure your safety and prevent any electrical damage during the installation process.
- Open the Computer Case: Remove the side panel of your computer case. This will provide you access to the internal components.
- Locate the PCIe Slot: Identify the PCIe slot on your motherboard where the new GPU will be installed. It is usually longer and located nearest to the CPU. Refer to your motherboard’s manual for specific instructions on locating the PCIe slot.
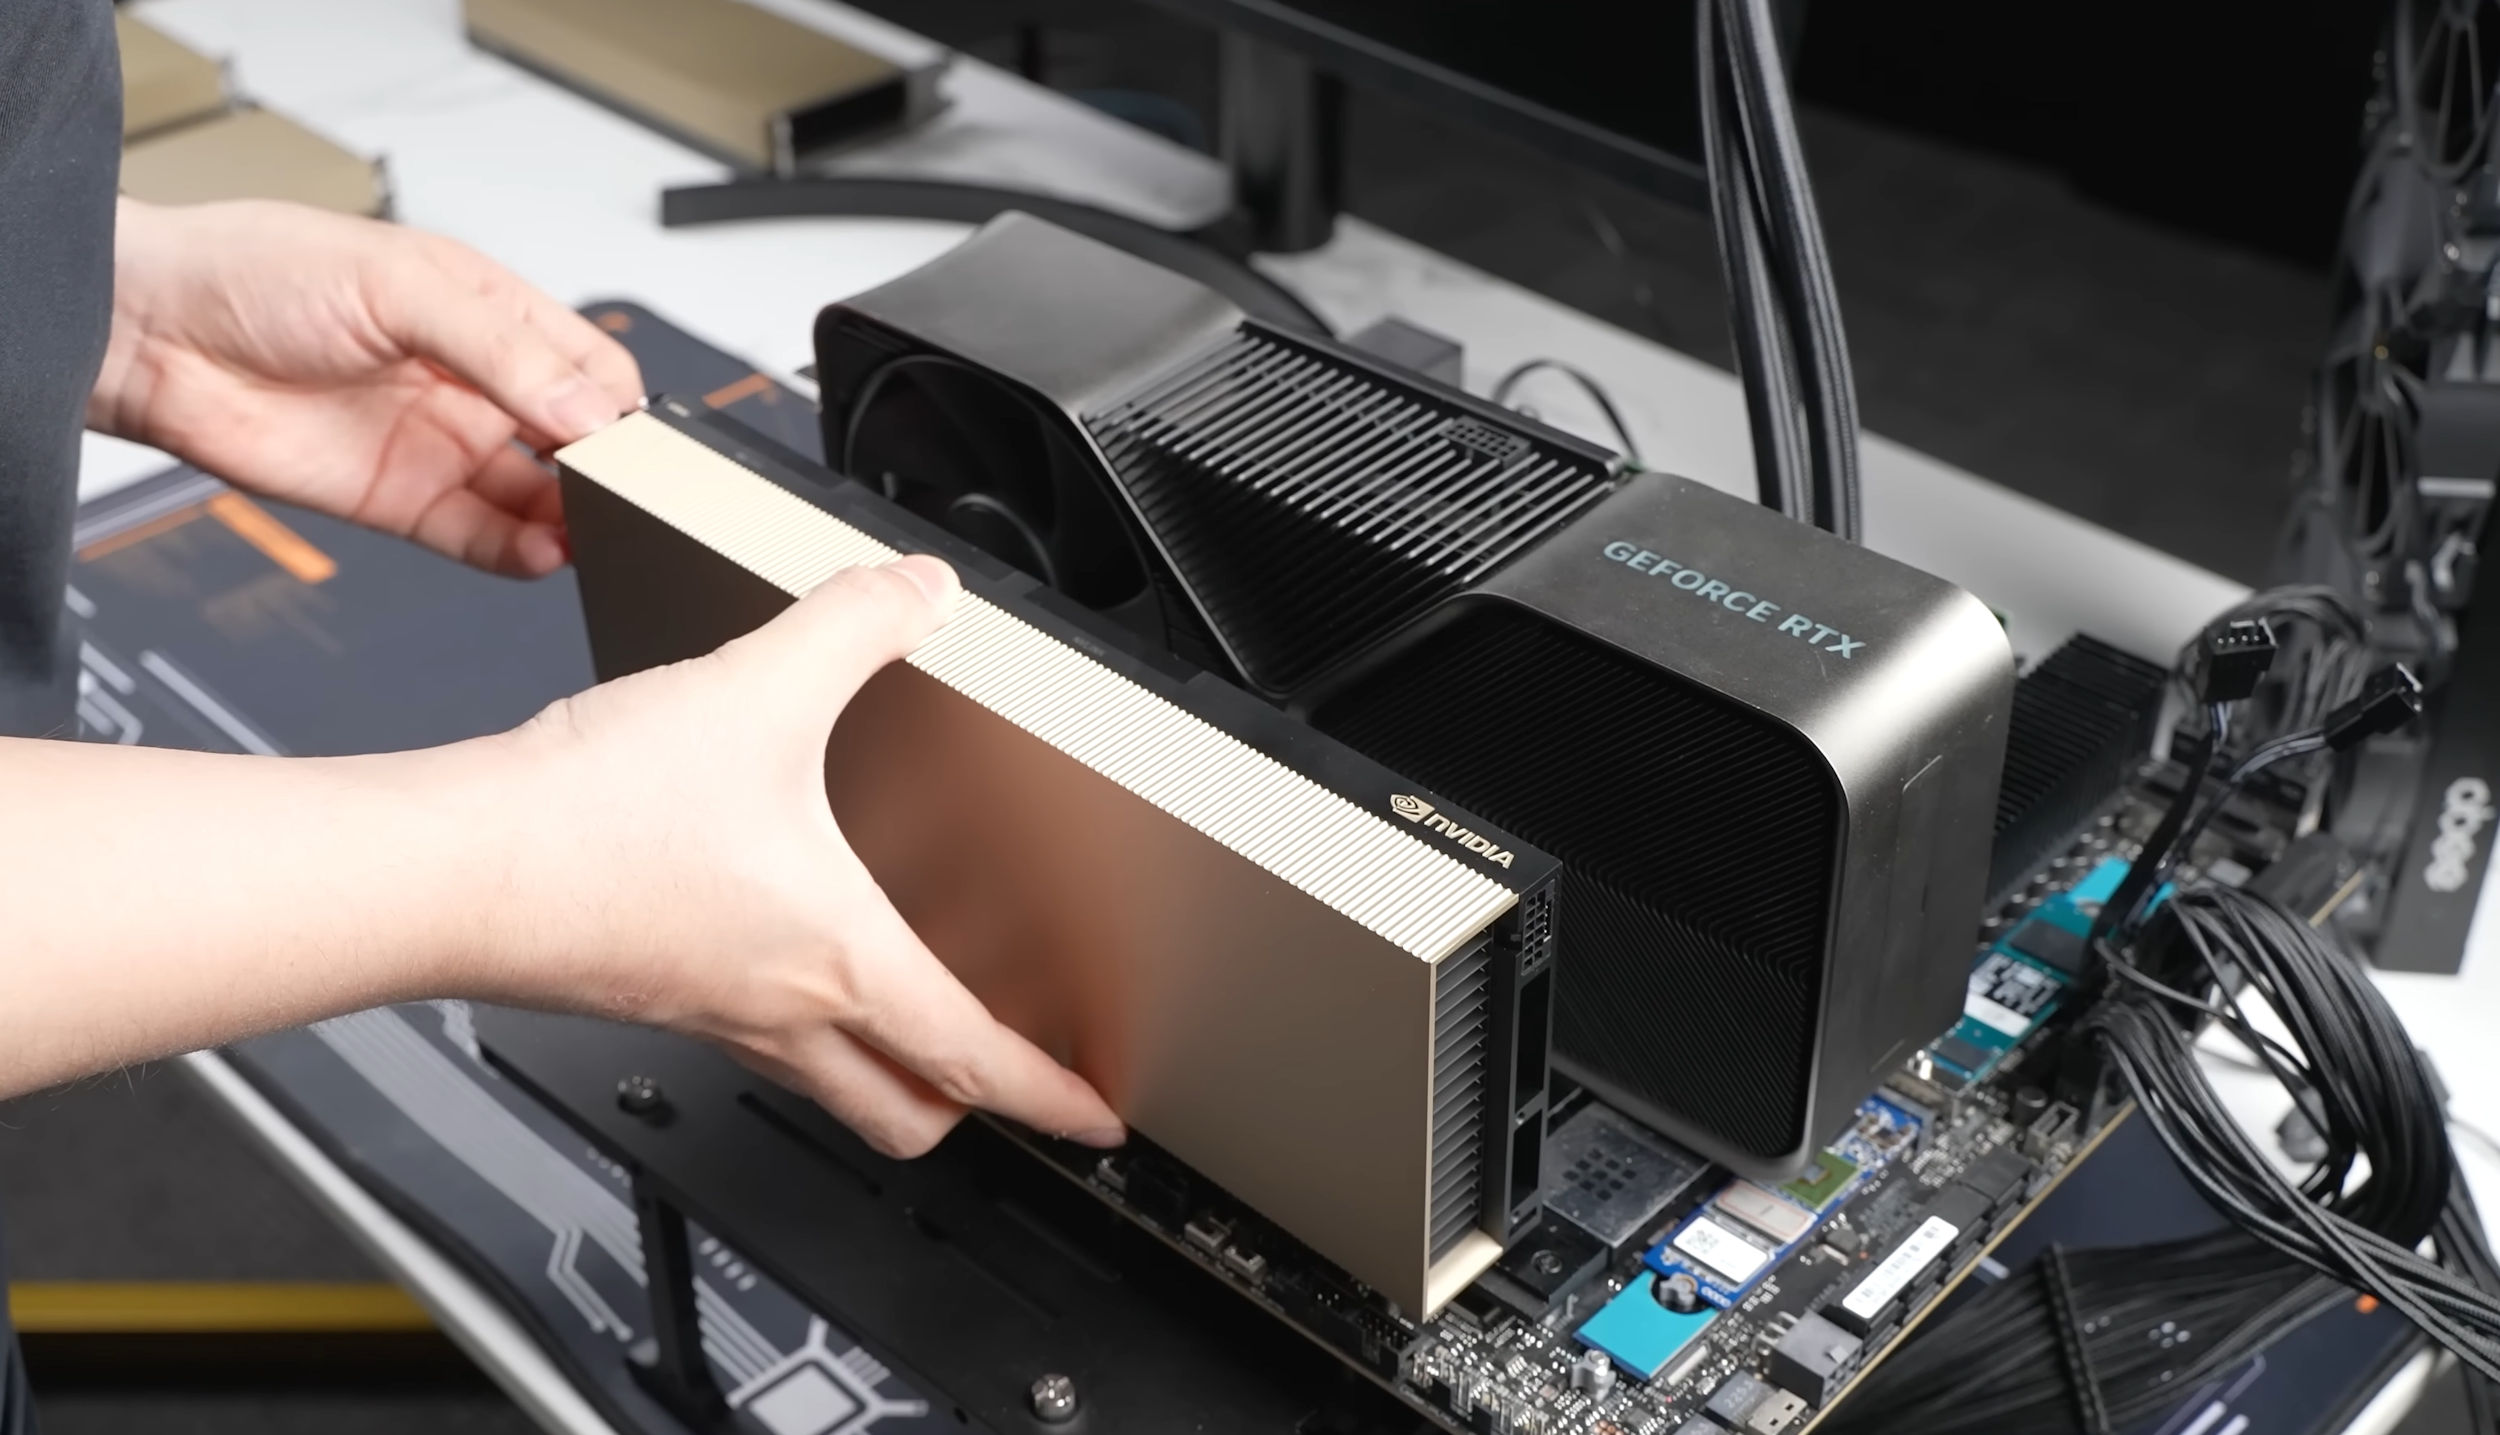
- Prepare the GPU: Carefully remove the GPU from its packaging. Handle it by the edges to avoid damage to the components. Remove any protective covers or caps from the connectors.
- Insert the GPU: Align the gold-plated connectors on the bottom of the GPU with the PCIe slot. Gently insert the GPU into the slot, making sure it is securely seated. Apply even pressure, but avoid using excessive force.
- Secure the GPU: Depending on your computer case, you may need to use screws or clips to secure the GPU in place. Check your case’s manual for specific instructions on securing expansion cards.
- Connect Power Cables: If your GPU requires additional power connectors, locate them on the GPU and connect the corresponding power cables from your power supply. Ensure that the connections are secure.
- Close the Case: Put the side panel back on your computer case and secure it with the necessary screws or latches.
- Plug In and Power On: Reconnect the power cable to your computer and plug it back into the wall outlet. Turn on your computer and wait for it to boot up.
Once your computer is up and running, the GPU hardware installation is complete. However, to ensure optimal performance and compatibility, it is essential to update the GPU drivers, which we will cover in the next section.
Updating GPU Drivers
After installing the GPU hardware, it’s important to update the drivers to ensure that your system is using the latest software and taking full advantage of the GPU’s capabilities. Follow these steps to update your GPU drivers:
- Identify Your GPU Model: Determine the make and model of your GPU. You can find this information on the GPU itself or by checking your computer’s documentation.
- Visit the Manufacturer’s Website: Go to the website of the GPU manufacturer, such as NVIDIA or AMD, and navigate to their driver download section.
- Select the Correct GPU Model: Choose the appropriate options to select the correct GPU model, operating system, and driver version. It’s crucial to choose the correct driver to ensure compatibility and stability.
- Download and Install: Click on the download link to download the driver installation package. Once downloaded, run the installer and follow the on-screen instructions to install the driver.
- Restart Your Computer: After the driver installation is complete, restart your computer. This allows the changes to take effect and ensures a smooth transition to the updated drivers.
It’s also a good idea to check for driver updates periodically. GPU manufacturers release driver updates to improve performance, introduce new features, and address any issues or bugs. By keeping your drivers up to date, you can ensure optimal performance and compatibility with the latest software and games.
If you encounter any difficulties during the driver installation process, consult the manufacturer’s support resources or online forums for troubleshooting guidance. These resources often provide step-by-step instructions and solutions for common issues.
With the GPU drivers updated, your system is now primed to deliver the best performance and graphics capabilities. Proceed to the next section to configure your display settings and fine-tune your GPU for optimal visual experience.
Configuring Display Settings
Once you have installed the GPU hardware and updated the drivers, it’s time to configure your display settings to ensure the best visual experience. Follow these steps to optimize your display settings:
- Access Graphics Control Panel: Depending on your GPU manufacturer, you can access the graphics control panel by right-clicking on your desktop and selecting the appropriate option. Alternatively, you may find it in the system tray or through the Windows control panel.
- Adjust Display Resolution: In the graphics control panel, navigate to the display settings section. Here, you can adjust the display resolution to match the capabilities of your monitor. Choose a resolution that offers a balance between sharpness and performance.
- Set Refresh Rate: If your monitor supports higher refresh rates, such as 144Hz or 240Hz, ensure that you select the appropriate refresh rate in the graphics control panel. Higher refresh rates result in smoother motion and reduced motion blur.
- Configure Multi-Monitor Setup: If you have multiple monitors connected to your GPU, configure their positions and arrangement in the graphics control panel. You can rearrange the displays, set primary and secondary monitors, and adjust resolution independently for each monitor.
- Enable Graphics Enhancements: Explore the graphics control panel to find options for enhancing your visual experience. This may include settings such as anti-aliasing, anisotropic filtering, or dynamic contrast. Experiment with these settings to find the right balance between visual fidelity and performance.
- Enable V-Sync and G-Sync/Freesync: If you experience screen tearing or want to synchronize the frame rate of your GPU with your monitor’s refresh rate, enable V-Sync. Additionally, if your monitor supports G-Sync (NVIDIA) or FreeSync (AMD), enable these features for smoother gaming experiences and reduced input lag.
- Save and Apply: Once you have adjusted your display settings, save the changes and apply them. Some settings may require a system restart to take effect.
- Calibrate Display: For more advanced users, consider calibrating your display using the built-in calibration tools or third-party software. This can help achieve accurate colors, brightness, and contrast levels.
By configuring your display settings, you can optimize your visual experience, fine-tuning it to suit your preferences and the capabilities of your monitor. Take the time to experiment with different settings and find the combination that provides the best performance and visual quality for your needs.
In the next section, we will discuss how to test and troubleshoot your GPU to ensure everything is working as expected.
Testing and Troubleshooting
After setting up and configuring your GPU, it’s crucial to test it to ensure that everything is functioning correctly. Follow these steps to test and troubleshoot your GPU:
- Run Benchmark Software: Utilize benchmarking software to stress-test your GPU and assess its performance. These tools provide valuable information about frame rates, temperatures, and stability, helping you gauge the capabilities of your GPU.
- Monitor Temperatures: Pay attention to the temperatures of your GPU during heavy workloads or gaming sessions. Use software tools that display real-time temperature information, ensuring that your GPU stays within safe operating ranges. Consider adjusting fan speeds or applying additional cooling solutions if temperatures exceed recommended limits.
- Check for Driver Updates: Regularly check for driver updates from your GPU manufacturer. Updated drivers often resolve compatibility issues, bug fixes, and provide performance optimizations. Download and install the latest drivers to ensure that your GPU operates at its best.
- Test Applications and Games: Run graphics-intensive applications and games to assess the performance and stability of your GPU. Observe for any graphical glitches, crashes, or performance issues. If you encounter problems, verify that your drivers are up to date, the applications are fully patched, and hardware temperatures are within acceptable limits.
- Check for Error Messages: If you encounter any error messages or system crashes related to your GPU, note down the details of the error messages. Use online resources, forums, or the manufacturer’s support to troubleshoot and find solutions to the specific error codes or messages you encounter.
- Reset or Reinstall Drivers: In some cases, if you experience persistent issues, it may be necessary to perform a clean driver installation by uninstalling the existing GPU drivers and reinstalling the latest version. Use driver uninstallation tools or the manufacturer’s provided software to ensure a clean removal before reinstalling the drivers.
- Contact Manufacturer Support: If you have tried troubleshooting steps and are still experiencing issues with your GPU, reach out to the manufacturer’s support team for assistance. They can provide you with additional guidance or recommend possible solutions.
By performing thorough tests and troubleshooting steps, you can identify and address any issues with your GPU. Regular testing ensures that your system is running optimally and allows you to enjoy uninterrupted, high-performance graphics.
Now that you have successfully set up and tested your GPU, let’s explore the numerous benefits it brings in the next section.
Benefits of GPU Graphics
Switching from CPU graphics to a dedicated GPU offers numerous benefits that can greatly enhance your computing experience. Here are some of the key advantages of using a GPU:
- Improved Performance: The primary benefit of a dedicated GPU is the significant increase in graphics performance. These powerful processors are designed specifically for rendering and processing complex visual data, resulting in faster and smoother graphics-intensive tasks, such as gaming, video editing, and 3D rendering.
- Enhanced Visuals: With a dedicated GPU, you can enjoy stunning graphics and visual effects. GPUs support advanced rendering techniques, such as real-time ray tracing, which brings more realistic lighting, shadows, and reflections into your games and applications.
- Smooth Multi-Monitor Setup: Dedicated GPUs offer seamless support for multi-monitor setups, allowing you to extend your workspace across multiple screens. This is ideal for professionals who need to work with multiple applications simultaneously or gamers who want an immersive gaming experience spanning multiple displays.
- High-Resolution Gaming: A GPU is essential for gaming at high resolutions, such as 1440p or 4K. These higher resolutions demand more processing power, and a dedicated GPU can handle the increased pixel count, resulting in sharper and more detailed visuals.
- Accelerated Video Encoding and Decoding: Dedicated GPUs come equipped with hardware encoders and decoders, which significantly improve video processing performance. This hardware acceleration speeds up tasks like video editing, streaming, and playback, reducing rendering times and enhancing overall productivity.
- Virtual Reality (VR) Support: VR applications require high-performance graphics to deliver an immersive experience. A dedicated GPU provides the necessary processing power, low latency, and compatibility to enjoy VR content smoothly without compromising on the quality and responsiveness.
- Expanded Creative Possibilities: For professionals in creative fields like graphic design, animation, and 3D modeling, a dedicated GPU unlocks new possibilities. The increased performance and specialized features enable faster rendering, smoother workflows, and the ability to handle complex projects with ease.
These benefits highlight the transformative power of dedicated GPUs, enabling you to push the boundaries of visual computing. Whether you’re a gamer, content creator, or professional, upgrading to a dedicated GPU can elevate your experience to new heights.
Now that you understand the benefits of GPU graphics, let’s move on to address some common questions in the next section.
Frequently Asked Questions (FAQs)
Here are some common questions about switching from CPU graphics to GPU:
- Why should I switch from CPU graphics to GPU?
- Can I install a GPU on any computer?
- How do I choose the right GPU for my needs?
- Do I need to uninstall the CPU graphics drivers?
- How often should I update my GPU drivers?
- What should I do if I encounter issues after installing a GPU?
Switching to a dedicated GPU offers several advantages, including improved performance, enhanced visuals, support for multi-monitor setups, high-resolution gaming, accelerated video encoding, and compatibility with virtual reality applications.
Installing a GPU requires checking compatibility with your computer’s motherboard, ensuring an available PCIe slot, and having a power supply with sufficient wattage and necessary connectors. You also need to ensure there is enough physical space in your computer case to accommodate the GPU.
Consider factors like your intended usage (gaming, professional work, etc.), budget, power requirements, and compatibility with your current setup. Research different GPU models, compare their performance benchmarks and features, and read reviews to make an informed decision.
It’s recommended to uninstall the CPU graphics drivers before installing a dedicated GPU. This ensures a clean installation of the GPU drivers and avoids conflicts between the two. Use driver uninstallation tools or the manufacturer’s provided software to remove the old drivers.
It’s a good practice to check for GPU driver updates periodically. New driver versions often include performance improvements, bug fixes, and compatibility enhancements. Update your drivers whenever an update is available to ensure optimal performance and stability.
If you face any issues after installing a GPU, start by checking the drivers. Ensure that you have the latest drivers installed and that they are compatible with your operating system. If the issue persists, try reseating the GPU, checking power connections, and consulting the manufacturer’s support resources for troubleshooting guidance.
These FAQs address some of the common concerns when it comes to switching from CPU graphics to a dedicated GPU. If you have any further questions or need assistance, don’t hesitate to consult the GPU manufacturer’s support or seek help from online communities and forums.
Now that you have a better understanding of the process and benefits of switching to a GPU, you’re ready to make an informed decision and enjoy the enhanced graphics capabilities it brings.