Introduction
Do you want to watch your favorite movies or share presentations on a bigger screen? Connecting your laptop to a TV or monitor via HDMI is the perfect solution. HDMI (High-Definition Multimedia Interface) allows for high-quality audio and video transmission, making it an ideal choice for connecting devices.
However, if you’re new to the world of HDMI connections, it may seem daunting at first. Don’t worry, though! In this article, we will guide you through the process of showing HDMI on your laptop step-by-step and troubleshoot any common issues you may encounter.
Before we dive into the details, it’s essential to note that not all laptops support HDMI connections. Please check your laptop’s specifications or user manual to ensure it has an HDMI port. If your laptop lacks an HDMI port, consider alternative connection options such as VGA or USB-C.
Once you’ve confirmed that your laptop supports HDMI, you’re ready to embark on a visual journey by connecting it to a larger display. Whether you want to enjoy movies, gaming, or presentations, the following steps will help you unleash the power of HDMI.
So, grab your HDMI cable, prepare your laptop and TV or monitor, and let’s get started with the process of showing HDMI on your laptop!
Ensure Compatibility
Before connecting your laptop to a TV or monitor via HDMI, it’s important to ensure that both devices are compatible. Here are a few things to consider:
- Check HDMI Ports: Verify that both your laptop and the TV or monitor have HDMI ports. Typically, the HDMI port on your laptop will be labeled as “HDMI” or have an HDMI symbol next to it. On the TV or monitor, the HDMI port is usually located on the back or side panel and may be labeled as “HDMI In.”
- Check HDMI Versions: HDMI technology has evolved over the years, with different versions offering varying capabilities. It’s advisable to use HDMI 1.4 or higher for optimal video and audio quality. However, most devices are backward compatible, so even if your laptop and TV have different HDMI versions, they should still work together.
- Ensure Adequate Hardware: Confirm that you have an HDMI cable that is long enough to connect your laptop to the TV or monitor. It’s recommended to use a cable with gold-plated connectors for better signal transfer and durability.
- Consider Display Resolutions: Take note of the display resolution capabilities of both your laptop and the TV or monitor. For the best viewing experience, ensure that they have compatible resolutions. If the TV or monitor has a higher resolution than your laptop, don’t worry, as it will still work. The display will either be scaled down or show black borders around the screen.
By verifying the compatibility between your laptop and the TV or monitor, you can avoid any potential issues during the connection process. Now that you’ve ensured compatibility let’s move on to the next step – connecting the HDMI cable!
Connect HDMI Cable
Now that you’ve confirmed compatibility, it’s time to connect your laptop to the TV or monitor using an HDMI cable. Follow these steps:
- Power Off Devices: Before making any connections, turn off both your laptop and the TV or monitor. This will prevent any potential damage to the devices or ports.
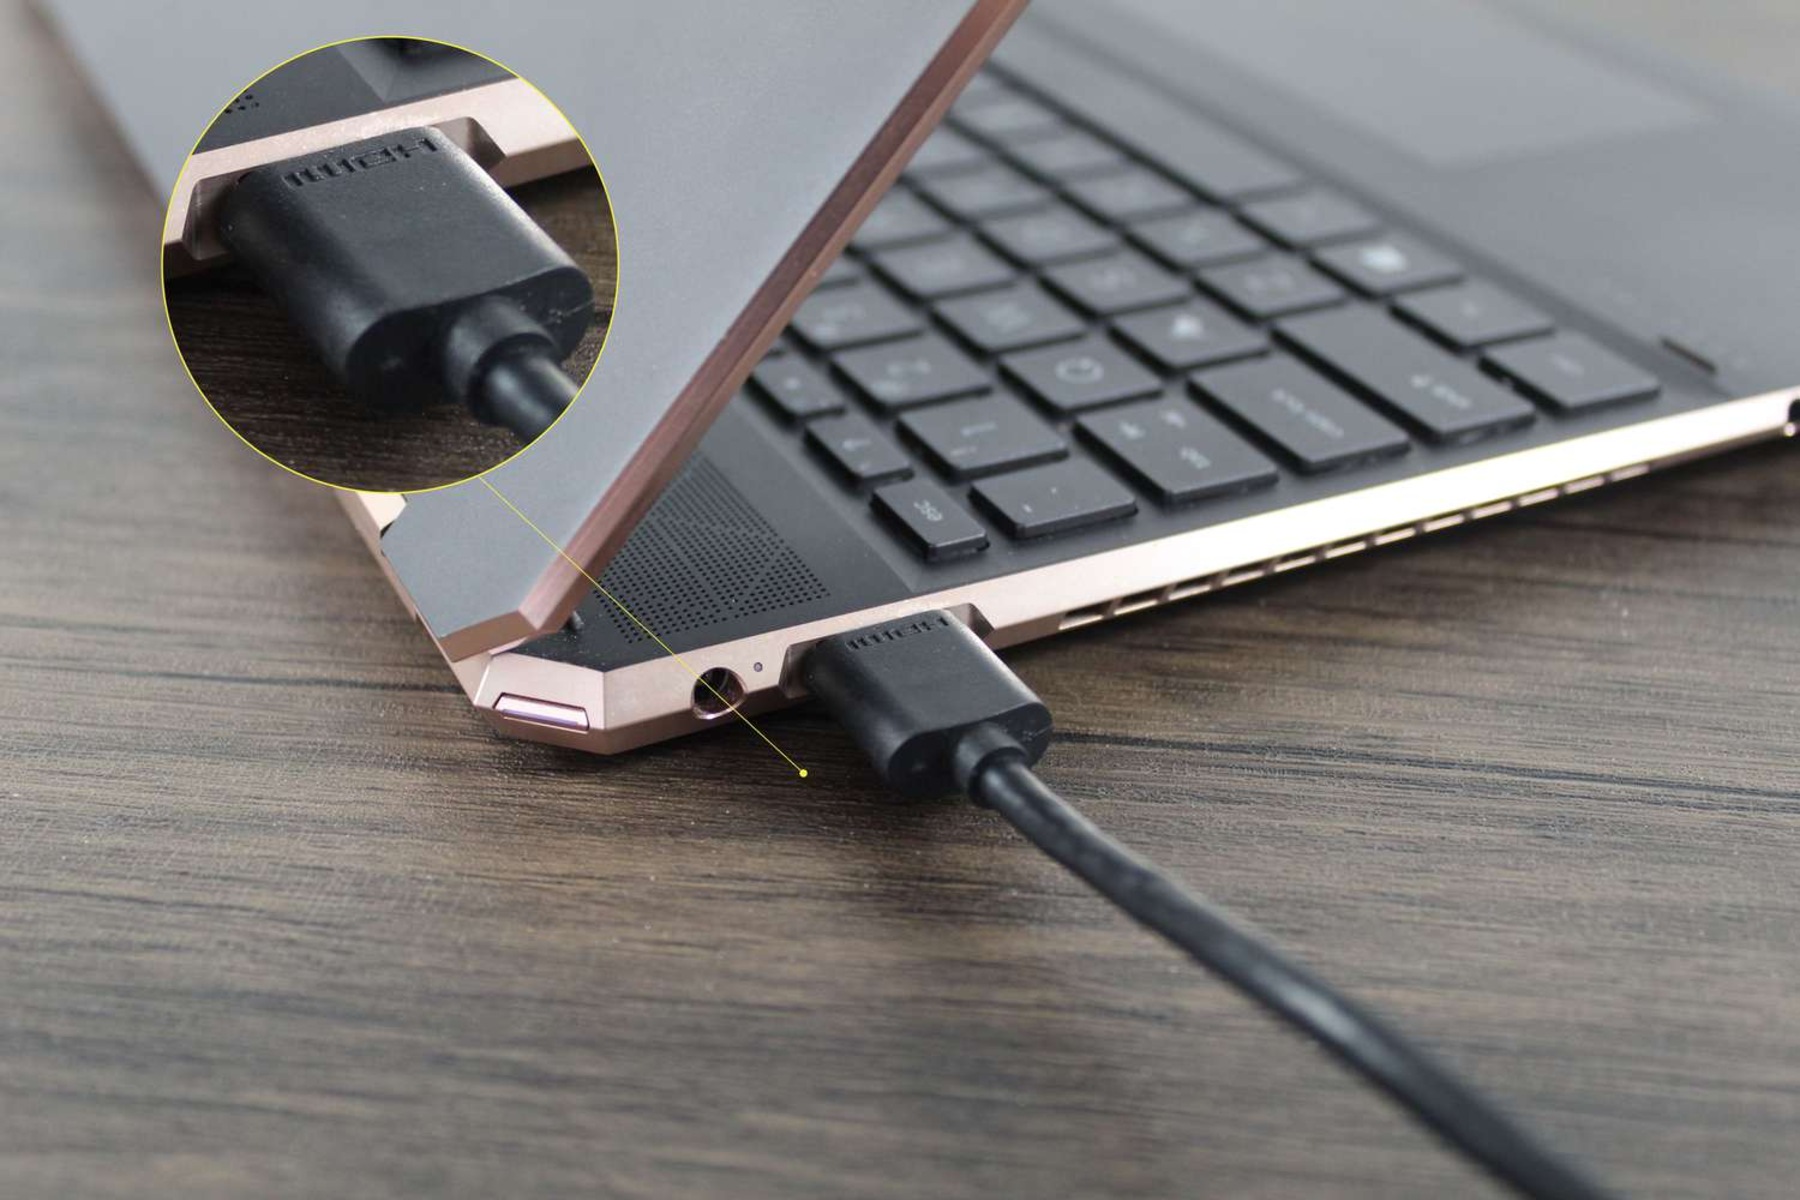
- Locate HDMI Ports: Identify the HDMI port on your laptop and the TV or monitor. They should be clearly labeled and easily accessible. Plug one end of the HDMI cable into the HDMI port on your laptop.
- Connect to TV or Monitor: Next, locate the HDMI port on the TV or monitor and plug the other end of the HDMI cable into it. Make sure the connection is secure and snug.
- Switch on Devices: Once the HDMI cable is properly connected, power on both your laptop and the TV or monitor.
- Select HDMI Input: On the TV or monitor, use the remote or controls to select the HDMI input that corresponds to the HDMI port you connected the cable to. Most TVs and monitors have multiple HDMI inputs, so be sure to choose the correct one.
- Adjust Laptop Display Settings: On your laptop, go to the display settings and choose the appropriate display mode. You can mirror your laptop’s screen to the TV or monitor, extend the display to have a dual-monitor setup, or use the TV or monitor as the primary display. Adjust the resolution settings if needed.
That’s it! The HDMI cable should now provide a seamless connection between your laptop and the TV or monitor. You should see your laptop’s screen mirrored or extended on the larger display. If not, don’t worry – we’ll address common troubleshooting tips in the next section.
Adjust Display Settings
After connecting your laptop to a TV or monitor via HDMI, you may need to adjust the display settings to optimize the viewing experience. Here are some steps to help you:
- Access Display Settings: On your laptop, right-click anywhere on the desktop and select “Display settings” or “Screen resolution.” Alternatively, you can access the display settings through the Control Panel or System Preferences, depending on your operating system.
- Choose Display Mode: In the display settings, you’ll see different options for adjusting the display mode. Select the desired mode based on your preference:
- Mirror Display: This option duplicates your laptop screen on the TV or monitor, creating an identical display.
- Extended Display: Choose this mode to extend your laptop’s screen onto the TV or monitor, effectively creating a dual-monitor setup. You can then drag windows and applications between the screens.
- Display Only on TV or Monitor: Select this mode if you want to use the TV or monitor as the primary display and disable your laptop screen.
- Adjust Resolution: If the TV or monitor has a different native resolution than your laptop, it’s recommended to adjust the display resolution to match or closely match the native resolution of the larger display. This will ensure the best image quality and avoid any distortion or scaling issues.
- Configure Sound Settings: By default, the audio output may still be routed through your laptop’s speakers. To switch the audio to the TV or monitor’s speakers, go to the sound settings and select the HDMI output as the audio device.
- Test and Fine-Tune: After making the necessary display and sound settings, test the connection by playing media files, opening applications, or testing different resolutions. Depending on your preferences and the capabilities of your laptop and TV or monitor, you may need to make further adjustments, such as screen brightness, color calibration, or aspect ratio.
By adjusting the display settings, you can achieve the desired visual and audio experience when showing HDMI on your laptop. If you encounter any issues or find that the display is not working as expected, refer to the troubleshooting section for solutions.
Troubleshooting Common Issues
While connecting your laptop to a TV or monitor via HDMI is usually a straightforward process, you may encounter some common issues along the way. Here are a few troubleshooting tips to help you resolve these problems:
- No Signal: If your TV or monitor displays a “No Signal” message, ensure that the HDMI cable is securely connected to both your laptop and the TV or monitor. Check that the correct HDMI input is selected on your TV or monitor, and try reconnecting the cable.
- Blank or Flickering Screen: If you see a blank screen or experience flickering while using HDMI, it could be due to an incompatible resolution between your laptop and the TV or monitor. Adjust the display resolution on your laptop to match the native resolution of the larger display, if possible.
- Poor Image or Sound Quality: If you notice degraded image or sound quality, try using a different HDMI cable. A faulty or low-quality cable can result in signal loss or interference. Additionally, check that your laptop’s display and audio settings are properly configured for HDMI output.
- Unsupported HDMI Version: In some cases, older laptops may not support newer HDMI versions. If you encounter compatibility issues due to different HDMI versions, consider using an HDMI adapter or converter to bridge the gap between your laptop’s HDMI output and the TV or monitor’s input.
- Software or Driver Issues: Outdated display drivers or incompatible software can also cause HDMI connection problems. Make sure your laptop’s graphics drivers are up to date and compatible with HDMI output. You can download the latest drivers from the manufacturer’s website.
- Audio Not Working: If you’re experiencing sound issues when using HDMI, check that the audio output is set to the HDMI device in your laptop’s sound settings. Additionally, ensure that the TV or monitor’s volume is turned up and not muted.
If you’ve tried these troubleshooting steps and are still unable to resolve the issue, it may be helpful to consult the user manual or contact the manufacturer’s support for further assistance.
Conclusion
Connecting your laptop to a TV or monitor using an HDMI cable opens up a world of possibilities, allowing you to enjoy movies, gaming, and presentations on a larger screen. Through this article, we have provided a step-by-step guide to help you show HDMI on your laptop.
We began by ensuring compatibility between your laptop and the TV or monitor, emphasizing the importance of HDMI ports, versions, display resolutions, and hardware. Once compatibility was confirmed, we moved on to connecting the HDMI cable, ensuring a secure connection between the devices.
After the physical connection was established, we discussed the process of adjusting display settings on your laptop to achieve the best visual experience. We covered display modes, resolution adjustments, and sound configurations to optimize the output on the TV or monitor.
To equip you with troubleshooting skills, we highlighted common issues that may arise during the HDMI connection process and provided practical tips to resolve them. These issues include signal loss, blank or flickering screens, poor quality, compatibility conflicts, and audio problems.
By following the steps outlined in this guide and taking into account the troubleshooting tips, you should be able to successfully show HDMI on your laptop without any major complications. Remember to consult the user manual or manufacturer’s support if you encounter persistent difficulties.
Now that you have a comprehensive understanding of the process, it’s time to grab your HDMI cable and embark on a visual adventure on the bigger screen. Enjoy the immersive experience of watching movies, playing games, or delivering captivating presentations – all made possible by connecting your laptop to a TV or monitor using HDMI.