Introduction
Welcome to the world of video sharing on Zoom! With the rapid rise of virtual meetings and online collaborations, being able to share videos during your Zoom meetings can enhance your presentations, training sessions, and overall communication. Whether you want to share a captivating video clip, a tutorial, or an entertaining moment, Zoom makes it easy to engage your audience with multimedia content. In this article, we will guide you through the steps of sharing a video on Zoom, ensuring that your video playback is smooth and seamless.
Sharing videos on Zoom can add an extra layer of visual communication to your meetings, allowing you to engage your participants and deliver your message effectively. By sharing videos, you can create immersive experiences, foster knowledge transfer, and make your presentations more interesting and interactive.
Perhaps you want to showcase a recorded training session, demonstrate a product, or share a highlights reel from a recent event. Whatever the purpose may be, Zoom offers the flexibility to incorporate videos into your meetings and create a dynamic environment for collaboration.
Throughout this article, we will provide you with step-by-step instructions to share videos on Zoom. From opening the Zoom application to adjusting video and audio settings, you will become familiar with the entire process of sharing videos seamlessly. Whether you are a seasoned Zoom user or new to the platform, this guide will equip you with the necessary knowledge to share videos with confidence.
So, without further ado, let’s dive into the world of video sharing on Zoom and unlock new possibilities for collaboration and communication!
Step 1: Open Zoom
The first step in sharing a video on Zoom is to open the Zoom application on your computer or mobile device. If you haven’t already downloaded Zoom, you can visit the Zoom website or your app store to download and install it for free.
Once you have successfully installed Zoom, launch the application to get started. You will be greeted by the Zoom home screen, where you can access various features and settings for your meetings.
If you’re using a computer, you can find the Zoom application in your applications folder or on your desktop. Double-click on the Zoom icon to open the application.
If you’re using a mobile device, locate the Zoom app on your home screen or in your app drawer. Tap on the Zoom icon to open the app.
Pro tip: It’s a good idea to sign in to your Zoom account before starting a meeting. By signing in, you can access all the features and settings associated with your Zoom account, such as personal meeting IDs, scheduled meetings, and recorded meetings.
Signing in also allows you to access your meeting history and manage your Zoom settings more efficiently. If you don’t have a Zoom account yet, you can create one for free by clicking on the “Sign Up” or “Create Account” button on the login screen.
By following this first step, you have successfully opened the Zoom application and are now ready to start or join a meeting. Let’s move on to the next step and explore how to initiate a Zoom meeting or join an existing one.
Step 2: Start or Join a Meeting
Now that you have opened the Zoom application, it’s time to start or join a meeting. Zoom offers different options to initiate or join a meeting, depending on your needs and preferences.
If you want to start a new meeting, click on the “New Meeting” button on the Zoom home screen. This will instantly launch a new meeting room where you can invite participants to join. You can also customize your meeting settings, such as enabling video or audio upon entry, and configuring security options like meeting passwords and waiting rooms.
If you have a scheduled meeting, you can click on the “Join” button and enter the unique meeting ID provided by the meeting organizer. This allows you to join an existing meeting and participate in the discussion or presentation.
Additionally, if you are invited to a meeting and have the meeting ID handy, you can join a meeting by clicking on the “Join” button and entering the meeting ID in the specified field. This allows you to connect with the meeting participants and engage in the conversation.
Zoom also offers other convenient methods to initiate or join meetings. If you have Zoom installed as a browser extension or add-on, you can start or join meetings directly from your web browser, eliminating the need to open the Zoom application separately.
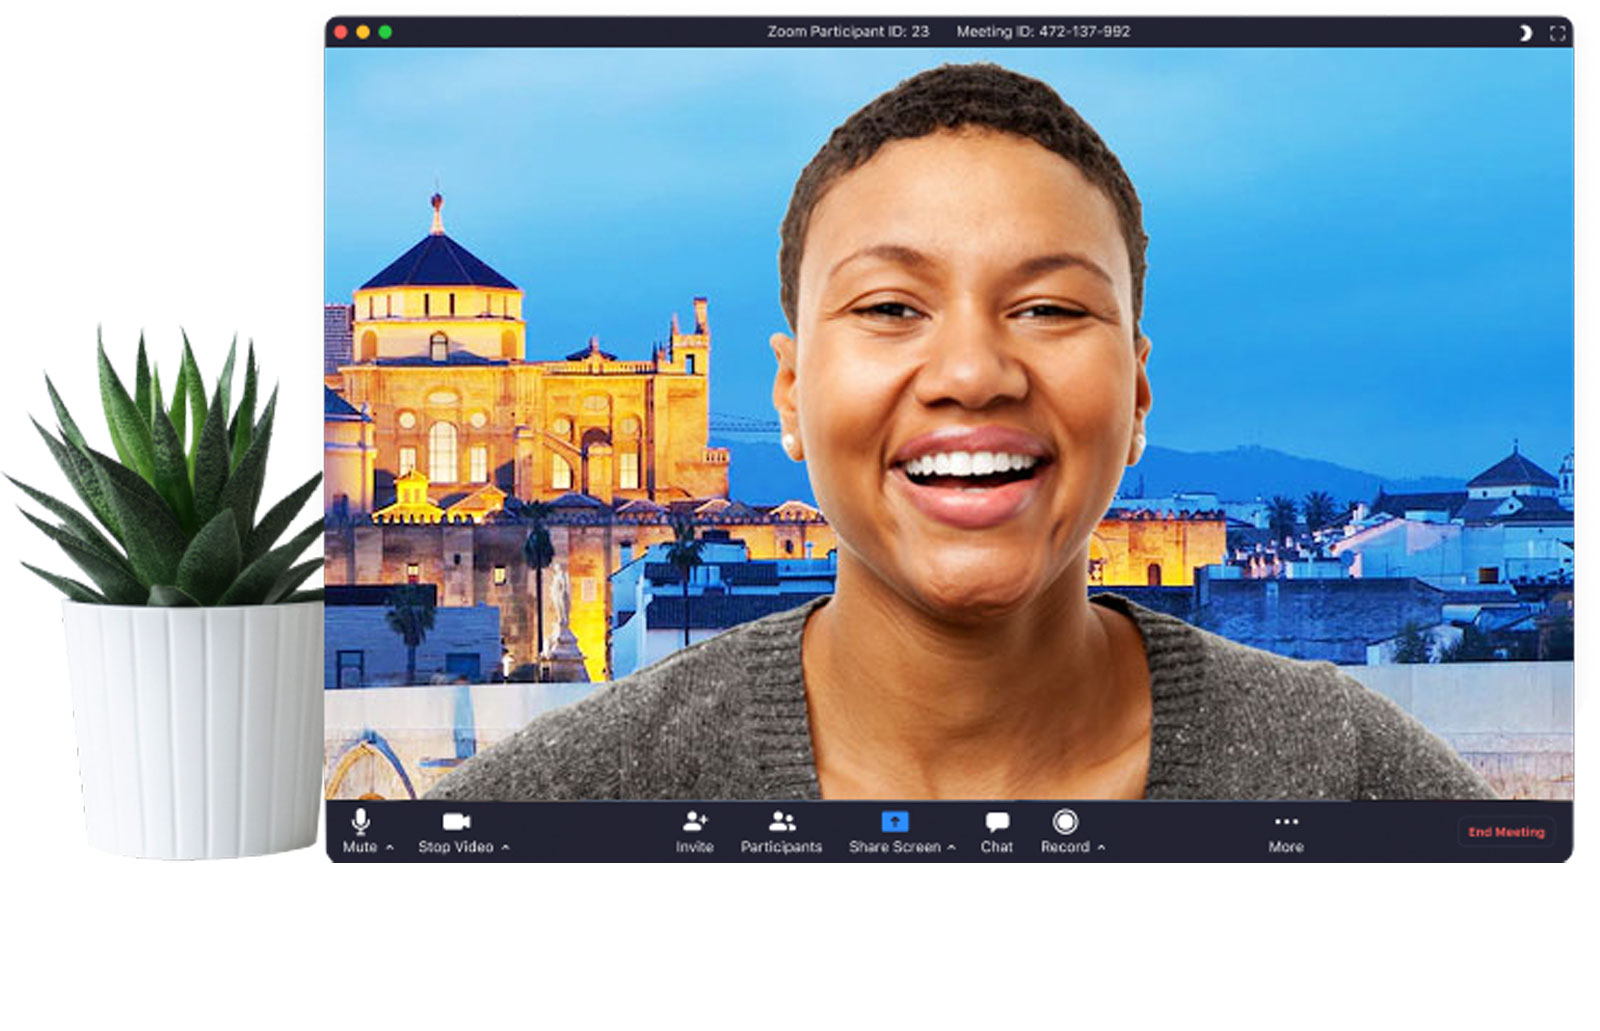
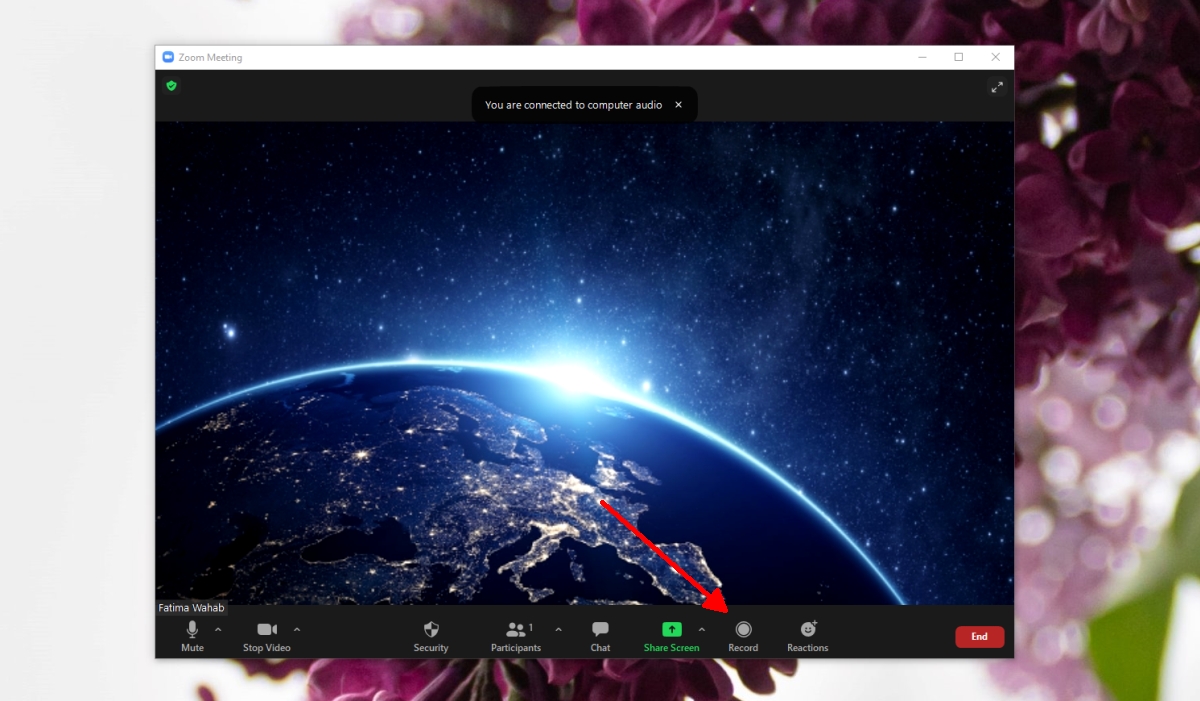
Pro tip: Familiarize yourself with Zoom’s meeting controls to make the most out of your meeting experience. You can mute or unmute yourself, turn your video on or off, share your screen, and access other meeting features using the toolbar at the bottom of the meeting window.
By following this step, you have successfully started or joined a meeting on Zoom. You are now ready to proceed to the next step and learn how to share your screen in a meeting so that you can share your video with the participants.
Step 3: Click on the “Share Screen” Button
Once you have entered a meeting room on Zoom, it’s time to click on the “Share Screen” button to begin sharing your video. This can be done to share a pre-recorded video file, a live streaming video, or even your computer screen if you have a video playing locally.
To initiate screen sharing, locate the toolbar at the bottom of the meeting window. Among the available options, you will find the “Share Screen” button represented by an icon of a computer screen.
Click on the “Share Screen” button to activate the screen sharing feature. A pop-up window will appear, displaying a list of available screens and applications that you can share.
Note: Depending on your device and Zoom settings, you may be prompted to grant screen sharing permissions for the Zoom application. Make sure to follow the on-screen instructions and allow the necessary permissions for a seamless sharing experience.
Once you have clicked on the “Share Screen” button, you will have the option to choose between sharing your entire screen or sharing a specific application window. If you wish to share a video, it is recommended to share the specific application window where your video is playing. This ensures that the video is the primary focus for the participants and prevents distractions from other elements on your screen.
After selecting the desired screen or application window to share, click on the “Share” button located at the bottom right corner of the screen sharing pop-up window. This will initiate the video sharing process, and the chosen screen or application window will be visible to all participants in the meeting.
Pro tip: Before sharing your video, it’s advisable to close any unnecessary applications or windows that might distract participants or interrupt the smooth playback of the video. This allows for a more focused and enjoyable viewing experience for everyone involved.
By following this step, you have successfully clicked on the “Share Screen” button on Zoom, and you are now ready to proceed to the next step of choosing the video you want to share. Let’s continue exploring the process of sharing videos on Zoom!
Step 4: Choose the Video You Want to Share
Now that you have activated the screen sharing feature on Zoom, it’s time to choose the video you want to share with the meeting participants. This could be a pre-recorded video file stored on your computer or a live streaming video from a website or application.
If you have a pre-recorded video file that you want to share, make sure it is located in a easily accessible location on your computer. This could be in your documents folder, desktop, or any other directory where you can easily navigate to it.
To choose the video you want to share, navigate to the application or window that contains the video. If it’s a video file, open the file in a media player application such as VLC Media Player or Windows Media Player. Alternatively, if you want to share a live streaming video, open the website or application that is playing the video.
Note: Make sure to test the video playback before sharing it in the meeting. Ensure that the video is playing correctly, the audio is clear, and any buffering or loading issues are resolved. This ensures a seamless viewing experience for the participants.
Once you have chosen the video you want to share, go back to the Zoom meeting window. With the screen sharing feature still active, participants will now see the chosen video playing on their screens.
Pro tip: If you want to enhance the video playback experience, you can optimize your screen sharing settings by enabling “Optimize Screen Share for Video Clip” in the advanced screen sharing options. This ensures that the video is shared at optimal quality and frame rate, providing a smoother and more enjoyable viewing experience for everyone.
By following this step, you have successfully chosen the video you want to share on Zoom. You are now ready to proceed to the next step and click on the “Share Screen” button again to begin playing the video for the meeting participants. Let’s continue exploring the process of sharing videos on Zoom!
Step 5: Click on the “Share Screen” Button Again
After choosing the video you want to share with the meeting participants, it’s time to click on the “Share Screen” button again to begin playing the video. This step ensures that the video is properly displayed and visible to all attendees in the meeting.
In the Zoom meeting window, locate the toolbar at the bottom and find the “Share Screen” button represented by an icon of a computer screen. Click on this button once again to activate the screen sharing feature.
A pop-up window will appear, similar to the one you encountered in the previous step. This time, however, you don’t need to select a new screen or application window. Simply click on the “Share” button located at the bottom right corner of the pop-up window.
By clicking on the “Share” button, Zoom will start sharing the chosen video with the meeting participants. The video will be displayed on the screens of all attendees, allowing them to watch and enjoy the content you have selected.
Note: Depending on your Zoom settings, you may have the option to enable computer sound sharing during screen sharing. This allows the audio of the shared video to be transmitted to the participants as well. Make sure to check the audio settings and choose the appropriate option to ensure a complete multimedia experience.
Pro tip: If you want to provide commentary or additional context while the video is playing, you can use the Zoom meeting controls to unmute your microphone and speak to the participants. This allows you to engage in a live discussion or provide explanations while the video is playing, enhancing the collaborative experience.
By following this step, you have successfully clicked on the “Share Screen” button once again on Zoom, and the video you have chosen is now being displayed to all the participants in the meeting. You are now ready to proceed to the next step and play the video for everyone to enjoy. Let’s continue exploring the process of sharing videos on Zoom!
Step 6: Play the Video
With the video shared and displayed on the screens of all meeting participants, it’s time to play the video and let everyone enjoy the content. Playing the video seamlessly ensures that all attendees can watch it in sync and fully engage with the content you have chosen to share.
If the video you shared is a pre-recorded file, use the media player application to start playing the video. Locate the play button or press the spacebar to initiate playback. The video will start playing on your screen as well as on the screens of all meeting participants.
Note: Ensure that the audio settings are properly configured so that the participants can hear the sound of the shared video. Adjust the volume of the media player or the computer system to an appropriate level to ensure clear and audible audio playback.
If you are sharing a live streaming video, open the website or application where the video is being played and start the video from there. Make sure to have a stable internet connection to avoid interruptions or buffering issues during the playback.
As the video plays, all participants will be able to watch and listen to its content. They can follow along with your narration, ask questions, or provide comments using the Zoom chat or microphone features, depending on the meeting settings and facilitation style.
Pro tip: To ensure a smooth video playback experience, make sure to have a strong internet connection and allocate sufficient bandwidth for the video sharing. Close any unnecessary applications or downloads that might consume resources and affect the video playback quality.
By following this step, you have successfully played the video on Zoom. With the video running smoothly, all participants can enjoy the shared content and engage with you and each other during the viewing experience. Now, let’s proceed to the next step and explore how to adjust video and audio settings to enhance the video sharing experience on Zoom.
Step 7: Adjust Video and Audio Settings
Once the video is playing, it’s important to ensure that the video and audio settings are properly adjusted to enhance the viewing experience for all meeting participants. With the right settings in place, everyone can fully enjoy the shared video and engage with the content effectively.
To adjust the video settings, you can use the controls provided by the media player application. These controls typically include options for adjusting the playback speed, toggling full-screen mode, and controlling the video quality. Make sure to choose settings that optimize the video’s clarity and resolution, taking into account the strength of your internet connection and the capabilities of the participants’ devices.
Additionally, consider the size of the video window that is being shared. You can resize and reposition the video window on your screen to ensure that it is visible to all meeting participants without obstructing any important meeting information or participant video feeds.
Regarding the audio settings, ensure that the sound levels are balanced and appropriate for the video playback. If necessary, adjust the volume controls on your device or the media player to ensure clear and audible audio output. The participants should be able to hear the video’s sound without it being too loud or too soft.
Note: Depending on the Zoom meeting and audio settings, participants may also have the option to adjust their individual audio settings. Encourage participants to adjust their audio settings, such as volume and microphone sensitivity, to ensure optimal audio quality for their particular setup.
Pro tip: Communication is key when adjusting video and audio settings. Monitor the chat or listen for feedback from the participants to ensure that everyone is able to see and hear the video clearly. If any issues arise, take the necessary steps to resolve them promptly so that the overall experience is not compromised.
By following this step, you have successfully adjusted the video and audio settings to optimize the video sharing experience on Zoom. With the right settings in place, both the video and audio aspects of the shared content can be enjoyed by all meeting participants. Now, let’s move on to the final step and learn how to stop sharing the video.
Step 8: Stop Sharing the Video
When you are ready to conclude the video sharing session, it’s important to know how to stop sharing the video on Zoom. By stopping the sharing, you will return the meeting focus to the main discussion and allow participants to move on to other agenda items or activities.
To stop sharing the video, locate the Zoom meeting window and find the screen sharing controls at the bottom of the screen. In the toolbar, you will see a “Stop Share” button. Click on this button to deactivate the screen sharing feature and stop the video from being displayed to the meeting participants.
Once you click on the “Stop Share” button, the video will no longer be visible on the screens of the meeting attendees. This will bring the meeting back to its normal state, where participants can engage in discussion, collaborate, or proceed with any other planned activities.
Note: It’s important to announce to the participants that you are stopping the video sharing. This way, they can have a clear understanding that the video portion of the meeting has concluded and are prepared to shift their focus accordingly.
Pro tip: After stopping the video sharing, take a moment to ask participants if they have any questions, comments, or feedback related to the shared video. This can help facilitate discussion and ensure that everyone had a chance to comprehend and grasp the content before moving on.
By following this final step, you have successfully stopped sharing the video on Zoom. Congratulations! You have now completed the process of sharing a video during a Zoom meeting. Now, wrap up the meeting as planned or continue on to any other activities on the agenda.
Conclusion
Sharing videos on Zoom can significantly enhance the way you communicate, collaborate, and engage with meeting participants. By following the step-by-step guide outlined in this article, you have learned how to seamlessly share videos during Zoom meetings.
From opening the Zoom application and initiating a meeting to choosing the video you want to share and adjusting the video and audio settings, each step has been explained in detail to ensure a smooth and enjoyable video sharing experience.
Remember to prepare the video in advance, test its playback, and optimize the screen sharing settings for the best possible quality. Additionally, consider the audio settings to ensure clear and audible playback for all participants.
Throughout the sharing process, stay attentive to the needs and feedback of the participants. Encourage questions, comments, and discussions related to the shared video to create an interactive and collaborative environment.
Once the video sharing is complete, don’t forget to stop sharing the video and announce the end of the video session. This will allow the meeting to transition smoothly into other agenda items or activities.
Now that you have mastered the art of sharing videos on Zoom, you can captivate your audience, deliver impactful presentations, and facilitate engaging discussions. Video sharing on Zoom opens up exciting possibilities for communication, training, and remote collaborations.
So go ahead, explore and experiment with the video sharing feature on Zoom, and elevate your virtual meetings to a whole new level of interactivity and engagement.
Happy Zooming!


