Introduction
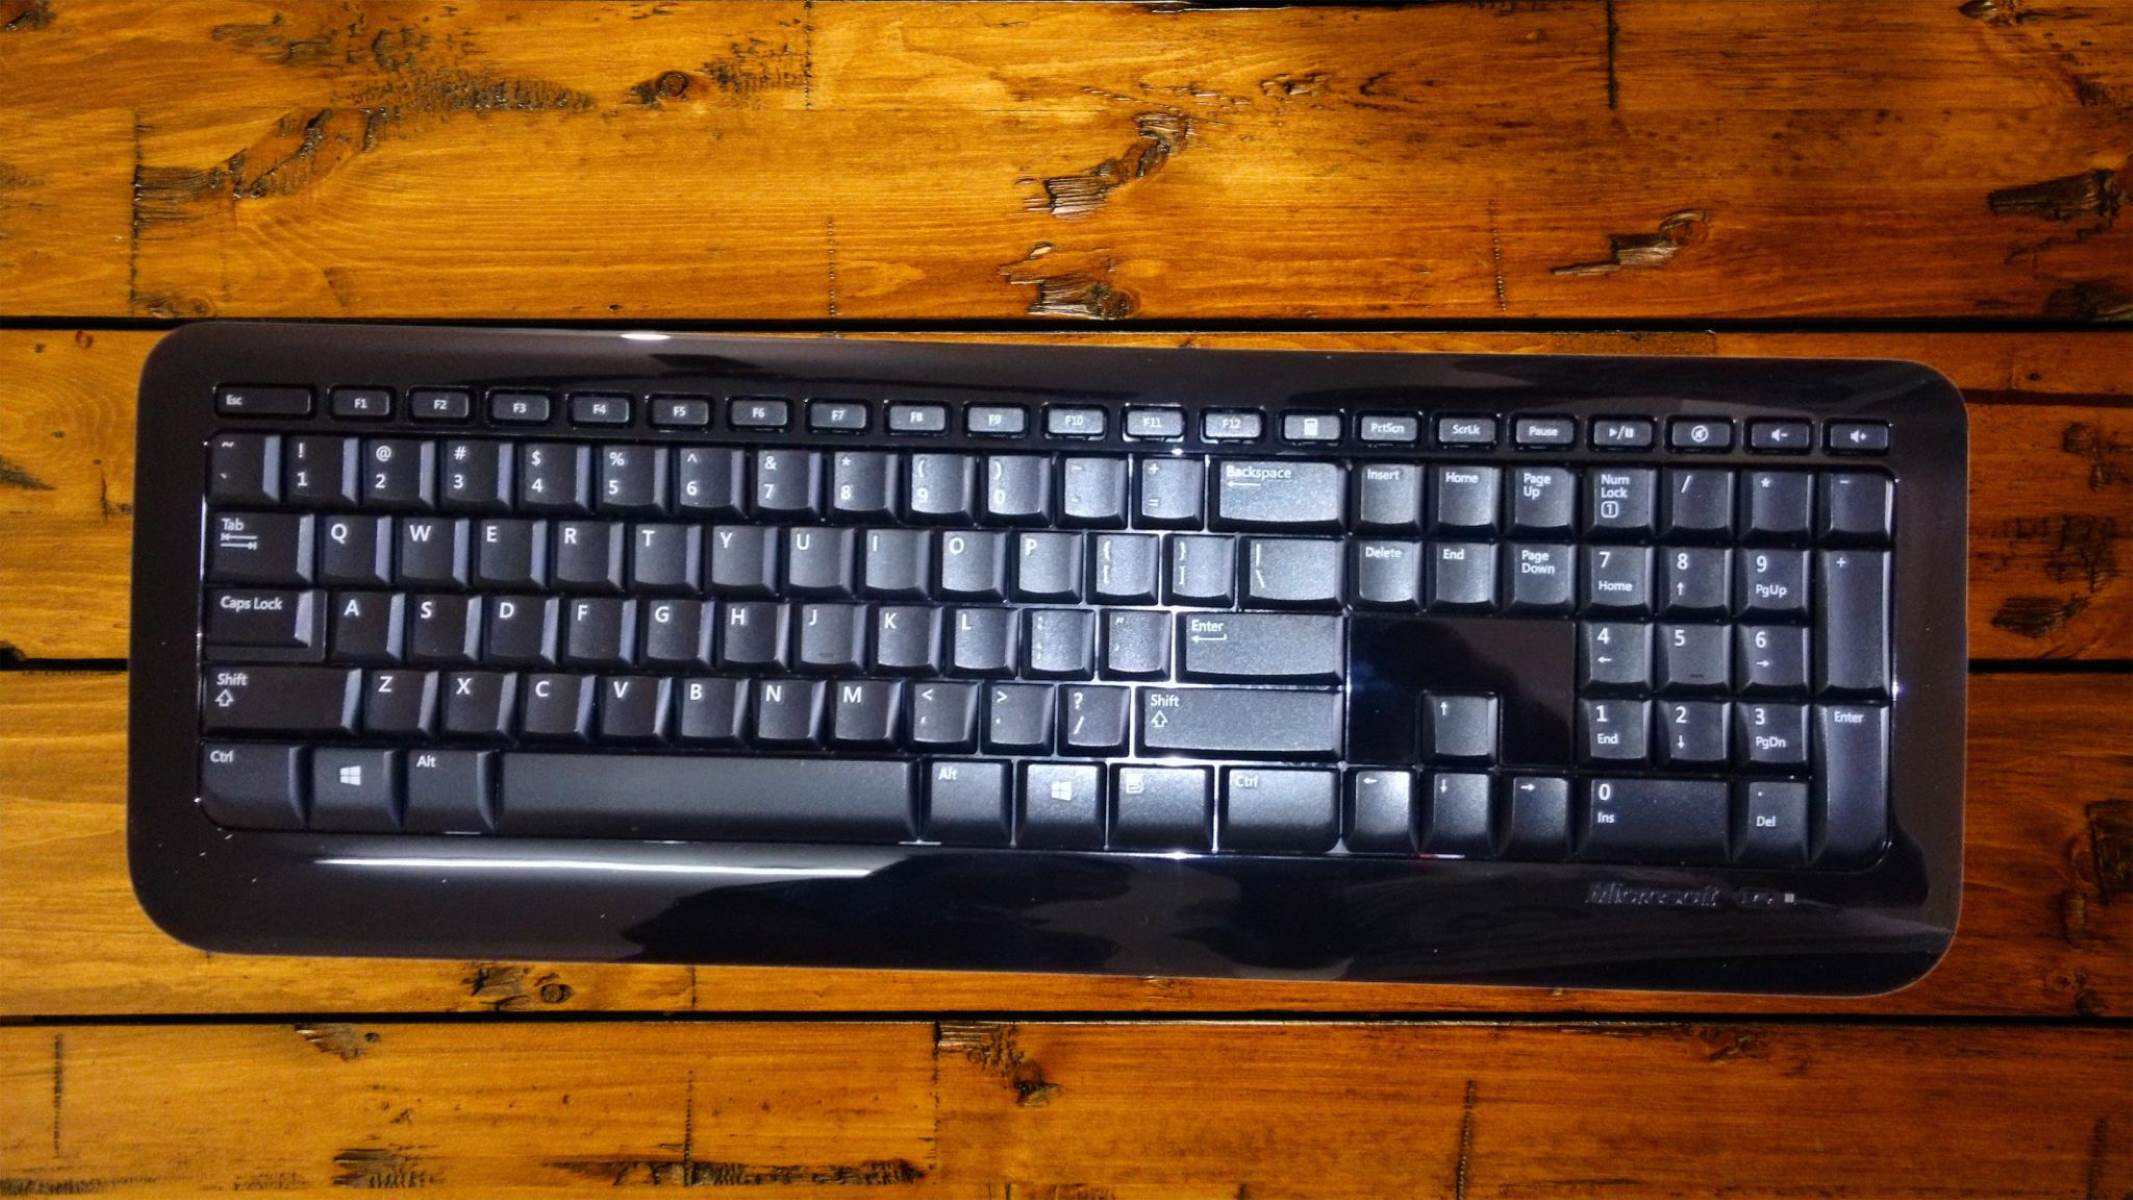
Welcome to our guide on how to set up the Microsoft Wireless Keyboard 800. If you’ve recently purchased this keyboard or are planning to, this step-by-step tutorial will help you get it up and running quickly and easily. The Microsoft Wireless Keyboard 800 offers a convenient and reliable wireless connectivity option, allowing you to work and type without the restrictions of a cable.
Designed with simplicity and functionality in mind, this keyboard offers a comfortable typing experience with its soft-touch keys and quiet operation. Whether you’re using it for work, gaming, or casual web browsing, this wireless keyboard is a reliable choice.
In this guide, we’ll walk you through the setup process, including unboxing the keyboard, connecting the USB receiver, installing batteries, synchronizing the keyboard and receiver, customizing keyboard settings, and troubleshooting common issues. By following these steps, you’ll be able to start using your Microsoft Wireless Keyboard 800 in no time.
Before we dive into the setup process, it’s important to note that this guide assumes you have already unboxed the keyboard and have it ready for installation. If you haven’t done so yet, make sure to unpack the keyboard and keep all the accessories, including the USB receiver and batteries, handy.
Now, let’s get started with the setup process of your Microsoft Wireless Keyboard 800. Follow along with each step, and soon enough, you’ll have a fully functional wireless keyboard at your fingertips.
Step 1: Unboxing the Keyboard
The first step in setting up your Microsoft Wireless Keyboard 800 is to unbox it. Take a moment to carefully remove the keyboard from its packaging, and also locate the USB receiver and any additional accessories that may be included. The packaging may vary, but it should be fairly straightforward to identify the components you need.
Once you have everything out of the box, make sure to inspect the keyboard for any visible damage or defects. It’s always a good idea to check the keyboard for any loose or broken keys before proceeding with the installation process.
Next, locate a suitable location for your keyboard on your desk or workspace. Ensure that there is enough space for comfortable typing and that the keyboard is positioned in a way that minimizes strain on your wrists and arms. Consider using a keyboard stand or wrist rest if needed to optimize your ergonomic setup.
Now that you have unboxed the keyboard and prepared your workspace, you’re ready to move on to the next step: connecting the USB receiver.
Step 2: Connecting the USB Receiver
With the keyboard unboxed and the workspace ready, it’s time to connect the USB receiver. The USB receiver is a small device that allows your keyboard to wirelessly communicate with your computer. It’s essential for establishing a connection between the keyboard and your system.
Locate the USB receiver that came with your Microsoft Wireless Keyboard 800. It is typically a small dongle that plugs into a USB port on your computer. If your computer has multiple USB ports, choose one that is easily accessible and in close proximity to where you’ll be using the keyboard.
Insert the USB receiver into the USB port on your computer. Make sure to push it in firmly to ensure a secure connection. Once inserted, your computer should automatically detect the USB receiver and prepare it for pairing with your keyboard.
It’s important to note that some models of the Microsoft Wireless Keyboard 800 may have a built-in USB receiver storage compartment. If your keyboard has this feature, you can find the compartment beneath it. Simply slide open the compartment and insert the USB receiver inside for safekeeping when not in use.
Once the USB receiver is connected, you’re one step closer to enjoying the wireless functionality of your Microsoft Wireless Keyboard 800. Now, it’s time to move on to the next step: installing batteries.
Step 3: Installing Batteries
Now that you have connected the USB receiver, it’s time to install the batteries in your Microsoft Wireless Keyboard 800. This step is crucial for powering the keyboard and ensuring its functionality.
Flip the keyboard over so that the bottom side is facing up. Look for the battery compartment, usually located near the top of the keyboard. You may need to press a release button or slide a cover to access the battery compartment.
Depending on the model, the Microsoft Wireless Keyboard 800 typically requires two AA batteries for operation. Check the polarity markings inside the battery compartment to ensure you insert the batteries correctly.
Insert the batteries into the compartment, following the polarity markings as a guide. Make sure they are securely placed and that the compartment cover or closure is properly sealed. This will help maintain a stable connection and prevent the batteries from falling out during use.
Once you have installed the batteries, flip the keyboard back over to its original position. You are now ready to turn on the keyboard and establish a connection with the USB receiver.
Installing fresh batteries is essential to ensure optimal performance and a prolonged battery life for your Microsoft Wireless Keyboard 800. Remember to replace the batteries when they are running low to avoid any interruption in usage.
Now that you have installed the batteries, it’s time to move on to the next step: turning on the keyboard.
Step 4: Turning on the Keyboard
With the batteries securely installed, it’s time to turn on your Microsoft Wireless Keyboard 800. Turning on the keyboard will activate its wireless functionality and prepare it for the pairing process with the USB receiver.
Find the power switch or button on your keyboard. It is usually located on the top or side of the keyboard, near the function keys or the power indicator light. Slide the power switch to the “On” position or press the power button to turn on the keyboard.
Once turned on, you may see a power indicator light on the keyboard. This light indicates that the keyboard is powered and ready to be paired with the USB receiver.
It’s important to note that some models of the Microsoft Wireless Keyboard 800 may have an automatic power-saving feature. This feature allows the keyboard to enter a power-saving mode when not in use, helping to conserve battery life. If your keyboard does not have a visible power indicator light, don’t worry. It is likely functioning correctly.
By turning on the keyboard, you have taken a crucial step in the setup process. The next step involves synchronizing the keyboard with the USB receiver to establish a reliable wireless connection.
Now that the keyboard is turned on, let’s move on to the next step: synchronizing the keyboard and receiver.
Step 5: Synchronizing the Keyboard and Receiver
Now that your Microsoft Wireless Keyboard 800 is powered on, it’s time to synchronize it with the USB receiver. This process allows the keyboard and receiver to establish a secure wireless connection and ensures that keystrokes are accurately transmitted to your computer.
Locate the connect button on the USB receiver. It is usually located on the side or the bottom of the receiver. Press and hold the connect button for a few seconds until the LED indicator on the receiver starts blinking.
Next, locate the connect button on the bottom of your keyboard. Press and hold the connect button for a few seconds until the power indicator light on the keyboard starts blinking. This indicates that the keyboard is searching for the USB receiver.
Once the power indicator light on the keyboard stops blinking and remains steady, it means that the synchronization process is complete. Your Microsoft Wireless Keyboard 800 is now successfully paired with the USB receiver, and you can start using it wirelessly.
If the synchronization process fails or if your computer doesn’t detect the keyboard, try the following troubleshooting steps:
- Make sure the USB receiver is securely plugged into a USB port on your computer.
- Check that the batteries in the keyboard are correctly installed and have enough charge.
- Try pressing the connect buttons on both the receiver and the keyboard again.
- Restart your computer and try the synchronization process again.
Following these troubleshooting steps should help resolve any connectivity issues and ensure a successful synchronization between the keyboard and receiver.
With the keyboard and receiver synchronized, you are now ready to move on to the next step: customizing keyboard settings to suit your preferences.
Step 6: Customizing Keyboard Settings
After successfully synchronizing your Microsoft Wireless Keyboard 800 with the USB receiver, it’s time to customize the keyboard settings to suit your preferences. Customizing the settings can enhance your typing experience and make using the keyboard more efficient.
Microsoft provides software called the Microsoft Mouse and Keyboard Center that allows you to customize keyboard settings. It enables you to remap keys, create macros, adjust keyboard lighting (if available), and customize other features based on your needs.
To customize the keyboard settings:
- Download and install the Microsoft Mouse and Keyboard Center software from the Microsoft website.
- Launch the software and follow the on-screen instructions to set it up.
- Once the software is installed, you can access various customization options for your Microsoft Wireless Keyboard 800.
- Explore the software interface to discover the available settings and features.
- Remap keys: Assign different functions or shortcuts to specific keys on the keyboard.
- Create macros: Record a series of keystrokes or actions to be executed with a single key press.
- Adjust keyboard lighting (if available): Customize the backlighting or LED effects of the keyboard.
- Customize other features: Depending on your keyboard model, you may have additional customization options, such as media controls, volume settings, or application-specific shortcuts.
Take your time to explore and experiment with the customization options to tailor the keyboard settings to your liking. These customizable features can enhance your productivity and make your typing experience more enjoyable.
Once you have customized the keyboard settings to your satisfaction, you’re ready to use your Microsoft Wireless Keyboard 800 according to your preferences and needs.
In the next section, we’ll cover some common troubleshooting steps to help you address any issues you may encounter while using the keyboard.
Step 7: Troubleshooting Common Issues
While using the Microsoft Wireless Keyboard 800, you may encounter some common issues that can affect its performance. Here are a few troubleshooting steps you can take to resolve these issues and ensure smooth operation:
- Check the battery levels: If the keyboard is unresponsive or keys are not registering, it could be due to low battery levels. Replace the batteries with fresh ones and ensure they are correctly installed.
- Re-sync the keyboard and receiver: If the connection between the keyboard and receiver is lost, re-syncing them can resolve the issue. Follow the synchronizing steps mentioned in Step 5 to establish a new connection.
- Clear interference: If the keyboard is not functioning properly, there may be interference from other wireless devices in the vicinity. Move other wireless devices away from the keyboard and receiver to improve signal strength.
- Restart your computer: Sometimes, a simple computer restart can resolve connectivity issues. Restart your computer and check if the keyboard works properly after the reboot.
- Update drivers and software: Ensure that you have the latest drivers and software for the Microsoft Wireless Keyboard 800 installed on your computer. Visit the Microsoft website to download any available updates.
- Check USB port: Try connecting the USB receiver to a different USB port on your computer. A faulty USB port could be causing connectivity problems.
- Reset keyboard settings: If you have customized the keyboard settings and are experiencing issues, try resetting the settings to the default configuration. Refer to the Microsoft Mouse and Keyboard Center software for instructions on how to do this.
- Contact customer support: If you have tried all the troubleshooting steps and are still having issues with your keyboard, it may be necessary to contact Microsoft customer support for further assistance.
By following these troubleshooting steps, you can effectively address common issues that may arise while using the Microsoft Wireless Keyboard 800. Remember to consult the user manual that came with your keyboard for specific troubleshooting guidance and contact support if needed.
With the troubleshooting steps completed, you should now have a clearer understanding of how to resolve any issues that may arise and continue enjoying the convenience and functionality of your Microsoft Wireless Keyboard 800.
Conclusion
Congratulations! You have successfully set up your Microsoft Wireless Keyboard 800. By following the step-by-step instructions in this guide, you unboxed the keyboard, connected the USB receiver, installed batteries, turned on the keyboard, synchronized it with the receiver, customized keyboard settings, and learned how to troubleshoot common issues.
The Microsoft Wireless Keyboard 800 offers a convenient and reliable wireless typing experience, allowing you to work and navigate your computer without the constraints of a cable. With its soft-touch keys, quiet operation, and customizable settings, this keyboard is designed to enhance your productivity and comfort.
Remember to keep an eye on the battery levels and replace them when needed. Regularly clean and maintain your keyboard to ensure optimal performance. If you encounter any difficulties or have questions about your Microsoft Wireless Keyboard 800, don’t hesitate to refer to the user manual or seek assistance from Microsoft customer support.
We hope this guide has been helpful in setting up and customizing your Microsoft Wireless Keyboard 800. Enjoy the freedom and convenience this wireless keyboard brings to your computer experience, and happy typing!