Introduction
Welcome to our guide on how to set up the Logitech Extreme 3D Pro joystick! Whether you’re a seasoned gamer looking to enhance your gaming experience or a flight simulator enthusiast seeking a more realistic control system, the Logitech Extreme 3D Pro is an excellent choice.
This joystick is designed with precision and durability in mind, offering a wide range of customizable features that will allow you to tailor your gaming experience to your liking. In this comprehensive guide, we will walk you through the step-by-step process of unboxing and setting up the Logitech Extreme 3D Pro joystick to ensure that you can start gaming with ease.
Before we dive into the setup process, it’s important to note that this guide assumes you are using a Windows operating system. However, the general principles outlined here can also apply to other operating systems with minor variations in software installation.
So, if you’re ready to take your gaming to the next level and unleash your piloting skills, let’s get started with unboxing this high-quality joystick and setting it up on your PC.
Step 1: Unboxing the Logitech Extreme 3D Pro
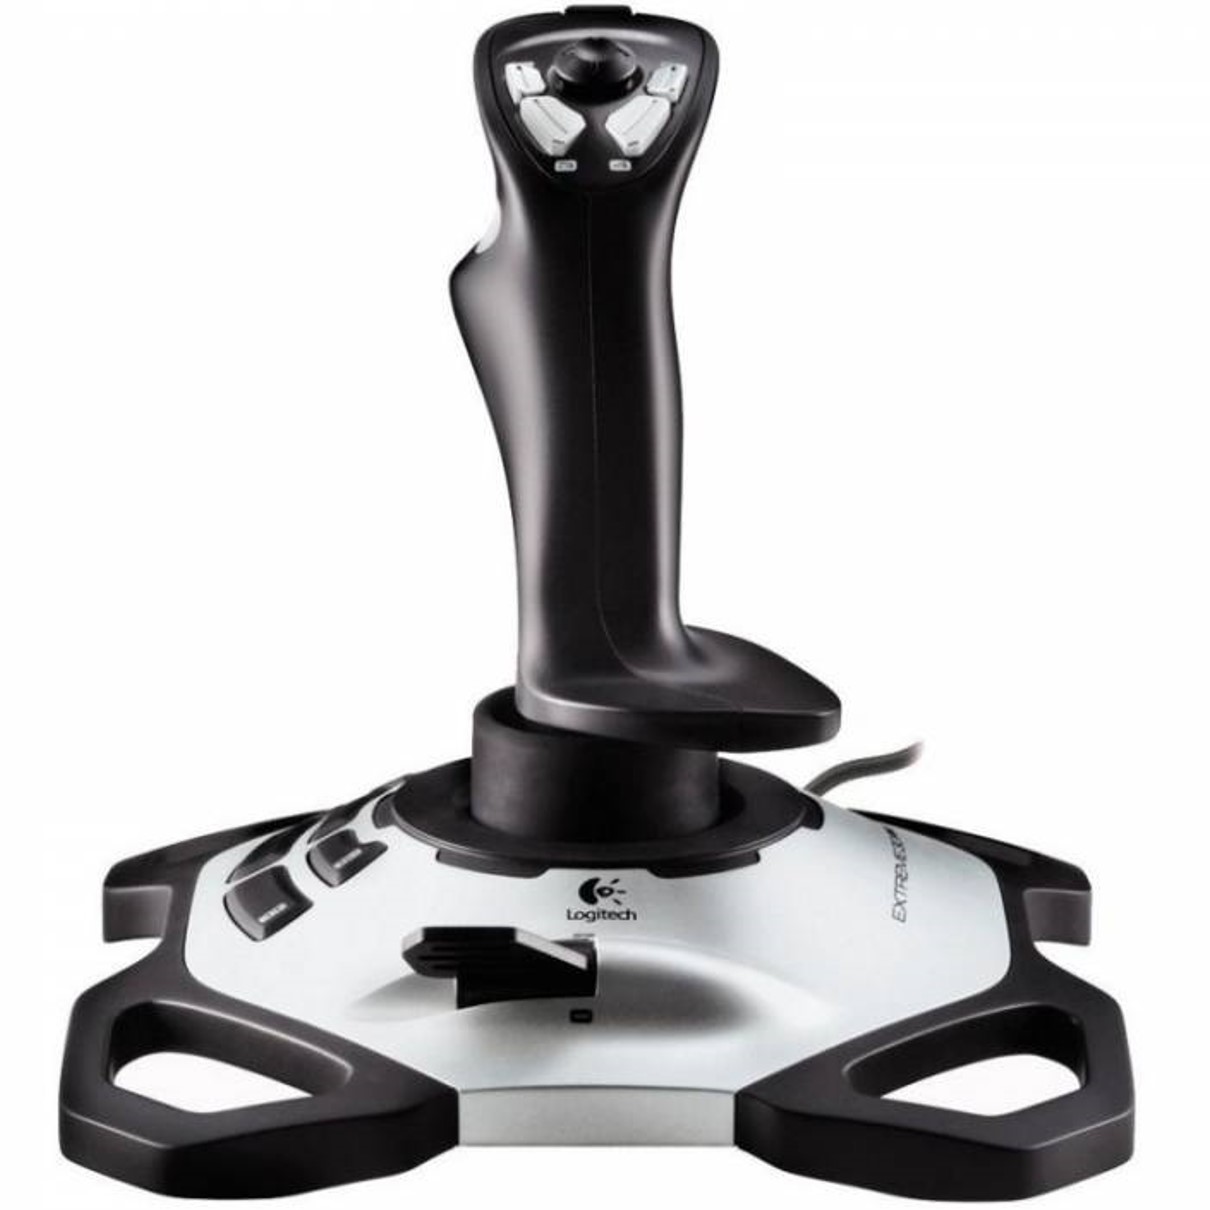
Before you can start using the Logitech Extreme 3D Pro joystick, you’ll need to unbox it and familiarize yourself with its components. Follow these steps to unbox your joystick:
- Locate the package containing the Logitech Extreme 3D Pro joystick. It should be carefully sealed to ensure all components are intact.
- Use a pair of scissors or a box cutter to carefully open the packaging, being cautious not to damage the contents inside.
- Once the packaging is opened, you should find the joystick itself, along with any accompanying cables or accessories.
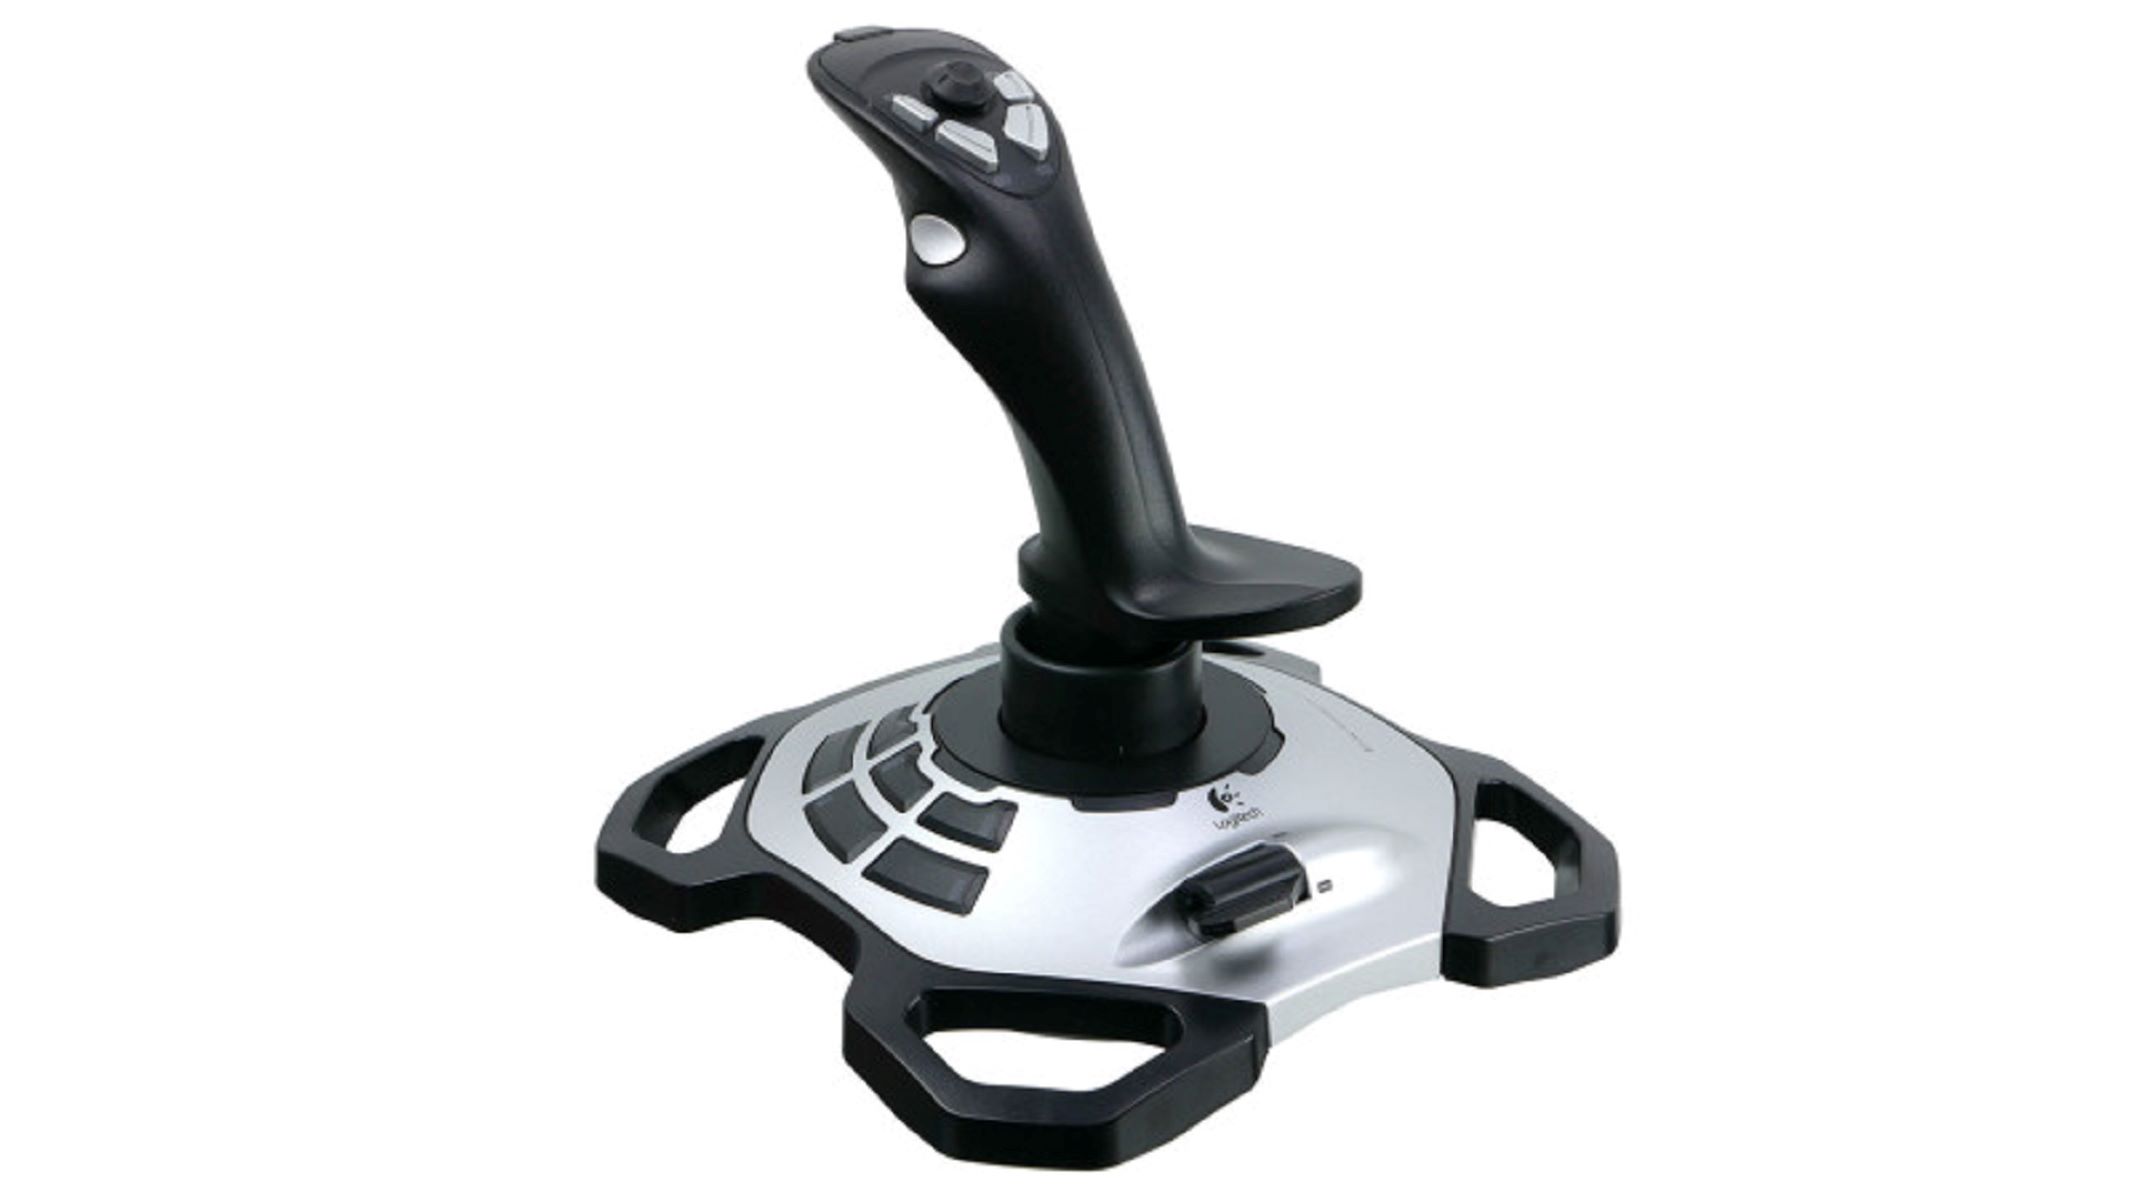
- Remove the joystick from its protective casing and take a moment to examine its design and construction. The Logitech Extreme 3D Pro features a comfortable grip and various buttons and controls that enhance your gaming experience.
- Inspect the cable that connects the joystick to your PC. Ensure that it is free from any visible damage or tangles.
- Lastly, check if there are any additional components or accessories included in the package, such as a user manual or driver installation CD. These resources will be helpful during the setup process.
It’s essential to handle the Logitech Extreme 3D Pro with care during the unboxing process to avoid any accidental damage. Once you have completed this step, you can move on to the next step, which involves connecting the joystick to your PC.
Step 2: Connecting the Joystick to your PC
Now that you have unboxed the Logitech Extreme 3D Pro joystick, it’s time to connect it to your PC. Follow these simple steps to establish a connection:
- Locate an available USB port on your computer. The Logitech Extreme 3D Pro joystick comes with a USB connector, which is the primary method of connecting it to your PC.
- Take the USB connector and insert it firmly into the USB port on your computer. Ensure that it is fully inserted to establish a secure and stable connection.
- Once connected, your PC should recognize the Logitech Extreme 3D Pro joystick and begin installing the required drivers automatically. If prompted to install drivers from a CD or the Logitech website, follow the instructions provided to complete the installation. This step may vary depending on your operating system.
- Allow your computer a few moments to recognize the joystick and establish the necessary connections. During this time, you may notice the joystick’s LED lights illuminate, indicating that it is powered and ready for use.
- To ensure that the joystick is properly connected and functioning correctly, navigate to the Device Manager on your PC. To do this, right-click on the Start button, select “Device Manager,” and expand the category labeled “Human Interface Devices.” You should see the Logitech Extreme 3D Pro joystick listed as one of the devices.
- If the joystick is listed without any warning icons or error messages, it means that the connection was successful, and you can proceed to the next step. However, if you encounter any issues or see any error messages, refer to the user manual or visit the Logitech support website for troubleshooting guidance.
Now that you’ve successfully connected the Logitech Extreme 3D Pro joystick to your PC, it’s time to move on to the next step, which involves installing the Logitech Gaming Software.
Step 3: Installing the Logitech Gaming Software
The Logitech Gaming Software is a powerful tool that allows you to customize the settings and features of your Logitech Extreme 3D Pro joystick. Follow these steps to install the software on your PC:
- Visit the Logitech support website or insert the driver installation CD provided with the joystick into your computer’s CD drive.
- Locate the Logitech Gaming Software download or installation file.
- Double-click on the installation file to begin the installation process. Follow the on-screen instructions to proceed.
- Read and accept the terms and conditions of the software license agreement.
- Choose the destination folder where you want the Logitech Gaming Software to be installed, or leave it as the default option.
- Click on the “Install” button and wait for the installation to complete. This process may take a few moments.
- Once the installation is finished, you may be prompted to restart your computer to finalize the software installation. If prompted, save any ongoing work and restart your PC.
- After your computer restarts, launch the Logitech Gaming Software from the desktop shortcut or the Start menu.
- The software will detect your connected Logitech Extreme 3D Pro joystick and display it in the main interface. This indicates that the software is successfully installed and ready to be used.
Congratulations! You have successfully installed the Logitech Gaming Software, which will now allow you to personalize and optimize your gaming experience with the Logitech Extreme 3D Pro joystick.
In the next step, we will cover the process of calibrating the joystick to ensure optimal performance and accuracy. So, let’s move on to Step 4!
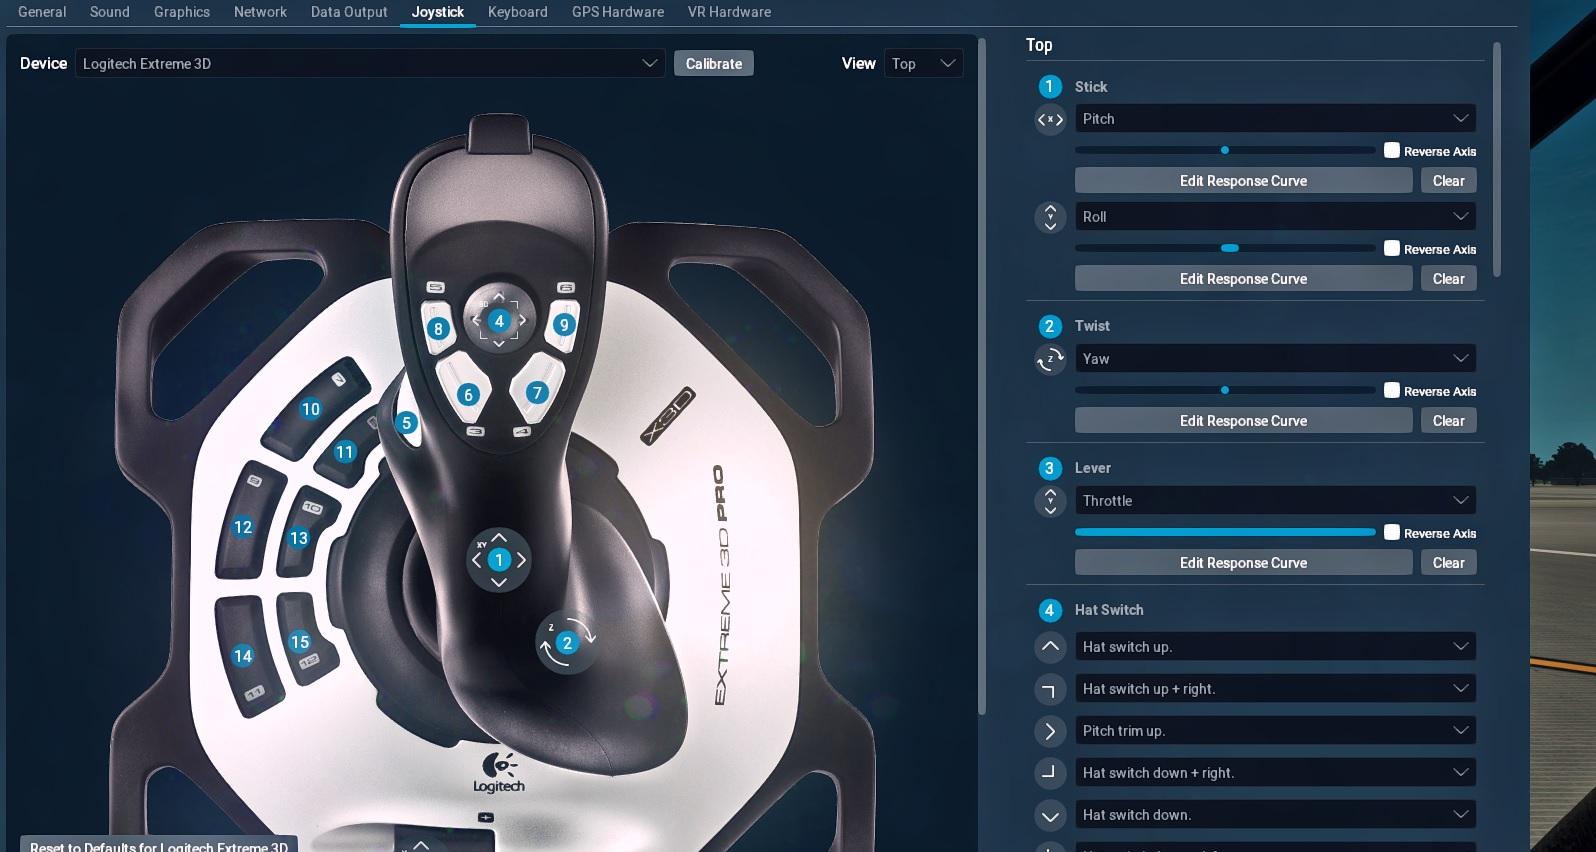
Step 4: Calibrating the Logitech Extreme 3D Pro
Calibrating your Logitech Extreme 3D Pro joystick is an essential step to ensure accurate and precise control while gaming. Follow these steps to calibrate your joystick:
- Open the Logitech Gaming Software on your computer. If you haven’t installed it yet, please refer to Step 3 for instructions on how to do so.
- In the Logitech Gaming Software interface, locate and click on the “Settings” tab.
- Within the Settings tab, navigate to the “Joystick” section. Here, you will find options related to calibrating and customizing your joystick.
- Click on the “Calibrate” button to initiate the calibration process. This action will open a new window that guides you through the calibration steps.
- Follow the on-screen instructions provided by the calibration wizard. Typically, you will be asked to center each axis of the joystick and move it to its extreme positions.
- Make sure to follow the prompts precisely and take your time to perform each action accurately.
- Once you have completed the calibration process, click on the “Finish” or “Done” button to save your settings.
- You can also customize additional settings in the Logitech Gaming Software, such as button mapping, sensitivity adjustments, and advanced features. Explore the software to personalize your gaming experience further.
Calibrating the Logitech Extreme 3D Pro ensures that your joystick is correctly recognized by your computer and provides precise control during gameplay. By following these steps, you can optimize the performance of your joystick and enjoy a smooth gaming experience.
With the calibration complete, let’s move on to the next step, where we will cover customizing buttons and assigning commands to enhance your gaming experience even further.
Step 5: Customizing Buttons and Assigning Commands
One of the great advantages of the Logitech Extreme 3D Pro joystick is its ability to be customized and tailored to your individual gaming preferences. Follow these steps to customize the buttons and assign commands:
- Launch the Logitech Gaming Software on your computer.
- In the software interface, locate and click on the “Settings” tab.
- Within the Settings tab, navigate to the “Joystick” section.
- Here, you will find several options for customizing your joystick.
- To assign commands to specific buttons, simply click on the button you want to customize.
- A drop-down menu will appear, allowing you to select from a wide range of pre-defined functions or macros.
- If you prefer, you can create custom commands by selecting the “Edit” option and entering your desired command.
- Repeat this process for each button you want to customize.
- You can also adjust the joystick’s sensitivity and axis settings within the software to further fine-tune your gaming experience.
Customizing buttons and assigning commands allows you to optimize your Logitech Extreme 3D Pro joystick to suit your specific gaming needs. Whether you prefer easy access to certain functions or want to streamline complex commands, this step gives you the flexibility to create a personalized setup.
Take your time to experiment with different button configurations and functions until you find the perfect setup that enhances your gaming performance and enjoyment.
With your customized settings in place, let’s move on to Step 6, where we will test the joystick with compatible games to ensure everything is working correctly.
Step 6: Testing the Joystick with Compatible Games
Now that you have customized your Logitech Extreme 3D Pro joystick and assigned commands to the buttons, it’s time to put it to the test with some compatible games. Follow these steps to ensure your joystick is working correctly:
- Launch a compatible game that supports joystick input. Flight simulators, space exploration games, and combat flight games are some popular genres that typically offer joystick support.
- Check the game’s settings or options menu for joystick configuration. Look for an option to enable joystick input or search for a control settings section.
- Within the game’s control settings, locate the joystick configuration options. Depending on the game, you may find options to calibrate or map joystick buttons and axes.
- Ensure that the game recognizes your Logitech Extreme 3D Pro joystick. If it is properly connected and calibrated, the game should detect it automatically.
- Test the joystick by moving the axes and pressing the buttons. Verify that the game’s on-screen actions correspond to your joystick inputs.
- If necessary, make any additional adjustments within the game’s control settings to fine-tune the joystick response and button assignments.
- Continue playing the game and take note of how the Logitech Extreme 3D Pro enhances your gaming experience. Enjoy the precise control and immersive gameplay that the joystick provides.
Testing the Logitech Extreme 3D Pro joystick with compatible games is an exciting step that allows you to fully experience the capabilities of your joystick. Make sure to explore various games and genres to take advantage of the enhanced immersion and control provided by the joystick.
Keep in mind that different games may require different configurations, so be prepared to adjust the joystick settings within each game accordingly.
Congratulations! You have successfully set up and tested your Logitech Extreme 3D Pro joystick. Embrace the enhanced control and immersive gameplay experience that this joystick offers as you embark on exciting gaming adventures.
Conclusion
Congratulations on successfully setting up your Logitech Extreme 3D Pro joystick! By following this comprehensive guide, you have unboxed the joystick, connected it to your PC, installed the Logitech Gaming Software, calibrated the joystick, customized buttons and assigned commands, and tested it with compatible games.
The Logitech Extreme 3D Pro joystick offers precise control, durability, and a customizable gaming experience. Whether you’re an avid flight simulator enthusiast or simply enjoy playing games that benefit from joystick input, this joystick will enhance your gaming sessions and immerse you in a whole new level of gameplay.
Remember to explore the various customization options within the Logitech Gaming Software to fine-tune your joystick settings and create a setup that perfectly suits your gaming style and needs. Additionally, regularly check for software updates and firmware updates from Logitech to ensure you’re making the most of your joystick’s capabilities.
Now that you have a firm grasp of the setup process and customization options, you’re ready to embark on thrilling gaming adventures with your Logitech Extreme 3D Pro joystick. Enjoy the precise control, immersive experience, and unparalleled enjoyment that this joystick brings to your favorite games.
So, buckle up and get ready to soar through the virtual skies like a seasoned pilot, or engage in heart-pounding combat with the confidence of a skilled warrior, all thanks to the Logitech Extreme 3D Pro joystick.
Happy gaming!