Introduction
Welcome to our guide on how to set up your LED TV for the best picture quality. As you unbox your brand new LED TV, you might be excited to jump right in and start enjoying your favorite shows and movies. However, taking a few minutes to properly set up your TV can make a world of difference in the picture quality and overall viewing experience.
LED TVs offer incredible clarity, vibrant colors, and sharp details that bring your entertainment to life. But to truly optimize their performance, it is essential to understand and adjust the various features and settings available.
In this guide, we will walk you through the step-by-step process of setting up your LED TV to ensure the best picture quality. From understanding the different settings to calibrating the color and modifying the sound, we have got you covered.
Before we dive into the specifics, it’s important to note that while the general steps remain similar, the exact settings and menus may vary depending on the make and model of your TV. Consult your TV’s user manual for further guidance tailored to your specific model.
So, let’s get started and unlock the full potential of your LED TV for an immersive and visually stunning viewing experience!
Understand Your TV’s Features and Settings
Before you begin adjusting your TV’s picture settings, it’s important to familiarize yourself with the various features and settings available. This will help you make informed decisions and optimize the picture quality according to your preferences. Here are some key features and settings to consider:
- Picture Modes: Most LED TVs offer different picture modes, such as Standard, Movie, Sports, and Game. Each mode is optimized for specific content and lighting conditions. Experiment with different modes to find the one that suits your viewing preferences.
- Backlight and Contrast: The backlight controls the brightness of the TV, while the contrast determines the difference between light and dark areas. Adjust these settings to achieve a balanced picture with accurate brightness levels.
- Brightness: The brightness setting influences the overall luminance of the picture. It should be adjusted based on ambient lighting conditions. Lower the brightness in a dark room and increase it in a well-lit room to avoid eye strain and maintain clarity.
- Color Temperature: Color temperature refers to the warmth or coolness of the picture. It is measured in Kelvin. Most TVs offer options like Warm, Neutral, and Cool. Experiment with these settings to find the color temperature that appears natural and pleasing to your eyes.
- Sharpness: The sharpness setting controls the level of detail and clarity in the picture. Too high a sharpness level can result in artificial-looking images, while too low can make the picture appear soft. Adjust this setting to your preference, keeping in mind that some content may require more sharpness than others.
Getting acquainted with these settings will empower you to make effective adjustments and optimize your TV’s picture quality. Remember to make changes gradually and test them with different types of content to find the perfect balance.
Choose the Right Location and Lighting
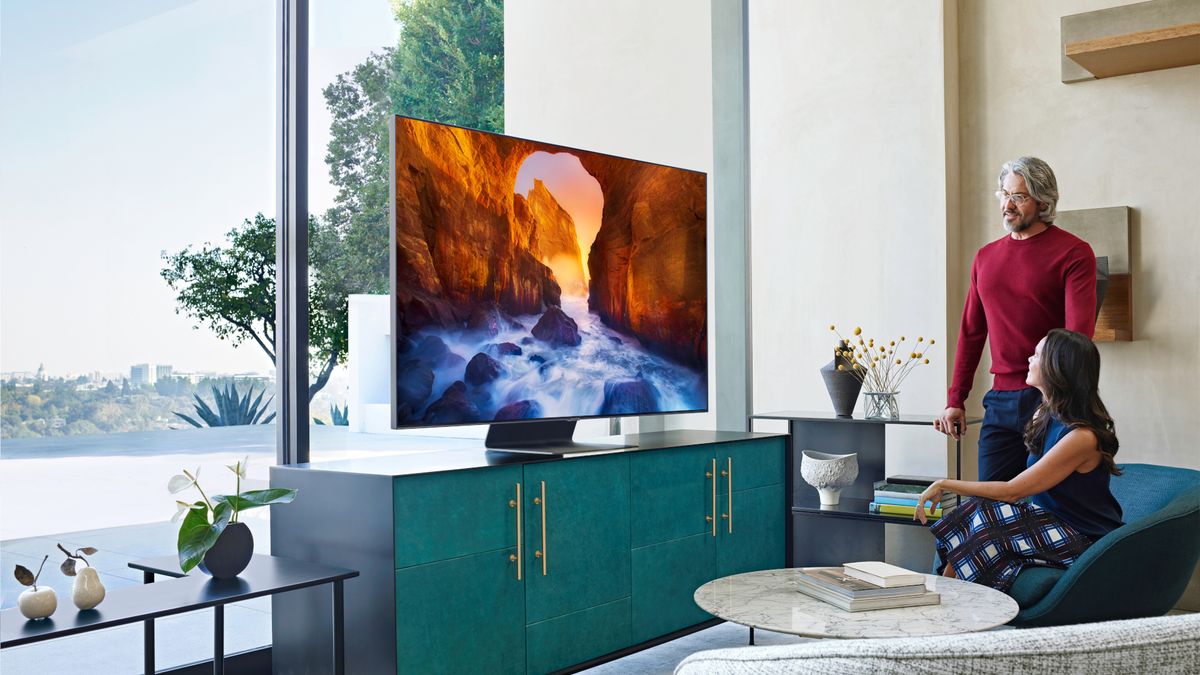
The location and lighting conditions of your TV can have a significant impact on the overall picture quality. Here are some factors to consider when choosing the right location for your LED TV:
- Distance and Viewing Angle: Select a location that allows for an optimal viewing distance and angle. The ideal distance is typically around 1.5 to 2.5 times the diagonal screen size. Ensure that you can comfortably view the screen without straining your eyes or neck.
- Avoid Glare and Reflections: Place your TV away from windows or other light sources that could cause reflections or glare on the screen. Glare can diminish the contrast and clarity of the picture, making it harder to enjoy the content. If necessary, use curtains or blinds to control incoming light.
- Ambient Lighting: Consider the lighting conditions in the room where your TV will be located. Harsh and direct lighting can wash out the colors and affect the overall image quality. Opt for softer, diffused lighting or adjustable lighting options to create a more immersive viewing experience.
- Room Color: The color of the walls in the room can impact how the TV’s colors appear. Neutral wall colors, such as white or gray, are recommended as they do not interfere with the color reproduction. Avoid extremely bright or overly dark wall colors that could distort the perceived picture quality.
By carefully choosing the location and taking lighting conditions into account, you can enhance the picture quality of your LED TV. A well-placed TV in a properly lit environment will provide a more captivating and immersive viewing experience.
Adjust the Picture Settings
Once you have chosen the right location and lighting for your LED TV, it’s time to adjust the picture settings to enhance the visual quality. Follow these steps to fine-tune the settings:
- Access the Settings Menu: Locate the settings menu on your TV. It is usually accessible through a button on the remote control or in the main menu.
- Picture Mode: Select the desired picture mode that best suits your preferences and content. Each mode is optimized for specific viewing experiences, such as movies, sports, or gaming.
- Backlight: Adjust the backlight setting to control the overall brightness of the display. Increase it for a brighter picture in well-lit rooms, or decrease it for a more comfortable viewing experience in darker environments.
- Contrast: Set the contrast level to determine the difference between light and dark areas on the screen. Increasing the contrast can make the picture more vibrant, but be cautious not to overdo it, as this may result in loss of detail.
- Brightness: Set the brightness level to optimize visibility. Adjust it based on the ambient lighting conditions in your room, ensuring that the picture is clear and comfortable to view without straining your eyes.
- Color Settings: Fine-tune the color settings to achieve accurate and vibrant colors. Adjust the color, hue, and saturation levels to your preference, making sure that the colors appear natural and lifelike.
- Sharpness: Control the sharpness level to enhance the clarity and detail of the picture. Be cautious not to set it too high, as it can introduce artifacts and make the image look artificial. Find the right balance based on your personal preference and the content you are watching.
Remember to take your time and make slight adjustments while observing the changes on the screen. Calibration is subjective, and what looks best to one person may differ for another. Trust your eyes and strive for a balanced and visually appealing picture that suits your viewing preferences.
Set the Proper Contrast, Brightness, and Sharpness Levels
Optimizing the contrast, brightness, and sharpness levels of your LED TV is crucial for achieving a clear and immersive viewing experience. Follow these guidelines to set these parameters correctly:
- Contrast: Adjust the contrast level to find the right balance between dark and light areas on the screen. Increasing the contrast will make the image more vibrant, while reducing it can enhance detail in darker scenes. Experiment with different levels until you achieve a visually pleasing balance.
- Brightness: The brightness setting affects the luminance of the picture. Adjust it based on the lighting conditions in your room. In a well-lit environment, increase the brightness so that the picture remains visible and clear. In a dimly lit room, decrease the brightness to avoid eye strain and enhance the contrast of the image.
- Sharpness: The sharpness level determines the crispness and clarity of the displayed content. While it may be tempting to set the sharpness to the maximum, doing so can result in artificial-looking images. Start by setting it to a moderate level and gradually adjust it based on your preference. Take into account the content you are watching, as some may benefit from higher sharpness levels (e.g., sports or video games).
When adjusting these settings, it can be helpful to have some reference material, such as test patterns or professionally calibrated images, to ensure accurate adjustments. Additionally, avoid making drastic changes to all settings at once. Instead, make subtle adjustments, observe the results, and fine-tune accordingly.
Ultimately, the goal is to achieve a visually pleasing and natural-looking image that enhances your viewing experience. Experiment with different settings, take your time to find the right balance, and trust your eyes to make the adjustments that best suit your preferences and content.
Calibrate the Color and Tint
Calibrating the color and tint settings of your LED TV is essential to ensure accurate and vibrant colors. Follow these steps to calibrate these parameters:
- Color Temperature: The color temperature determines the warmth or coolness of the picture. Most TVs offer preset options like Warm, Neutral, and Cool. Start by selecting the appropriate preset and assess if the colors appear natural and pleasing to your eyes. If necessary, fine-tune the color temperature by adjusting the RGB levels individually.
- Color Saturation: Adjust the color saturation level to control the intensity and richness of the colors. Be careful not to oversaturate the colors, as this can result in an unnatural and artificial-looking image. Make subtle adjustments to achieve a balanced and lifelike color representation.
- Tint: The tint setting affects the balance between red and green colors in the image. Use the tint adjustment to eliminate any color cast or hue imbalance. Adjust it until the picture appears neutral, without any visible dominance of red or green tones.
When calibrating the color and tint settings, it’s crucial to use high-quality reference material, such as calibration discs or professional test patterns, if available. These references can provide a more accurate representation of colors and help you fine-tune the settings effectively.
Remember that personal preference plays a significant role in color calibration. Different lighting conditions and individual visual preferences can impact your perception of color. Therefore, trust your eyes and make adjustments that look natural and visually appealing to you.
By calibrating the color and tint settings of your LED TV, you can enjoy accurate and vibrant colors that bring your content to life. Take your time, experiment with different settings, and find the perfect balance that suits your viewing preferences and makes the colors on your screen truly captivating.
Enable Motion Smoothing and Noise Reduction
Enabling motion smoothing and noise reduction features on your LED TV can enhance the overall picture quality and clarity. Here’s how to utilize these settings:
- Motion Smoothing: Motion smoothing, also known as motion interpolation or motion enhancement, aims to reduce motion blur and improve the smoothness of on-screen movements. This feature works by inserting extra frames between the original frames to create a smoother transition. While it can make fast-paced content, such as sports or action movies, appear more fluid, some viewers prefer the traditional cinematic look without motion smoothing. Experiment with the motion smoothing settings to determine what suits your preferences.
- Noise Reduction: Noise reduction filters help in reducing visual artifacts and graininess in the picture caused by low-quality sources, weak signals, or poor video compression. It can be particularly beneficial when watching older movies or low-resolution content. However, excessive noise reduction can lead to loss of detail and a softening effect. Adjust the noise reduction settings to find the optimal balance between reducing unwanted noise and preserving picture clarity.
It’s important to note that enabling motion smoothing and noise reduction features can impact the overall viewing experience differently for each individual. Some users may love the smoothness and clarity they offer, while others may prefer a more natural or film-like look. Ultimately, the choice depends on personal preference and the type of content you are watching.
Remember to make gradual adjustments and observe the results while viewing different types of content. Experiment with different settings to find the ideal balance that enhances the picture quality while maintaining a visual presentation that aligns with your preferences.
By enabling motion smoothing and noise reduction features, you can potentially enjoy a smoother and clearer viewing experience with reduced visual distractions and improved picture quality.
Adjust the Aspect Ratio and Screen Size
Adjusting the aspect ratio and screen size settings of your LED TV is crucial to ensure that the displayed content is properly proportioned and maximizes the viewing area. Follow these steps to adjust these parameters:
- Aspect Ratio: The aspect ratio determines the proportional relationship between the width and height of the displayed image. Most modern TVs have a default aspect ratio of 16:9, which is suitable for most content. However, certain older movies or TV shows may have a different aspect ratio, such as 4:3. Adjust the aspect ratio setting to match the content you are watching, and ensure that the image is not stretched or distorted.
- Screen Size: The screen size setting allows you to adjust the displayed image size to fit your viewing needs. This setting is particularly useful if you are watching content that isn’t being displayed in its original aspect ratio. Resize the image until it fills the screen without cropping essential information, such as subtitles or on-screen menus.
When adjusting the aspect ratio and screen size, it’s essential to preserve the original integrity of the content. Avoid stretching or zooming in excessively, as this can distort the images and lead to an inaccurate representation of the intended visuals.
For precise adjustments, consult the aspect ratio and screen size recommendations provided with the content you are watching. These guidelines, often mentioned in the DVD or Blu-ray menu options, can help you select the most appropriate settings for a true-to-source viewing experience.
By adjusting the aspect ratio and screen size settings of your LED TV, you can ensure that the content is displayed accurately, maximizing your viewing area while preserving the intended visual proportions.
Optimize the Sound Settings
While picture quality is crucial, the sound quality of your LED TV plays an equally important role in enhancing your overall viewing experience. Here are some tips to help you optimize the sound settings:
- Audio Presets: Most LED TVs offer pre-set audio modes like Standard, Movie, Music, or Sports. These presets are optimized for specific types of content. Experiment with different audio presets to find the one that suits your preferences and enhances the audio quality for the content you are watching.
- Equalizer Settings: Some TVs allow you to adjust the equalizer settings to fine-tune the audio output to your liking. The equalizer enables you to modify the levels of different frequency ranges, such as bass, mid-range, and treble, for a more custom audio experience. Play around with these settings to enhance the sound balance and make it more enjoyable to your ears.
- Virtual Surround Sound: If your TV comes with a virtual surround sound option, enable it to create a more immersive audio experience. Virtual surround sound attempts to replicate a multi-speaker setup, making the sound feel more expansive. This feature is particularly beneficial when watching movies or playing video games that benefit from a more immersive audio environment.
- External Speakers or Soundbar: Consider connecting external speakers or a soundbar to your LED TV for a more immersive and high-quality audio experience. The built-in speakers on most TVs can be limited in terms of sound quality, and external speakers can provide enhanced sound reproduction and clarity.
When optimizing the sound settings, take into account the size and layout of your viewing area, as well as personal audio preferences. Experiment with different settings and configurations to find the optimal sound quality that elevates your viewing experience to the next level.
Remember to periodically check for firmware updates for your TV, as manufacturers often release updates that can improve sound quality and add new features. Keeping your TV updated ensures that you are getting the best possible audio performance.
By optimizing the sound settings of your LED TV, you can create a more immersive and enjoyable audio experience that complements the stunning visuals on your screen, resulting in a more satisfying overall viewing experience.
Additional Tips to Enhance Picture Quality
While adjusting the settings on your LED TV is essential for optimizing picture quality, there are a few additional tips you can follow to further enhance the visual experience:
- Keep Your TV Clean: Dust and smudges on the screen can affect the picture quality. Regularly clean your TV screen with a soft, lint-free cloth to remove any dirt or fingerprints. Avoid using harsh chemicals, as they can damage the screen.
- Update Firmware: Check for firmware updates for your TV and install them regularly. Manufacturers often release updates to address bugs, improve performance, and introduce new features that can enhance the picture quality of your LED TV.
- Use High-Quality Content: Whenever possible, watch content in high-definition (HD) or ultra-high definition (UHD) formats, such as Blu-ray or streaming services that offer 4K resolution. High-quality content provides sharper details, vibrant colors, and improved overall picture quality compared to standard-definition content.
- Improve Room Lighting: Consider controlling ambient light in your viewing room. As much as possible, minimize glare and prevent direct sunlight from hitting the TV screen. Using curtains or blinds can help you achieve better viewing conditions and enhance picture quality.
- Avoid Vivid or Dynamic Modes: While some TVs offer vivid or dynamic picture modes that promise enhanced colors and contrast, they often sacrifice accuracy for a more eye-catching display. Stick to standard modes or movie modes for more natural and true-to-life picture quality.
- Adjust Subtitle Settings: If you frequently watch content with subtitles, adjust the subtitle settings to ensure they are clear and visible without blocking important parts of the screen. Most TVs offer options to adjust the size, color, and position of subtitles for a better viewing experience.
By following these additional tips, you can further enhance the picture quality of your LED TV. Remember that every viewing environment is unique, so feel free to experiment with various settings to find what works best for your specific setup and personal preferences.
Conclusion
Setting up your LED TV for the best picture quality involves a combination of adjusting various settings, optimizing the viewing environment, and considering personal preferences. By following the steps outlined in this guide, you can unlock the full potential of your LED TV and enjoy a more immersive and visually stunning viewing experience.
Understanding your TV’s features and settings allows you to make informed decisions and tailor the picture quality according to your preferences. Choosing the right location and lighting ensures that the screen is free from glare and distractions, enhancing the overall viewing experience.
Adjusting the contrast, brightness, and sharpness levels helps to achieve a balanced and clear picture quality, while calibrating the color and tint settings ensures accurate and vibrant colors. Enabling motion smoothing and noise reduction features can further enhance the visual clarity, while optimizing the sound settings complements the stunning visuals with immersive audio.
Additionally, considering the aspect ratio and screen size ensures that the content is displayed in the proper proportions, and following the additional tips provided helps to further enhance picture quality.
Remember that every TV and viewing environment is unique, so don’t be afraid to experiment with different settings and configurations until you find the optimal setup that suits your preferences and provides the best viewing experience for the content you enjoy.
Now that you have learned how to set up your LED TV for the best picture quality, it’s time to sit back, relax, and immerse yourself in your favorite movies, shows, and games with breathtaking visuals that bring the entertainment to life.


