Introduction
Welcome to our guide on how to set up Avast Free Antivirus! In today’s digital world, keeping our computers protected from threats is of utmost importance. Avast Free Antivirus is a popular and highly effective antivirus software that provides comprehensive protection from various malware, viruses, and other online threats.
Whether you’re a seasoned computer user or a novice, this step-by-step guide will walk you through the process of downloading, installing, and configuring Avast Free Antivirus, ensuring that your computer is safeguarded against potential threats.
Avast Free Antivirus offers a range of features, including real-time protection, scanning for malware, phishing protection, and web shield functionality. With its user-friendly interface and powerful security capabilities, it’s no wonder that Avast Free Antivirus is trusted by millions of users worldwide.
In this guide, we will cover the essential steps to get Avast Free Antivirus up and running on your computer. We will explore how to download the software, install it correctly, and configure the initial settings. Additionally, we will discuss running scans, setting up real-time protection, updating the software, and customizing the advanced settings to meet your specific needs.
No matter if you’re using a Windows or Mac operating system, our guide is designed to walk you through the setup process and ensure that you have the necessary protection in place to keep your computer secure.
So, without further ado, let’s dive into the step-by-step instructions on how to set up Avast Free Antivirus and enjoy a safe and secure digital experience!
Step 1: Downloading Avast Free Antivirus
The first step in setting up Avast Free Antivirus is to download the software from the official Avast website. Follow these simple steps to get started:
- Open your web browser and go to the Avast official website.
- On the homepage, you will find a prominent “Download Free Antivirus” button. Click on it.
- The website will detect your operating system automatically and provide you with the correct version of Avast Free Antivirus to download. If it doesn’t, select your operating system from the drop-down menu and click “Download”.
- Your browser will start downloading the Avast Free Antivirus installer file. The file size is relatively small, so it should not take too long to download.
- Once the download is complete, locate the installer file in your downloads folder or the location where your browser saves downloaded files.
It is important to note that Avast Free Antivirus is a legitimate software developed by Avast, so you should always download it from their official website to ensure you’re getting the genuine version and avoiding any potential risks or malware.
Now that you have successfully downloaded the Avast Free Antivirus installer, you’re ready to move on to the next step, which is installing the software on your computer.
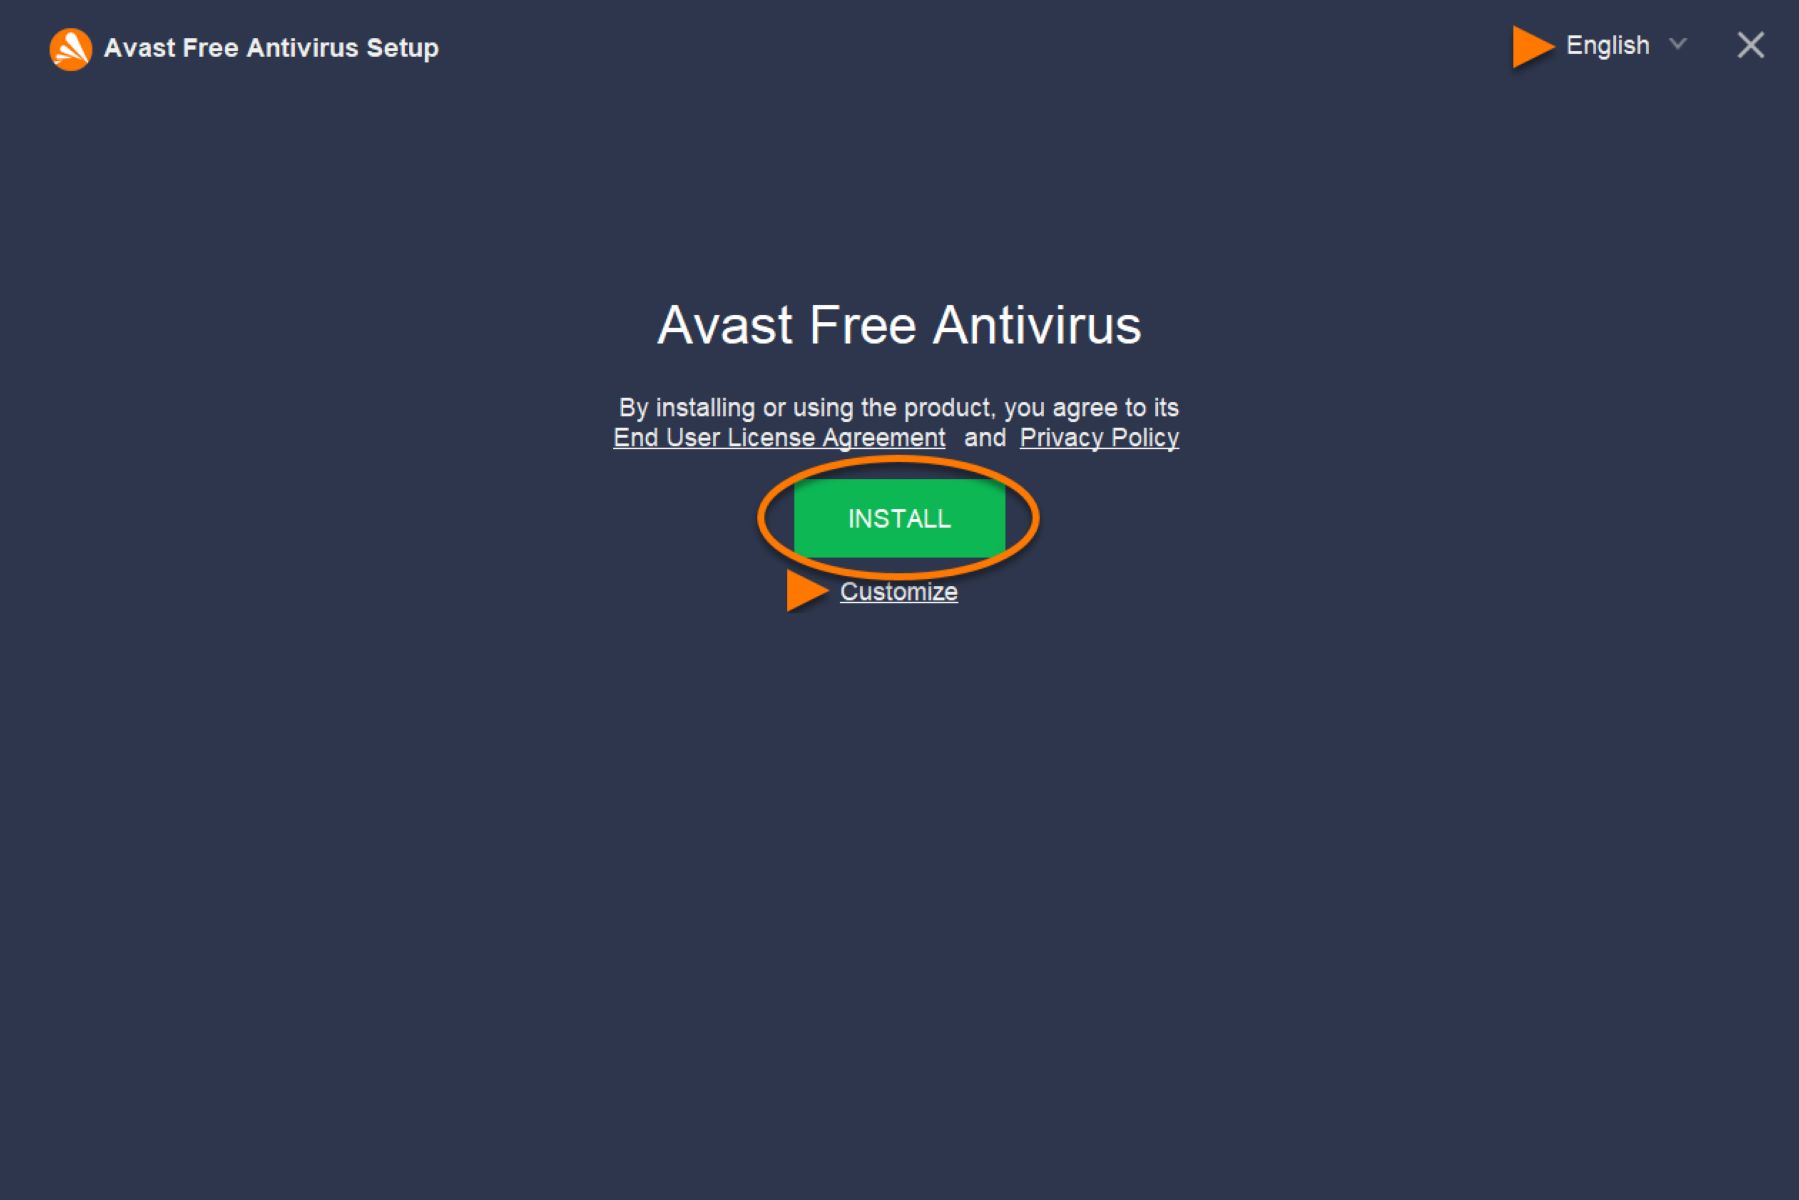
Step 2: Installing Avast Free Antivirus
With the Avast Free Antivirus installer file downloaded to your computer, it’s time to proceed with the installation process. Follow these steps to install Avast Free Antivirus:
- Locate the Avast Free Antivirus installer file that you downloaded in the previous step.
- Double-click on the installer file to run it. This will launch the Avast Setup Wizard.
- Choose your preferred language for the installation process and click “Install”.
- Avast will now begin the installation process. This may take a few moments, so be patient.
- During the installation, Avast may offer additional features or products. If you’re only interested in installing Avast Free Antivirus, ensure that the checkboxes for any additional features are unchecked.
- Follow the on-screen prompts and instructions to complete the installation. Avast will automatically configure your settings based on recommended preferences, but you can customize them later if desired.
- Once the installation is complete, you will see a confirmation message indicating that Avast Free Antivirus has been successfully installed.
Congratulations! You’ve now installed Avast Free Antivirus on your computer. The software is ready to start protecting your system from various threats. However, before you begin using Avast, it’s important to perform some initial configuration, which we will cover in the next step.
Step 3: Initial Configuration
After installing Avast Free Antivirus, it’s crucial to perform some initial configuration to ensure that the software is optimized based on your preferences. Follow these steps to get started:
- Open Avast Free Antivirus by double-clicking on its icon on your desktop or by searching for it in the Start menu.
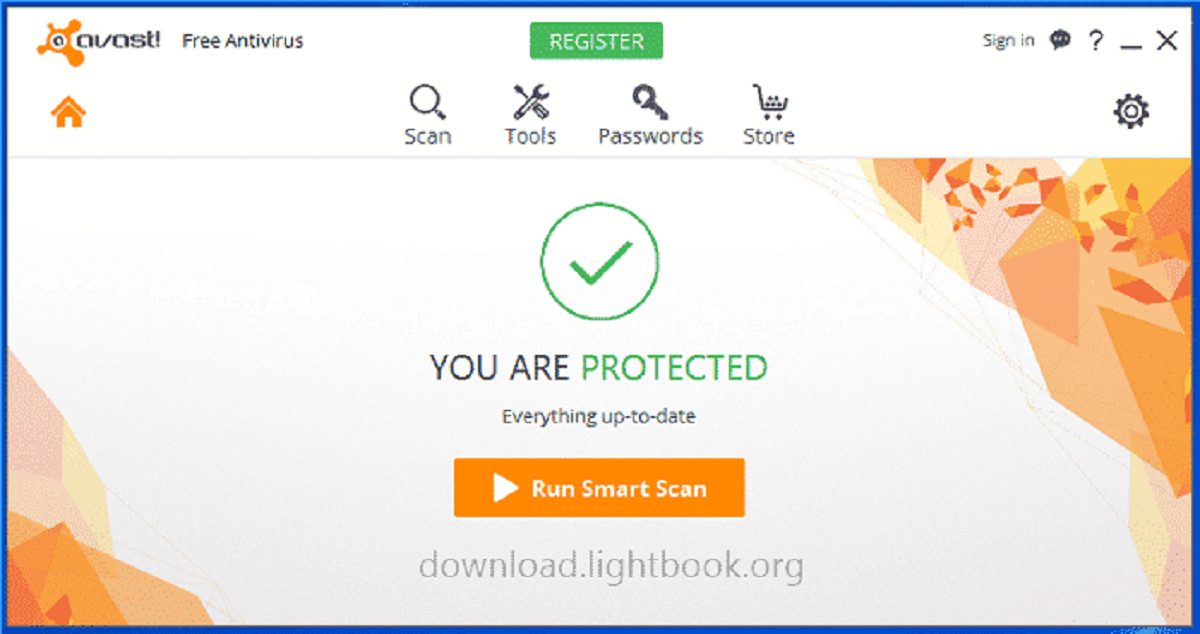
- Once Avast is open, you will be greeted by the main dashboard. Here, you can see an overview of your system’s protection status.
- Click on the “Menu” button in the top-right corner of the Avast window, and then select “Settings” from the dropdown menu.
- In the Settings menu, you’ll find various categories on the left-hand side. Explore each category to customize Avast according to your preferences.
- Start with the “General” category, where you can configure basic settings such as notifications and sounds.
- Next, navigate to the “Protection” category to adjust the real-time scanning, web shield, email shield, and other protection features.
- Take some time to review and configure the settings in other relevant categories, such as “Update”, “Privacy”, and “Performance”. Adjust the options based on your needs and priorities.
- Once you have customized the settings to your liking, click on the “OK” button to save the changes.
By going through the initial configuration, you can ensure that Avast Free Antivirus is set up based on your preferences and provides the optimal level of protection for your computer.
Now that you have completed the initial configuration, you can move on to the next step, which involves running a full system scan to check for any existing threats on your computer.
Step 4: Running a Full System Scan
Running a full system scan with Avast Free Antivirus is an essential step to ensure that your computer is free from malware and other threats. Follow the steps below to initiate a full system scan:
- Open Avast Free Antivirus and make sure you are on the main dashboard.
- Click on the “Protection” tab at the left-hand side of the screen.
- Under the “Core Shields” section, click on the “Scan Now” button.
- A dropdown menu will appear, offering various scan options. Select “Full Virus Scan” to initiate a comprehensive scan of your entire system.
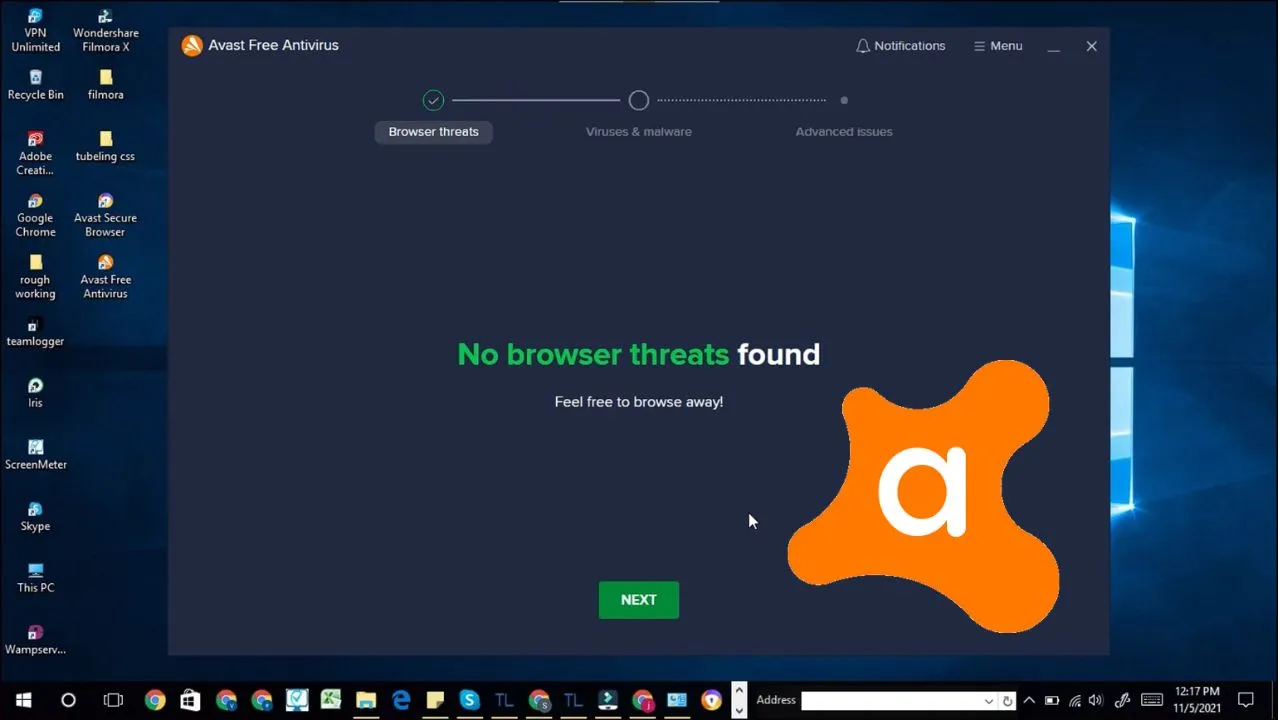
- Avast will now start scanning your computer for any potential threats. This process may take some time, depending on the size of your system and the number of files it needs to examine.
- While the scan is progressing, Avast will display the current status and any detected threats in real-time.
- Once the scan is complete, Avast will present you with a summary of the scan results, including any threats or issues found.
- If any threats are detected, Avast will provide options for dealing with them, such as quarantining or deleting the infected files.
- If no threats are found, you can rest assured that your computer is clean and secure.
Performing regular full system scans is crucial to maintain a secure environment for your computer. It helps to detect and remove any existing threats, ensuring that your data, privacy, and overall system performance are safeguarded.
Now that you have performed a full system scan, the next step is to set up real-time protection with Avast Free Antivirus to prevent any future threats from infiltrating your system.
Step 5: Setting Up Real-Time Protection
Real-time protection is a critical feature of Avast Free Antivirus that continuously monitors your computer for any malicious activities or threats in real-time. Follow these steps to set up real-time protection:
- Open Avast Free Antivirus and go to the main dashboard.
- Click on the “Protection” tab located in the left-hand side menu.
- Under the “Core Shields” section, you will find various components of real-time protection, such as File Shield, Behavior Shield, Web Shield, and more.
- Make sure all the components are enabled. If any of them are disabled, click on the toggle switch to turn them on.
- Each component comes with its own set of customizable settings. You can click on the gear icon next to each component to access and configure the specific settings according to your preferences.
- For example, in the File Shield settings, you can specify certain file types to be excluded from scanning, set up sensitivity levels, and choose how to handle detected threats.
- In the Web Shield settings, you can enable features like scanning for malicious downloads, blocking dangerous websites, and detecting phishing attempts.
- Make sure to review and adjust the settings for each component as needed to maximize your computer’s protection.
- Once you have modified the settings, click on the “OK” button to save your changes.
Setting up real-time protection ensures that Avast Free Antivirus actively monitors your computer’s activities, files, and internet connections in real-time, providing proactive protection against potential threats. This helps to prevent malware infections, phishing attacks, and other malicious activities that could compromise your system’s security.
With real-time protection enabled, Avast Free Antivirus will proactively detect and block threats, keeping your computer safe while you browse the internet, download files, or perform any other online activities.
Now that you have set up real-time protection, it is essential to keep Avast Free Antivirus up to date with the latest virus definitions and program updates. This is covered in the next step.
Step 6: Updating Avast Free Antivirus
Regularly updating Avast Free Antivirus is crucial to ensure that your computer stays protected against the latest threats. Avast regularly releases updates that include new virus definitions, program enhancements, and security patches. Follow these steps to keep Avast Free Antivirus up to date:
- Open Avast Free Antivirus and go to the main dashboard.
- Click on the “Menu” button located in the top-right corner of the screen.
- In the dropdown menu, select “Settings” to access the Avast settings.
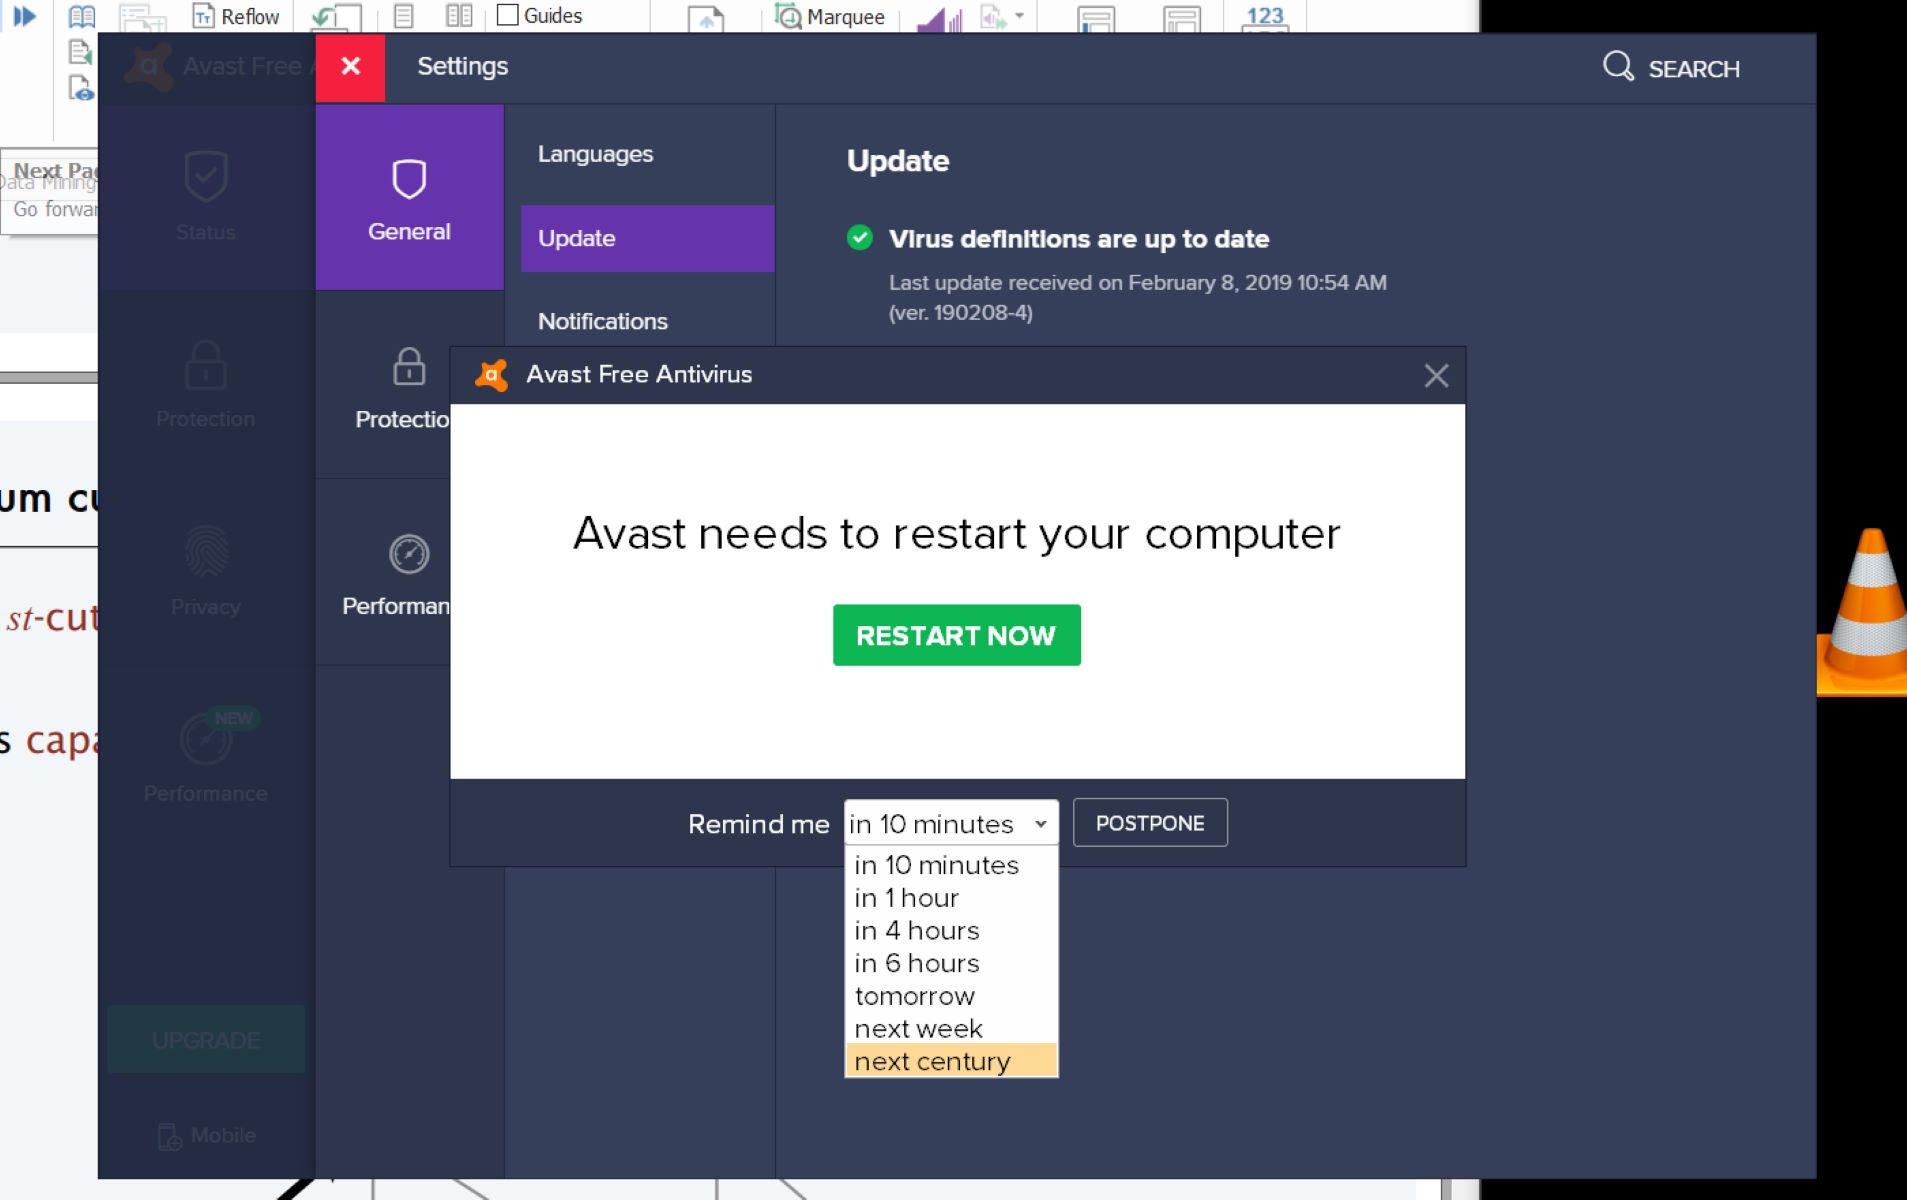
- In the Settings menu, click on the “General” category on the left-hand side.
- Under the “General” settings, you will find the option “Update”. Click on it.
- In the Update settings, you can configure how Avast should handle updates.
- By default, Avast is set to update automatically, which is the recommended option. This ensures that you receive timely updates without any manual intervention.
- If you prefer manual updates, you can choose the option to update when you want or set up a specific schedule.
- Once you have selected your preferred update settings, click on the “OK” button to save your changes.
Avast Free Antivirus will now automatically check for updates and install them as per your chosen settings. It is important to keep Avast up to date to ensure that you have the latest virus definitions, program enhancements, and security patches, providing you with the best possible protection against emerging threats.
Regular updates help Avast Free Antivirus to stay effective in detecting and preventing new malware, viruses, and other online threats. By keeping the software up to date, you can have peace of mind knowing that your computer is continuously protected.
Now that you have updated Avast Free Antivirus, the next step is to explore the various customization options available to tailor the software to your specific needs.
Step 7: Customizing Avast Free Antivirus Settings
Avast Free Antivirus offers a range of customization options that allow you to tailor the software to your specific needs and preferences. By exploring and adjusting these settings, you can optimize Avast’s performance and enhance your overall experience. Follow these steps to customize Avast Free Antivirus settings:
- Open Avast Free Antivirus and go to the main dashboard.
- Click on the “Menu” button located in the top-right corner of the screen.
- In the dropdown menu, select “Settings” to access the Avast settings.
- On the left-side menu, you will find various categories where you can customize different aspects of Avast.
- Start with the “General” category, where you can modify settings related to notifications, sounds, and appearance.
- Explore other categories such as “Protection” to adjust the behavior of each shield component, “Update” to configure update settings, and “Privacy” to manage data sharing preferences.
- Take some time to review and configure the settings in other relevant categories, such as “Performance” and “Troubleshooting”, which offer options to optimize system resources and resolve potential issues.
- Depending on your needs, you can also access more advanced settings by clicking on the “Troubleshooting” category and then selecting “Advanced” at the top of the screen.
- Make sure to save any changes you make by clicking on the “OK” button after modifying the settings in each category.
Customizing Avast Free Antivirus settings allows you to tailor the software to your preferences, ensuring an optimal balance between security, performance, and usability. By configuring the settings based on your specific needs, you can have a personalized experience while keeping your computer protected.
By completing these seven steps, you have successfully set up and customized Avast Free Antivirus on your computer. You are now equipped with top-notch protection against malware, viruses, and other online threats.
Remember to regularly update Avast Free Antivirus and perform regular scans to ensure continued protection. Additionally, stay vigilant while browsing the internet and downloading files, as safe computing practices are equally important in maintaining a secure system.
Enjoy your safe and secure digital experience with Avast Free Antivirus!
Conclusion
Congratulations! You have successfully followed our step-by-step guide to set up Avast Free Antivirus on your computer. By downloading, installing, and configuring this powerful antivirus software, you have taken a significant step towards safeguarding your system from malware, viruses, and other online threats.
Avast Free Antivirus offers robust protection with its real-time scanning, web shield, behavior shield, and other advanced features. By running regular full system scans and keeping the software up to date, you can ensure that your computer stays secure and your data remains protected.
Throughout this guide, we covered essential steps such as downloading Avast Free Antivirus, installing it correctly, configuring the initial settings, running full system scans, setting up real-time protection, updating the software, and customizing the advanced settings to meet your specific needs.
Remember, the threat landscape is constantly evolving, so it’s important to stay vigilant while browsing the internet, downloading files, and engaging in other online activities. Practice safe computing habits by avoiding suspicious websites, being cautious with email attachments, and keeping your operating system and other software up to date.
We hope this guide has provided you with a clear understanding of how to set up and customize Avast Free Antivirus. By following these steps, you can enjoy a safe and secure digital experience, knowing that your computer is protected by one of the most trusted antivirus solutions available.
Thank you for choosing Avast Free Antivirus, and we wish you a secure and worry-free computing experience!