Introduction
Virtual Reality (VR) headsets have revolutionized the way we experience entertainment and interact with digital environments. Whether you’re a gaming enthusiast, a fan of immersive experiences, or simply curious about the latest technology, setting up a VR headset opens up a whole new world of possibilities.
With the advancements in VR technology, these headsets have become more accessible and user-friendly. However, for those who are new to VR, the setup process can seem daunting. But fear not! In this guide, we will walk you through the steps to set up your VR headset, ensuring you get the best experience possible.
Before diving into the setup process, it’s important to choose the right VR headset for your needs. There are various options available in the market, each offering different features, specifications, and compatibility requirements. Consider factors such as your budget, the type of content you want to experience, and the platform you’ll be using.
Once you’ve selected your VR headset, the next step is to ensure that your system meets the necessary compatibility requirements. VR experiences demand substantial computing power, so it’s essential to have a capable computer or gaming console.
After verifying the system compatibility, the next stage involves installing the required software. VR headsets typically come with their own software ecosystem or rely on third-party applications. Taking the time to install and set up the necessary software will ensure a seamless VR experience.
Once the software is installed, it’s time to physically connect the VR headset to your device. This step may involve HDMI or USB connections, depending on the type of headset you have. Follow the manufacturer’s instructions to establish a secure and stable connection.
With the headset connected, it’s important to adjust the fit and comfort for an optimal experience. Each headset will have its own method of adjustment, which may involve straps, foam inserts, or interchangeable faceplates. Take the time to find the right fit and make sure the headset is comfortable to wear for extended periods.
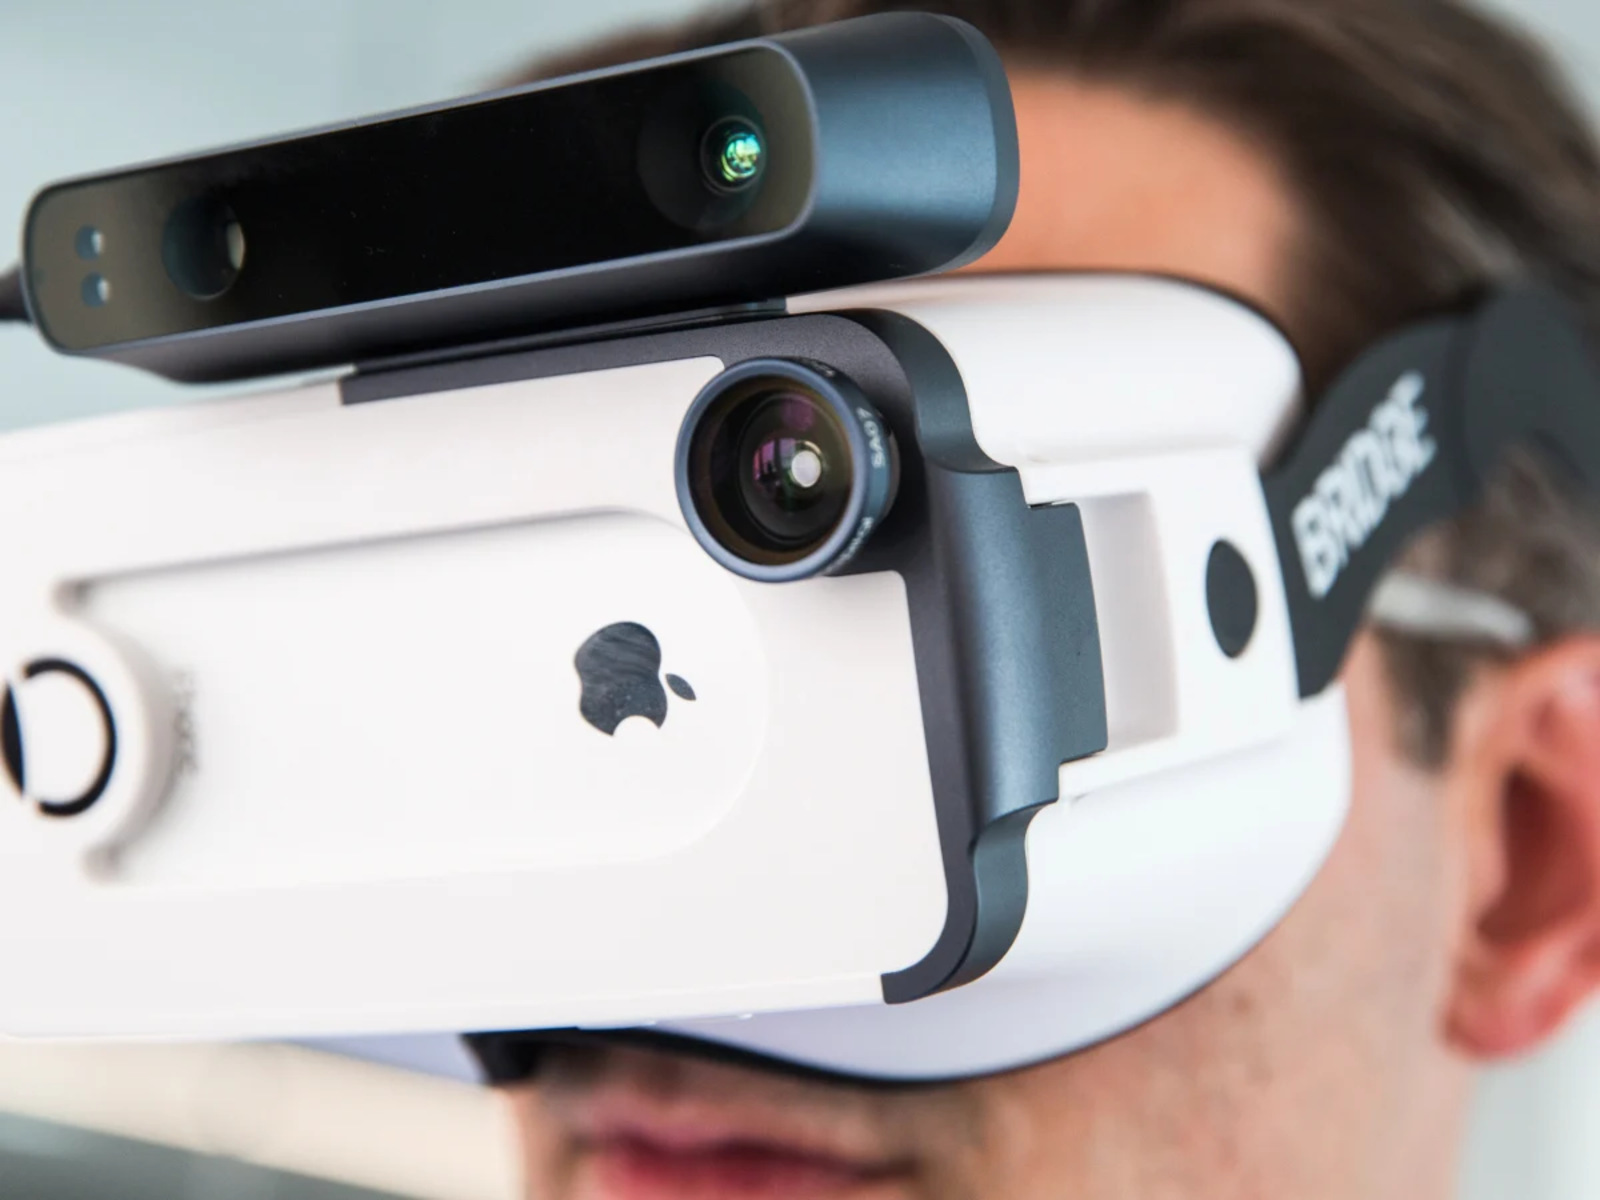
In addition to fit and comfort, most VR headsets utilize tracking sensors for accurate movement detection. These sensors, whether they are external devices or built-in cameras, need to be properly positioned and calibrated to ensure precise tracking of your movements in virtual reality.
Audio plays a crucial role in the immersive experience of VR. Make sure to configure the audio settings properly, whether it’s through built-in speakers, headphones, or external speakers. Additionally, if your VR headset has built-in microphones, check the microphone settings to ensure clear communication.
Controllers are an essential part of the VR experience, allowing you to interact with the virtual environment. Proper calibration of the controllers is necessary for accurate tracking and responsiveness. Follow the manufacturer’s instructions to calibrate the controllers for optimal performance.
Finally, it’s time to test your newly set up VR headset. Launch some VR applications or games and ensure that everything is working as intended. Take some time to familiarize yourself with the controls and navigation within the virtual world.
If you encounter any issues during the setup process or while using your VR headset, don’t panic. Troubleshooting common problems is part of the experience, and there are resources available online and support communities that can assist you in resolving any technical difficulties.
Now that you have a general understanding of how to set up a VR headset, let’s dive into each step in more detail to ensure you have an immersive and enjoyable virtual reality experience.
Choosing the Right VR Headset
When it comes to choosing a VR headset, there are several factors to consider. The market offers a range of options, each with its own features, specifications, and compatibility requirements. To ensure you make the right choice, let’s explore some key considerations.
First and foremost, set a budget for your VR headset. Prices can vary significantly, so it’s important to determine how much you’re willing to invest. Keep in mind that more expensive headsets often come with advanced features and better overall performance.
Next, think about the type of content you plan to experience. Are you primarily interested in gaming, virtual tours, or educational applications? Different headsets cater to different types of experiences. For example, some headsets are specifically designed for gaming and offer precise tracking and dedicated controllers.
Consider the platform you’ll be using the most. VR headsets are divided into PC-based, console-based, and standalone categories. PC-based headsets usually offer higher performance and greater immersion but require a powerful computer. Console-based headsets, on the other hand, are designed to work with specific gaming consoles, while standalone headsets are self-contained and do not require external devices.
Another crucial aspect is comfort. VR experiences can last for extended periods, so it’s important to choose a headset that fits comfortably on your head and doesn’t cause discomfort. Look for adjustable headbands, cushioned materials, and lightweight designs. Some headsets even offer interchangeable faceplates to accommodate different face shapes.
Take into account the tracking system of the VR headset. Tracking refers to the ability of the headset to detect and follow your movements in the virtual environment. Some headsets use external sensors or cameras, while others have built-in tracking capabilities. External sensors generally provide more accurate tracking but require more setup and space.
Lastly, consider the ecosystem and content availability. Each VR headset has its own software ecosystem, which includes a library of applications, games, and experiences. It’s essential to ensure that the headset you choose has a wide range of compatible content for you to enjoy.
By considering these factors, you can make an informed decision and choose the VR headset that best suits your needs and preferences. Remember to do thorough research, read reviews, and try out different headsets whenever possible. This will allow you to find the perfect VR headset that will transport you to a whole new world of virtual reality entertainment.
Checking System Compatibility
Before diving into the exciting world of virtual reality, it’s crucial to ensure that your system meets the necessary compatibility requirements. VR experiences demand substantial computing power, so it’s important to assess your current setup to avoid any performance issues or compatibility conflicts.
The first step is to check the hardware requirements for the VR headset you’ve chosen. These requirements may include minimum specifications for your computer’s processor, graphics card, RAM, and available storage space. Review the manufacturer’s guidelines to determine if your system meets these requirements. If it doesn’t, you may need to upgrade certain components or consider purchasing a more suitable VR headset for your setup.
Take note of the recommended specifications as well. While it’s possible to run VR experiences with the minimum requirements, meeting the recommended specifications will provide a smoother and more immersive experience.
Ensure that your operating system is compatible with the VR headset’s software requirements. Some VR headsets may only be compatible with specific versions of Windows, macOS, or even certain gaming consoles. It’s important to verify this information to avoid any compatibility issues during installation or usage.
Check if your computer or gaming console has the necessary ports for connecting the VR headset. Most headsets require HDMI or USB ports, so make sure your system has the appropriate ports available. Additionally, consider the number of ports required. Some headsets may need multiple connections, so ensure you have enough available ports.
Standalone headsets have their own hardware requirements, as they do not rely on a computer or gaming console. However, ensure that your device meets the compatibility requirements specified by the manufacturer. These requirements may include specific versions of operating systems, available storage space, and internet connectivity.
It’s also worth noting that VR experiences can be resource-intensive, so close any unnecessary applications or processes running in the background before launching a VR application. This will free up system resources and enhance the performance of the VR headset.
Lastly, consider the physical space needed for VR experiences. Some headsets require a dedicated play area to ensure safe movement without any obstacles. Measure the space you have available and compare it with the headset’s recommended play area. If your available space is limited, consider a VR headset that offers a more compact or room-scale experience.
By thoroughly checking the system compatibility before setting up your VR headset, you can avoid potential frustrations or disappointments. Ensure that your hardware, software, and available space align with the requirements specified by the manufacturer. This will ensure a smooth and enjoyable virtual reality experience.
Installing Necessary Software
Once you’ve chosen the right VR headset and ensured system compatibility, the next step is to install the necessary software. VR headsets typically come with their own software ecosystem or rely on third-party applications to deliver the immersive virtual reality experience. Here’s a step-by-step guide on installing the required software:
- Start by reading the manufacturer’s instructions that came with your VR headset. These instructions will outline the specific software requirements and provide guidance on where to download the software.
- Visit the official website or app store of the VR headset manufacturer. Look for the software or app that corresponds to your headset model and download it. You may need to create an account or sign in to access the software.
- If your VR headset relies on third-party applications, such as SteamVR or Oculus software, you’ll need to download and install those as well. These applications act as a hub for accessing and managing VR content.
- Follow the installation prompts and agree to any terms and conditions. Pay attention to any additional software or drivers that may be included in the installation. These may be necessary for proper functionality of the VR headset.
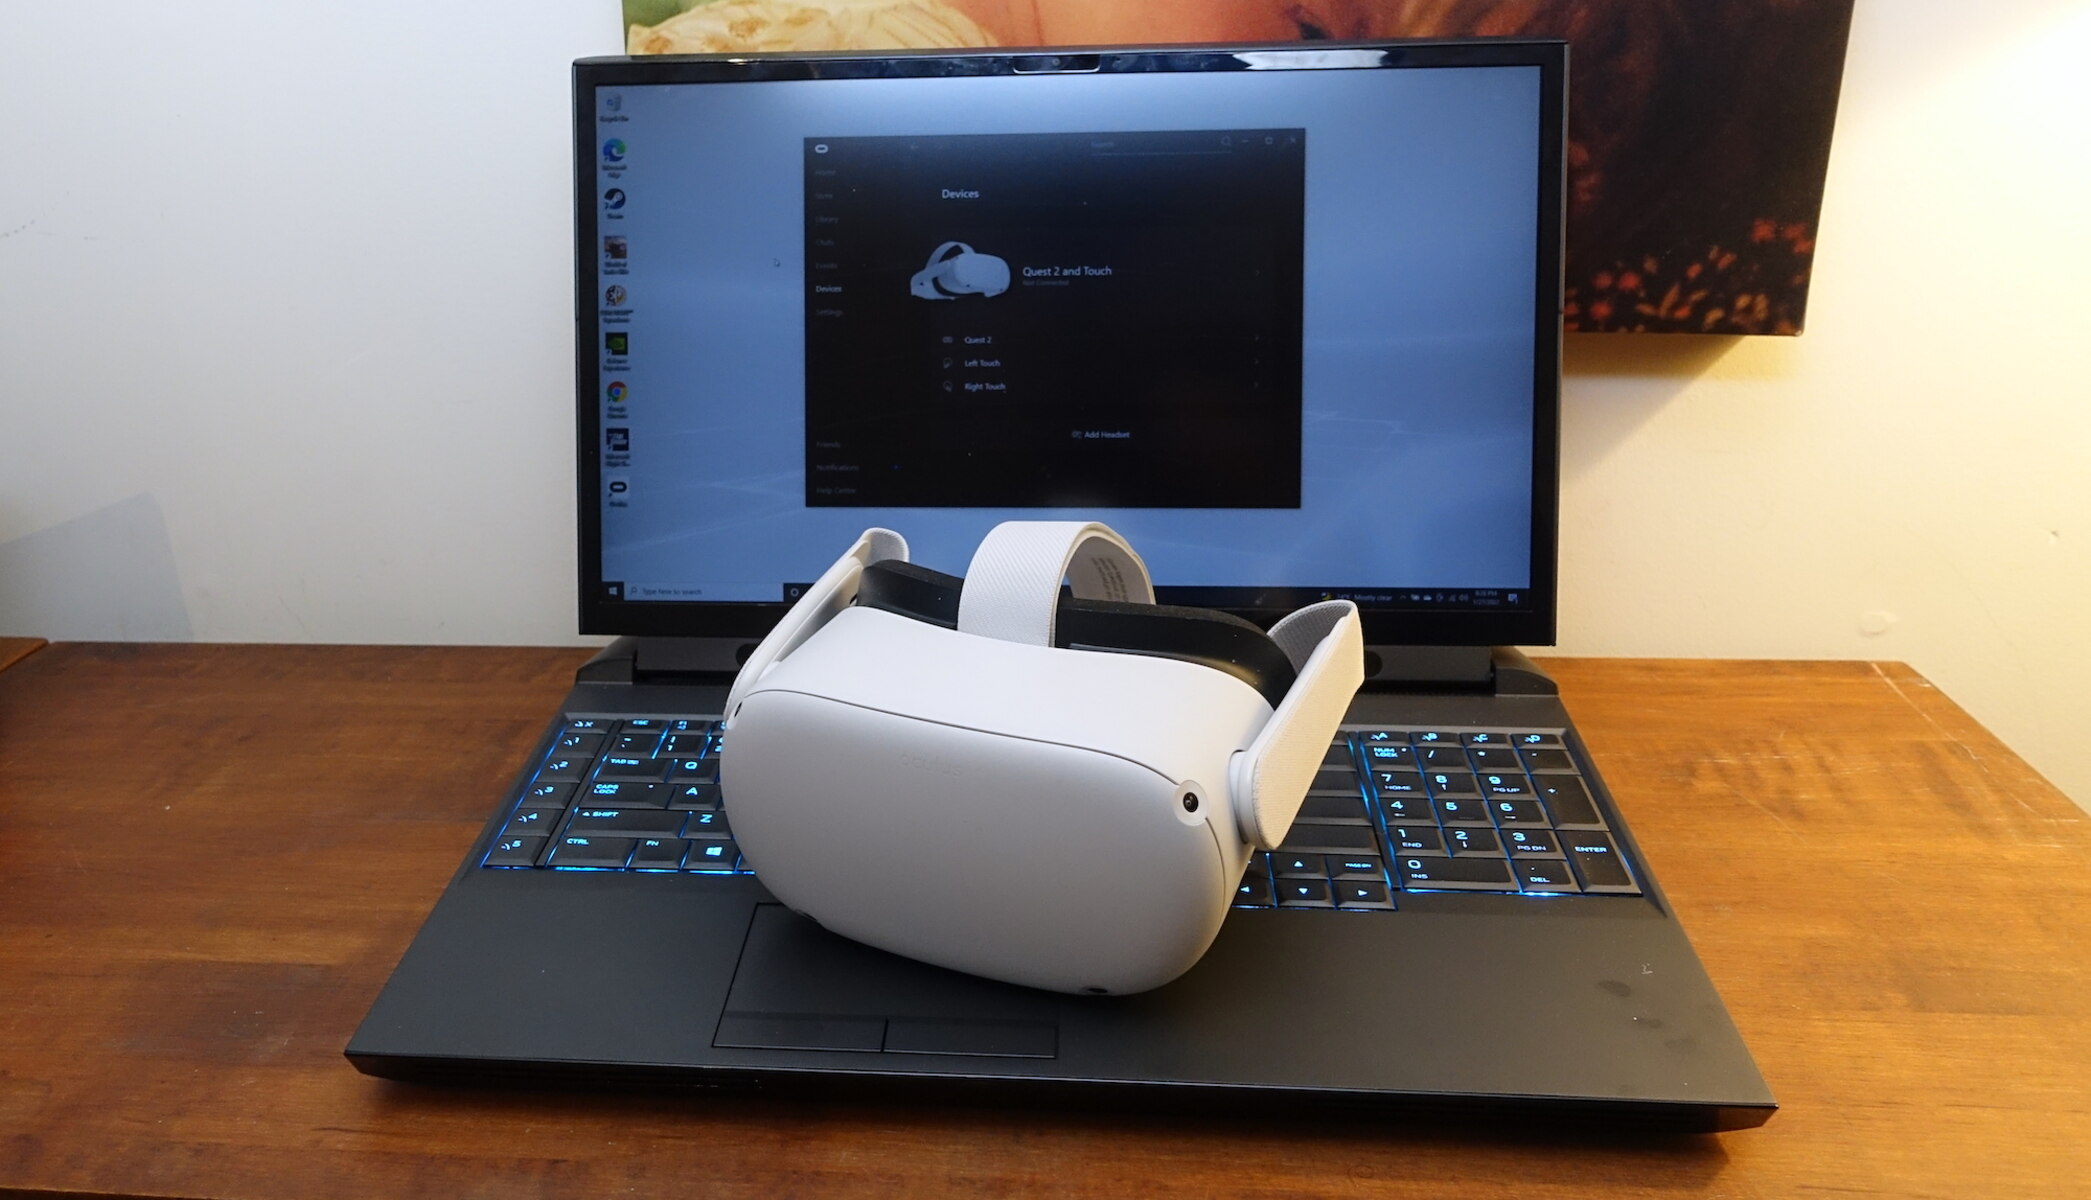
- Once the software is installed, connect your VR headset to your computer or gaming console according to the manufacturer’s instructions. Ensure that the headset is properly recognized and detected by the software.
- Launch the VR software or app on your computer or gaming console. You may be prompted to perform additional setup steps or firmware updates. Follow the on-screen instructions to complete these steps.
- If prompted, create or sign in to your VR headset account. This account may provide access to exclusive content, updates, and community features.
- Once the software is installed and set up, you’re ready to explore the world of virtual reality! Browse the library of VR experiences, games, and apps available and choose what interests you the most.
- Remember to keep the software and any associated drivers up to date. Manufacturers often release updates that improve performance, add new features, and enhance compatibility with the latest hardware.
By following these steps, you’ll ensure that the necessary software for your VR headset is properly installed and ready to use. Take your time to familiarize yourself with the software interface, settings, and options. This will allow you to customize your VR experience and make the most out of your virtual reality journey.
Connecting the VR Headset
With the necessary software installed, it’s time to connect your VR headset to your computer or gaming console. This step is crucial to establish a stable and secure connection for an immersive virtual reality experience. Follow these steps to connect your VR headset:
- Start by locating the appropriate cables for your VR headset. Most headsets utilize HDMI and USB connections, although the specific cables may vary depending on the headset model.
- Plug one end of the HDMI cable into the HDMI port on your computer or gaming console. Make sure the cable is securely connected.
- Connect the other end of the HDMI cable to the HDMI port on your VR headset. Again, ensure a secure connection.
- Next, locate the USB cable provided with your VR headset. Plug one end of the USB cable into a USB port on your computer or gaming console.
- Connect the other end of the USB cable to the corresponding USB port on your VR headset. This connection is essential for data transfer and power supply.
- Some VR headsets may require additional connections. For example, certain models may have a separate audio cable or wireless transmitters that need to be connected to the corresponding ports. Refer to the manufacturer’s instructions for any additional connection requirements.
- Once all the necessary cables are connected, ensure that the headset is turned on if it has a power switch. Some headsets may have an LED indicator that confirms a successful connection.
- Check your computer or gaming console to ensure that the VR headset is detected. You can usually find this information in the VR software or app installed on your system.
- If the VR headset is not detected, try restarting your computer or gaming console and reconnecting the cables. It’s also a good idea to check for any software updates for your system and the VR headset.
- If you’re using a wireless VR headset, follow the manufacturer’s instructions for the specific setup process. Wireless headsets often require additional steps, such as connecting to a wireless network or pairing with a wireless adapter.
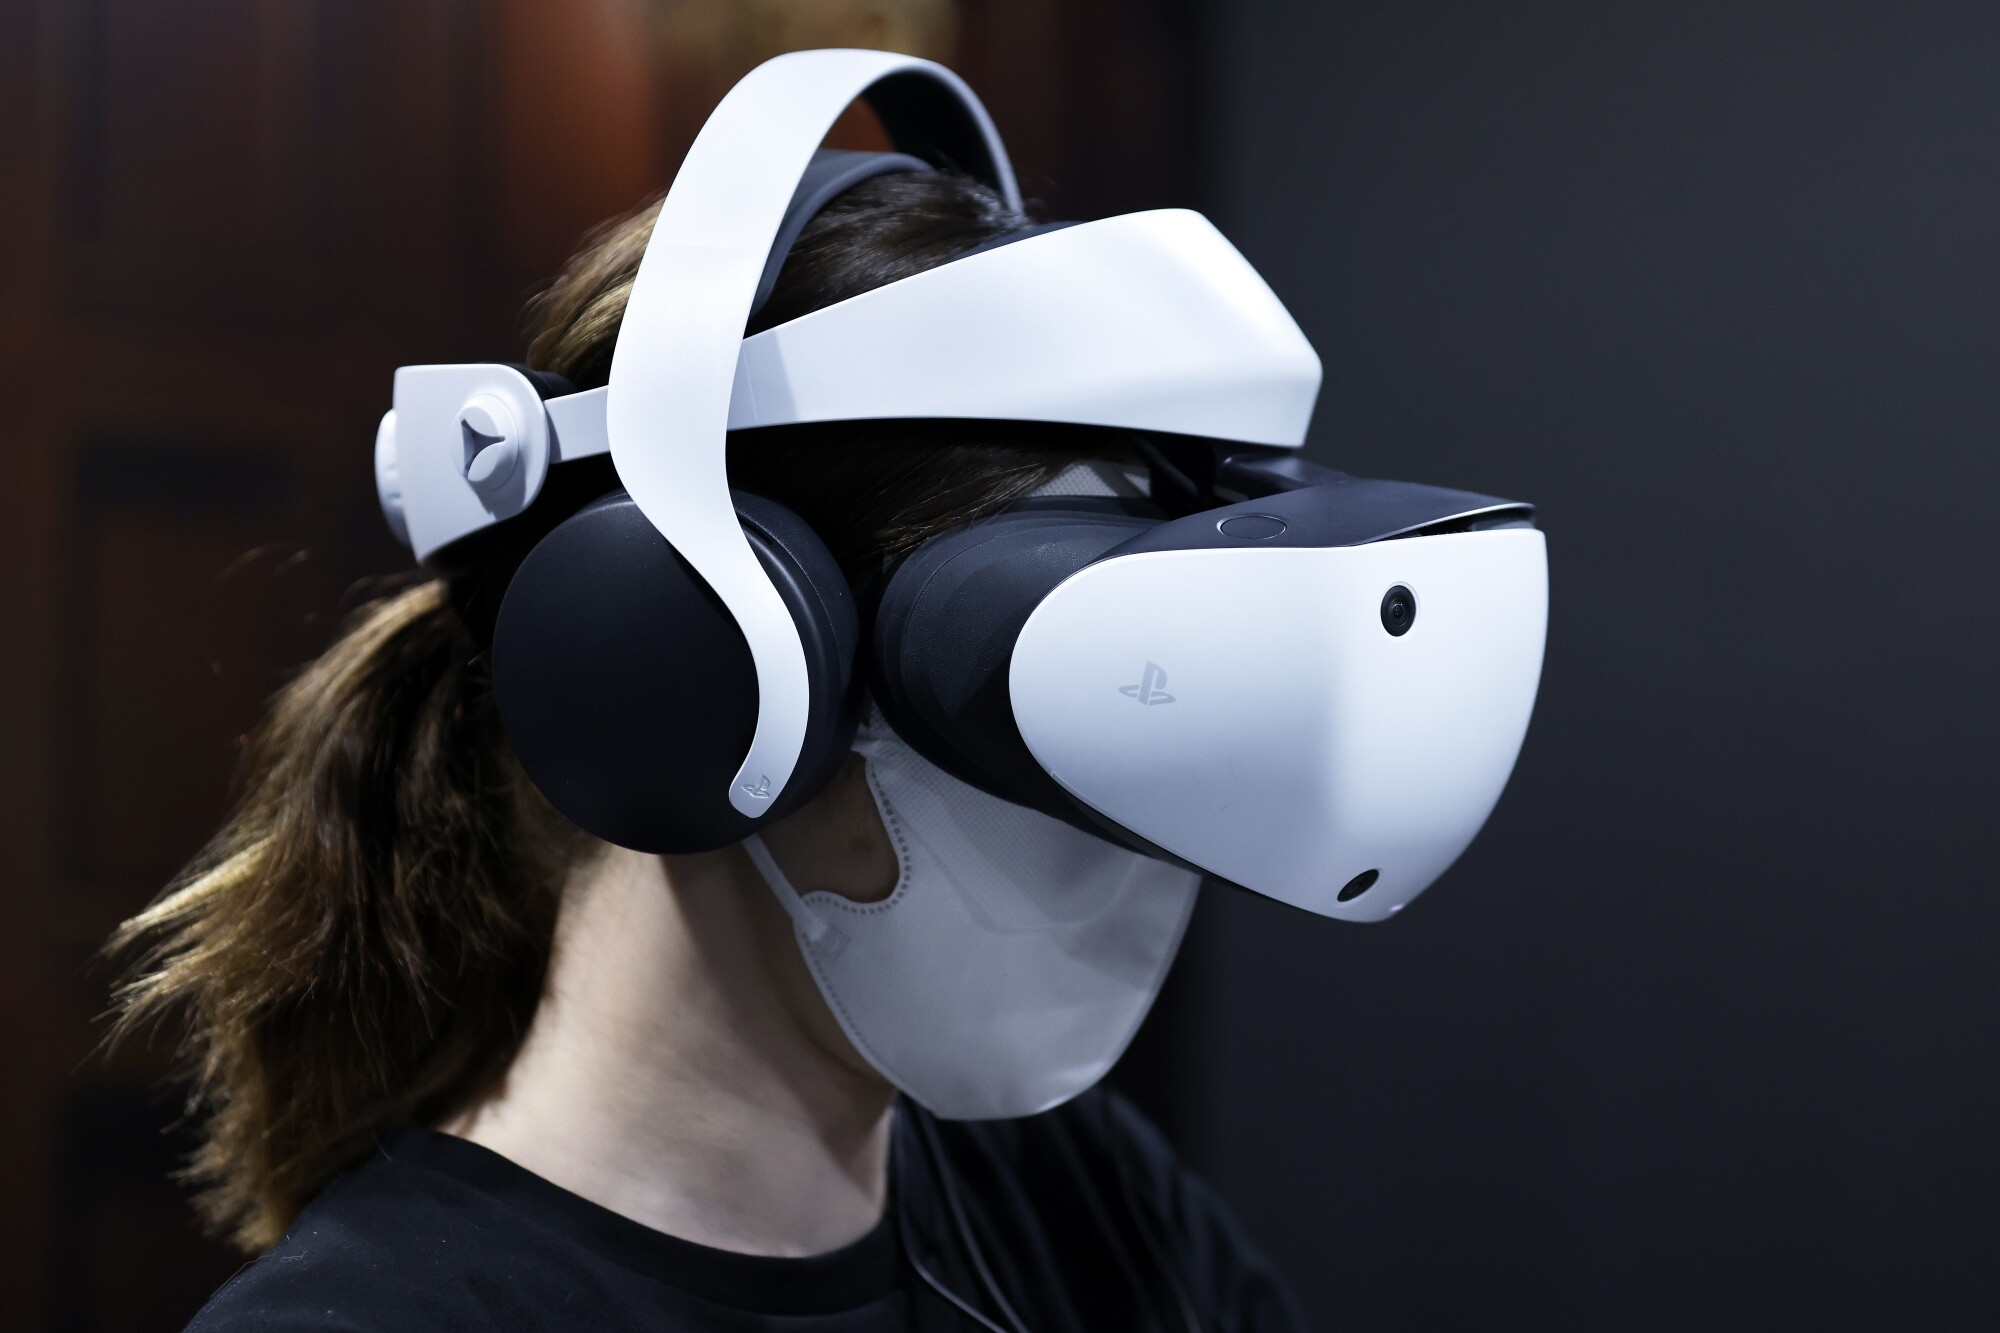
- Once the VR headset is successfully connected, put it on and adjust the straps or fit for a comfortable experience. Ensure that the headset is snugly positioned on your head and that the display is aligned with your eyes.
By following these steps, you’ll be able to successfully connect your VR headset to your computer or gaming console. Remember to consult the manufacturer’s instructions for any specific connection requirements or troubleshooting tips. With the headset properly connected, you’re now ready to start exploring the exciting world of virtual reality.
Adjusting the Fit and Comfort
Ensuring a proper fit and maximum comfort is essential for an enjoyable VR experience. Wearing the VR headset for extended periods can become uncomfortable if it’s not adjusted correctly. Follow these steps to adjust the fit and comfort of your VR headset:
- Start by loosening all the straps on the VR headset. This will allow you to put it on easily without any discomfort.
- Place the VR headset over your head, making sure that the display is aligned with your eyes. Position it so that it rests comfortably on the bridge of your nose.
- Tighten the head strap or straps according to your comfort level. The headset should fit snugly on your head, but not be overly tight or cause any pain or discomfort.
- Adjust the top strap of the headset to distribute the weight evenly. This will prevent any strain on your forehead or cheeks.
- Check the side straps or adjustments on the headset for a secure fit. These straps help keep the headset in place while you move and prevent it from shifting or falling off.
- Take a moment to adjust the lenses of the VR headset. Some headsets offer the option to adjust the lens distance to match your inter-pupillary distance (IPD). This ensures a clearer and more comfortable view of the virtual environment.
- If your VR headset has adjustable audio, position the speakers or earbuds to fit comfortably over your ears. Make sure the audio is balanced and clear.
- If your VR headset has built-in ventilation, ensure that it’s not blocked. Proper ventilation helps prevent overheating and ensures a comfortable experience.
- Once you’ve adjusted the fit and comfort of the VR headset to your liking, take a moment to test it by moving your head in different directions. The headset should stay securely in place without shifting or feeling loose.
- If you experience any discomfort while wearing the VR headset, such as pressure on your head, face, or eyes, readjust the straps or make necessary changes until you achieve a comfortable fit.
Remember, everyone’s head shape and size are different, so it may take a little trial and error to find the perfect fit. Take your time to make the necessary adjustments and ensure that the VR headset is comfortable and secure. A properly fitted headset will enhance your immersion in the virtual reality world and allow you to fully enjoy the experience.
Setting Up the Tracking Sensors
Tracking sensors play a vital role in capturing your movements and translating them into the virtual world. Proper positioning and calibration of these sensors are necessary for accurate tracking and a seamless virtual reality experience. Follow these steps to set up the tracking sensors for your VR headset:
- Start by referring to the manufacturer’s instructions for the specific setup requirements of your VR headset’s tracking system. Different headsets utilize different tracking technologies, such as external sensors or built-in cameras.
- If your VR headset uses external sensors, place them in the recommended positions according to the manufacturer’s instructions. Typically, the sensors should be positioned high up in the room, facing towards the play area.
- Ensure that the tracking sensors have a clear line of sight to your VR headset. Avoid any obstacles or obstructions that might interfere with the tracking process. If necessary, adjust the position of the sensors to achieve optimal tracking coverage.
- If your VR headset relies on built-in cameras for tracking, check if any calibration steps are required. Some headsets may ask you to perform certain movements or gestures to enable accurate tracking.
- Once the sensors are properly positioned, launch the VR software or app on your computer or gaming console. Navigate to the tracking settings or calibration section.
- Follow the instructions provided by the software or app to calibrate the tracking sensors. This may involve standing or moving within the play area while the system recognizes and maps your movements.
- During the calibration process, make sure to stand at different positions within the play area to ensure the tracking sensors can accurately detect your movements from various angles.
- After the calibration is complete, test the tracking by moving around within the play area. Perform different actions, such as walking, crouching, and reaching, to ensure that the tracking accurately captures your movements in the virtual world.
- If you notice any discrepancies or inaccuracies in the tracking, consider adjusting the position or angle of the tracking sensors. Experiment with different placements to achieve the best results.
- Keep in mind that proper lighting conditions can also affect tracking accuracy. Avoid overly bright or dim lighting, as well as excessive backlighting or shadows, which may interfere with the tracking sensors. Adjust the lighting in the room if necessary.
By following these steps, you’ll be able to set up the tracking sensors for your VR headset and ensure accurate movement detection in the virtual environment. Remember to consult the manufacturer’s instructions for any specific setup requirements or troubleshooting tips. Properly calibrated tracking sensors will enhance the realism and immersion of your VR experience, allowing you to fully engage with the virtual world.
Configuring Audio and Microphone
Configuring the audio and microphone settings of your VR headset is essential for an immersive and interactive virtual reality experience. Properly setting up the audio ensures clear and realistic sound, while configuring the microphone allows you to communicate effectively with others in the virtual world. Follow these steps to configure the audio and microphone settings:
- If your VR headset has built-in speakers, put on the headset and adjust the position of the speakers over your ears for a comfortable fit. Ensure that the speakers are not blocked or covered by any objects.
- If your VR headset does not have built-in speakers, connect your headphones or external speakers to the appropriate audio jack or port on the headset. Make sure the connection is secure.
- Launch the VR software or app on your computer or gaming console and navigate to the audio settings section.
- Check for any specific audio settings or options provided by the VR software or app. Some applications may allow you to adjust the spatial audio, balance, or volume levels.
- Experiment with the audio settings to find the right balance and volume that suit your preferences. Test the sound by playing a VR experience or video and ensure that the sound is clear, realistic, and immersive.
- If your VR headset has a built-in microphone or microphone input, ensure that it is properly positioned near your mouth. Adjust the microphone sensitivity or volume settings in the VR software or app.
- Test the microphone by speaking into it and checking if your voice is loud and clear. Adjust the microphone settings as needed to improve the audio quality and reduce any background noise.
- If you are using an external microphone, such as a headset or desktop microphone, connect it to the appropriate microphone input on your VR headset or computer. Adjust the microphone settings in the VR software or app accordingly.
- Ensure that your VR headset and its associated software or app have permission to access your computer or gaming console’s audio and microphone devices. Check the settings or permissions section of your computer or console’s operating system to verify this.
- Remember to keep your audio and microphone drivers up to date. Manufacturers often release updates that improve performance, compatibility, and audio quality.
By following these steps, you’ll be able to configure the audio and microphone settings of your VR headset for a customized and immersive virtual reality experience. Take the time to adjust the audio and microphone settings to your liking, ensuring clear sound and effective communication in the virtual world. Remember to test the settings and make any necessary adjustments based on your preferences and the specific VR experiences you’ll be engaging with.
Calibrating Controllers
Calibrating the controllers for your VR headset is crucial for accurate tracking and responsive interactions within the virtual environment. Proper calibration ensures that your movements and gestures are accurately captured, allowing for a seamless and immersive VR experience. Follow these steps to calibrate the controllers:
- Start by turning on your VR headset and ensuring that the controllers are properly charged or have fresh batteries.
- Launch the VR software or app on your computer or gaming console and navigate to the controller calibration or settings section.
- Check the manufacturer’s instructions or the VR software’s documentation for any specific controller calibration requirements or steps.
- Place the controllers on a flat surface and ensure they are not obstructed by any objects or surfaces that may interfere with calibration.
- Follow the on-screen instructions provided by the VR software or app to initiate the controller calibration process.
- This process may involve holding down specific buttons or triggers on the controllers, performing certain movements or gestures, or moving the controllers within a defined space.
- Make sure to follow the instructions accurately and precisely to ensure the calibration is successful.
- After the calibration is complete, test the controllers by moving them within the play area or performing various actions and gestures.
- Ensure that the controllers accurately track your movements and that the virtual representations of the controllers align with their physical positions.
- If you notice any discrepancies or inaccuracies in the controller tracking, try recalibrating or adjusting the position and angle of the tracking sensors.
- Refer to the manufacturer’s guidelines or consult the VR software’s documentation for troubleshooting steps if you encounter persistent issues.
- Keep in mind that some VR software or apps may offer additional controller customization options, such as button mapping or sensitivity adjustments.
- Take the time to explore these options and customize the controller settings according to your preferences and comfort level.
By following these steps, you’ll be able to successfully calibrate the controllers for your VR headset. Proper controller calibration allows for precise tracking and enhances the overall immersion and interaction in the virtual reality experience. Take some time to familiarize yourself with the controller movements and gestures to make the most out of your VR adventures.
Testing Your VR Headset
After setting up and calibrating your VR headset, it’s important to thoroughly test it to ensure that everything is working as intended. Testing allows you to familiarize yourself with the controls, navigation, and overall experience of virtual reality. Follow these steps to test your VR headset:
- Start by launching a VR application or game that you’re interested in trying out. You can choose from a wide variety of VR experiences available in the software or app ecosystem of your VR headset.
- Put on your VR headset and ensure that it’s properly adjusted and comfortable on your head.
- Use the controller or controllers to navigate through the virtual environment. Test the responsiveness and accuracy of the controller tracking by performing various movements, such as pointing, grabbing, or throwing objects.
- Maintain awareness of your surroundings and the boundary of your play area to ensure that you don’t accidentally bump into objects or walls.
- Experiment with different VR experiences or games to explore the range of interactions and challenges they offer. Test your ability to teleport, climb, shoot, or solve puzzles within the virtual world.
- Take note of any issues or inconsistencies you encounter during testing. These may include tracking problems, audio glitches, motion sickness, or discomfort.
- Adjust the settings or seek guidance from the VR software or app on how to resolve any technical or performance issues you may encounter.
- Pay attention to the overall immersion and realism of the VR experience. Evaluate the visual quality, audio effects, and the level of engagement and presence you feel within the virtual environment.
- Consider sharing your experience and discussing it with fellow VR enthusiasts or online communities. This can provide valuable insights and recommendations for optimizing your VR headset setup and finding exciting VR content.
- Regularly check for firmware updates or software patches for both your VR headset and the VR applications you use.
- Continue to explore and try new VR experiences to expand your virtual reality horizons and make the most of your VR headset.
By thoroughly testing your VR headset and exploring various VR experiences, you’ll gain a deeper understanding of its capabilities and limitations. You’ll also be able to identify any areas for improvement or customization to enhance your overall VR experience. Remember to have fun and embrace the immersive virtual world that awaits you!
Troubleshooting Common Issues
While using a VR headset can be an exciting and immersive experience, it’s not uncommon to encounter certain issues along the way. Fortunately, many common issues can be resolved with some troubleshooting. Here are some steps you can take to address common problems you may encounter:
- If you’re experiencing tracking issues, ensure that your tracking sensors or cameras are properly positioned and calibrated. Try adjusting their positions or angles to achieve better tracking coverage. Avoid bright lights or reflective surfaces that may interfere with the sensors.
- If the VR display is blurry or unclear, make sure that the headset is properly positioned on your head. Adjust the lenses, if applicable, to improve focus. Clean the lenses with a microfiber cloth to remove any smudges or dirt that may be causing blurriness.
- If you’re experiencing motion sickness or discomfort, take frequent breaks and gradually increase the amount of time you spend in VR. Experiment with different VR experiences to find ones that are more comfortable for you. Adjusting the fit and ensuring proper calibration can also help reduce motion sickness.
- If your audio is not working or is distorted, check the audio connections and ensure that the volume is adjusted properly. If using headphones, make sure they are plugged in securely. Update the audio drivers and try adjusting the audio settings in the VR software or app.
- If your controllers are not responding or seem to be out of sync, check the batteries or charge level. Make sure the controllers are properly connected to your VR headset and that they are within the tracking range. Consider recalibrating the controllers and ensuring that you’re using the latest firmware for both the controllers and the VR headset.
- If the VR software or app is not launching or crashes frequently, check for any available updates and ensure that your computer or gaming console meets the system requirements. Restart the VR software or app and try launching it again. If the issue persists, reinstall the software or contact the support team of the VR software or app for further assistance.
- If you’re encountering connectivity issues, such as the VR headset disconnecting or lagging, check the cables and connections. Ensure that the cables are securely plugged in and that there are no loose or damaged connections.
- If you’re having trouble finding compatible VR content, explore different VR software platforms or app stores. Join VR communities and forums to get recommendations and insights from other users. Remember to check for updates and new releases regularly.
- If you’ve tried various troubleshooting steps and are still experiencing issues, consult the manufacturer’s documentation, website, or customer support. They may be able to provide specific guidance or solutions tailored to your VR headset and the issue you’re facing.
- Remember to stay up to date with the latest firmware updates, software patches, and driver updates for both your VR headset and the devices it’s connected to. Updating regularly can help resolve known issues and improve overall performance.
By following these troubleshooting steps, you can address common issues that may arise while using your VR headset. It’s important to be patient and persistent when troubleshooting, as solutions may vary depending on the specific problem and VR headset model. Embrace the learning process and enjoy the incredible experiences that virtual reality has to offer!
Conclusion
Setting up and using a VR headset can be an exciting and immersive experience, and with the right knowledge and guidance, you can make the most out of your virtual reality journey. In this guide, we have covered the essential steps to help you set up your VR headset, from choosing the right headset to troubleshooting common issues.
Choosing the right VR headset involves considering factors such as your budget, the type of content you want to experience, and the platform you’ll be using. Checking system compatibility ensures that your computer or gaming console meets the necessary requirements for a seamless VR experience.
Installing the necessary software and connecting your VR headset to your device are important steps in getting your VR headset up and running. Adjusting the fit and comfort of the headset ensures a comfortable experience during prolonged use.
Setting up the tracking sensors, configuring audio and microphone settings, calibrating controllers, and testing the VR headset allow you to fine-tune your setup and ensure the best possible experience. Additionally, troubleshooting common issues helps you overcome any challenges you may face along the way.
Remember that VR technology is constantly evolving, and staying up to date with firmware and software updates is crucial for optimal performance and access to new features. Keep exploring new VR experiences, engage with the VR community, and don’t hesitate to reach out to customer support for assistance if needed.
With the information and steps provided in this guide, you’re now equipped to embark on your VR adventures and immerse yourself in the incredible world of virtual reality. Enjoy the thrilling experiences, interactive gameplay, and mind-bending journeys that await you!