Introduction
Welcome to the world of 3D printing! Whether you’re a hobbyist or a professional, it’s essential to understand how to optimize your 3D printer’s performance for the best results. One crucial aspect of achieving high-quality prints is setting the flowrate correctly.
Flowrate, also known as the extrusion multiplier or flow factor, refers to the amount of filament that is being extruder and deposited during the printing process. It controls the flow of plastic through the nozzle, directly impacting the print’s overall quality, strength, and surface finish.
Why is adjusting the flowrate important? Well, every 3D printer is different, and factors such as the type of filament, nozzle diameter, and temperature can affect the ideal flowrate setting. By fine-tuning the flowrate, you can ensure precise and consistent extrusion, preventing under or over-extrusion issues that can compromise the final print.
Assessing the quality of your prints is essential to determine if you need to adjust the flowrate. Look for signs of under-extrusion, such as gaps or inconsistencies in the print layers, weak bonding between layers, or visible infill patterns on the print’s surface. On the other hand, over-extrusion can result in excessive filament being laid down, leading to inaccurate dimensions, rough surfaces, and even nozzle clogging.
Several factors can influence the flowrate, including the filament type and brand, printing speed, layer height, and temperature settings. Understanding these variables will help you achieve optimal flowrate settings for different prints and materials.
In this article, we will guide you through the steps to set the flowrate on your 3D printer. It’s important to note that these steps are generally applicable but may vary depending on your printer model and slicing software.
What is Flowrate?
In the world of 3D printing, flowrate refers to the rate at which plastic filament is extruded from the printer’s nozzle during the printing process. It determines the amount of material that is being deposited on each layer of the print. The flowrate is expressed as a percentage, where 100% is the default value defined in the printer’s firmware.
When you set the flowrate to 100%, the printer should extrude the filament at the intended diameter specified in the slicer software. However, due to various factors, such as filament inconsistency and mechanical tolerances, the actual flowrate may deviate from the intended value. This discrepancy can lead to under or over-extrusion, affecting the print’s quality and dimensional accuracy.
By adjusting the flowrate, you can fine-tune the amount of filament being extruded, ensuring that it matches your desired specifications. Increasing the flowrate (over 100%) will result in more filament being extruded, while decreasing it (below 100%) will reduce the amount of extruded material.
Flowrate adjustment is especially important when switching between different types or brands of filaments. Each filament has its own unique characteristics, such as viscosity, melting point, and diameter consistency. These variations can require changes to the flowrate to achieve optimal printing results.
It’s important to understand that flowrate adjustment is not the same as adjusting the printing speed. The printing speed determines how quickly the printer moves, while the flowrate affects the amount of material being extruded per unit of time. Both parameters can be adjusted independently to achieve the desired print quality.
Overall, flowrate adjustment allows you to fine-tune your 3D printer’s extrusion process and ensure consistent, accurate prints. It gives you greater control over the flow of filament, resulting in improved surface finish, dimensionally accurate prints, and stronger, more reliable parts.
Why Adjust the Flowrate?
Adjusting the flowrate on your 3D printer is crucial for achieving optimal print quality. Here are a few reasons why it’s important to make flowrate adjustments:
- Prevent Under-Extrusion: Under-extrusion occurs when the printer doesn’t extrude enough filament to fill the desired space in the print. This can result in gaps between layers, weak bonding, and a fragile final print. By increasing the flowrate, you can ensure that the proper amount of filament is extruded, preventing under-extrusion issues.
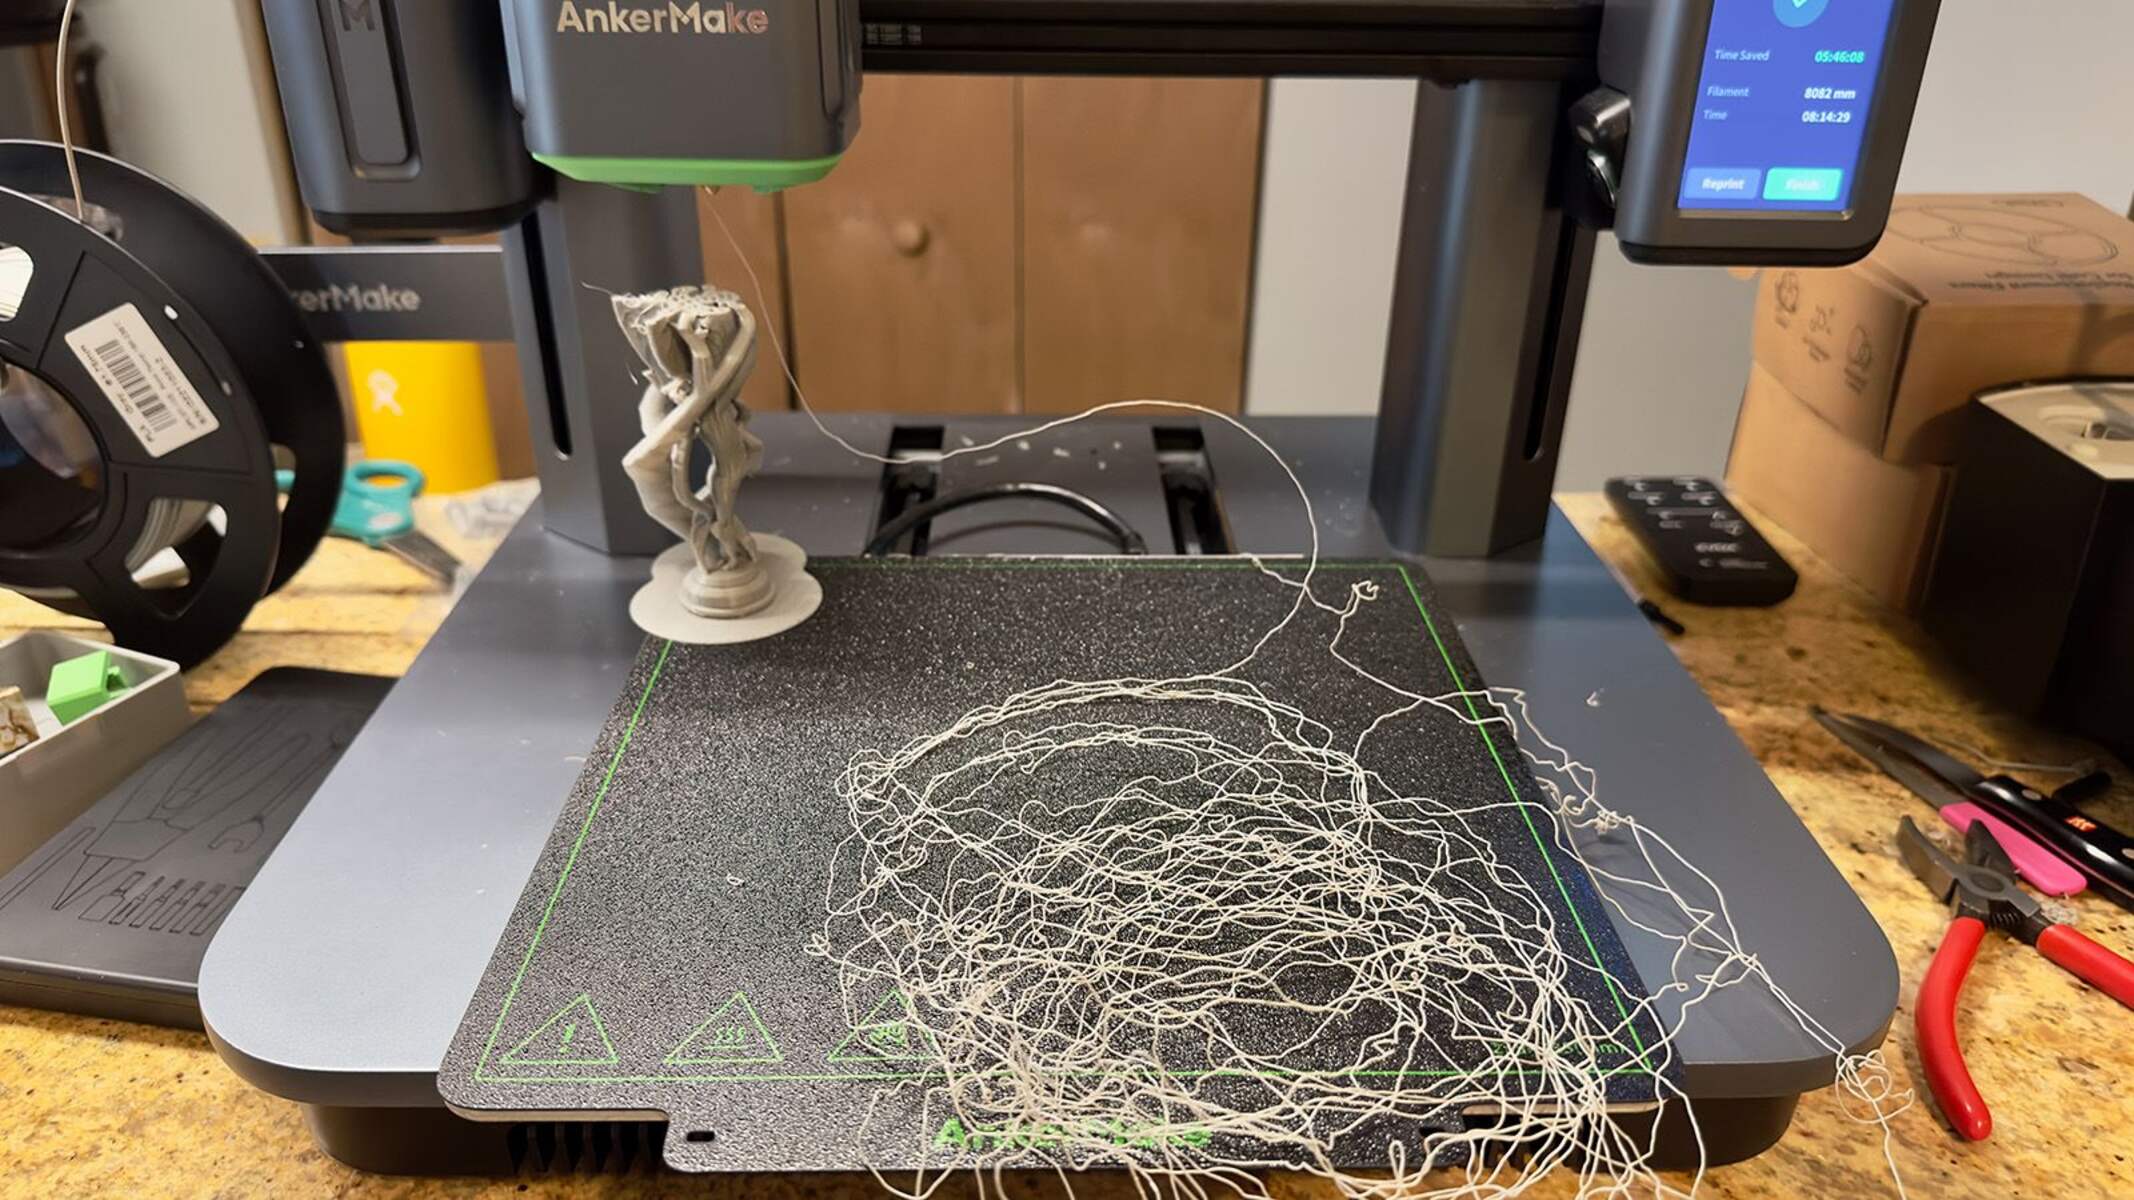
- Avoid Over-Extrusion: Over-extrusion happens when more filament is extruded than necessary, leading to excessive material buildup and inaccurate dimensions. This can cause rough surfaces, poor layer adhesion, and even clogging of the nozzle. Adjusting the flowrate to a lower value can help mitigate over-extrusion problems by reducing the amount of extruded material.
- Account for Filament Variations: Filament from different manufacturers or even different spools from the same manufacturer can vary in diameter and consistency. These variations can affect extrusion rates and require flowrate adjustments to maintain the desired print quality. By fine-tuning the flowrate, you can compensate for these filament differences and ensure consistent extrusion.
- Print with Different Materials: Different types of filaments, such as PLA, ABS, PETG, or flexible materials, have different flow characteristics. Adjusting the flowrate allows you to optimize the extrusion process for each material, ensuring proper layer adhesion and reducing the risk of print failures. Each filament has its own sweet spot for flowrate settings, and finding the right balance is key to achieving high-quality prints.
- Fine-Tune Specific Print Settings: Sometimes, you may need to fine-tune specific print settings for unique requirements. For example, when aiming for stronger mechanical properties, you may want to slightly increase the flowrate to improve the part’s strength. Or, if you’re looking for smoother surface finishes, dialing down the flowrate can help reduce the appearance of layer lines.
By adjusting the flowrate, you have the flexibility to optimize your prints for different scenarios and materials. It allows you to fine-tune the extrusion process and achieve the desired print quality, strength, and surface finish. However, it’s essential to make small adjustments and perform test prints to find the optimal flowrate setting for each specific situation.
Assessing the Quality of Prints
Assessing the quality of your 3D prints is crucial to determine if any adjustments, including flowrate, need to be made. Here are some key factors to consider when evaluating the print quality:
- Layer Adhesion: Examine the layers of your print and check for any gaps or inconsistencies. Adequate layer adhesion ensures the overall strength and durability of the printed object. Weak adhesion can result in a fragile or easily breakable final product.
- Surface Finish: Inspect the surface of your print for smoothness and evenness. A well-tuned flowrate should result in a clean and uniform surface without visible lines or imperfections. Rough surfaces can indicate over-extrusion, while gaps or rough patches may be a sign of under-extrusion.
- Dimensional Accuracy: Measure the dimensions of the printed object using calipers or a similar tool. Compare the measurements to the intended dimensions specified in the 3D model. Inaccurate dimensions can be an indication of flowrate issues, such as over or under-extrusion.
- Infill Density: Inspect the infill of your print, which refers to the internal structure that provides support and strength. The infill should be evenly distributed and have the desired density as specified in the slicing software. Inconsistent or sparse infill can result from flowrate discrepancies.
- Overhangs and Bridges: Examine how your printer handles overhangs and bridges. Overhangs are the horizontal sections of the print that extend beyond the support structures. Bridges are horizontal sections that span gaps without support. A well-calibrated flowrate and proper cooling result in clean, well-supported overhangs and bridges.
- Fine Details: Evaluate the fine details of your print, such as small text or intricate features. Flowrate adjustments can affect the precision and visibility of these details. If they appear distorted or poorly defined, it may be an indication that the flowrate needs adjustment.
When assessing your prints, it’s important to consider the individual characteristics of your 3D printer, the filament being used, and the specific settings you’ve implemented. Keep in mind that achieving perfect prints may require experimentation and fine-tuning of multiple parameters, including flowrate.
Regularly assessing the quality of your prints will help you identify any issues or areas for improvement. By understanding the relationship between flowrate and print quality, you can make the necessary adjustments to achieve exceptional results.
Factors Affecting Flowrate
Several factors can influence the flowrate on a 3D printer. Understanding these factors is essential for achieving optimal printing results. Here are some key factors that can affect the flowrate:
- Filament Diameter: The diameter of the filament is a crucial factor in determining the flowrate. Different filaments may have slight variations in diameter, which directly impact the extrusion amount. Ensure that you accurately measure the filament diameter and input the correct value in the slicing software.
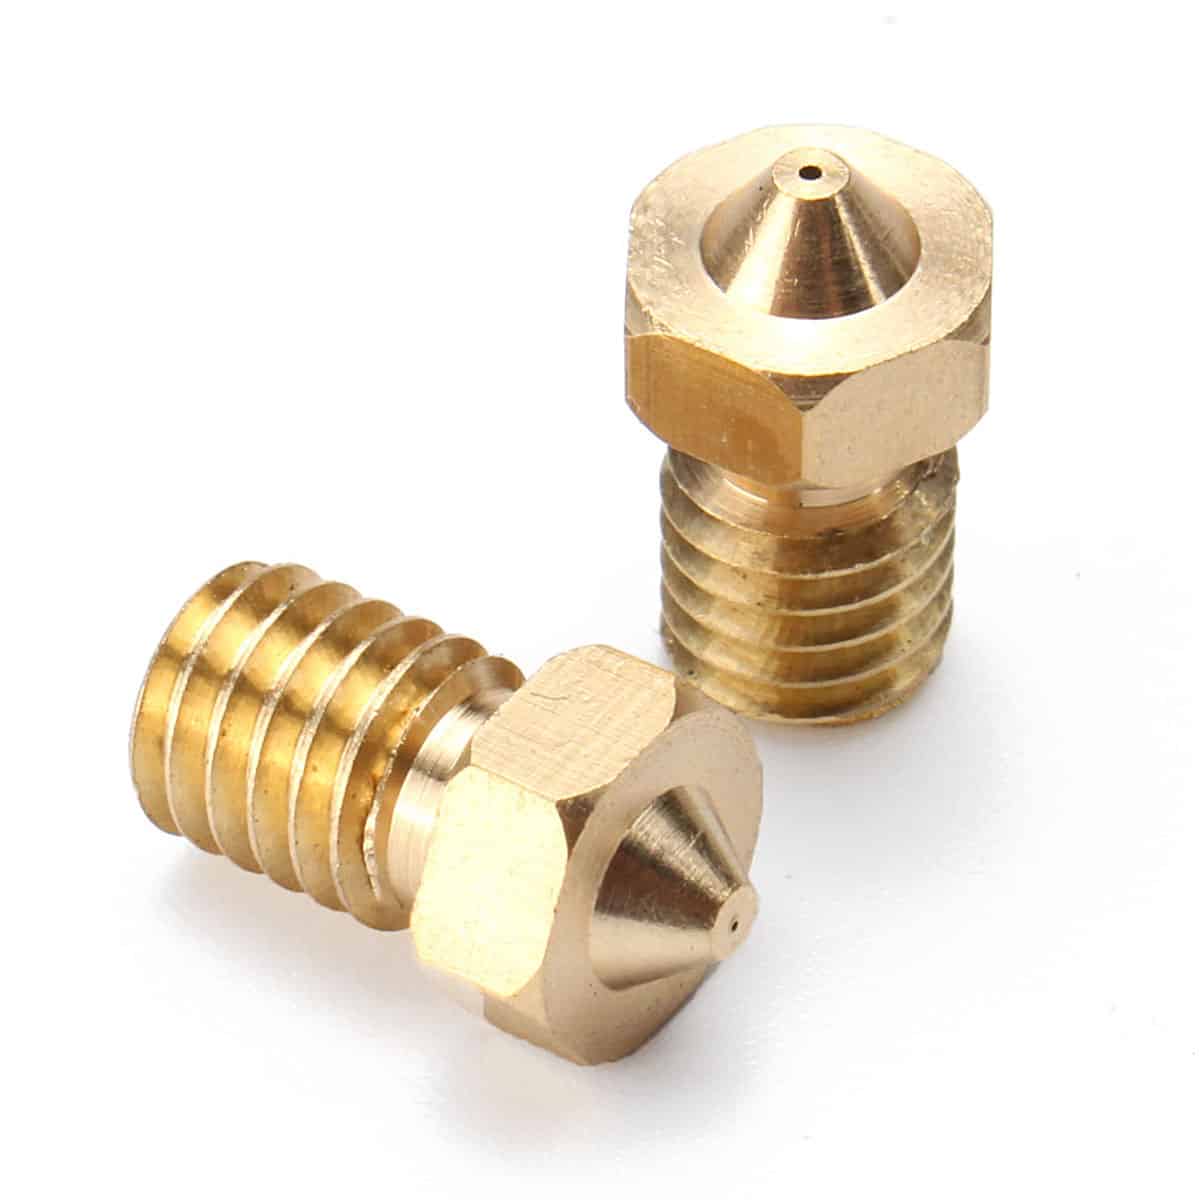
- Nozzle Diameter: The diameter of the nozzle determines the size of the extruded filament. Smaller nozzle diameters will require lower flowrates, while larger nozzles may need higher flowrates to maintain a consistent extrusion. It’s important to match the flowrate with the appropriate nozzle size for optimal extrusion.
- Printing Speed: The speed at which the printer moves during the print affects the flowrate. Higher printing speeds may require increased flowrates to compensate for the quick movement and ensure adequate filament deposition. Slower speeds may benefit from lower flowrates to prevent over-extrusion.
- Layer Height: The layer height, or the thickness of each layer in the print, influences the flowrate. Thicker layers may require higher flowrates to ensure proper filament deposition, while thinner layers may need lower flowrates to prevent excessive material buildup. Adjusting the flowrate accordingly helps maintain precise layer heights.
- Temperature: The printing temperature affects the viscosity and flow characteristics of the filament. Higher temperatures generally result in more fluid material that requires increased flowrates. Lower temperatures may require lower flowrates to compensate for the reduced fluidity and prevent over-extrusion.
- Print Design: The complexity and design of the print can also impact the flowrate. Prints with intricate details or fine features may require adjustments to the flowrate to ensure the precise deposition of filament. Designs with large solid areas may necessitate higher flowrates to achieve proper infill density.
It’s worth noting that these factors are interconnected, and adjustments to one factor may require compensations in another. Achieving the ideal flowrate involves finding the right balance among these factors to achieve the desired print quality and dimensional accuracy.
Experimentation and test prints are crucial in determining the optimal flowrate for different scenarios and materials. By understanding how these factors influence the flowrate, you can make more informed adjustments and fine-tune your print settings for exceptional results.
Steps to Set the Flowrate on a 3D Printer
Setting the flowrate on your 3D printer is a process that requires careful calibration and adjustment. Here are the step-by-step instructions to help you set the flowrate:
- Prepare for Calibration: Start by ensuring that your printer is properly calibrated, and the print bed is leveled. A well-calibrated printer provides a solid foundation for accurate flowrate adjustments.
- Choose a Test Model: Select a small test model that allows you to evaluate various aspects of print quality, such as layer adhesion, surface finish, and dimensional accuracy. This model should have different features that challenge the printer’s capabilities.
- Default Flowrate: Begin with the default flowrate setting (typically 100%) and print the test model. This will provide a baseline reference for comparison with the adjusted flowrate prints.
- Examine the Test Print: Evaluate the test print for any quality issues, such as under or over-extrusion, rough surfaces, or dimensional inaccuracies. Take note of any areas that require improvement.
- Adjust Flowrate: Gradually adjust the flowrate based on the evaluation of the test print. If under-extrusion is observed, increase the flowrate by small increments (e.g., 5%). Conversely, if over-extrusion is evident, decrease the flowrate accordingly.
- Print and Assess: After each flowrate adjustment, reprint the test model and assess the print quality. Keep track of the changes made and compare the new prints to the baseline reference and previous iterations. This iterative process helps you narrow down the ideal flowrate setting.
- Fine-Tune: Fine-tune the flowrate by making smaller adjustments as you approach the optimal setting. At this stage, focus on specific areas that may still exhibit issues, such as fine details, overhangs, or bridges.
- Validation Prints: Once you believe you’ve found the optimal flowrate setting, print a few validation models to confirm the consistency and quality of the prints. These prints should showcase the desired characteristics, such as strong layer adhesion, smooth surfaces, and accurate dimensions.
- Document the Flowrate: Once you’re satisfied with the print quality, document the flowrate setting you have determined for future reference. This way, you can reproduce the setting for similar prints or materials in the future.
Remember that flowrate calibration is a process that may require multiple iterations and adjustments. Each printer and filament combination will have unique requirements. Patience and experimentation are key to achieving optimal flowrate settings and producing high-quality 3D prints.
Test Print and Fine-Tuning
Performing a test print and fine-tuning the flowrate is a crucial step in achieving optimal print quality on your 3D printer. Here’s how you can effectively test and fine-tune the flowrate:
1. Select a Test Model: Choose a test model that represents the key features and challenges you encounter in your regular prints. It should include different geometries, overhangs, and intricate details to thoroughly test the flowrate adjustments.
2. Print at Default Flowrate: Start by printing the test model using the default flowrate setting. This will serve as the reference point and allow you to compare subsequent prints with different flowrates.
3. Examine the Test Print: Carefully evaluate the quality of the test print. Look for signs of over or under-extrusion, such as gaps between layers, weak bonding, or rough surfaces. Take note of any areas that require improvement or adjustments.
4. Adjust the Flowrate: Based on your observations from the test print, make incremental changes to the flowrate. If you notice under-extrusion, increase the flowrate slightly, such as by 5%. On the other hand, if over-extrusion is evident, decrease the flowrate by a similar amount.
5. Reprint and Evaluate: After adjusting the flowrate, reprint the test model and carefully assess the changes. Pay close attention to the areas that previously exhibited issues. Repeat this process of adjusting, printing, and evaluating until you achieve the desired print quality.
6. Fine-Tune Specific Settings: Once you’ve narrowed down the flowrate, focus on fine-tuning specific settings to further improve the print quality. Experiment with parameters like temperature, printing speed, layer height, and cooling settings to optimize the flowrate for different aspects of the print.
7. Iterative Process: Flowrate fine-tuning is a iterative process that requires patience and attention to detail. Continuously analyze the changes in the prints and make minor adjustments as needed. Reflect on each iteration to understand how the flowrate adjustments impact the overall print quality.
8. Verify the Results: Once you are satisfied with the print quality, perform additional test prints and verify the consistency of the results. Print different models to ensure that the flowrate adjustments work well with various geometries and complexities.
Keep in mind that flowrate adjustments may vary based on different filament types, printer models, and slicer software. Therefore, it’s important to document the optimal flowrate settings for future reference, which will save time and effort when printing similar objects or materials in the future.
Conclusion
Setting and fine-tuning the flowrate on your 3D printer is a crucial step in achieving high-quality prints. By adjusting the flowrate, you can ensure precise and consistent extrusion, reducing the risk of under or over-extrusion issues and improving the overall print quality.
Throughout this article, we discussed the importance of adjusting the flowrate and understanding its impact on print quality. We explored factors that can affect the flowrate, such as filament diameter, nozzle diameter, printing speed, layer height, temperature, and print design. By considering these factors, you can make informed adjustments to the flowrate for optimal results.
We also outlined the steps to set the flowrate on a 3D printer, including preparing for calibration, choosing a test model, printing at default flowrate, examining the test print, adjusting the flowrate, re-evaluating the print quality, and fine-tuning specific settings. This iterative process helps you find the optimal flowrate setting and ensure consistent, high-quality prints.
Remember, flowrate calibration is a continuous process that requires experimentation, observation, and documentation. Each printer and filament combination may have unique requirements, so it’s essential to understand the specific characteristics of your equipment and materials.
By taking the time to assess the quality of your prints, understand the factors affecting the flowrate, and fine-tune the settings, you can unlock the full potential of your 3D printer. Achieving exceptional print quality not only enhances the visual appeal but also ensures the strength, accuracy, and functionality of the printed objects.
Happy printing!