Introduction
Welcome to the digital age where technology has made communication faster and more convenient. Sending a fax used to involve bulky fax machines, phone lines, and piles of paper. However, with the advent of email fax services, you can now send faxes directly from your email account with just a few clicks.
In this article, we will guide you through the step-by-step process of sending a fax from your email. Whether you need to send an important document, sign a contract, or share business information, sending a fax via email is a hassle-free and efficient solution. This method eliminates the need for physical fax machines, reduces paper waste, and saves you time.
The beauty of using email to send a fax is that it offers a seamless integration between digital communication and traditional faxing. You can easily transmit documents of various file formats, such as PDFs, Word documents, or images, without the need for printing or scanning. Moreover, email fax services often provide additional features like tracking delivery status and storing fax records for future reference.
Whether you are an individual or a business professional, learning how to send a fax from email will undoubtedly streamline your document transmission process. So let’s dive into the steps required to set up and use this convenient method of faxing.
Step 1: Set Up an Email Fax Service
Before you can start sending faxes from your email, you’ll need to sign up for an email fax service. There are several providers available, so it’s important to choose one that best fits your needs. Look for services that offer user-friendly interfaces, secure transmission, and reasonable pricing.
To set up an email fax service, follow these steps:
- Research and compare different email fax service providers. Consider factors such as pricing plans, features, ease of use, customer reviews, and customer support options.
- Select the email fax service that best suits your requirements and sign up for an account. This typically involves providing your email address, contact information, and choosing a subscription plan.
- Once you have signed up, you may receive a confirmation email with instructions on how to activate your account. Follow the provided steps to complete the activation process.
- Next, you may need to choose a fax number. Some email fax services allow you to select a local or toll-free number, while others may assign one to you. Consider the geographical coverage of the fax number and any additional costs associated with choosing a specific type.
- Once your account is set up and your fax number is assigned or chosen, configure your email fax service settings. This may involve setting preferences such as paper orientation, resolution, cover page options, and email notifications. Make sure to review all the available settings and customize them according to your needs.
- Lastly, test your email fax service by sending a test fax to ensure everything is functioning as expected. Most providers offer a free trial or a test fax feature that allows you to send a sample document to a predefined number or email address to verify successful transmission.
Setting up a reliable and efficient email fax service is crucial for seamless faxing from your email. Take the time to explore different options and choose the one that aligns with your preferences. Once you have completed the setup process, you’re ready to start sending faxes conveniently from your email account.
Step 2: Compose a New Fax
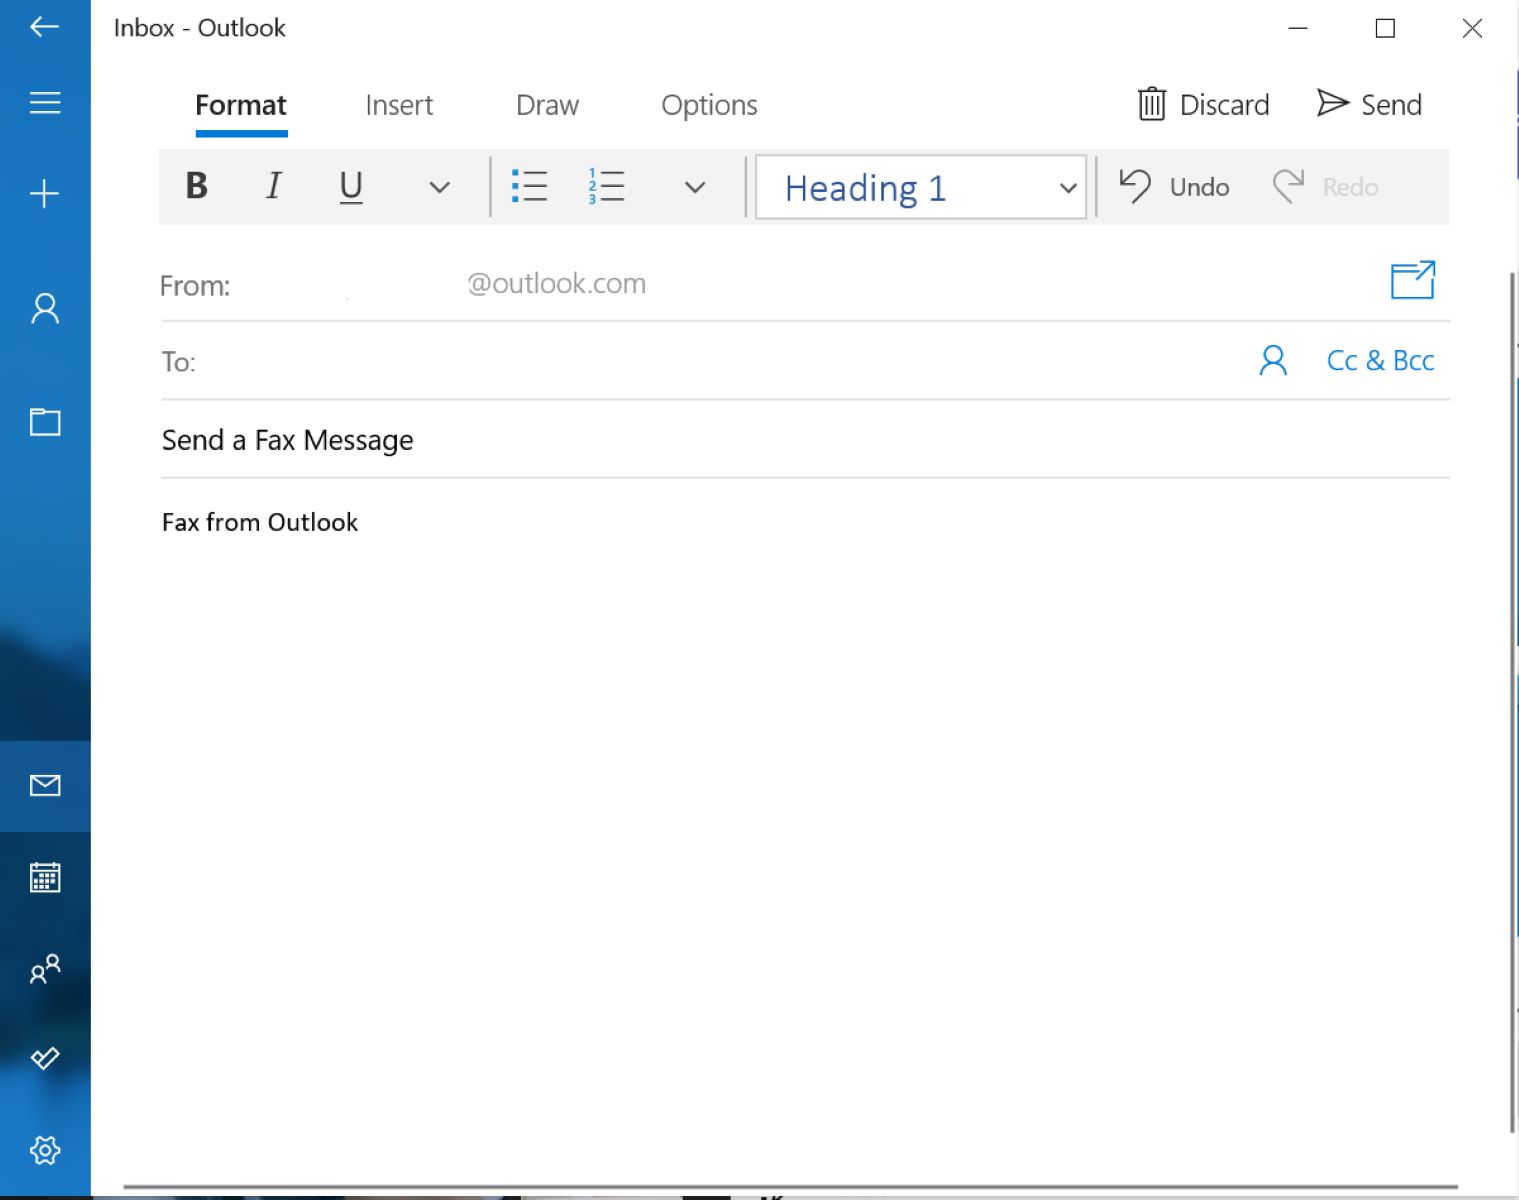
Now that you have set up your email fax service, it’s time to compose a new fax. The process is similar to drafting a regular email, but with a few additional steps specific to faxing. Follow these guidelines to ensure a smooth fax composition process:
- Open your email client or webmail interface and click on the “Compose” or “New Email” button to start a new message.
- In the recipient field, enter the fax number of the person or organization you wish to send the fax to. It’s important to format the fax number correctly, including the country and area codes as necessary. Some email fax services also allow you to enter the recipient’s name or a cover page note for better organization.
- Add a subject line to your fax email. While it is not mandatory, it can be helpful for reference purposes or if the recipient prints out your fax.
- Compose the body of your fax in the email’s text area. Here, you can provide a brief message or any additional information related to the fax. Keep in mind that the content of the body may appear on the cover page of the fax, depending on your fax service settings.
- If needed, you can attach one or multiple files to your fax email. Typically, email fax services support common file formats such as PDF, Word documents, or image files. Click on the “Attach” or “Paperclip” icon in your email client to select the desired files from your computer or cloud storage.
- Double-check your composed email to ensure accuracy and completeness. Verify that the recipient’s fax number, subject line, and attached document(s) are correct.
By following these steps, you can effectively compose a new fax within your email client. Remember to proofread the content and confirm that all the necessary attachments are included before proceeding to the next step.
Step 3: Enter the Recipient’s Fax Number
Once you have composed your fax, the next step is to enter the recipient’s fax number. Accuracy is crucial in this step to ensure that your fax reaches the intended recipient. Follow these guidelines to enter the recipient’s fax number correctly:
- Review the fax number you have obtained for the recipient. Ensure that you have included the country code, area code, and the actual fax number itself. Double-check for any errors or typos.
- In the recipient field of your email, enter the recipient’s fax number exactly as it is. Remove any spaces, dashes, or parentheses from the fax number. If your email fax service requires a specific format, make sure to follow those guidelines.
- If your email client or service provides a separate field for the recipient’s name or cover page note, enter that information accordingly. This can be beneficial when organizing and archiving your fax transmissions.
- Take a moment to recheck the recipient’s fax number and ensure that it corresponds to the correct party. This is especially important when sending faxes to multiple recipients to avoid any confusion.
Entering the recipient’s fax number accurately is crucial for the successful transmission of your fax. A small error in the fax number can lead to the fax being sent to the wrong recipient or not being delivered at all. Therefore, it is important to double-check and verify the recipient’s fax number before proceeding to the next step.
Step 4: Attach the Document to Be Fax
Now that you have entered the recipient’s fax number, it’s time to attach the document that you want to fax. Whether it’s a contract, a form, or any other important document, attaching it correctly ensures that it will be transmitted as intended. Follow these steps to attach the document to your fax:
- In your email client or webmail interface, locate the “Attach” or “Paperclip” icon, usually found in the toolbar of the compose window. Click on it to initiate the attachment process.
- Navigate to the location on your computer where the document is stored. This can be your local storage, cloud storage, or any other location where the document is saved.
- Select the document or files that you want to fax. Depending on your email client or service, you may be able to select multiple documents to send as a single fax. Ensure that the file format is compatible with your email fax service, such as PDF, Word, or image files.
- After selecting the document(s), click the “Attach” or “Open” button to attach them to your fax email. The selected files will be uploaded and appear as attachments in your email.
- Different email clients or services may display the attachments differently, but they are typically listed below the subject line or in a designated section of the email.
- Verify that the correct document(s) are attached before proceeding with sending the email. Double-check the file names and confirm that all the necessary documents have been included.
By following these steps, you can successfully attach the document(s) that you want to fax. It’s important to ensure the accuracy and completeness of the attached file(s) to avoid any confusion or delays during the fax transmission process.
Step 5: Send the Email
After you have composed your fax, entered the recipient’s fax number, and attached the document(s) to be faxed, it’s time to send the email and initiate the fax transmission process. Follow these steps to send your fax email:
- Review the content of your fax email one last time to ensure accuracy, clarity, and completeness. Check for any typos or errors in the recipient’s fax number, subject line, body text, or attached documents.
- If your email client or service allows for it, you can choose to save a draft of your fax email for future reference or to make any necessary changes before sending.
- Click on the “Send” button in your email client or interface to send the fax email. Depending on your email service, this button may be labeled as “Send,” “Send Email,” or a similar term.
- Once you have sent the email, your email fax service will begin the fax transmission process. It will convert your email and attachments into a fax format that can be received by traditional fax machines.
- Some email fax services provide notifications or delivery confirmations to let you know if your fax has been successfully sent. These notifications may be sent to your email address or available within your email fax service account dashboard. Check for any available status updates or delivery reports.
When sending the fax email, it’s important to ensure that you have a stable internet connection to avoid any interruptions during the transmission process. If you encounter any issues or errors, refer to the troubleshooting resources provided by your email fax service or contact their customer support for assistance.
By following these steps and sending the email, you have initiated the process of transmitting your fax. Now, all that’s left is to confirm the successful delivery of your fax, which we’ll cover in the next step.
Step 6: Confirm Successful Fax Delivery
After sending your fax email, it’s crucial to confirm whether the fax has been successfully delivered to the intended recipient. This step allows you to ensure that your important documents have reached their destination without any issues. Follow these guidelines to confirm the successful delivery of your fax:
- Check your email for any delivery confirmations or status updates from your email fax service. Some providers offer notifications that confirm the successful transmission of your fax. Look for any email notifications that indicate the status of your fax, such as “Sent,” “Delivered,” or “Successful transmission.”
- If your email fax service provides a dashboard or an online account, log in and review your transmission history. Look for the specific fax you sent and check its delivery status. Some services may even provide a delivery confirmation report or a log of all your past faxes.
- Reach out to the recipient and confirm if they have received your fax. You can do this through a follow-up email, phone call, or any other preferred method of communication. Ask them whether they received the fax and if there were any issues or errors during transmission.
- If you suspect that the fax may not have been delivered successfully, double-check the recipient’s fax number for accuracy. It’s possible that there was a typo or error in the fax number, which resulted in an unsuccessful delivery.
- If necessary, resend the fax to the recipient, ensuring that you have corrected any mistakes in the fax number or any other relevant details. Follow the same steps as before to compose a new fax, enter the recipient’s fax number, attach the document, and send the email.
By following these steps and confirming the successful delivery of your fax, you can ensure that your important documents have reached their intended destination. If you encounter any issues or errors during the confirmation process, reach out to your email fax service provider for assistance. They can help troubleshoot any problems that may have occurred during fax transmission.
Conclusion
Sending a fax from your email is a convenient and efficient way to transmit important documents without the need for physical fax machines or paper. By following the steps outlined in this guide, you can easily set up an email fax service, compose a new fax, enter the recipient’s fax number, attach the document, send the email, and confirm successful fax delivery.
Using an email fax service allows for seamless integration between digital communication and traditional faxing. You can transmit documents of various file formats, such as PDFs, Word documents, or images, directly from your email client. This method eliminates the need for printing or scanning, reduces paper waste, and saves time.
Before sending a fax, it’s important to choose a reliable and user-friendly email fax service that meets your specific needs. Take the time to research different providers and compare their pricing plans, features, and customer reviews. This will ensure that you select the best option for your faxing requirements.
Once you have set up an email fax service, follow the step-by-step instructions in this guide to compose and send your fax. Double-check the recipient’s fax number, attach the necessary document(s), and review your email before sending. After sending the fax, confirm its successful delivery through notifications, transmission history, or by contacting the recipient directly.
With the ease and convenience of sending faxes from your email, you can streamline your document transmission process and enhance your communication capabilities. Embrace the digital age and leverage the power of email fax services to send your faxes quickly, securely, and efficiently.