Introduction
When it comes to optimizing the performance and lifespan of your SSD (Solid State Drive), enabling TRIM is a crucial step. TRIM is a command that helps maintain the efficiency of your SSD by allowing the operating system to inform the drive which data blocks are no longer in use. This ensures that the SSD can efficiently manage and free up space, leading to improved performance and longevity.
Understanding how to run TRIM on your SSD is essential for maximizing its capabilities. In this article, we will explore the importance of TRIM for SSDs and provide step-by-step instructions for enabling TRIM on Windows, macOS, and Linux operating systems. Additionally, we will discuss how to verify TRIM functionality and address common issues that may arise during the process.
By following the instructions outlined in this article, you will be able to unleash the full potential of your SSD, ensuring optimal performance and longevity for years to come. Let’s dive in and explore the world of TRIM and how it can benefit your SSD.
What is TRIM?
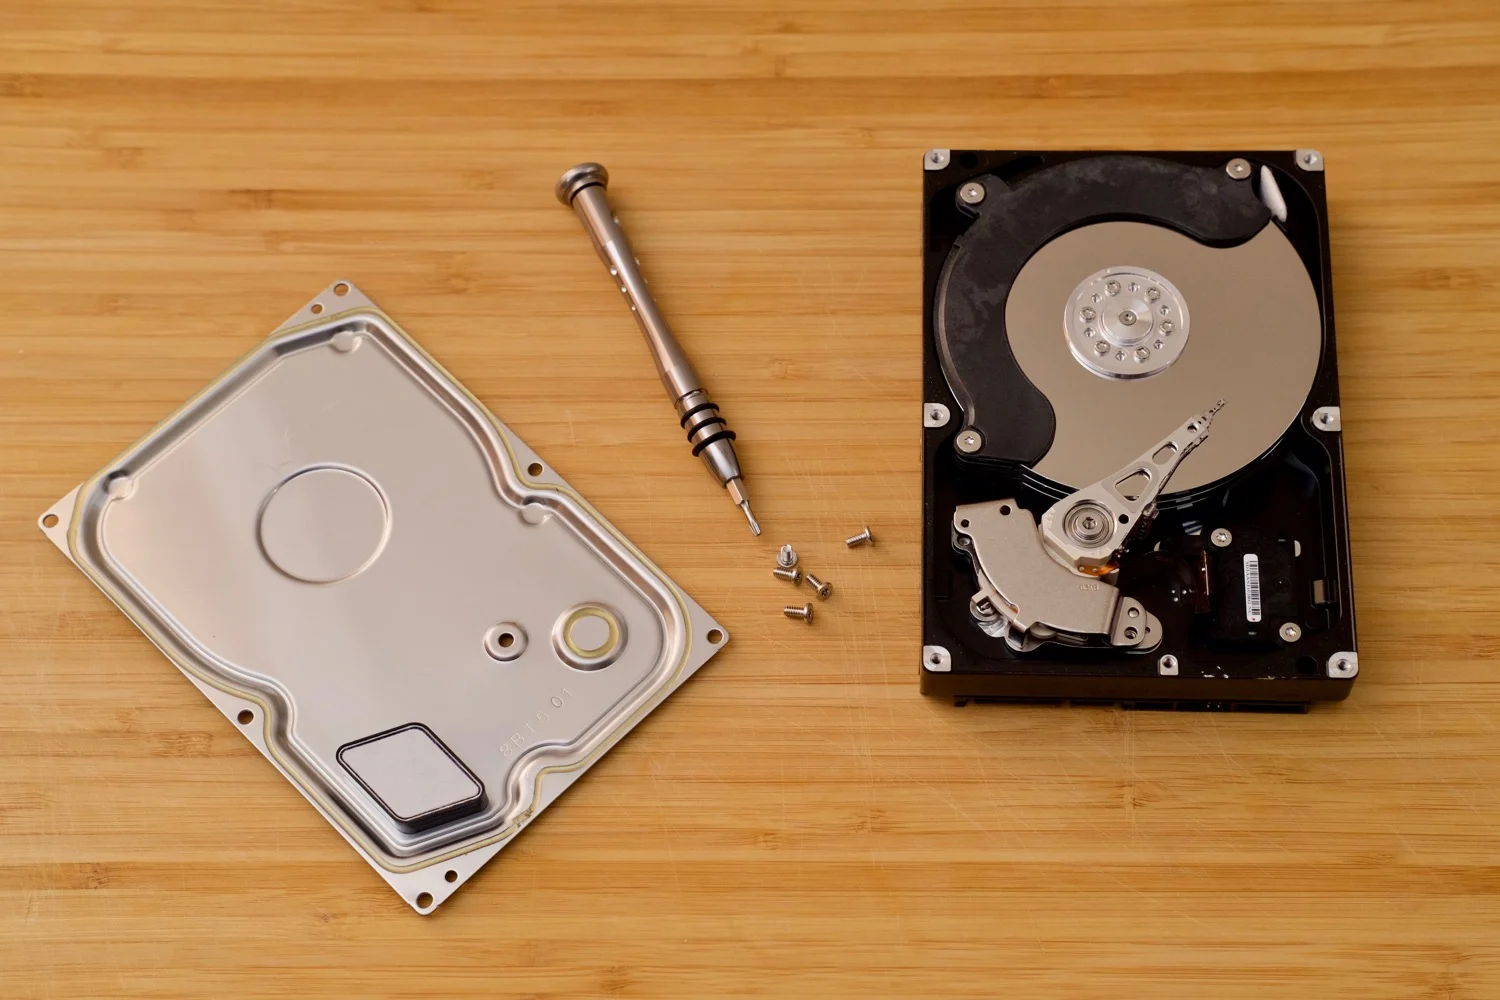
TRIM is a command that plays a vital role in maintaining the performance and longevity of SSDs. SSDs work differently from traditional hard disk drives (HDDs), as they use flash memory to store data instead of spinning disks. While this provides significant advantages such as faster access times and improved durability, it also introduces unique challenges in managing data storage.
Unlike HDDs, which can overwrite data directly, SSDs must perform additional operations before writing new data to ensure efficiency and prevent performance degradation. When data is deleted or modified on an SSD, the drive does not immediately erase the affected cells. Instead, the SSD marks these cells as available for new data to be written in the future.
Here is where TRIM comes into play. Without TRIM, the SSD’s performance can be negatively impacted over time. When new data needs to be written, the drive must first erase the cells marked as available. This adds an extra step and slows down the write process. Over time, if the drive keeps performing this erase step every time data needs to be written, it can lead to decreased performance and reduced lifespan.
TRIM solves this problem by allowing the operating system to inform the SSD about the data that has been deleted or is no longer in use. When TRIM is enabled, the SSD receives these notifications and proactively erases the marked cells, making them instantly available for new data. As a result, the SSD can write new data more efficiently, leading to faster performance and preventing degradation over time.
It is important to note that TRIM is supported by most modern SSDs and operating systems, including Windows, macOS, and Linux. Enabling TRIM is a simple yet crucial step to ensure your SSD performs optimally and maintains its longevity.
Why is TRIM important for SSDs?
Enabling TRIM on your SSD is essential for several reasons. Let’s explore why TRIM is important for the performance and lifespan of your SSD:
1. Improves Performance: By enabling TRIM, you allow your SSD to maintain its efficiency by quickly reclaiming unused space. This ensures that the drive can write new data without the need to perform time-consuming erase operations. As a result, you’ll experience improved read and write speeds, leading to faster overall system performance.
2. Prevents Write Amplification: Write amplification is a phenomenon where the SSD needs to write more data than necessary due to inefficient data management. When TRIM is not enabled, the SSD has to perform the erase step before new data can be written. This process increases the number of write operations the drive needs to perform, leading to write amplification and reducing the SSD’s lifespan. By enabling TRIM, you minimize write amplification and extend the life of your SSD.
3. Increases Longevity: SSDs have a limited number of write cycles before they start to wear out. Enabling TRIM ensures that unnecessary write operations, such as overwriting cells that still contain valid data, are minimized. This extends the lifespan of your SSD, allowing you to use it for a longer period without experiencing performance degradation.
4. Optimizes Storage Space: When TRIM is enabled, the SSD can quickly identify and free up unused space. This helps optimize the storage capacity of your drive, ensuring that you have ample space for storing new files and applications. By avoiding the accumulation of remnants of deleted or outdated data, you can make the most of your SSD’s storage capacity.
5. Compatible with Modern Operating Systems: TRIM is supported by most modern operating systems, including Windows, macOS, and Linux. This means that regardless of the platform you use, you can take advantage of the benefits of TRIM to optimize your SSD’s performance.
By enabling TRIM on your SSD, you can unlock its full potential, improve performance, increase longevity, and optimize storage space. Now that we understand the significance of TRIM for SSDs, let’s move on to checking TRIM support on your SSD.
Checking TRIM support on your SSD
Before enabling TRIM on your SSD, it’s important to verify if your SSD and operating system support TRIM. Here are the steps to check TRIM support:
1. Windows:
- Open the Start menu and type “Command Prompt”.
- Right-click on “Command Prompt” and select “Run as administrator”.
- In the Command Prompt window, type the following command:
fsutil behavior query DisableDeleteNotify - If the command returns “DisableDeleteNotify = 0”, it means that TRIM is already enabled. If it returns “DisableDeleteNotify = 1”, TRIM is not enabled.
2. macOS:
- Click on the Apple menu and select “About This Mac”.
- In the Overview tab, click on “System Report”.
- In the left sidebar, under “Hardware”, click on “Storage”.
- Select your SSD from the list of drives.
- Look for the “TRIM Support” entry. If it says “Yes”, TRIM is enabled. If it says “No”, TRIM is not enabled.
3. Linux:
- Open a terminal.
- Enter the following command:
sudo hdparm -I /dev/sda | grep -i TRIM(Replace “/dev/sda” with the path to your SSD) - If you see “Data Set Management TRIM supported”, it means TRIM is supported. If you don’t see this message, TRIM is not supported.
By following these steps, you can determine whether TRIM is supported on your SSD. If TRIM is already enabled, you can proceed to the next section to verify TRIM functionality. If TRIM is not supported or not enabled, don’t worry. The next sections will guide you on how to enable TRIM on different operating systems.
Enabling TRIM on Windows
Enabling TRIM on Windows is a straightforward process. Follow the steps below to enable TRIM on your SSD:
- Open the Start menu and type “Command Prompt”.
- Right-click on “Command Prompt” and select “Run as administrator” to open the Command Prompt with administrative privileges.
- In the Command Prompt window, type the following command:
fsutil behavior set DisableDeleteNotify 0 - Press Enter to execute the command.
- You will see a message confirming that the DisableDeleteNotify setting has been successfully changed.
- Restart your computer to apply the changes.
After the restart, TRIM will be enabled on your SSD. It is important to note that newer versions of Windows typically enable TRIM by default, so you may not need to perform this step. However, it is recommended to verify TRIM support and enable it manually if necessary.
It’s also worth mentioning that some SSD manufacturers provide their own software tools that allow you to manage and optimize your SSD, including enabling TRIM. Check the manufacturer’s website or documentation to see if they provide any specific software for your SSD.
With TRIM enabled on your Windows system, your SSD will be able to maintain its performance and longevity by efficiently managing the storage and freeing up unused space. In the next sections, we will explore the process of enabling TRIM on macOS and Linux.
Enabling TRIM on macOS
Enabling TRIM on macOS is relatively simple. Here are the steps to enable TRIM on your SSD:
- Click on the Apple menu and select “About This Mac”.
- In the Overview tab, click on “System Report”.
- In the left sidebar, under “Hardware”, click on “Storage”.
- Select your SSD from the list of drives.
- Note down the “BSD Name” of your SSD (e.g., disk0, disk1)
- Open a Terminal window from the Applications folder or by searching in Spotlight.
- In Terminal, type the following command:
sudo trimforce enable - Press Enter to execute the command.
- Enter your administrator password when prompted.
- You will see a warning message about the potential risks of enabling TRIM. Read the message carefully and, if you agree, type “y” and press Enter.
- Reboot your Mac to apply the changes.
After the reboot, TRIM will be enabled on your SSD. It’s important to note that enabling TRIM using the trimforce command is only available on macOS 10.10.4 and later versions.
Keep in mind that enabling TRIM through this method is for third-party SSDs. If you’re using an Apple-branded SSD, TRIM is likely already enabled by default.
Now that you’ve successfully enabled TRIM on your macOS system, your SSD will be able to maintain optimal performance and longevity by efficiently managing your storage and eliminating unnecessary data blocks. Next, let’s move on to enabling TRIM on Linux.
Enabling TRIM on Linux
Enabling TRIM on Linux requires a few steps, but it can be done with relative ease. Follow the instructions below to enable TRIM on your Linux system:
- Open a terminal on your Linux distribution.
- Enter the following command to check if TRIM is already enabled:
sudo hdparm -I /dev/sda | grep -i TRIM(Replace “/dev/sda” with the path to your SSD) - If the command returns “Data Set Management TRIM supported”, it means that TRIM is already enabled on your SSD. You can skip the rest of the steps.
- If the command does not return any information about TRIM support, proceed with the following steps.
- Edit the fstrim.service file by entering the following command:
sudo nano /etc/systemd/system/fstrim.service - In the editor, add the following lines:
- Save the file and exit the editor.
- Enable the fstrim.service unit by entering the following command:
sudo systemctl enable fstrim.service - Restart your Linux system for the changes to take effect.
[Unit]
Description=Discard unused blocks on filesystems from /etc/fstab
Documentation=man:fstrim(8)
[Service]
Type=oneshot
ExecStart=/sbin/fstrim --all || true
[Install]
WantedBy=multi-user.target
After restarting your system, TRIM will be enabled on your Linux system. The fstrim.service unit will automatically run regular TRIM operations on your SSD, ensuring that unused blocks are discarded and maintaining optimal performance.
Please note that the steps mentioned above are general and may vary depending on your Linux distribution. Consult your distribution’s documentation or community resources for specific instructions related to TRIM on your version of Linux.
Now that TRIM is enabled on your Linux system, your SSD will benefit from efficient data management and improved performance. Let’s move on to the next section to verify the functionality of TRIM.
Verifying TRIM functionality
Once you have enabled TRIM on your SSD, it’s important to verify that TRIM is functioning correctly. Verifying TRIM functionality ensures that your SSD is receiving and processing TRIM commands effectively. Here are the steps to verify TRIM functionality:
- Open a command prompt or terminal on your operating system.
- Type the following command to run a TRIM test:
sudo fstrim -v /(Replace “/” with the mount point of your SSD if it’s different) - Press Enter to execute the command.
- You will see a progress bar indicating the TRIM operation.
- Once the TRIM operation is completed, you will see a summary that confirms the amount of trimmed space and the time it took.
If the TRIM test completes successfully and shows a non-zero amount of trimmed space, it indicates that TRIM is working correctly on your SSD. This means that your SSD is receiving TRIM commands and successfully freeing up the unused space.
However, if the TRIM test fails or shows zero trimmed space, it could indicate a potential issue with TRIM functionality. In such cases, you may need to revisit the steps to enable TRIM on your operating system and double-check the compatibility of your SSD and its firmware with TRIM.
It’s important to note that some SSDs have built-in garbage collection mechanisms that can mitigate the need for TRIM. These SSDs may not show trimmed space in the test results, but they can still effectively manage and optimize storage internally.
Verifying TRIM functionality on your SSD ensures that it is performing optimally and maintaining its efficiency. If the TRIM test is successful, you can have peace of mind knowing that your SSD is benefiting from TRIM’s benefits. In case of any issues, refer to the next section for common troubleshooting tips.
Common issues and troubleshooting tips
While enabling TRIM on your SSD is generally a smooth process, there can be some common issues that might arise. Here are a few troubleshooting tips to help you address these issues:
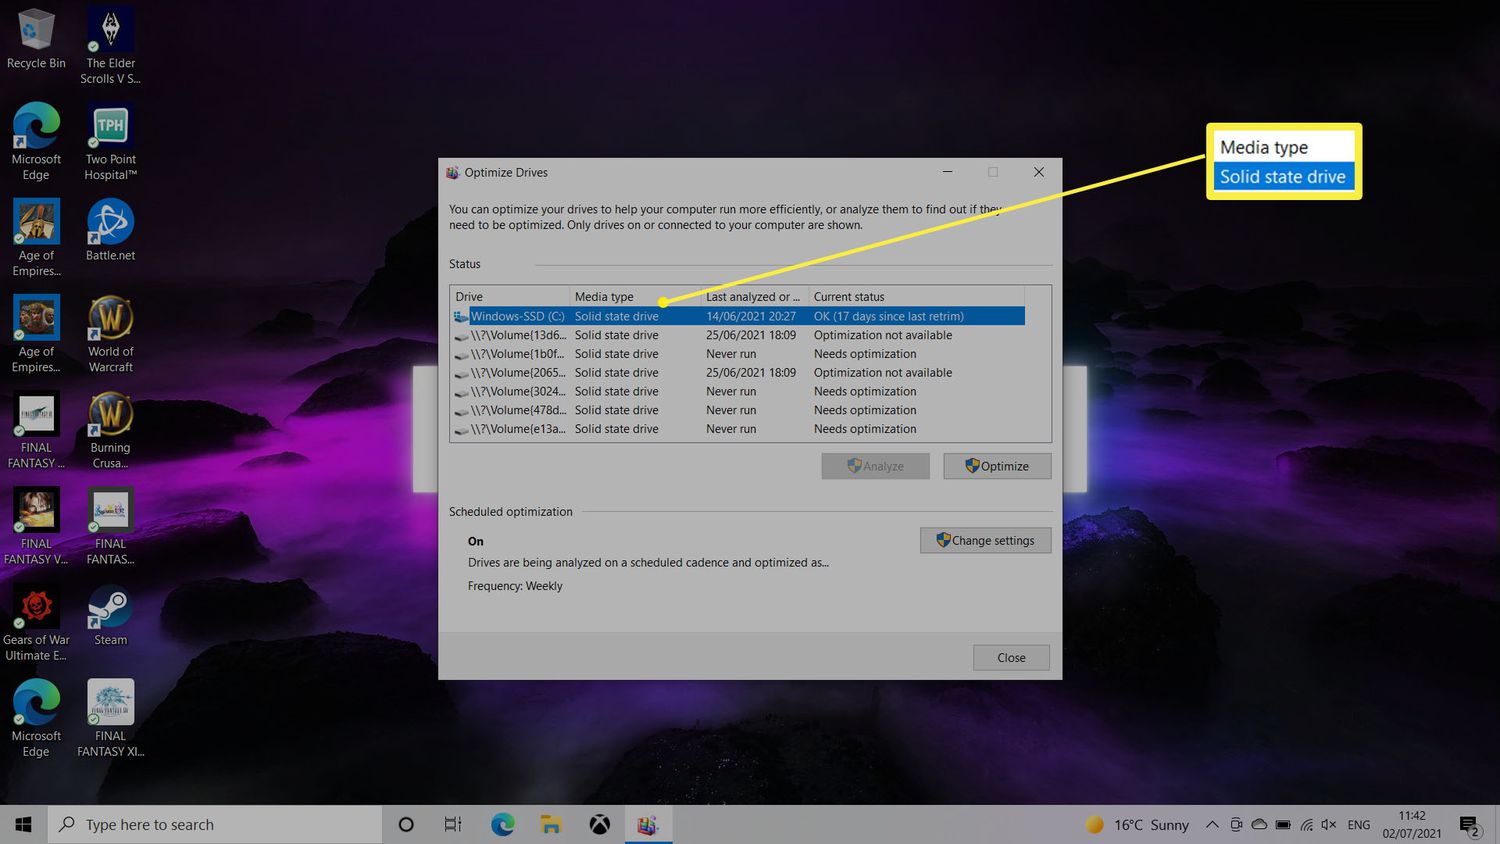
1. TRIM not supported by the SSD: If you find that TRIM is not supported by your SSD, it could be due to its age or firmware limitations. In such cases, consider upgrading to a newer SSD that supports TRIM for optimal performance and longevity.
2. Outdated firmware: An outdated firmware on your SSD may cause issues with TRIM functionality. Check with the manufacturer’s website for firmware updates or utilize their provided software tools to ensure you have the latest firmware version installed.
3. Incorrect TRIM status: Sometimes, the operating system may incorrectly report the TRIM status. If you have enabled TRIM but it still shows as disabled, double-check your settings and execute the TRIM verification command again to confirm its status. In some cases, a system restart may be required for the changes to take effect.
4. Incompatible storage controller drivers: Ensure that you have the latest storage controller drivers installed on your system. Incompatible or outdated drivers can interfere with TRIM functionality. Check the manufacturer’s website or your system’s support page for updated drivers.
5. Trim inconsistencies: In some cases, you may encounter inconsistencies with TRIM operations, where TRIM commands are not executed effectively on certain areas of the SSD. This may happen due to various reasons, such as SSD firmware limitations or file system issues. In such cases, performing a secure erase of the SSD and reinstalling the operating system can help resolve the inconsistencies.
6. Third-party SSD management software: Consider using third-party SSD management software provided by your SSD manufacturer. These tools often offer features that can help manage TRIM functionality more effectively, troubleshoot issues, and provide insights into the health and performance of your SSD.
If you encounter any issues while enabling or using TRIM on your SSD, it’s recommended to consult the relevant documentation provided by your SSD manufacturer or seek support from their customer service. They can provide guidance and assistance tailored to your specific SSD model and configuration.
By troubleshooting and resolving common issues, you can ensure that TRIM is functioning correctly on your SSD, allowing it to maintain optimal performance and longevity.
Conclusion
Enabling TRIM on your SSD is a crucial step to optimize its performance and maximize its lifespan. TRIM allows the operating system to communicate with the SSD, ensuring efficient data management by identifying and freeing up unused space. This leads to improved performance, prevention of write amplification, increased SSD longevity, and optimized storage capacity.
In this article, we explored the importance of TRIM for SSDs and provided step-by-step instructions for enabling TRIM on Windows, macOS, and Linux operating systems. We also covered how to check TRIM support, verify TRIM functionality, and provided troubleshooting tips for common TRIM-related issues.
Remember, enabling TRIM on your SSD may vary depending on the operating system and SSD model you are using. It’s essential to refer to the specific instructions provided by your SSD manufacturer or consult their support documentation for accurate guidance.
By following the instructions outlined in this article, you can ensure that your SSD remains in optimal condition, delivering fast and reliable performance for your computing needs. Taking the time to enable TRIM and verifying its functionality will help you make the most of your SSD investment and enjoy its benefits for years to come.