Introduction
Welcome to this guide on how to restore your ASUS gaming laptop to factory settings. Over time, your laptop’s performance can degrade due to various factors, such as the accumulation of unnecessary files or the presence of malware. Restoring your laptop to its factory settings can help resolve these issues and bring it back to its original state, ready for optimal performance.
Before proceeding with the restoration process, it is essential to understand that restoring your laptop to factory settings will erase all data on the device. Therefore, it is crucial to back up any important files, documents, or media that you wish to keep. Once your data is backed up, you can proceed confidently with the restoration process.
In this step-by-step guide, we will walk you through the process of restoring your ASUS gaming laptop to its factory settings. We will cover how to access the recovery partition, start the recovery process, choose the appropriate recovery type, and confirm the restoration. Additionally, we will provide guidance on what steps to take after the restoration is complete to ensure your laptop is up to date and running smoothly.
Restoring your ASUS gaming laptop can help resolve performance issues and improve overall system stability. It is a valuable tool for troubleshooting problems you may encounter with your device. By returning your laptop to its factory settings, you can eliminate any potential software conflicts or issues that may have arisen over time.
Now that we have provided an overview of what this guide will cover, let’s dive into the first step: backing up your data. Remember, taking the time to back up your files before proceeding is crucial to ensure you don’t lose any important information during the restoration process.
Step 1: Backing Up Your Data
Before proceeding with the restoration process, it is essential to back up any data that you wish to keep. Restoring your ASUS gaming laptop to factory settings will erase all the files on your device, returning it to its original state. By backing up your data, you can ensure that you don’t lose any important documents, photos, or other files.
To back up your data, you have several options. You can use an external hard drive, USB flash drive, cloud storage service, or even a network-attached storage (NAS) device. Choose the method that works best for you and follow these steps to back up your data:
- Create a folder on your chosen storage device or cloud service with a clear name, such as “ASUS laptop backup.”
- Manually copy and paste important files and folders from your laptop to the backup folder. This includes documents, photos, videos, music, and any other files that you want to keep.
- Ensure that you have copied all necessary files by double-checking the content of the backup folder.
- Eject or safely remove the storage device from your laptop to ensure that the backup is complete and secure.
By following these steps, you can rest assured that your data is safely stored and can be easily accessed once the restoration process is complete. It is recommended to take the time to thoroughly check and verify the backup to avoid any potential data loss.
Remember, backing up your data is an essential precautionary step before restoring your ASUS gaming laptop. It ensures that you have a copy of all important files, providing peace of mind during the restoration process. With your data safely backed up, you can proceed to the next step: accessing the recovery partition of your laptop.
Step 2: Accessing the Recovery Partition
Once you have backed up your data and ensured its safety, you can proceed to access the recovery partition on your ASUS gaming laptop. The recovery partition is a dedicated portion of your laptop’s storage that contains the necessary files and tools to restore your device to its factory settings.
Follow these steps to access the recovery partition on your ASUS gaming laptop:
- Turn off your laptop completely by clicking on the “Start” menu and selecting “Shut down.”
- Press the power button to turn on your laptop.
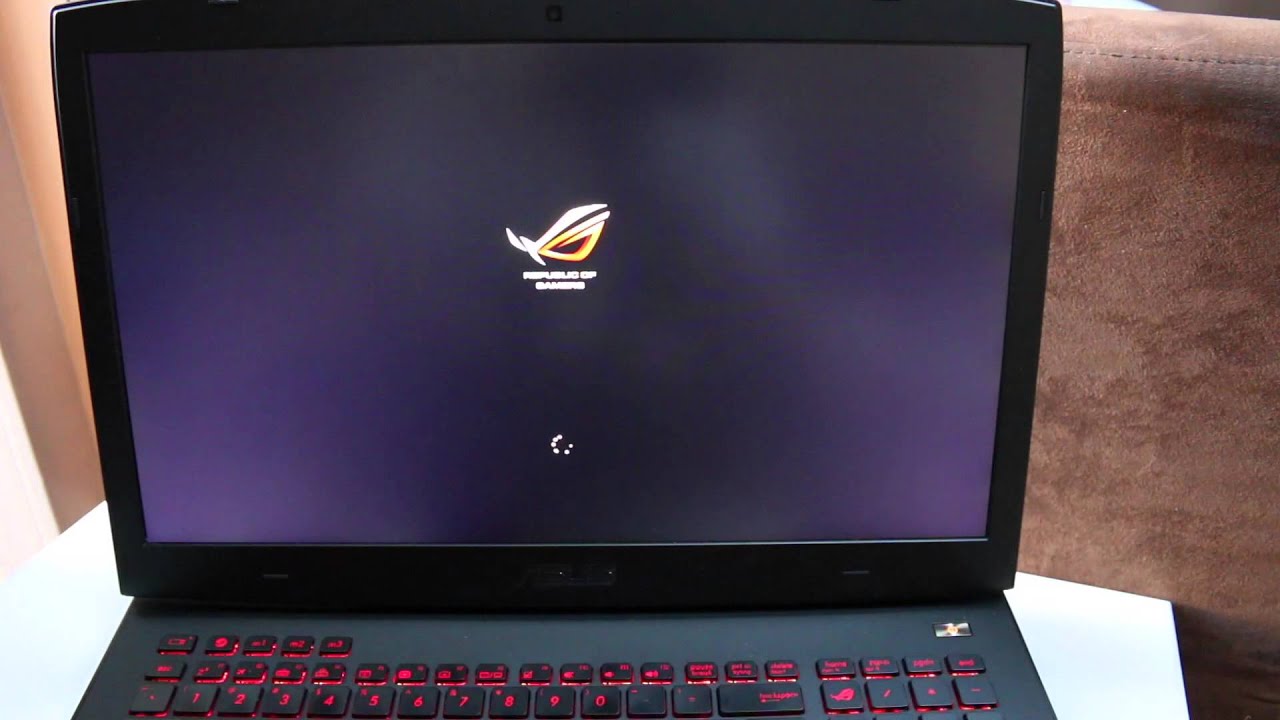
- As the laptop boots up, press and hold the “F9” key on your keyboard until the ASUS logo appears. This will take you to the Advanced Boot Options screen.
- Once you reach the Advanced Boot Options screen, use the arrow keys on your keyboard to highlight and select the “Repair Your Computer” option.
- A new window will appear with different options. Select the language you prefer and click “Next.”
- In the next screen, enter your login credentials, such as your username and password, if prompted, and click “OK.”
At this point, you have successfully accessed the recovery partition of your ASUS gaming laptop. From here, you can proceed to the next steps in the restoration process. It is important to note that the specific steps to access the recovery partition may vary slightly depending on the model and BIOS version of your ASUS laptop. Be sure to consult the user manual or ASUS support website for any specific instructions related to your laptop model.
Now that you have accessed the recovery partition, you are one step closer to restoring your ASUS gaming laptop to its factory settings. In the next step, we will guide you through starting the recovery process. Remember to follow each step carefully to ensure a successful restoration.
Step 3: Starting the Recovery Process
Now that you have accessed the recovery partition on your ASUS gaming laptop, it’s time to begin the actual recovery process. This step will guide you through the initial steps to initiate the restoration and prepare your laptop for the factory settings.
Follow these steps to start the recovery process:
- In the “System Recovery Options” window, you will see a list of options. Click on “ASUS Recovery Wizard.”
- A new window will appear, presenting you with different recovery options. Select “Recover Windows to First Partition Only” and click “Next.”
- You will be prompted to confirm that you want to start the recovery process. Ensure that you have backed up all important data and click “Next” to proceed.
- Read the warning message that appears and click “OK” to continue.
- The recovery process will now begin, and your laptop will restart automatically.
- During the recovery process, the ASUS Recovery Wizard will guide you through the necessary steps. Follow the on-screen instructions to complete the restoration.
It is important to note that the recovery process may take some time, depending on the specifications of your laptop and the amount of data to be restored. It is recommended to be patient and not interrupt the process to avoid any potential issues.
Once the recovery process is complete, your laptop will be restored to its factory settings. This means that all previously installed applications, settings, and personal files will be removed. Your laptop will essentially be in the same state as when you first purchased it.
Now that you have started the recovery process, you are on your way to restoring your ASUS gaming laptop to its original state. In the next step, we will discuss the different recovery types available and help you choose the most suitable one for your needs. Stay tuned!
Step 4: Choosing the Recovery Type
After starting the recovery process on your ASUS gaming laptop, you will be presented with different recovery types to choose from. This step will guide you through the available options and help you select the most appropriate recovery type based on your needs.
Follow these steps to choose the recovery type:
- Once the ASUS Recovery Wizard opens, you will see a list of recovery options. These may vary depending on your laptop model and the specific recovery tools included.
- Read through the available recovery types and their descriptions. These may include options such as “Restore Windows to Entire HD,” “Restore Windows to Entire HD with Two Partitions,” or “Restore Windows to Entire HD with Three Partitions.”
- Consider the pros and cons of each recovery type based on your requirements. The “Restore Windows to Entire HD” option will erase all partitions on your laptop’s hard drive and create a single partition, while the options with multiple partitions allow you to divide the hard drive into separate sections for different purposes.
- Select the recovery type that best suits your needs by clicking on the corresponding option.
- Review the summary of the recovery type you have chosen. Ensure that you have understood the implications and click “Next” to proceed.
Choosing the right recovery type is important as it determines the partition and formatting of your laptop’s hard drive. Consider factors such as the amount of storage you require, the need for separate partitions, and the specific functionalities you want after the restoration.
Once you have chosen the recovery type and confirmed your selection, the restoration process will continue accordingly. The ASUS Recovery Wizard will guide you through the remaining steps to complete the restoration.
Now that you have selected the appropriate recovery type, you are well on your way to restoring your ASUS gaming laptop to its factory settings. In the next step, we will discuss how to confirm the restoration before proceeding. Stay tuned!
Step 5: Confirming the Restoration
Once you have chosen the recovery type for your ASUS gaming laptop, it is essential to confirm the restoration before proceeding. This step will guide you through the process of confirming the restoration, ensuring that you are fully aware of the consequences and are ready to proceed.
Follow these steps to confirm the restoration:
- Read the summary of the chosen recovery type carefully. Make sure you understand that all data and settings on your laptop will be erased, and it will be reverted to its original factory state.
- Double-check that you have backed up all important data, as the restoration process will erase everything on your laptop.
- Take note of any specific instructions or warnings provided by the ASUS Recovery Wizard regarding driver installations or additional software.
- If you are fully prepared and have understood the consequences of the restoration, click “Next” to confirm and proceed.
Confirming the restoration is crucial as it ensures that you have fully considered the implications and are ready to proceed with the erasing of your laptop’s data and settings. It is important to be certain and confident in your decision before continuing with the restoration process.
Once you have confirmed the restoration, the ASUS Recovery Wizard will initiate the process. Your laptop will go through the necessary steps to revert to its factory settings, removing all previously installed applications, settings, and personal files.
Now that you have confirmed the restoration, you are one step closer to bringing your ASUS gaming laptop back to its original state. In the next step, we will guide you through the process of restoring the factory settings. Stay tuned!
Step 6: Restoring the Factory Settings
After confirming the restoration, it’s time to proceed with actually restoring the factory settings on your ASUS gaming laptop. This step will walk you through the process of restoring the laptop, bringing it back to its original state as if it was freshly purchased.
Follow these steps to restore the factory settings:
- The restoration process will begin automatically after you have confirmed the restoration. Your laptop will go through a series of steps, including formatting the hard drive and reinstalling the original operating system.
- During the restoration process, your laptop may restart multiple times. This is normal and part of the procedure.
- Follow any on-screen prompts or instructions provided by the ASUS Recovery Wizard.
- Be patient and allow the restoration process to complete. This may take some time, depending on the specifications of your laptop and the amount of data being restored.
It is crucial not to interrupt the restoration process, as doing so may cause potential issues or incomplete restoration. Allow your laptop to complete the necessary steps until it informs you that the restoration process has finished.
Restoring the factory settings on your ASUS gaming laptop will remove all previously installed applications, settings, and personal files. Your laptop will essentially be back to its original state when it was first purchased.
Now that you have successfully restored the factory settings on your laptop, you can proceed to the next step to complete the restoration process.
Coming up in the next step, we will guide you through the essential steps to take after the restoration is complete in order to start using your ASUS gaming laptop again. Stay tuned!
Step 7: Completing the Restoration
After restoring your ASUS gaming laptop to its factory settings, there are a few final steps to complete the restoration process. These steps will ensure that your laptop is set up properly and ready for use.
Follow these steps to complete the restoration:
- After the restoration is complete, your laptop will restart. Allow it to boot up and follow the on-screen instructions to set up the initial system configuration.
- Choose your preferred language, time zone, and other settings as prompted by the setup wizard.
- Provide the necessary information, such as your username and password, for the creation of a new user account.
- Once you have completed the initial setup, your laptop will be ready to use.
- Take a moment to check the functionality of your laptop. Ensure that the essential drivers and software are installed correctly and that everything is working as intended.
It is important to ensure that all necessary drivers and software are up to date after completing the restoration. Visit the ASUS support website to download and install the latest drivers specific to your laptop model. This will help optimize the performance and compatibility of your system.
If you have any specific software or applications that were installed on your laptop before the restoration process, you will need to reinstall them manually. Make a list of the essential software you had before the restoration and download them from the respective sources or install them from the original installation media.
By completing these final steps, you have successfully restored your ASUS gaming laptop to its factory settings and prepared it for use. Your laptop is now in its original state, ready for you to customize and personalize it according to your needs.
Congratulations on completing the restoration process! In the next step, we will provide guidance on updating drivers and software to ensure that your laptop operates smoothly. Stay tuned!
Step 8: Setting Up Your Laptop After Restoration
Now that you have completed the restoration of your ASUS gaming laptop, it’s time to set it up according to your preferences and needs. This step will guide you through the essential actions to take after the restoration process, ensuring your laptop is customized and ready for optimal performance.
Follow these steps to set up your laptop after restoration:
- Connect your laptop to the internet to ensure you have access to the latest updates and drivers.
- Run Windows Update to download and install any available updates for your operating system. This will help improve security and fix any known issues.
- Visit the ASUS support website and download the latest drivers specific to your laptop model. Install them to ensure that your hardware is functioning correctly.
- Reinstall any essential software or applications that were previously installed on your laptop. Use the installation media or download them from the original sources.
- Customize your desktop and personalize the settings according to your preferences. This may include adjusting display settings, configuring your desktop background, and setting up power management options.
- Install any additional software or applications that you need for your specific tasks or entertainment purposes.
- Consider creating a backup of your newly restored setup to avoid the need for a complete restoration in the future. Regularly backing up your data and settings is essential for protecting your valuable files.
By following these steps, you can ensure that your ASUS gaming laptop is set up properly after the restoration process. Taking the time to update drivers, install necessary software, and customize your settings will optimize the performance and functionality of your laptop.
Keep in mind that the specific steps and preferences may vary depending on your individual needs and the specific model of your ASUS gaming laptop. Take the time to explore the settings and options available to you to make the most out of your device.
Now that you have set up your laptop after the restoration process, you are ready to enjoy the performance and capabilities of your ASUS gaming laptop. In the final step, we will provide concluding thoughts and a brief recap of the restoration process. Please stay tuned!
Step 9: Updating Drivers and Software
After setting up your ASUS gaming laptop, it is crucial to keep your drivers and software up to date. This step will guide you through the process of updating drivers and software, ensuring that your laptop operates smoothly and efficiently.
Follow these steps to update your drivers and software:
- Visit the ASUS support website and navigate to the drivers and downloads section.
- Enter your laptop model or select it from the provided list to access the drivers specific to your device.
- Download the latest versions of the drivers, including chipset drivers, graphics drivers, network drivers, and any other necessary drivers that may be available for your laptop model.
- Once downloaded, open the downloaded files and follow the installation instructions. It may be recommended to restart your laptop after installing certain drivers.
- After updating the drivers, check for updates for the installed software and applications.
- For software downloaded from the ASUS support website, visit the website periodically to check for any new versions or updates.
- For other third-party software or applications, open the respective software and check for updates within the program’s settings or preferences. Alternatively, you can visit the developer’s website for updates.
- Install any available updates for your software, following the instructions provided for each specific program.
Regularly updating your drivers and software is essential for optimal performance, compatibility, and security. Updated drivers help ensure that your laptop’s hardware functions correctly, while updated software provides access to new features and improvements.
As you update your drivers and software, it is recommended to create a system restore point before making any major changes. This allows you to revert to a previous working state if any issues arise during or after the update process.
By staying on top of driver and software updates, you can ensure that your ASUS gaming laptop remains optimized and protected against potential vulnerabilities or performance issues.
Congratulations! You have completed the final step of updating drivers and software on your ASUS gaming laptop. Your laptop is now fully prepared to deliver the best gaming experience and performance possible. Enjoy your restored and upgraded device to the fullest!
Conclusion
Congratulations on successfully restoring your ASUS gaming laptop to its factory settings! By following the step-by-step guide provided, you have taken the necessary steps to improve its performance and resolve any issues that may have been affecting its functionality.
Throughout the restoration process, you learned how to back up your data to ensure its safety, access the recovery partition on your laptop, start the recovery process, choose the appropriate recovery type, confirm the restoration, restore the factory settings, set up your laptop, and update drivers and software.
Restoring your ASUS gaming laptop to factory settings can be a valuable troubleshooting tool when you experience performance issues or encounter software conflicts. It allows you to start fresh and return your device to its original state, ready for optimal performance and functionality.
Remember, backing up your data before initiating the restoration process is crucial to avoid any loss of important files or documents. Additionally, regularly updating your drivers and software is essential to ensure that your laptop remains up to date with the latest features, improvements, and security fixes.
As you continue to use your restored ASUS gaming laptop, be sure to maintain regular backups of your important data and periodically check for driver and software updates. This proactive approach will help keep your laptop running smoothly and efficiently for a longer period.
We hope that this guide has provided you with the necessary knowledge and confidence to successfully restore your ASUS gaming laptop to factory settings. Should you encounter any issues in the future, refer back to this guide as a handy reference.
Thank you for choosing ASUS for your gaming laptop needs. We wish you many enjoyable gaming sessions and productive tasks on your newly restored and optimized device!