Introduction
Are you tired of uploading photos to Instagram only to find that they are cropped or pixelated? As an avid Instagram user, you know that image quality is crucial for creating an appealing and professional-looking feed. That’s where the importance of resizing photos for Instagram comes into play.
Resizing photos for this popular social media platform ensures that your images fit perfectly within Instagram’s established dimensions and guidelines. By doing so, you can showcase your creativity and capture your audience’s attention without compromising the quality of your photographs.
Whether you’re an aspiring influencer, a social media manager, or simply using Instagram to share your personal moments, it’s essential to understand the photo requirements and how to resize your images effectively. In this article, we’ll explore various options to resize your photos for Instagram, ranging from using Instagram’s in-app editing tools to third-party mobile apps and desktop software.
So, if you’re ready to take your Instagram game to the next level and ensure your photos are presented seamlessly on this platform, read on to discover the techniques and tips for resizing your photos for the optimum Instagram experience.
Why Resizing Photos for Instagram is Important
Instagram has become more than just a platform for sharing photos. It has evolved into a powerful tool for communication, brand promotion, and self-expression. With over a billion active users, it’s crucial to optimize your content to stand out from the crowd. One of the key factors in achieving this is resizing your photos specifically for Instagram.
When you upload a photo that doesn’t meet Instagram’s recommended dimensions, it can lead to cropping, distortion, or pixelation, resulting in a less appealing visual experience. By resizing your photos for Instagram, you can ensure that your images appear exactly as you intended them to be, without any loss of quality or important elements being cut off.
Furthermore, resizing your photos allows you to take advantage of Instagram’s grid layout. Instagram displays images in a square format, with a maximum aspect ratio of 1:1. By adhering to these dimensions, your photos will seamlessly fit into the grid, creating a more polished and cohesive aesthetic for your profile.
Another reason why resizing your photos is important is because Instagram’s algorithms prioritize high-quality, visually appealing content. When photos are properly resized and optimized, they load faster and engage users more effectively. This can lead to increased visibility, higher engagement rates, and ultimately, more followers and potential opportunities for growth.
Whether you’re an individual looking to build a personal brand, a business trying to boost your online presence, or an artist showcasing your work, resizing your photos for Instagram is an essential step in ensuring your content looks its best and reaches its full potential.
Now that we understand the importance of resizing photos for Instagram, let’s delve into the specific requirements and various methods you can use to resize your photos effectively.
Understanding Instagram’s Photo Requirements
Before resizing your photos for Instagram, it’s essential to familiarize yourself with the platform’s photo requirements. Instagram has specific guidelines in place to ensure that images are displayed in the best possible way across different devices and screen sizes.
Firstly, Instagram recommends using a square aspect ratio for your photos, with a minimum resolution of 1080 pixels by 1080 pixels. This ensures that your images appear crisp and clear on high-resolution displays. However, you can also upload photos with other aspect ratios, such as portrait (4:5) or landscape (1.91:1), as long as they meet the minimum resolution requirement.
In addition to aspect ratio and resolution, it’s important to be mindful of the maximum file size that Instagram allows. Currently, the maximum file size for photos on Instagram is 20 megabytes (MB). This ensures that your photos can be uploaded quickly and don’t consume excessive data for users browsing on mobile devices.
When resizing your photos, keep in mind that Instagram applies compression to images to optimize loading speed. To maintain as much image quality as possible, it’s recommended to upload photos with minimal compression. This way, you can preserve the details, colors, and clarity of your images.
Lastly, consider how your photos will appear on Instagram’s grid layout. The square aspect ratio works well for achieving a consistent and visually pleasing grid, but you can also get creative with different aspect ratios to add variety to your profile. Just ensure that your images are resized appropriately to fit within the given dimensions without being cropped or distorted.
By understanding and adhering to Instagram’s photo requirements, you can ensure that your resized photos will look stunning and maintain their quality when uploaded to the platform. Now, let’s explore the different options available to resize your photos for Instagram.
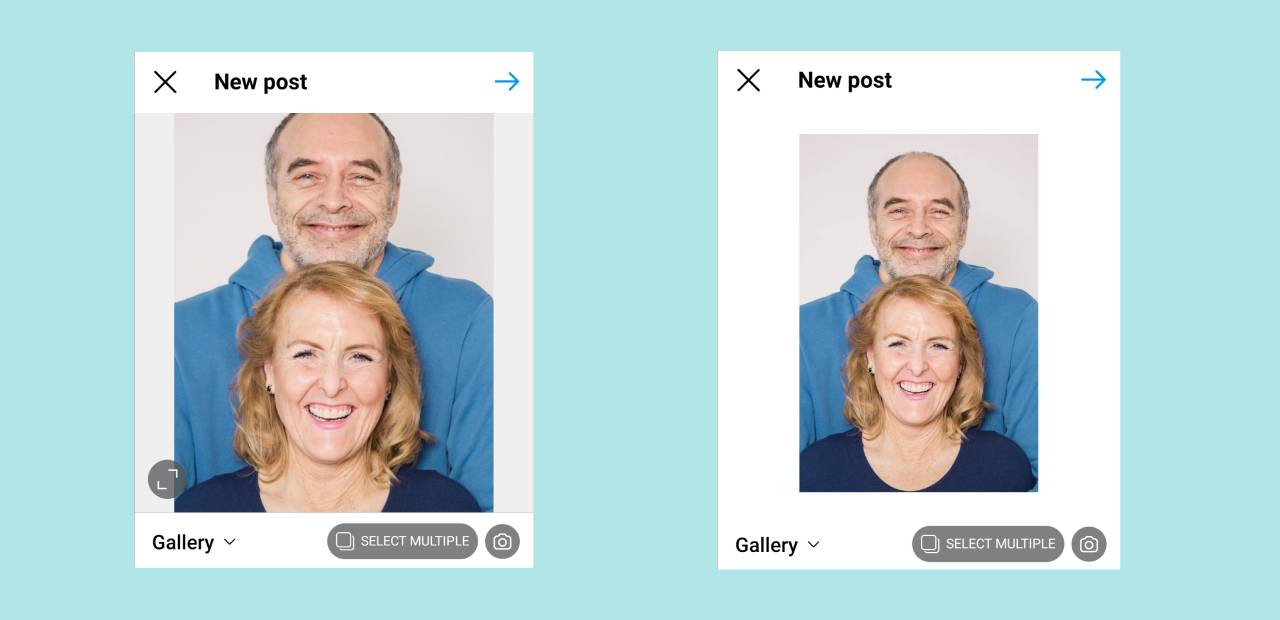
Option 1: Resizing Photos Using Instagram’s In-App Editing Tools
Instagram provides built-in editing tools that allow you to resize your photos directly within the app. This option is convenient and doesn’t require any additional software or apps.
To resize a photo using Instagram’s in-app editing tools, follow these steps:
- Select the photo you want to upload from your gallery or take a new photo using Instagram’s camera.
- Tap on the editing tools icon (a wand or pencil) located at the bottom of the screen.
- Choose the aspect ratio you want to use from the options provided. If you want to maintain the original aspect ratio, select “Original.” For a square aspect ratio, select “Square.” If you prefer a portrait or landscape aspect ratio, select the corresponding option.
- Adjust and crop your photo by dragging the edges of the frame within the editing screen.
- Once you’re satisfied with the resized photo, apply any desired filters or additional edits.
- Tap the “Next” button and proceed with adding a caption, hashtags, and location as usual.
- Finally, tap the “Share” button to upload your resized photo to your Instagram profile.
Using Instagram’s in-app editing tools is a quick and straightforward way to resize your photos without the need for external apps. However, keep in mind that this option may have limitations in terms of advanced editing features and fine-tuning options. If you require more control over resizing or additional editing capabilities, you may want to explore other options.
Now that you know how to resize photos using Instagram’s in-app editing tools, let’s move on to option 2: resizing photos using third-party mobile apps.
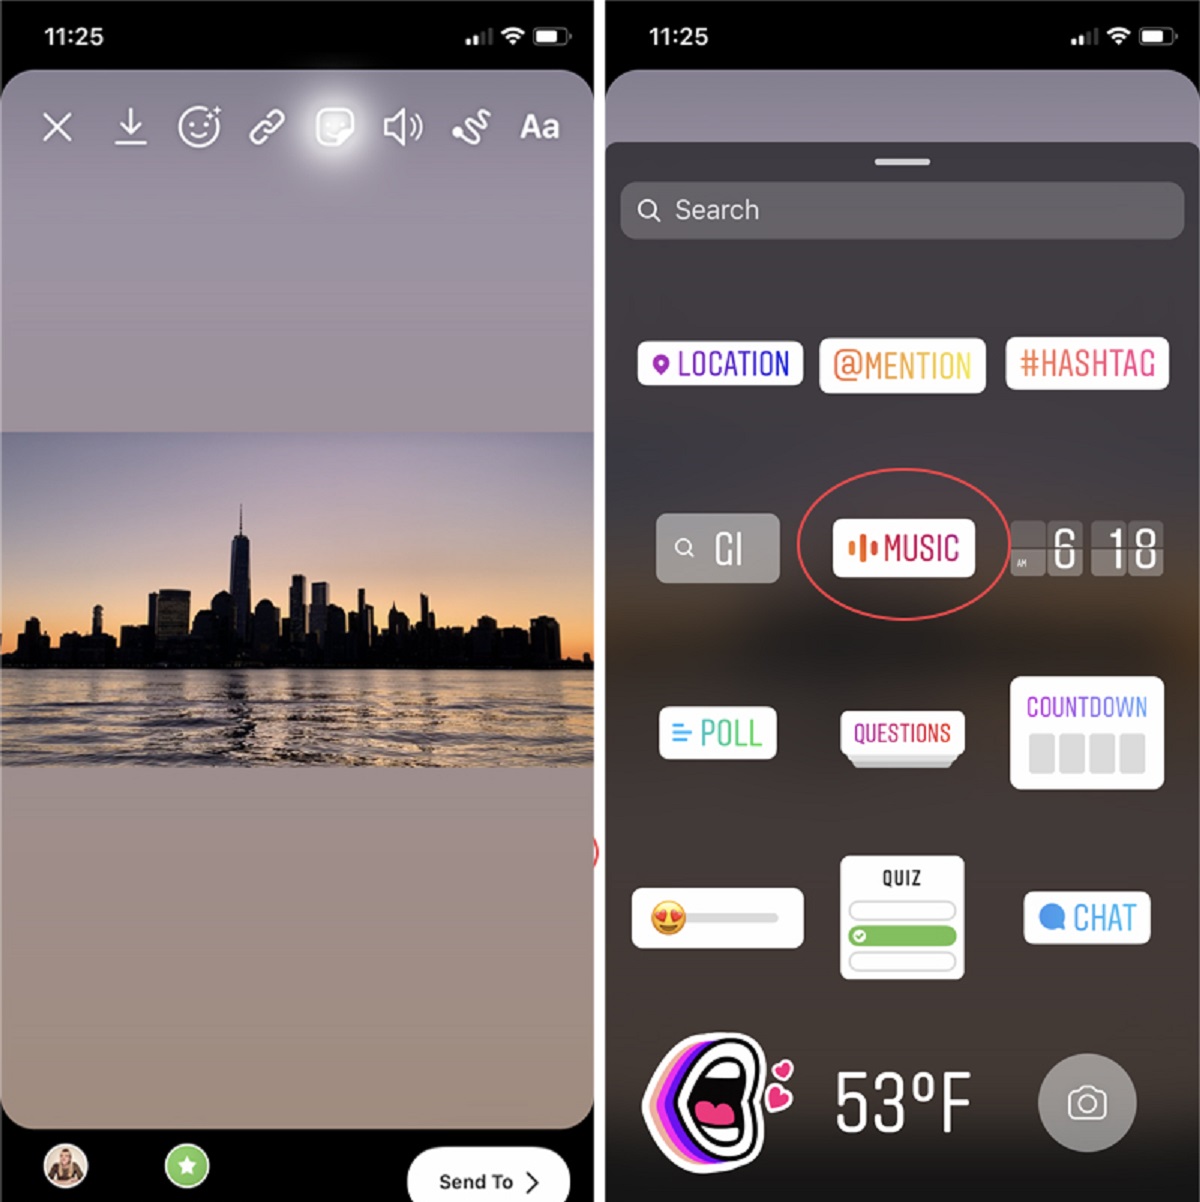
Option 2: Resizing Photos Using Third-Party Mobile Apps
If you’re looking for more advanced resizing options and greater control over the editing process, third-party mobile apps are a great alternative. These apps offer a wide range of features and functionalities specifically designed for resizing and optimizing photos for Instagram.
Here are a few popular third-party mobile apps that you can use to resize your photos:
- Adobe Lightroom Mobile: Known for its powerful editing capabilities, Adobe Lightroom Mobile allows you to resize your photos while maintaining excellent image quality. You can adjust the aspect ratio, crop the image, and make other fine-tuning edits before exporting it for Instagram.
- VSCO: Used by many Instagram enthusiasts, VSCO offers a variety of filters and editing tools, including resizing options. With VSCO, you can easily crop and resize your photos to fit Instagram’s dimensions without sacrificing quality.
- Snapseed: Developed by Google, Snapseed is a versatile editing app that allows you to resize and enhance your photos. It offers precise control over cropping and resizing, along with various other editing tools to enhance your images before sharing them on Instagram.
When using third-party mobile apps, make sure to choose an app that suits your specific needs and preferences. Experiment with different apps to find the one that offers the editing features you desire and a user-friendly interface that suits your workflow.
Once you’ve selected an app, follow the instructions provided by the app’s interface to resize your photos. Typically, you’ll need to import the photo, specify the desired aspect ratio or dimensions, make adjustments if necessary, and save the resized image to your camera roll. From there, you can easily upload the resized photo to Instagram.
Now that you’re familiar with resizing photos using third-party mobile apps, let’s proceed to option 3: resizing photos using desktop software.
Option 3: Resizing Photos Using Desktop Software
If you prefer working on your computer or need more advanced editing capabilities, resizing your photos using desktop software is a viable option. Desktop software provides a wider range of features, allowing you to have greater control over the resizing process.
Here are a few popular desktop software options for resizing photos:
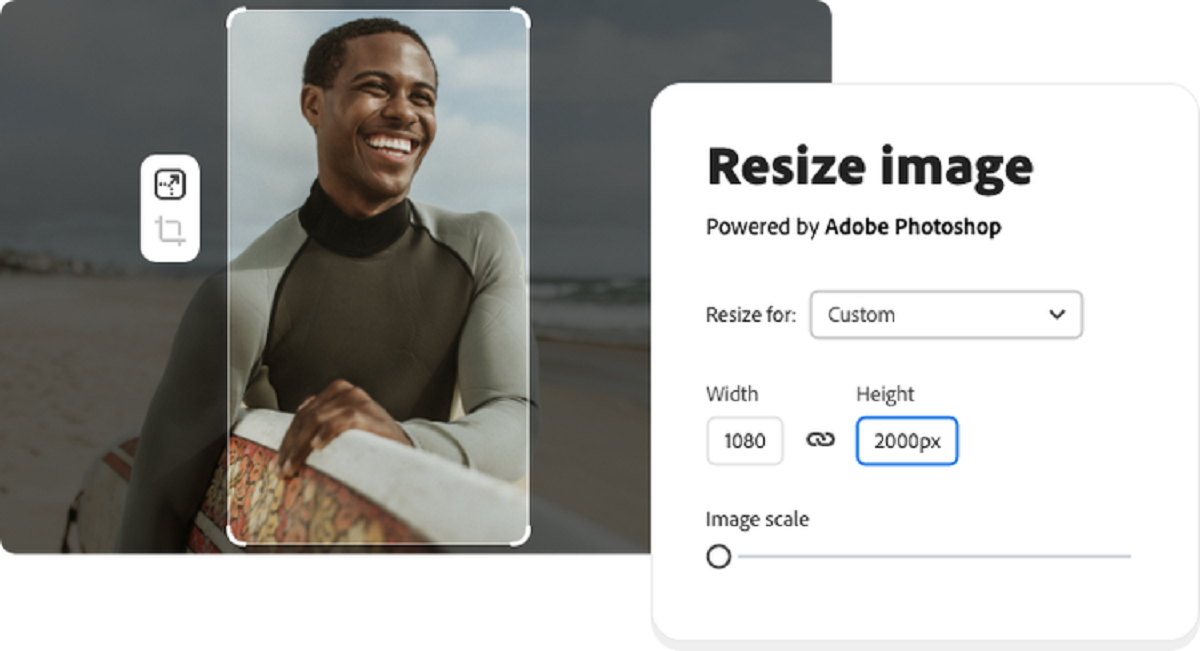
- Adobe Photoshop: As the industry-standard photo editing software, Adobe Photoshop offers extensive tools and options for resizing your photos. You can create a new document with the desired dimensions, paste your photo onto the canvas, and then adjust the size and aspect ratio accordingly.
- GIMP: An open-source alternative to Photoshop, GIMP provides powerful editing features, including resizing capabilities. With GIMP, you can easily resize your photos by specifying the desired dimensions, aspect ratio, and resolution.
- Lightroom Classic: Another Adobe software, Lightroom Classic is a comprehensive photo editing and management tool. In addition to its editing capabilities, Lightroom Classic allows you to resize your photos for Instagram by specifying the desired aspect ratio and dimensions.
When using desktop software, it’s important to have a basic understanding of the software’s interface and functionalities. Familiarize yourself with the resizing tools and options available to ensure you achieve the desired results.
To resize your photos using desktop software, open the software of your choice, import the photo, and navigate to the resize or image size options. Specify the desired dimensions or aspect ratio, preview the changes, and then save the resized photo to your preferred location. Finally, you can easily upload the resized photo to Instagram.
Remember, when using desktop software, make sure to save your resized photo in a web-friendly format, such as JPEG or PNG, to ensure optimal performance and quality on Instagram.
Now that you’re aware of the options available for resizing photos using desktop software, let’s move on to some important tips for maintaining photo quality while resizing.
Tips for Maintaining Photo Quality While Resizing
Resizing photos can sometimes lead to a loss in image quality, such as reduced sharpness or increased pixelation. However, by following these tips, you can minimize the impact on your photo’s quality:
- Start with a high-resolution photo: When resizing your photos, begin with a high-resolution image whenever possible. This provides more room to reduce the size without compromising the overall quality.
- Use the correct resizing technique: When resizing, use a technique that maintains the aspect ratio of the original photo. This prevents any distortion or stretching of the image, ensuring it appears natural and pleasing to the eye.
- Avoid excessive resizing: While it’s essential to resize your photos to fit Instagram’s requirements, avoid resizing them too much. Excessive resizing can lead to a significant loss of details and clarity. Aim to make minimal adjustments within the recommended dimensions to preserve the visual quality.
- Use proper sharpening techniques: After resizing, apply gentle sharpening to your photos to enhance their clarity and make up for any loss in sharpness during the resizing process. Be cautious not to overdo it, as excessive sharpening can introduce artifacts.
- Export with the appropriate settings: When saving your resized photos, ensure that you choose the appropriate file format and compression settings. JPEG is commonly used for photographs, while PNG is ideal for images with transparent backgrounds. Adjust the compression level to balance file size and image quality.
- Preview before uploading: Before uploading your resized photo to Instagram, take a moment to review it on various devices and screen sizes. This will help you identify any potential issues with the image quality and make necessary adjustments if needed.
By following these tips, you can maintain the quality and integrity of your photos while resizing them for Instagram. Experiment with different techniques and settings to find the best approach for your specific images.
Now that you’re equipped with these valuable tips, you’re ready to resize your photos for Instagram while maintaining their quality and visual appeal. Whether you choose to use Instagram’s in-app editing tools, third-party mobile apps, or desktop software, remember to make your photos shine by ensuring they meet Instagram’s requirements and resonate with your audience.
Conclusion
Resizing photos for Instagram is a crucial step in optimizing your content for this popular social media platform. By adhering to Instagram’s photo requirements and ensuring your images are properly resized, you can enhance the visual appeal of your feed and attract more engagement from your audience.
In this article, we explored various options for resizing photos, including using Instagram’s in-app editing tools, third-party mobile apps, and desktop software. Each option provides its own benefits and allows you to choose the method that best suits your needs and preferences.
Remember to maintain the quality of your photos while resizing by starting with high-resolution images, using proper resizing techniques, and applying subtle sharpening if needed. Additionally, pay attention to export settings to find the right balance between file size and image quality.
Whether you’re a social media influencer, a business, or an individual sharing your creative work, the quality of your photos on Instagram is essential. Resizing your photos correctly helps you create a visually appealing and professional-looking profile that stands out in the crowd.
So, embrace the power of resizing and start optimizing your photos for Instagram today. Experiment with different techniques, explore various editing tools, and make your images shine on this influential platform.
Now that you’re equipped with the knowledge and techniques to resize your photos effectively, go ahead and take your Instagram game to the next level!