Introduction
Replacing a trackpad on a MacBook Pro might seem like a daunting task, but with the right tools and a little patience, you can do it yourself and save on repair costs. Whether your trackpad is unresponsive, sticking, or malfunctioning, this step-by-step guide will walk you through the process of replacing it.
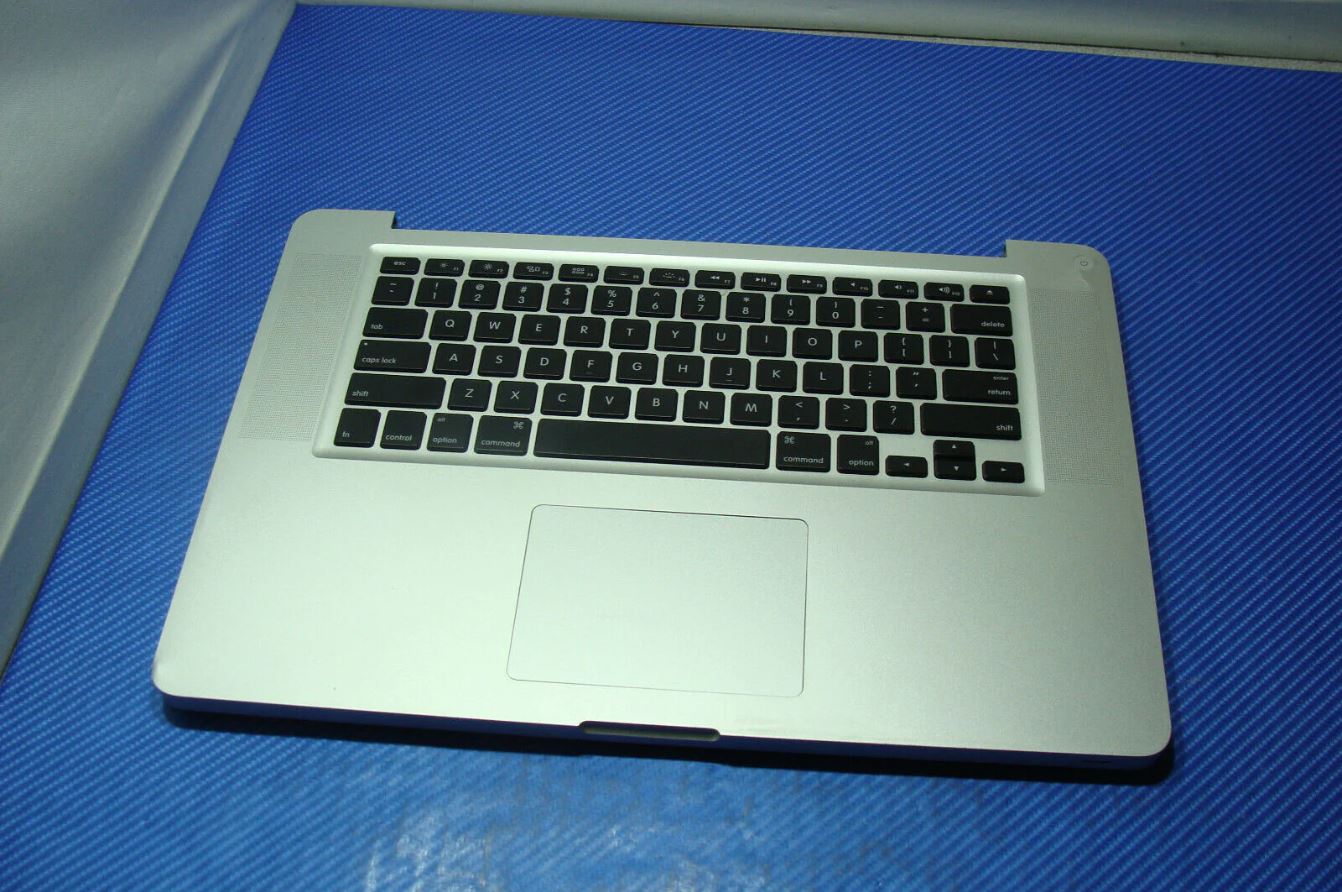
The trackpad is an essential part of your MacBook Pro, allowing you to navigate and interact with your computer. Over time, it can wear out or encounter issues that require replacement. Fortunately, you don’t need to be a tech expert to tackle this task. By following these instructions, you can replace the trackpad and have your MacBook Pro working flawlessly again.
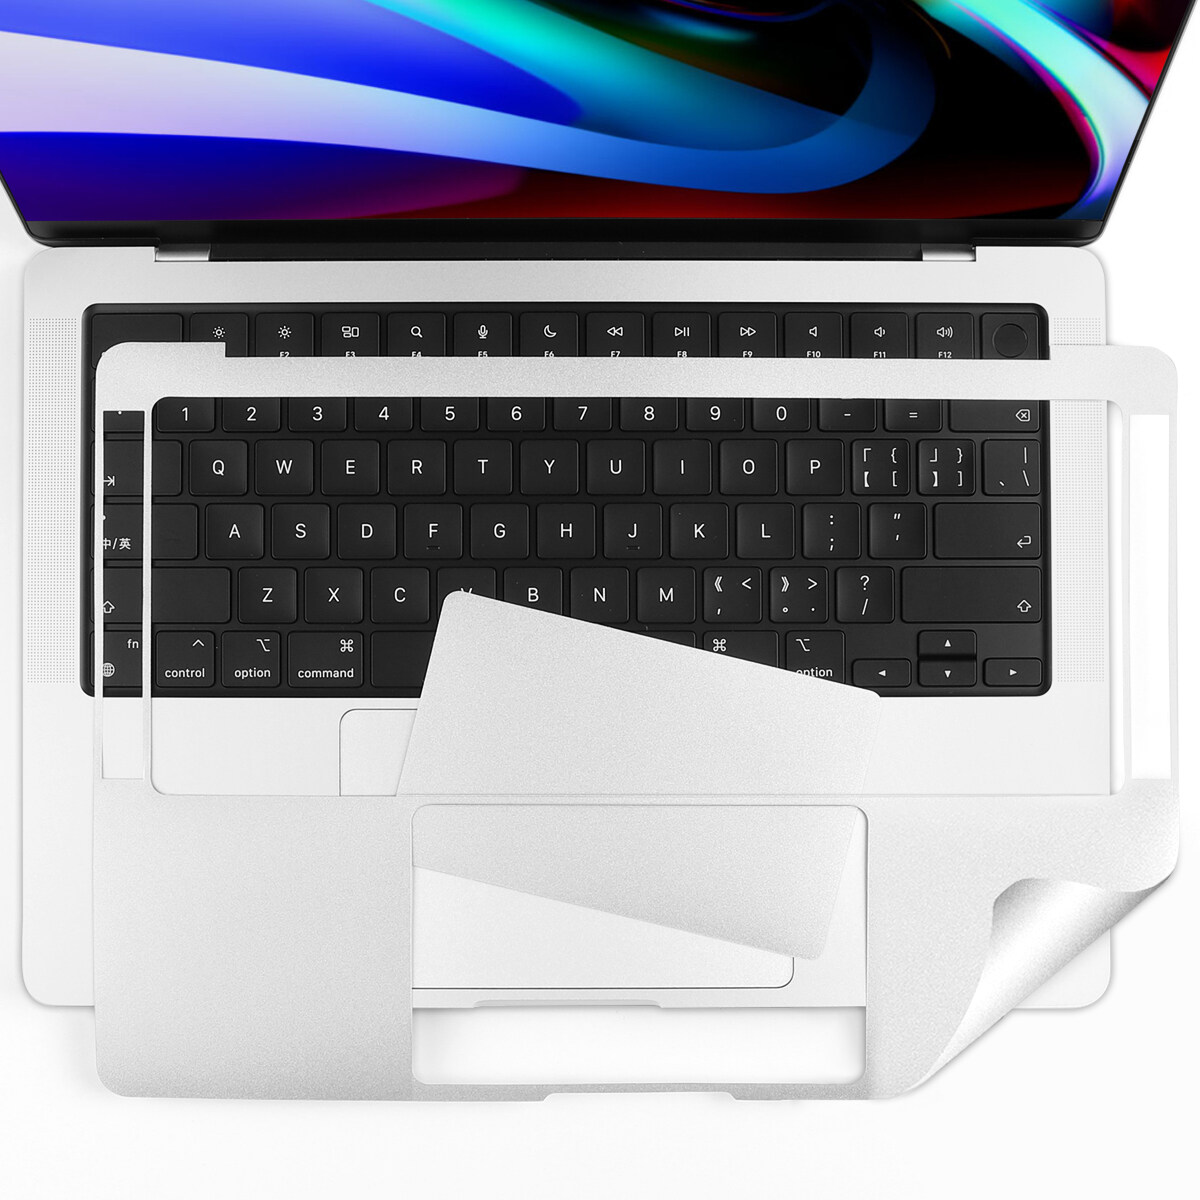
Before you begin, it’s essential to have the necessary tools and materials. This includes a replacement trackpad compatible with your MacBook Pro model, a small Phillips screwdriver, an anti-static wrist strap, and a clean, static-free workspace. Ensuring you have the right tools will make the process smoother and minimize the risk of damage to your device.
It’s worth noting that if your MacBook Pro is still under warranty, you may want to consult Apple or an authorized service provider to avoid voiding the warranty. However, if your warranty has expired or you’re comfortable with DIY repairs, this guide will provide you with the necessary steps to replace the trackpad on your own.
Now that you’re prepared and ready to get started, let’s dive into the step-by-step process of replacing a trackpad on a MacBook Pro. By following these instructions carefully, you’ll have a functioning trackpad in no time.
Tools and Materials Needed
Before you begin replacing the trackpad on your MacBook Pro, gather the following tools and materials:
- Replacement trackpad: Ensure you have a compatible replacement trackpad for your specific MacBook Pro model. You can find these online or at electronics stores.
- Small Phillips screwdriver: This tool will be used to remove the screws holding the trackpad and its bracket in place.
- Anti-static wrist strap: Wear this to ground yourself and prevent any static electricity from damaging your MacBook Pro’s sensitive components.
- Clean, lint-free cloth: Use this to wipe down the trackpad and surrounding area before installation.
- Isopropyl alcohol: This can be used to clean the trackpad and remove any residue or dirt that may have accumulated.
- Cotton swabs: These can be handy for applying the isopropyl alcohol when cleaning the trackpad.
- Tweezers: A pair of tweezers can be useful for handling small screws or connectors during the replacement process.
- Flat surface or container: Find a safe place to keep the screws and small parts organized during the trackpad replacement.
- Static-free workspace: Prepare a clean and clutter-free area where you can work on your MacBook Pro without any risk of static electricity or other interference.
Having all of these tools and materials ready will ensure a smooth and hassle-free trackpad replacement. It’s important to work in a well-lit and uncluttered area to prevent any accidental damage or loss of small components. Taking the time to gather everything you need beforehand will save you from potential frustration during the repair process.
Step 1: Prepare your workspace
Before diving into the trackpad replacement process, it’s crucial to prepare your workspace properly. Follow these steps to ensure a safe and organized environment:
- Clean your workstation: Start by clearing your workspace of any clutter or unnecessary items. This will provide you with ample space to work on your MacBook Pro without any obstructions.
- Turn off your MacBook Pro: Shut down your MacBook Pro completely to avoid any accidental damage or data loss during the trackpad replacement process. Disconnect the power adapter as well.
- Wear an anti-static wrist strap: Ground yourself and reduce the risk of static electricity damaging your MacBook Pro’s internal components by wearing an anti-static wrist strap. Attach one end of the strap to your wrist and the other end to a grounded metal surface.
- Choose a well-lit area: Find a well-lit location that will allow you to clearly see the small screws and connectors during the repair process. Adequate lighting will help prevent mistakes or accidents.
- Clean your hands: Wash your hands thoroughly or use an anti-static cleaning wipe to remove any oils or dirt. Clean hands will prevent any damage to the delicate electronic components of your MacBook Pro.
By taking the time to properly set up your workspace, you’ll create an environment conducive to a successful trackpad replacement. A clean and well-organized area will prevent any accidental damage or loss of tiny screws or connectors. Grounding yourself with an anti-static wrist strap will safeguard your MacBook Pro’s sensitive electronics from static discharge.
Once you’ve prepared your workspace, you’re ready to proceed with the trackpad replacement. Following the steps outlined in this guide will help you achieve a smooth and efficient repair process.
Step 2: Power off the MacBook Pro
Before starting the trackpad replacement process, it’s crucial to power off your MacBook Pro to ensure your safety and prevent any potential damage to the device. Follow these steps:
- Save your work: Take a moment to save any open files or projects you’re working on. Closing all programs and saving your work will prevent any data loss during the shutdown process.
- Disconnect the power adapter: Unplug the power adapter from your MacBook Pro. This step is important to avoid any electric shock or damage to the internal components of your device.
- Shut down your MacBook Pro: Press and hold the power button until the screen displays the shutdown options. Select the option to shut down your MacBook Pro completely. Wait a few moments for the device to power off.
Ensuring that your MacBook Pro is powered off before proceeding with the trackpad replacement is crucial for your safety and the integrity of the repair process. By shutting down the device properly and disconnecting the power adapter, you minimize the risk of accidental electrical shocks or damage to the device.
Remember to always handle your MacBook Pro with care, especially when working on its internal components. With your MacBook Pro powered off, you’re ready to move on to the next step in replacing the trackpad.
Step 3: Remove the bottom case
With your MacBook Pro powered off, it’s time to remove the bottom case to gain access to the internal components, including the trackpad. Follow these steps to remove the bottom case:
- Gather your tools: Ensure you have your small Phillips screwdriver handy for this step.
- Flip your MacBook Pro: Carefully flip your MacBook Pro upside down, so the bottom case is facing upwards. Place a soft cloth or towel underneath to protect the surface.
- Locate the screws: Look for the small screws that secure the bottom case to the MacBook Pro. They are usually located near the edges of the case.
- Remove the screws: Using your Phillips screwdriver, gently unscrew and remove all of the screws. Keep them organized and in a safe place, as you will need them later.
- Slide off the bottom case: After removing all the screws, carefully slide off the bottom case. Start from one side and gradually work your way around the edges until the entire case is detached.
- Set aside the bottom case: Place the bottom case in a safe location where it won’t get damaged or misplaced.
By removing the bottom case, you gain access to the internal components of your MacBook Pro, including the trackpad. This step is essential for the trackpad replacement process. Make sure to handle the bottom case with care, as it is still connected to the MacBook Pro by a ribbon cable. Avoid putting excessive pressure on the case to prevent any damage.
With the bottom case removed, you’re now ready to proceed to the next step: disconnecting the battery to ensure your safety during the repair process.
Step 4: Disconnect the battery
Before proceeding with the trackpad replacement on your MacBook Pro, it’s important to disconnect the battery to prevent any potential electrical mishaps. Follow these steps to safely disconnect the battery:
- Locate the battery connector: Look for the battery connector on the logic board of your MacBook Pro. It is a small rectangular connector with wires attached to it. Take note of its position for reconnection later.
- Use proper precautions: Before handling any internal components of your MacBook Pro, ensure that you are wearing an anti-static wrist strap and have grounded yourself to prevent any static electricity discharge.
- Gently disconnect the battery connector: Using your fingers or a pair of tweezers, carefully pull the battery connector straight out from its socket on the logic board. Apply gentle and even pressure to avoid any damage to the connector or the logic board.
- Verify battery disconnection: Once the battery connector is detached, double-check that it is not making any contact with the logic board. This action guarantees that there is no power being supplied to your MacBook Pro during the trackpad replacement.
Disconnecting the battery is a critical safety precaution before working on any internal components of your MacBook Pro. By doing so, you reduce the risk of accidentally damaging your device or experiencing an electric shock.
It’s important to note that when reconnecting the battery after the trackpad replacement, you should align the connector properly and push it straight into its socket until it clicks into place. This ensures a secure connection and enables your MacBook Pro to power on correctly.
With the battery safely disconnected, you can now move on to the next step of unscrewing the trackpad bracket to access the trackpad for replacement.
Step 5: Unscrew the trackpad bracket
Now that the battery is safely disconnected, you can proceed with removing the trackpad bracket to gain access to the trackpad itself. Follow these steps to unscrew the trackpad bracket:
- Locate the trackpad bracket: Identify the metal bracket covering the trackpad on your MacBook Pro. It is typically located near the center of the device.
- Use your small Phillips screwdriver: Take your small Phillips screwdriver and carefully unscrew the screws holding the trackpad bracket in place. Note the number and location of the screws for reassembly later.
- Set aside the screws and trackpad bracket: Keep the screws in a safe place and remove the trackpad bracket from your MacBook Pro. Set it aside for now, as you will need it during the reassembly process.
When unscrewing the trackpad bracket, make sure to apply consistent and gentle pressure to avoid stripping the screws or damaging the surrounding components. Take your time and ensure that each screw is fully loosened before removing them.
By removing the trackpad bracket, you are one step closer to accessing the trackpad for replacement. Ensure that you keep the trackpad bracket and screws in a safe location to avoid misplacing them during the repair process.
With the trackpad bracket removed, you can now proceed to the next step of disconnecting the trackpad cable in order to fully remove the old trackpad from your MacBook Pro.
Step 6: Disconnect the trackpad cable
With the trackpad bracket removed, the next step is to disconnect the trackpad cable, which connects the trackpad to the logic board of your MacBook Pro. Follow these steps to disconnect the trackpad cable:
- Locate the trackpad cable: Identify the flat ribbon cable connected to the trackpad on your MacBook Pro. Take note of its position and how it is attached to the logic board.
- Gently detach the trackpad cable: Using your fingers or a pair of tweezers, carefully disconnect the trackpad cable from its connector on the logic board. Apply gentle and even pressure to avoid bending or damaging the cable or the connector.
- Verify cable detachment: After disconnecting the trackpad cable, ensure that it is completely separated from the connector on the logic board. This step ensures a clean and secure disconnection.
When disconnecting the trackpad cable, it’s important to handle it with care as it is a delicate component. Avoid pulling or twisting the cable excessively to prevent any damage.
By disconnecting the trackpad cable, you have successfully detached the old trackpad from the logic board of your MacBook Pro. This step paves the way for removing the old trackpad and installing the new one in the next steps of the replacement process.
With the trackpad cable disconnected, you can now move on to the following step of removing the old trackpad from your MacBook Pro.
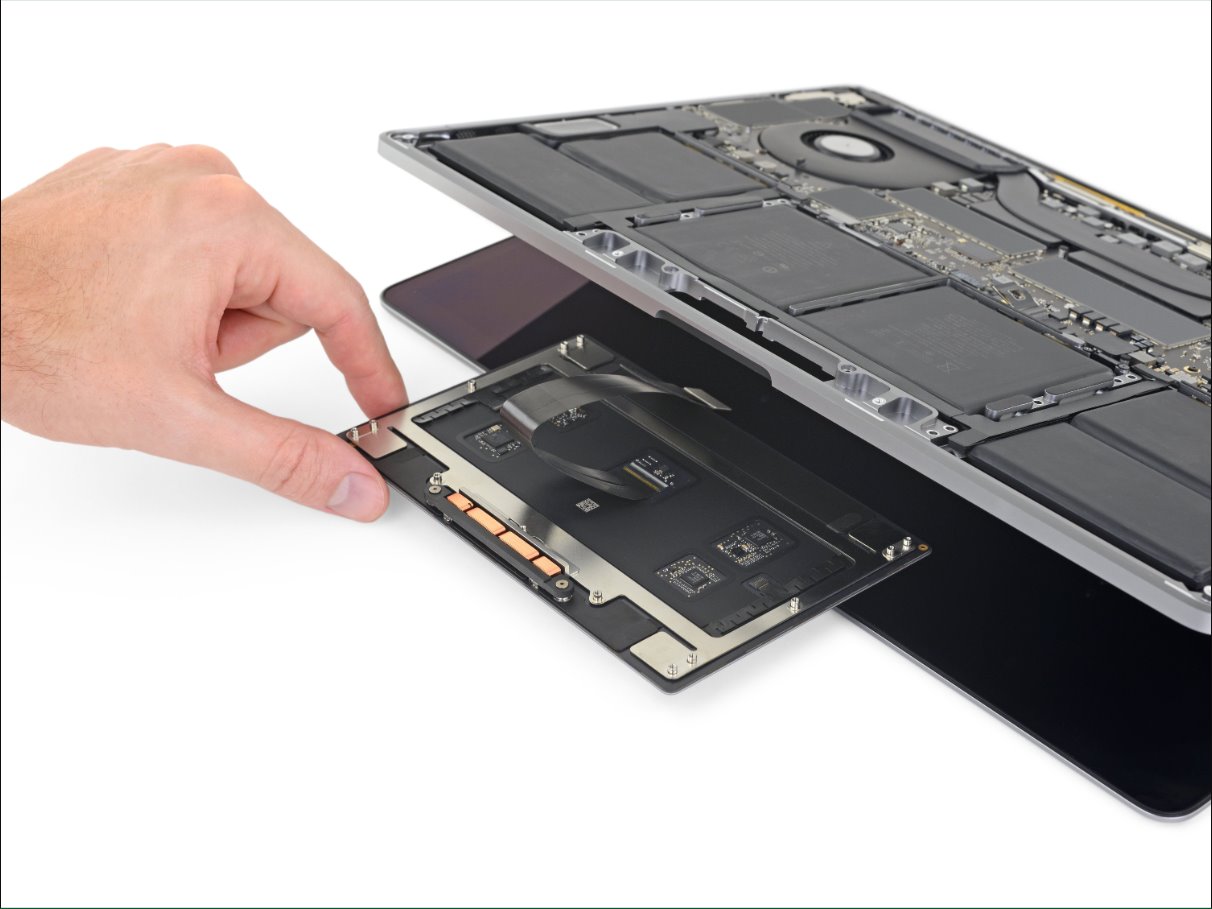
Step 7: Remove the old trackpad
With the trackpad cable disconnected, you can now proceed with removing the old trackpad from your MacBook Pro. Follow these steps to safely remove the old trackpad:
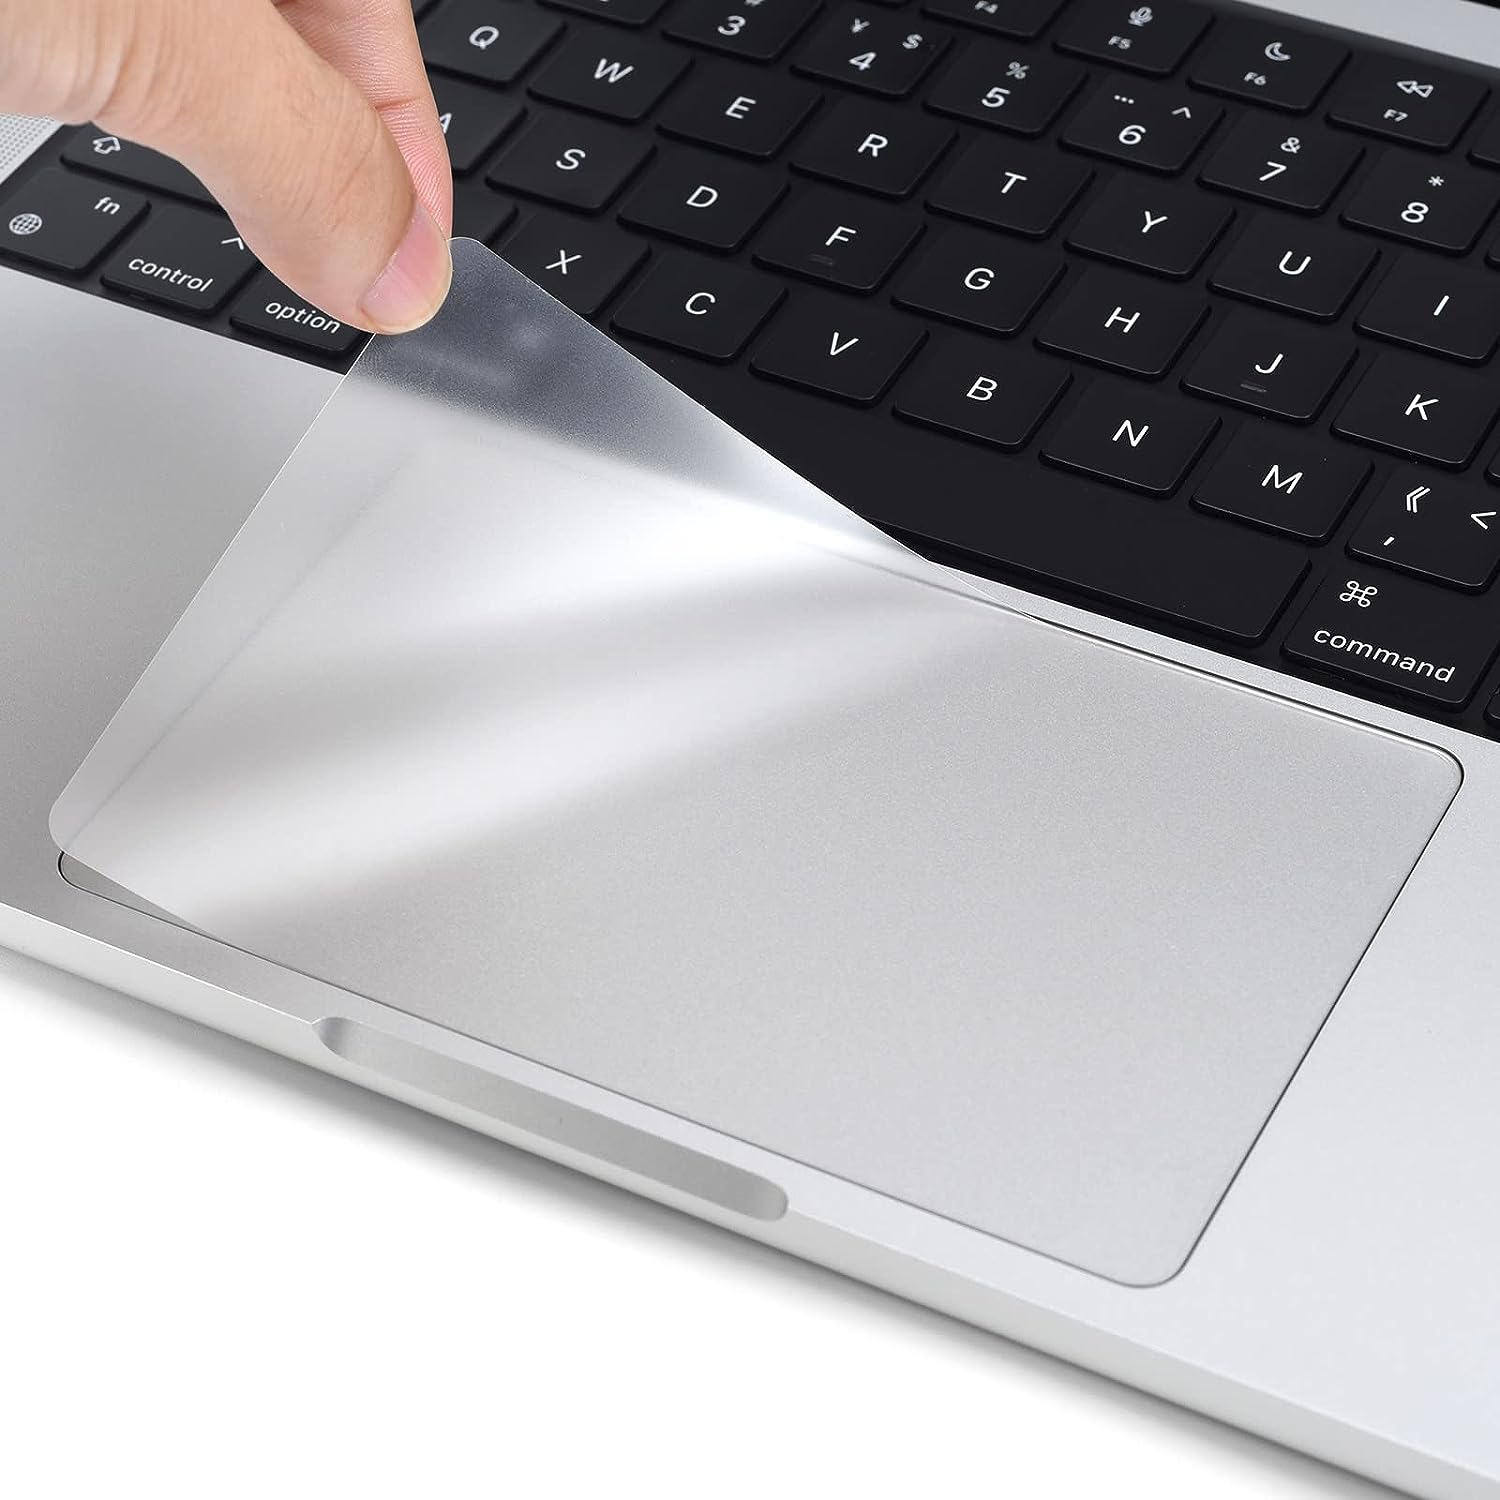
- Inspect the old trackpad: Take a moment to observe the condition of the old trackpad, noting any damage or signs of wear and tear that may have led to its malfunction.
- Release the adhesive: Carefully lift the old trackpad from the MacBook Pro, paying attention to any adhesive that may be holding it in place. Gently release the adhesive using a spudger or your fingers, taking care not to damage any surrounding components.
- Remove the old trackpad: Once the adhesive is released, gently slide the old trackpad out of its housing, ensuring that no cables or connectors are still attached. Set aside the old trackpad for proper disposal.
When removing the old trackpad, it’s important to be gentle and avoid using excessive force. Take your time to ensure a smooth and careful removal process to prevent any damage to the MacBook Pro or its internal components.
By successfully removing the old trackpad, you have made way for the installation of the new trackpad. Take a moment to clean the area where the old trackpad was located, removing any dust or residue before proceeding to the next step.
With the old trackpad safely removed, you’re ready to move on to the installation of the new trackpad in the upcoming steps of the trackpad replacement process.
Step 8: Install the new trackpad
With the old trackpad removed, it’s time to install the new trackpad onto your MacBook Pro. Follow these steps to ensure a successful installation:
- Examine the new trackpad: Before installation, carefully inspect the new trackpad to ensure it is in good condition and matches the specifications of your MacBook Pro model.
- Align the new trackpad: Position the new trackpad in the designated area within your MacBook Pro, making sure it lines up properly with the screw holes and cable connector.
- Attach the trackpad cable: Take the trackpad cable and connect it securely to the corresponding connector on the logic board. Make sure it is aligned correctly and push it in gently until it is fully seated.
- Secure the trackpad: If necessary, reapply adhesive to secure the new trackpad in place. Follow any specific instructions provided with the replacement trackpad, if applicable.
When installing the new trackpad, it’s crucial to be gentle and ensure proper alignment. Take care not to force any connections or apply excessive pressure during this step to avoid damaging the trackpad or the internal components of your MacBook Pro.
Once the new trackpad is securely installed, it’s a good idea to test its functionality before proceeding further. Power on your MacBook Pro and ensure that the trackpad responds accurately to touch and gestures.
Congratulations! You have successfully installed the new trackpad on your MacBook Pro. Now, it’s time to move on to reconnecting the trackpad cable and securing the trackpad bracket in the following steps of the trackpad replacement process.
Step 9: Reconnect the trackpad cable
With the new trackpad securely installed, it’s time to reconnect the trackpad cable to ensure proper functioning. Follow these steps to reconnect the trackpad cable:
- Locate the trackpad cable connector: Identify the trackpad cable connector on the logic board of your MacBook Pro. It should match the corresponding connector on the trackpad itself.
- Align the trackpad cable: Take the trackpad cable and align it with the connector on the logic board. Ensure that it is oriented correctly and matches the shape and size of the connector.
- Gently attach the trackpad cable: With careful precision, gently push the trackpad cable connector into the corresponding connector on the logic board. Apply even pressure and make sure it is fully seated, taking care not to bend or damage the cable or connector.
- Verify cable connection: After reconnecting the trackpad cable, double-check that it is firmly attached and properly aligned with the logic board. Ensure there are no visible gaps or loose connections.
When reconnecting the trackpad cable, be sure to handle it delicately to avoid any damage. Take your time to align the cable correctly with its connector, ensuring that it is fully inserted and securely seated. Verify the connection to guarantee proper functionality of the new trackpad.
With the trackpad cable successfully reconnected, you’re now ready to move on to securing the trackpad bracket in the next step of the trackpad replacement process.
Step 10: Screw back the trackpad bracket
Now that the trackpad cable is reconnected, it’s time to secure the trackpad bracket back into place. Follow these steps to screw back the trackpad bracket on your MacBook Pro:
- Retrieve the trackpad bracket: Locate the trackpad bracket that was set aside earlier during the removal process.
- Align the trackpad bracket: Position the trackpad bracket over the new trackpad, ensuring that it lines up with the screw holes and cable connector.
- Use your small Phillips screwdriver: Take your small Phillips screwdriver and carefully insert and tighten the screws into the designated holes on the trackpad bracket. Be mindful not to overtighten the screws, as it may cause damage.
- Verify bracket alignment and screw tightness: Double-check that the trackpad bracket is aligned correctly and that all screws are securely tightened. Ensure that there is no wobbling or movement of the trackpad bracket.
During the reinstallation of the trackpad bracket, it’s important to handle the screws with care and apply the appropriate amount of force when tightening them. Take your time to ensure that the bracket is aligned properly and the screws are tightened evenly.
By screwing back the trackpad bracket, you ensure the stability and proper positioning of the new trackpad within your MacBook Pro. This step is crucial to maintain the functionality and longevity of the trackpad.
With the trackpad bracket securely in place, it’s time to move on to reconnecting the battery in the next step of the trackpad replacement process.
Step 11: Reconnect the battery
With the trackpad bracket in place, the next step in replacing the trackpad on your MacBook Pro is to reconnect the battery. Follow these steps to safely reconnect the battery:
- Take note of the battery connector: Locate the battery connector on the logic board of your MacBook Pro. It should be in close proximity to where the trackpad and other components are situated.
- Align the battery connector: Carefully align the battery connector with its corresponding socket on the logic board. Ensure that the orientation is correct and the connectors line up properly.
- Gently attach the battery connector: With a gentle and even force, press the battery connector into its socket until it is securely seated. Make sure it is fully inserted and there are no visible gaps between the connector and the socket.
- Verify battery reconnection: After reconnecting the battery, double-check that the connector is firmly attached and precisely aligned with the logic board. Ensure that there is no wobbling or loose connection.
When reconnecting the battery, it is crucial to handle the connector with care and avoid applying excessive force. Take your time to align the connector correctly and make sure it is fully inserted and securely seated in its socket. This step is essential for the proper functioning of the battery and overall performance of your MacBook Pro.
Once you have successfully reconnected the battery, you can move on to the final step of replacing the trackpad on your MacBook Pro: replacing the bottom case.
Step 12: Replace the bottom case
After reattaching the battery, the final step to complete the trackpad replacement on your MacBook Pro is to replace the bottom case. Follow these steps to securely attach the bottom case:
- Retrieve the bottom case: Pick up the bottom case that you set aside earlier.
- Align the bottom case: Position the bottom case over the MacBook Pro, aligning it with the screw holes and ports.
- Start securing the screws: Begin by gently inserting and tightening the screws back into their respective holes. Ensure that each screw is aligned correctly and properly seated before moving on to the next one.
- Tighten the screws: Once all the screws are inserted, use your small Phillips screwdriver to firmly tighten them. Be careful not to overtighten, as it may cause damage to the bottom case or the MacBook Pro itself.
- Test the case: After securing all the screws, gently press and test the bottom case to ensure it is securely in place. It should fit snugly and not have any noticeable gaps.
When replacing the bottom case, make sure to take your time and align it correctly to ensure that all the screw holes match up. Be cautious not to force the bottom case or overtighten the screws, as this can lead to damage or misalignment.
By replacing the bottom case, you restore the overall integrity and protect the internal components of your MacBook Pro. It not only provides a secure enclosure but also enhances the aesthetics of your device.
Congratulations! You have successfully replaced the trackpad and reassembled the bottom case on your MacBook Pro. Your device is now ready to be powered on and used with the new trackpad.
Conclusion
Replacing the trackpad on your MacBook Pro is a task that may seem daunting at first, but with the right tools, patience, and following the step-by-step instructions provided in this guide, you can successfully complete the process. By replacing the trackpad, you can restore functionality and improve the overall user experience of your MacBook Pro.
Throughout the trackpad replacement process, it is crucial to work in a clean and organized workspace, follow proper safety precautions, and handle components with care. Taking the time to prepare your workspace, power off your MacBook Pro, remove the bottom case, disconnect the battery, unscrew the trackpad bracket, and disconnect the trackpad cable allows for easier access to the trackpad itself.
With the old trackpad removed, the installation of the new trackpad requires careful attention to aligning and securely connecting the trackpad cable, securing the trackpad bracket, and ultimately reassembling the bottom case. Each step contributes to the successful replacement of the trackpad in your MacBook Pro.
After the trackpad replacement and reassembly, it is important to test the functionality of the new trackpad to ensure it operates smoothly. If all tests are positive, you can enjoy a fully functioning trackpad once again.
Remember, if you are uncomfortable or unsure about any step of the process, it is always recommended to seek professional assistance or consult an authorized service provider. Additionally, if your MacBook Pro is still under warranty, consider reaching out to Apple for guidance and support to avoid voiding the warranty.
We hope this guide has provided you with the necessary knowledge and guidance to successfully replace the trackpad on your MacBook Pro. With patience and attention to detail, you can save on repair costs and have your MacBook Pro back in optimal working condition.