Introduction
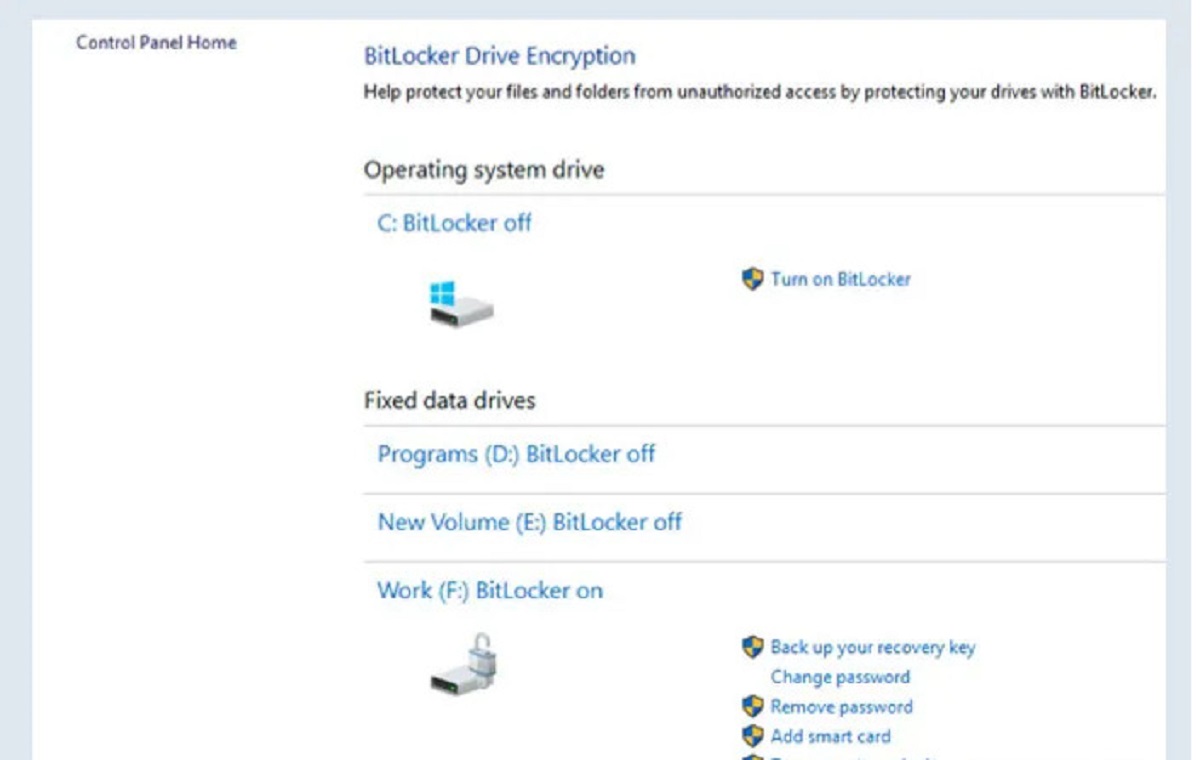
Bitlocker is a built-in encryption feature in Windows operating systems that provides an added layer of security for your data. It allows you to encrypt your internal and external hard drives, protecting your files and preventing unauthorized access.
While Bitlocker offers excellent data protection, there may be situations where you need to remove it from an external hard drive. This could be due to compatibility issues with other devices or the need to transfer the drive to a different operating system.
In this article, we will explore various methods to remove Bitlocker from an external hard drive. We will also discuss the precautions you should take before attempting to remove Bitlocker and common issues you might encounter during the process.
It’s important to note that the methods provided in this article are applicable to Windows operating systems. If you are using a different operating system, the steps may vary. It is always recommended to back up your data before making any changes to your external hard drive.
So, if you’re ready to learn how to remove Bitlocker from your external hard drive, let’s dive in!
What is Bitlocker?
Bitlocker is a full-disk encryption feature included in certain editions of Windows operating systems, such as Windows 10 Pro, Enterprise, and Education. It provides a robust security solution that helps protect your data from unauthorized access in case your device is lost or stolen.
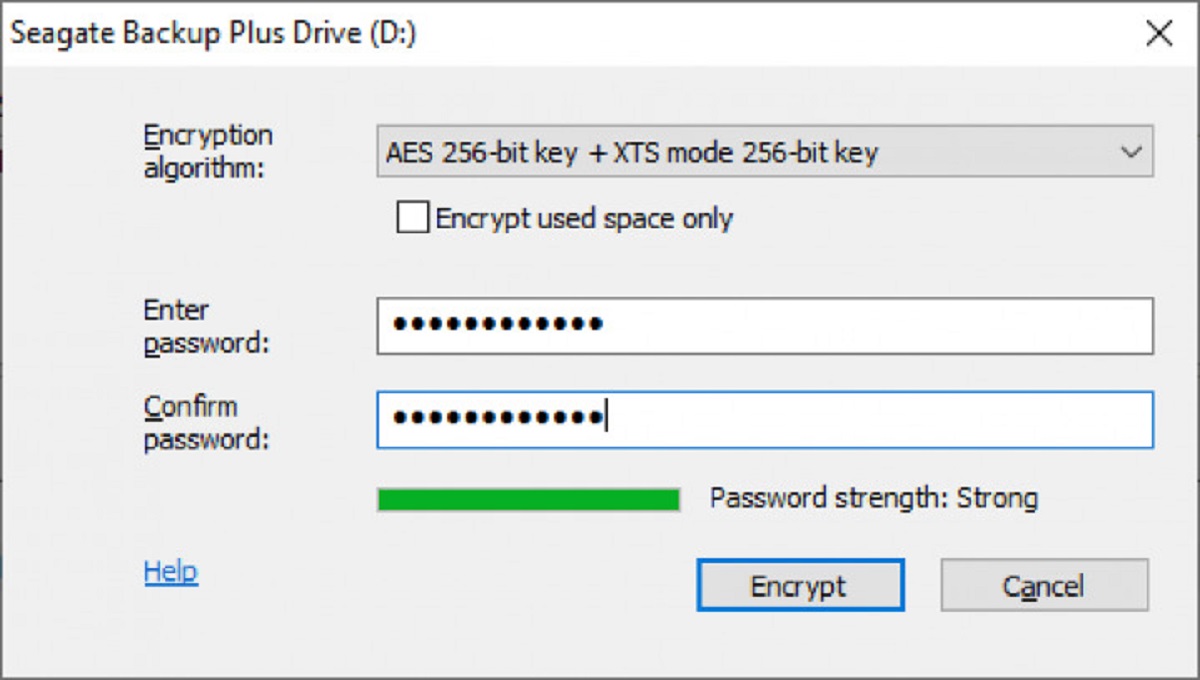
When you enable Bitlocker on a drive, it encrypts the entire contents of the drive and assigns a password or recovery key to unlock it. This encryption ensures that the data is secure and cannot be accessed without the appropriate authentication. Bitlocker uses various encryption algorithms, such as AES (Advanced Encryption Standard) and XTS (XOR and the Tweaked codebook mode with cipher-block chaining), to safeguard your data.
Bitlocker offers several benefits, such as:
- Data Protection: By encrypting the drive, Bitlocker prevents unauthorized users from accessing your data. Even if someone gains physical access to your drive, they won’t be able to read the encrypted contents without the password or recovery key.
- Transparent Operation: Once Bitlocker is enabled, it operates seamlessly in the background. It automatically encrypts newly added files and decrypts them when you access them.
- Support for Multiple Authentication Methods: You can unlock a Bitlocker-protected drive using a password, smart card, or USB key. This allows for flexible authentication options.
- Compatibility: Bitlocker is compatible with both internal and external hard drives, making it a versatile encryption solution.
By understanding what Bitlocker is and its benefits, you can make informed decisions regarding its usage and know when it may be necessary to remove it from an external hard drive. In the next section, we will explore the reasons why you might want to remove Bitlocker from your external hard drive.
Reasons to Remove Bitlocker from an External Hard Drive
While Bitlocker offers enhanced security and data protection, there are several scenarios where you may consider removing it from an external hard drive. Here are some common reasons why you might want to remove Bitlocker:
- Compatibility: Certain devices or operating systems may not support Bitlocker encryption. If you need to use the external hard drive on such devices, removing Bitlocker becomes necessary to ensure compatibility and seamless data access.
- Data Sharing: If you need to share the external hard drive with others who do not have the necessary authentication credentials, removing Bitlocker allows for easier data sharing. This can be helpful when collaborating on projects or sharing files with colleagues or friends.
- Migration to Another Operating System: If you plan to switch to a different operating system, such as macOS or Linux, you may need to remove Bitlocker as it is specific to Windows. This ensures that your external hard drive can be accessed and utilized seamlessly on the new platform.
- Data Recovery: In some cases, you might encounter issues with the Bitlocker encryption or forget the password or recovery key, making it impossible to access your data. Removing Bitlocker can be a last resort to recover your files and regain access to your external hard drive.
- Performance Concerns: Bitlocker encryption can impose a slight performance overhead on your system, especially on older or low-spec machines. If you notice a significant decrease in performance or slow disk read/write speeds, removing Bitlocker can help restore optimal performance.
It’s important to assess your specific needs and requirements before deciding to remove Bitlocker from an external hard drive. Ensure that you have a backup of your data and understand the implications of removing the encryption. In the following sections, we will explore different methods to remove Bitlocker based on your situation and preference.
Precautions to Take Before Removing Bitlocker
Before proceeding with the removal of Bitlocker from an external hard drive, there are several precautions you should take to ensure a smooth and secure process. These precautions include:
- Backup Your Data: Before removing Bitlocker, it is crucial to create a backup of all the data on your external hard drive. This ensures that you have a copy of your files in case of any unexpected issues during the removal process.
- Verify Data Integrity: Make sure to verify the integrity of your data before initiating the Bitlocker removal. Check for any errors or corruption in your files and fix them if needed.
- Ensure Sufficient Power: Make sure that your external hard drive has sufficient power during the Bitlocker removal process. Connect it to a reliable power source or use a laptop with a fully charged battery to avoid any interruptions.
- Maintain Power Supply: It is important to ensure a stable power supply to your computer during the Bitlocker removal process. Sudden power outages or fluctuations can interrupt the process and potentially corrupt your data.
- Keep Recovery Key Handy: If you have enabled Bitlocker with a recovery key, make sure to keep it in a safe place. The recovery key will be required in case you encounter any issues during the Bitlocker removal or need to recover your data.
- Update your Operating System: Before removing Bitlocker, ensure that your operating system is up to date with the latest patches and updates. This helps minimize any compatibility issues and ensures a smooth removal process.
- Disconnect from Network: Disconnect your computer from any network connections or disable Wi-Fi before initiating the Bitlocker removal. This helps secure your data and prevents unauthorized access during the process.
By following these precautions, you can minimize the risk of data loss or corruption while removing Bitlocker from your external hard drive. It’s always better to take the necessary steps to safeguard your data before making any changes to your drive.
Method 1: Using Bitlocker Drive Encryption Tool
The Bitlocker Drive Encryption Tool is a built-in feature of Windows that allows you to manage Bitlocker-encrypted drives. This tool provides a simple and straightforward method to remove Bitlocker from an external hard drive. Here’s how you can use the Bitlocker Drive Encryption Tool:
- Connect Your External Hard Drive: Connect the Bitlocker-encrypted external hard drive to your computer. Ensure that the drive is properly recognized and accessible.
- Open the Bitlocker Drive Encryption Tool: Press the Windows key + R, type ‘manage-bde -unlock X:’ (replace X with the drive letter assigned to your external hard drive), and press Enter. This will open the Bitlocker Drive Encryption Tool for your external hard drive.
- Disable Bitlocker: In the Bitlocker Drive Encryption Tool window, click on the ‘Turn off Bitlocker’ option. This will start the process of removing Bitlocker from your external hard drive.
- Follow the On-Screen Instructions: Follow the on-screen instructions to complete the Bitlocker removal process. You may be required to enter your password or recovery key to provide the necessary authentication.
- Wait for the Process to Complete: The Bitlocker removal process may take some time, depending on the size of your external hard drive and the amount of data stored on it. Allow the process to complete without interrupting or disconnecting the drive.
- Verify Bitlocker Removal: Once the process is complete, you can verify that Bitlocker has been successfully removed from your external hard drive. You should be able to access the drive and its contents without any encryption barriers.
Using the Bitlocker Drive Encryption Tool is an effective way to remove Bitlocker from your external hard drive. However, it is important to note that this method requires administrative access to your computer and may not be available on certain Windows editions. If you encounter any issues or difficulties, consider trying alternative methods or seeking additional support.
Method 2: Using Command Prompt
Another method to remove Bitlocker from an external hard drive is by using the Command Prompt, a powerful command-line tool in Windows. This method provides a manual approach to disable Bitlocker and remove the encryption. Follow these steps to use the Command Prompt:
- Connect Your External Hard Drive: Connect the Bitlocker-encrypted external hard drive to your computer. Ensure that the drive is properly recognized and accessible.
- Open Command Prompt as Administrator: Press the Windows key, search for Command Prompt, right-click on it, and select “Run as administrator”. This will open the Command Prompt with administrative privileges.
- Unlock the Drive: In the Command Prompt, type ‘manage-bde -unlock X:’ (replace X with the drive letter assigned to your external hard drive), and press Enter. Enter your password or recovery key when prompted to unlock the drive.
- Disable Bitlocker: Once the drive is unlocked, type ‘manage-bde -off X:’ and press Enter. This command will disable Bitlocker and remove the encryption from the external hard drive.
- Wait for the Process to Complete: The Command Prompt will display the progress of the Bitlocker removal process. Wait for it to complete without interrupting or disconnecting the drive.
- Verify Bitlocker Removal: After the process is finished, you can check if Bitlocker has been successfully removed. You should be able to access the external hard drive and its contents without any encryption barriers.
Note that using the Command Prompt method requires some technical knowledge and familiarity with command-line operations. Make sure to enter the commands correctly, specify the correct drive letter, and double-check before pressing Enter. If you encounter any issues or errors, consider seeking further guidance or exploring alternative methods.
Method 3: Using Bitlocker Management Console
Windows provides a graphical interface called the Bitlocker Management Console, which allows you to manage Bitlocker-encrypted drives in a more user-friendly way. This method provides an alternative approach to remove Bitlocker from an external hard drive. Follow these steps to use the Bitlocker Management Console:
- Connect Your External Hard Drive: Connect the Bitlocker-encrypted external hard drive to your computer. Ensure that the drive is properly recognized and accessible.
- Open the Bitlocker Management Console: Press the Windows key + R, type ‘manage-bde -status’ in the Run dialog box, and press Enter. This will open the Bitlocker Management Console, displaying a list of all Bitlocker-protected drives on your computer.
- Select the External Hard Drive: From the list of Bitlocker-protected drives, locate your external hard drive and make note of its Volume Identifier (such as C:, D:, etc.) and the corresponding Drive Key Provider ID.
- Open the Bitlocker Management Console for the External Drive: In the Bitlocker Management Console, type ‘manage-bde -protectors -delete X: -id {DriveKeyProviderID}’ (replace X with the volume identifier and {DriveKeyProviderID} with the actual Drive Key Provider ID) and press Enter. This command will remove the Bitlocker protection from the external hard drive.
- Wait for the Process to Complete: The Bitlocker Management Console will indicate the progress of the removal process. It may take some time, depending on the size and data stored on the external hard drive. Allow the process to complete without interrupting or disconnecting the drive.
- Verify Bitlocker Removal: Once the process is finished, verify that Bitlocker has been successfully removed from your external hard drive. You should be able to access the drive and its contents without any encryption barriers.
The Bitlocker Management Console offers a more visual and manageable way to remove Bitlocker from your external hard drive. It allows you to remove the protection using the Drive Key Provider ID associated with the external drive. If you encounter any difficulties or errors, consider seeking additional support or exploring alternative methods.
Method 4: Using PowerShell
PowerShell is a command-line shell and scripting language that provides more advanced options for managing Windows operations. You can also utilize PowerShell to remove Bitlocker from an external hard drive. Here’s how:
- Connect Your External Hard Drive: Connect the Bitlocker-encrypted external hard drive to your computer. Ensure that the drive is properly recognized and accessible.
- Open PowerShell as Administrator: Press the Windows key, type “PowerShell”, right-click on “Windows PowerShell”, and select “Run as administrator” to open PowerShell with administrative privileges.
- Unlock the Drive: In the PowerShell window, type ‘manage-bde –unlock X:’ (replace X with the drive letter assigned to your external hard drive), and press Enter. Enter your password or recovery key when prompted to unlock the drive.
- Disable Bitlocker: Once the drive is unlocked, type ‘Disable-BitLocker -MountPoint X:’ (replace X with the drive letter) in PowerShell and press Enter. This command will disable Bitlocker and remove the encryption from the external hard drive.
- Wait for the Process to Complete: PowerShell will display the progress of the Bitlocker removal process. Wait for it to complete without interrupting or disconnecting the drive.
- Verify Bitlocker Removal: After the process finishes, check if Bitlocker has been successfully removed. You should be able to access the external hard drive and its contents without any encryption barriers.
Using PowerShell to remove Bitlocker provides a more advanced and flexible method for managing Bitlocker encryption on your external hard drive. Make sure to follow the steps precisely and double-check the drive letter before running any commands. If you encounter any errors or difficulties, consult additional resources or consider seeking professional assistance.
Common Issues and Troubleshooting
While removing Bitlocker from an external hard drive is typically a straightforward process, you may encounter certain issues or errors along the way. Here are some common problems that you might face and solutions to troubleshoot them:
- Incorrect Password or Recovery Key: If you are unable to unlock the Bitlocker-encrypted drive, ensure that you are entering the correct password or recovery key. Double-check the credentials and try again.
- Drive Disconnection: If the external hard drive becomes disconnected or encounters a power outage during the Bitlocker removal process, it may result in data corruption. To avoid this, ensure a stable power supply and avoid disconnecting the drive until the process is completed.
- Incompatibility with Operating System: If you are experiencing compatibility issues with your operating system after removing Bitlocker, make sure that your system is up to date with the required updates and patches. Additionally, ensure that your operating system supports the file system used on the external hard drive.
- Data Corruption: In rare cases, the Bitlocker removal process may result in data corruption or loss. This can occur due to various reasons, such as disk errors or interruptions during the process. To minimize the risk, always back up your data before removing Bitlocker.
- Incomplete Removal: If Bitlocker is not completely removed from the external hard drive, it may still prompt for authentication or cause issues with data access. In such cases, consider using alternative methods or seeking assistance from professional data recovery services.
If you encounter any of these issues or encounter any other unexpected errors during the Bitlocker removal process, it is recommended to halt the process and seek appropriate support or professional help. Remember to take necessary precautions, such as backing up your data, to prevent any potential data loss or complications.
Conclusion
Removing Bitlocker from an external hard drive can be necessary for various reasons, such as compatibility issues, data sharing, or migration to a different operating system. In this article, we explored four different methods to remove Bitlocker, including using the Bitlocker Drive Encryption Tool, Command Prompt, Bitlocker Management Console, and PowerShell.
Before removing Bitlocker, it’s important to take precautions, such as backing up your data, verifying data integrity, and ensuring a stable power supply. These precautions help minimize the risk of data loss and ensure a smooth removal process.
While the methods provided in this article offer ways to remove Bitlocker, it is crucial to approach the process with care and follow the steps accurately. If you encounter any issues or errors during the removal process, consider seeking additional support or consulting professional data recovery services to prevent any potential data loss or corruption.
Remember that removing Bitlocker removes the encryption from your external hard drive, making it vulnerable to unauthorized access. If you have sensitive data, it is important to take appropriate security measures, such as using alternative encryption methods or keeping the drive in a secure location.
By understanding the different methods and taking the necessary precautions, you can successfully remove Bitlocker from your external hard drive and use it as per your requirements.


