Introduction
Welcome to our guide on how to put subtitles on Vimeo. Subtitles provide an excellent way to make your videos more accessible to a wider audience, as well as improve the user experience for those who are non-native English speakers or hard of hearing. Adding subtitles to your Vimeo videos can also enhance search engine optimization (SEO) and help your content reach a larger audience.
In today’s digital world, video content plays a significant role in engaging and informing viewers. As a result, platforms like Vimeo have become popular for hosting and sharing videos across various industries and genres. However, not all videos on Vimeo come with subtitles by default.
By adding subtitles, you can ensure that your message is accessible to individuals who prefer or require captions, further expanding the reach of your content and making it more inclusive. Additionally, captions can improve the overall user experience by allowing viewers to follow along with the video’s content even in noisy or quiet environments.
In this guide, we will explore different methods to put subtitles on your Vimeo videos. We will cover both built-in options provided by Vimeo, as well as external methods such as uploading a separate subtitle file or embedding subtitles directly into the video file.
Whether you are a video creator, marketer, or educator, learning how to add subtitles to Vimeo videos is an essential skill that will help you engage with your audience more effectively and optimize your content for search engines. So, let’s dive into the step-by-step process of preparing and adding subtitles to your Vimeo videos.
Why Add Subtitles to Vimeo Videos?
Adding subtitles to your Vimeo videos offers several benefits that can greatly enhance the viewing experience and increase the reach of your content. Here are a few compelling reasons why you should consider adding subtitles:
- Accessibility: Subtitles make your videos accessible to a wider audience, including individuals who are deaf or hard of hearing. By providing captions, you ensure that everyone can understand and enjoy your content, fostering inclusivity and equal access.
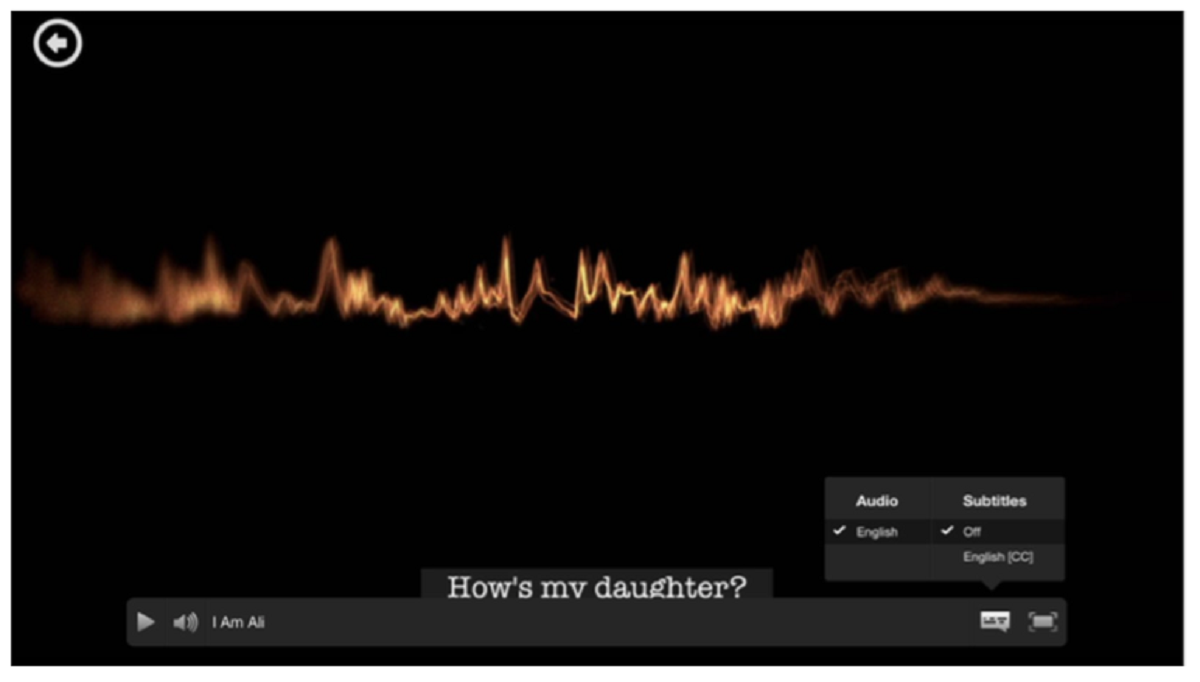
- Improved User Experience: Subtitles enable viewers to follow along with your video, even in situations where audio cannot be played or heard clearly. Whether viewers are in a noisy environment or watching without sound, subtitles allow them to understand your message without missing any crucial information.
- Enhanced SEO: Adding subtitles to your Vimeo videos can boost your search engine rankings. Search engines can crawl and index the text in the subtitles, making your videos more discoverable to relevant audiences. Including keywords in your subtitles can further optimize your videos for search queries.
- Language Accessibility: Adding subtitles in different languages allows you to reach a global audience. Non-native English speakers can watch and understand your videos more effectively if they have subtitles available in their preferred language. This can help you connect with viewers from different cultural backgrounds and expand your international reach.
- Compliance: In certain industries or regions, there may be legal requirements or accessibility standards that mandate the inclusion of subtitles in videos. By adding subtitles to your Vimeo videos, you ensure compliance with these regulations and avoid any potential legal or accessibility issues.
Whether your goal is to increase engagement, improve accessibility, or optimize your videos for better search visibility, adding subtitles to your Vimeo videos is a valuable strategy. By making your content more accessible and inclusive, you can attract a larger audience, engage viewers for longer durations, and ultimately achieve your video marketing objectives.
How to Prepare Your Subtitles
Before you can add subtitles to your Vimeo videos, it’s important to properly prepare your subtitle files. Here’s a step-by-step guide on how to prepare your subtitles:
- Transcribe the Dialogue: Start by transcribing the dialogue of your video. Listen carefully and type out the spoken words, including any relevant sounds or music cues. Ensure accuracy and proofread the transcript to avoid any errors.
- Break it into Time Segments: Divide the transcript into smaller time segments, typically ranging from a few seconds to a minute. Assign a timestamp to each segment, indicating when it should appear in the video. This timing will synchronize the subtitles with the visuals.
- Format the Subtitle File: Save the subtitle file in a compatible format. The most commonly used formats for subtitles include SubRip (.srt), WebVTT (.vtt), and Deep Subtitle Format (.json). Ensure that your chosen format is supported by Vimeo.
- Set the Duration and Display: Specify the duration for each subtitle segment, ensuring that it aligns with the timing in the video. You can also customize the font type, size, color, and positioning of the subtitles to match your video’s aesthetics and readability.
- Proofread and Review: Proofread the subtitles to check for any errors, misspellings, or grammatical issues. Additionally, review the subtitles for clarity and cohesion to ensure that they accurately represent the spoken content and provide a seamless viewing experience.
If you are working with a professional transcription service, they may be able to assist you in generating subtitle files directly. Alternatively, you can use dedicated subtitle editing software or online tools to create and format your subtitles.
Remember, the quality of your subtitles plays a crucial role in delivering a smooth and enjoyable viewing experience. Accurate timing, proper synchronization with the visuals, and correct language usage are all important factors to consider when preparing subtitles for your Vimeo videos.
Adding Subtitles to Your Vimeo Video
Now that you have prepared your subtitles, it’s time to add them to your Vimeo video. Vimeo provides several methods to add subtitles, ranging from using their built-in subtitle tool to uploading separate subtitle files or embedding subtitles directly into the video file. Let’s explore these methods:
Method 1: Using Vimeo’s Built-in Subtitle Tool
Vimeo offers a built-in subtitle tool that allows you to add subtitles directly within their platform. Here’s how to do it:
- Log in to your Vimeo account and navigate to the video manager.
- Select the video to which you want to add subtitles and click on the “Settings” tab.
- Scroll down to the “Subtitles and Captions” section and click on “Add” to open the subtitle editor.
- Choose the subtitle language and click on “Create new subtitles.”
- Copy and paste your prepared subtitles into the editor, aligning them with the corresponding timestamps.
- Customize the styling, font, and positioning of the subtitles if desired.
- Click on “Save” to apply the subtitles to your video.
Your subtitles will now be visible when viewers watch your Vimeo video.
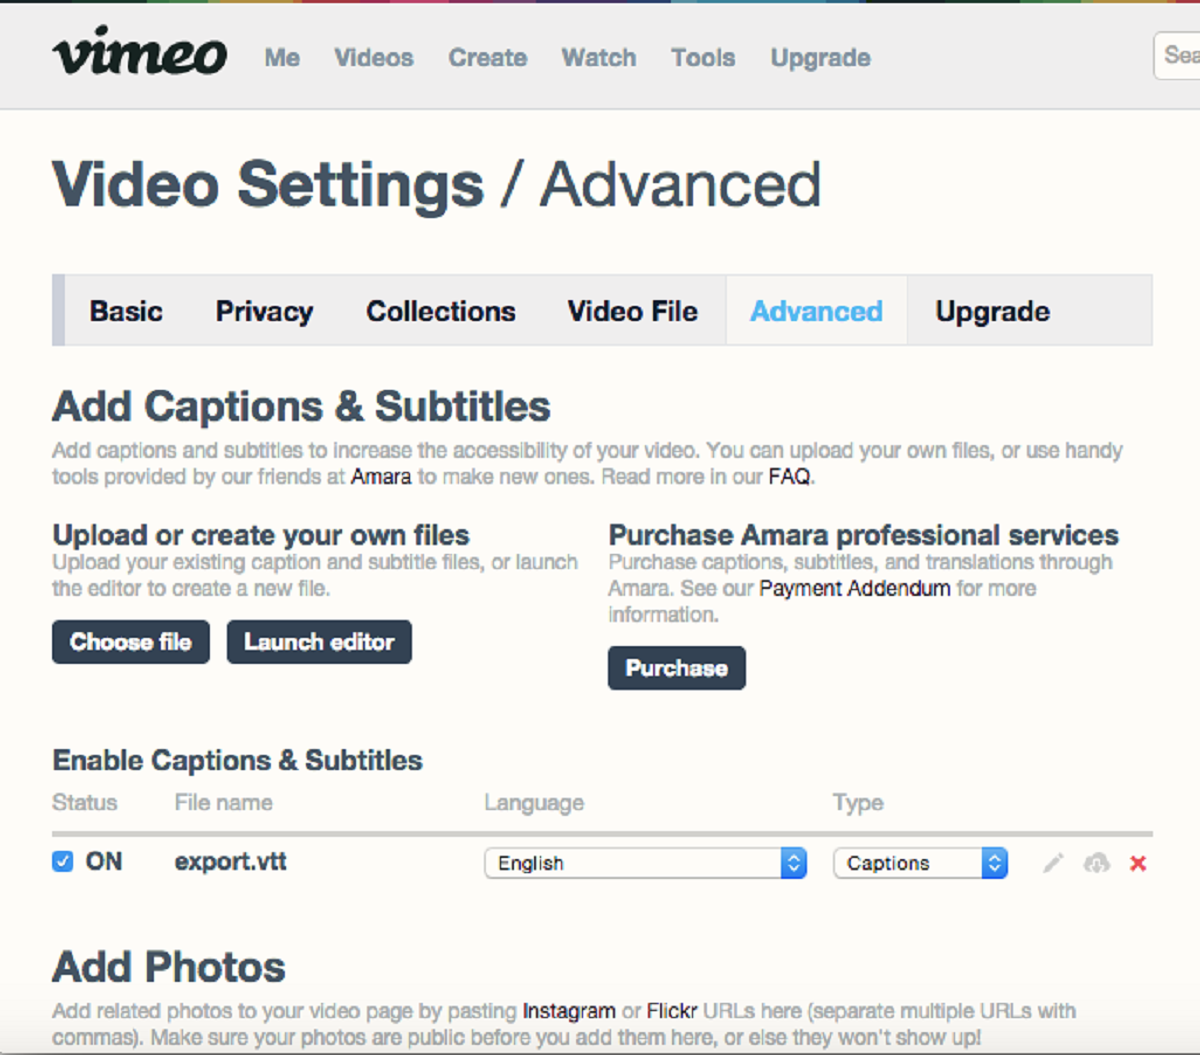
Method 2: Uploading Subtitles File
If you have prepared your subtitles as a separate file, you can upload it directly to your Vimeo video. Follow these steps:
- Log in to Vimeo and go to the video manager.
- Select the video to which you want to add subtitles and click on the “Settings” tab.
- Scroll down to the “Subtitles and Captions” section and click on “Add” to open the subtitle editor.
- Choose the subtitle language and select “Upload from File.”
- Upload your subtitle file (in the supported format) that you had prepared.
- Click on “Save” to apply the subtitles to your video.
Your subtitle file will be associated with the video, and viewers will be able to select and view the subtitles while watching.
Method 3: Embedding Subtitles in Video File
If you prefer to have the subtitles permanently embedded in your video file, you can use video editing software to add the subtitles before uploading to Vimeo. Here’s how:
- Open your video file in a video editing software that supports subtitle embedding.
- Add the prepared subtitles to the video, ensuring they are properly synchronized with the audio and visuals.
- Export the video with the embedded subtitles in a compatible format, such as MP4 or MOV.
- Upload the video file to your Vimeo account.
Viewers will be able to watch your Vimeo video with the embedded subtitles by default, without the need to enable or select them separately.
Remember to test your subtitles after adding them to ensure they are displaying correctly and synchronized with the video’s content. Make any necessary adjustments and review the video with subtitles enabled to ensure a seamless viewing experience for your audience.
Method 1: Using Vimeo’s Built-in Subtitle Tool
Vimeo offers a convenient built-in subtitle tool that allows you to add subtitles directly within their platform. This method is straightforward and ensures that your subtitles are synchronized with your video. Here’s how to use Vimeo’s built-in subtitle tool:
- Log in to your Vimeo account and navigate to the video manager.
- Select the video to which you want to add subtitles and click on the “Settings” tab.
- Scroll down to the “Subtitles and Captions” section and click on “Add” to open the subtitle editor.
- Choose the subtitle language and click on “Create new subtitles.” You can add subtitles in multiple languages if needed.
- Copy and paste your prepared subtitles into the subtitle editor, ensuring that each subtitle is aligned with the correct timing in the video.
- If necessary, you can customize the styling, font, size, color, and positioning of the subtitles to match your video’s aesthetics and improve readability.
- Preview your subtitles to ensure they appear as intended.
- Click on “Save” to apply the subtitles to your Vimeo video.
Once the subtitles are saved, they will be associated with your Vimeo video, allowing viewers to toggle them on or off while watching. Vimeo’s built-in subtitle tool simplifies the process of adding subtitles and ensures that they are displayed accurately.
Note that Vimeo supports popular subtitle file formats, such as SubRip (.srt) and WebVTT (.vtt). If you already have subtitles prepared in these formats, you can directly upload them using other methods. However, using Vimeo’s built-in subtitle tool can be a more convenient option if you prefer to add and manage subtitles directly within the Vimeo platform.
Remember to review your subtitled video after adding the subtitles to ensure that they are displayed correctly and synchronized with the video’s audio and visuals. Make any necessary adjustments within the subtitle editor if needed.
By utilizing Vimeo’s built-in subtitle tool, you can easily add and manage subtitles to make your videos more accessible and engaging for a broader audience. Take advantage of this feature to enhance the viewing experience and increase the reach of your Vimeo videos.
Method 2: Uploading Subtitles File
If you have prepared your subtitles as a separate file, Vimeo allows you to upload it directly to your video. This method is useful if you already have subtitles in a compatible format, such as SubRip (.srt) or WebVTT (.vtt). Here’s how to upload a subtitles file to your Vimeo video:
- Log in to your Vimeo account and go to the video manager.
- Select the video to which you want to add subtitles and click on the “Settings” tab.
- Scroll down to the “Subtitles and Captions” section and click on “Add” to open the subtitle editor.
- Choose the subtitle language from the dropdown menu.
- Select the “Upload from File” option.
- Click on the “Choose file” button and locate the subtitle file on your computer.
- Upload the subtitle file.
- Click on “Save” to associate the uploaded subtitle file with your Vimeo video.
Once the subtitle file is uploaded, Vimeo will link it to your video, and viewers will be able to select and view the subtitles while watching your video. This method allows you to separate the subtitles from the video file itself, making it easier to update or change the subtitles in the future without re-uploading the entire video.
Ensure that your subtitle file is in a supported format and adheres to the correct timing and formatting specifications. This will ensure seamless integration of the subtitles with your video on Vimeo.
After uploading the subtitle file, preview your video to ensure that the subtitles are displayed as expected. You can make adjustments or corrections within the subtitle editor if necessary. Remember to test the video to ensure that the subtitles are synchronized with the video’s content and enhance the overall viewing experience.
By uploading separate subtitle files, you can easily add and manage subtitles for your Vimeo videos. This method provides flexibility and convenience, particularly when you already have subtitles prepared in a compatible format. Make the most of this feature to make your videos accessible to a wider audience and improve viewer engagement.
Method 3: Embedding Subtitles in Video File
If you prefer to have the subtitles permanently embedded in your video file, you can use video editing software to add the subtitles before uploading the video to Vimeo. This method ensures that the subtitles are always displayed with the video, regardless of the platform or viewing settings. Here’s how to embed subtitles in your video file:
- Open your video file in a video editing software that supports subtitle embedding. Some popular video editing software options include Adobe Premiere Pro, Final Cut Pro, and VLC Media Player.
- Add the prepared subtitles to your video in the video editing software. Import the subtitle file and synchronize it with the audio and visuals of the video.
- Adjust the position, font, size, and style of the subtitles within the video editing software to achieve the desired appearance.
- Preview the video with the embedded subtitles to ensure they are displaying correctly and synchronized with the video’s content.
- Export the video with the embedded subtitles in a compatible format, such as MP4 or MOV. Keep in mind the recommended settings and specifications provided by Vimeo for optimal video playback.
- Upload the video file with the embedded subtitles to your Vimeo account.
Once the video with embedded subtitles is uploaded to Vimeo, viewers will see the subtitles by default when they watch the video. They don’t need to enable or select the subtitles separately.
By embedding the subtitles directly into the video file, you ensure that the subtitles are always visible, regardless of the platform or video player used. This method is particularly useful when you want to have full control over the appearance and display of the subtitles, without relying on external subtitle files.
Remember to test your video on Vimeo to ensure that the embedded subtitles are correctly displayed and synchronized. Check for any inconsistencies in timing or appearance, and make any necessary adjustments in your video editing software before re-uploading the video if needed.
By using video editing software to embed subtitles in your video file, you can ensure that your Vimeo video is always displayed with the subtitles, providing a seamless viewing experience for your audience.
Testing and Adjusting Subtitles
After adding subtitles to your Vimeo video, it is crucial to thoroughly test and review them to ensure that they are accurately displayed and synchronized with the video’s content. Testing and adjusting your subtitles will help you provide a seamless and enjoyable viewing experience for your audience. Here’s what you should do:
1. Watch the Video: Play the video with subtitles enabled and watch it from start to finish. Pay attention to the timing of the subtitles, ensuring they appear and disappear at the appropriate moments. Check for any syncing issues between the audio, visuals, and subtitles.
2. Review the Text: Read through the subtitles while watching the video. Look for any grammatical errors, spelling mistakes, or typos. Ensure that the text accurately and concisely represents the spoken words and conveys the intended message.
3. Check for Readability: Assess the readability and visibility of the subtitles. Verify that the font style, size, color, and positioning make the text easy to read against different backgrounds and video content. Adjust these settings if necessary to improve clarity.
4. Verify Timing: Pay close attention to the timing of the subtitles in relation to the video’s pace. Ensure that the subtitles appear on the screen long enough for viewers to read them comfortably without being too brief or lingering for too long. Make adjustments as needed to achieve proper timing.
5. Consider Viewer Feedback: Encourage viewers to provide feedback on the quality and accuracy of the subtitles. Listen to their suggestions and comments, and incorporate any necessary changes based on their feedback. This can help you refine and optimize the subtitles for a better viewer experience.
6. Make Adjustments: If you identify any issues during the testing process, go back to the subtitle editor or video editing software to make the necessary adjustments. Update the subtitles to address any timing, text, or readability issues that you encountered during testing.
Remember that subtitles should be a seamless part of the video viewing experience. They should enhance comprehension and accessibility without distracting or disrupting the flow of the content. Therefore, thorough testing and adjustments are crucial for ensuring the subtitles provide a positive viewing experience for all viewers.
By devoting time and effort to testing and adjusting your subtitles, you can ensure that they effectively convey the intended message, enhance viewers’ comprehension, and contribute to the overall quality of your Vimeo video.
Conclusion
Adding subtitles to your Vimeo videos can greatly enhance the accessibility, user experience, and overall reach of your content. Whether you choose to use Vimeo’s built-in subtitle tool, upload a separate subtitle file, or embed subtitles directly into the video file, it’s important to ensure that your subtitles are accurate, synchronized, and visually appealing.
By making your videos accessible to individuals who are deaf or hard of hearing, subtitles create a more inclusive environment and help you connect with a wider audience. Moreover, subtitles can improve the user experience for viewers in noisy or quiet environments, making it easier for them to follow along with your video content.
From an SEO perspective, adding subtitles to your Vimeo videos can enhance search engine visibility and attract more organic traffic. By including relevant keywords in your subtitles, you increase the chances of your videos appearing in search results for specific queries.
When preparing your subtitles, transcribe the dialogue accurately, divide it into time segments, and format the subtitle file correctly. This ensures that your subtitles are ready for uploading or embedding into your Vimeo video.
Testing and adjusting your subtitles is crucial to ensure their accuracy, readability, and synchronization with the video. Watch your video with subtitles enabled, review the text for errors, check for readability and timing issues, and consider viewer feedback to make necessary adjustments.
In conclusion, adding subtitles to your Vimeo videos is a valuable practice that benefits both your audience and your video content. It increases accessibility, improves the user experience, enhances SEO, and allows you to connect with a broader audience. By following the methods and guidelines outlined in this guide, you can effectively add subtitles to your Vimeo videos and deliver a more inclusive and engaging viewing experience.