Introduction
Welcome to our comprehensive guide on how to print a Google Calendar. Whether you prefer having a physical copy of your schedule or need to share it with others offline, printing your Google Calendar can be a convenient and practical solution. In this step-by-step tutorial, we’ll walk you through the process of accessing your Google Calendar, customizing the view, and adjusting the print settings to ensure you get a high-quality and accurate printout.
Google Calendar is a powerful tool that allows you to organize your events, appointments, and tasks efficiently. With its easy-to-use interface and seamless integration across devices, Google Calendar has become a go-to solution for individuals and businesses alike. However, despite its many benefits, there may be instances where printing the calendar becomes necessary. Whether it’s for personal reminders, sharing with colleagues, or simply having a physical backup, being able to print your Google Calendar can be highly valuable.
Fortunately, Google Calendar offers comprehensive printing options that allow you to customize the layout, include specific events or date ranges, and control the level of detail you want to include. By following the steps outlined in this guide, you’ll be able to print your Google Calendar with ease and precision.
Before we dive into the process, it’s essential to note that printing your Google Calendar can differ slightly depending on the device and browser you’re using. However, the core steps remain consistent across platforms. In this guide, we’ll focus on the web browser version of Google Calendar, which should cover the majority of users.
Now that we’ve set the stage, let’s begin our journey to printing your Google Calendar. Grab a pen and paper, bookmark this guide for future reference, and let’s get started!
Step 1: Accessing Your Google Calendar
The first step in printing your Google Calendar is to access it through your web browser. Here’s how you can do it:
- Open your preferred web browser and navigate to the Google Calendar website. If you are signed in to your Google account, you will be redirected to your calendar automatically. If not, sign in using your Google account credentials.
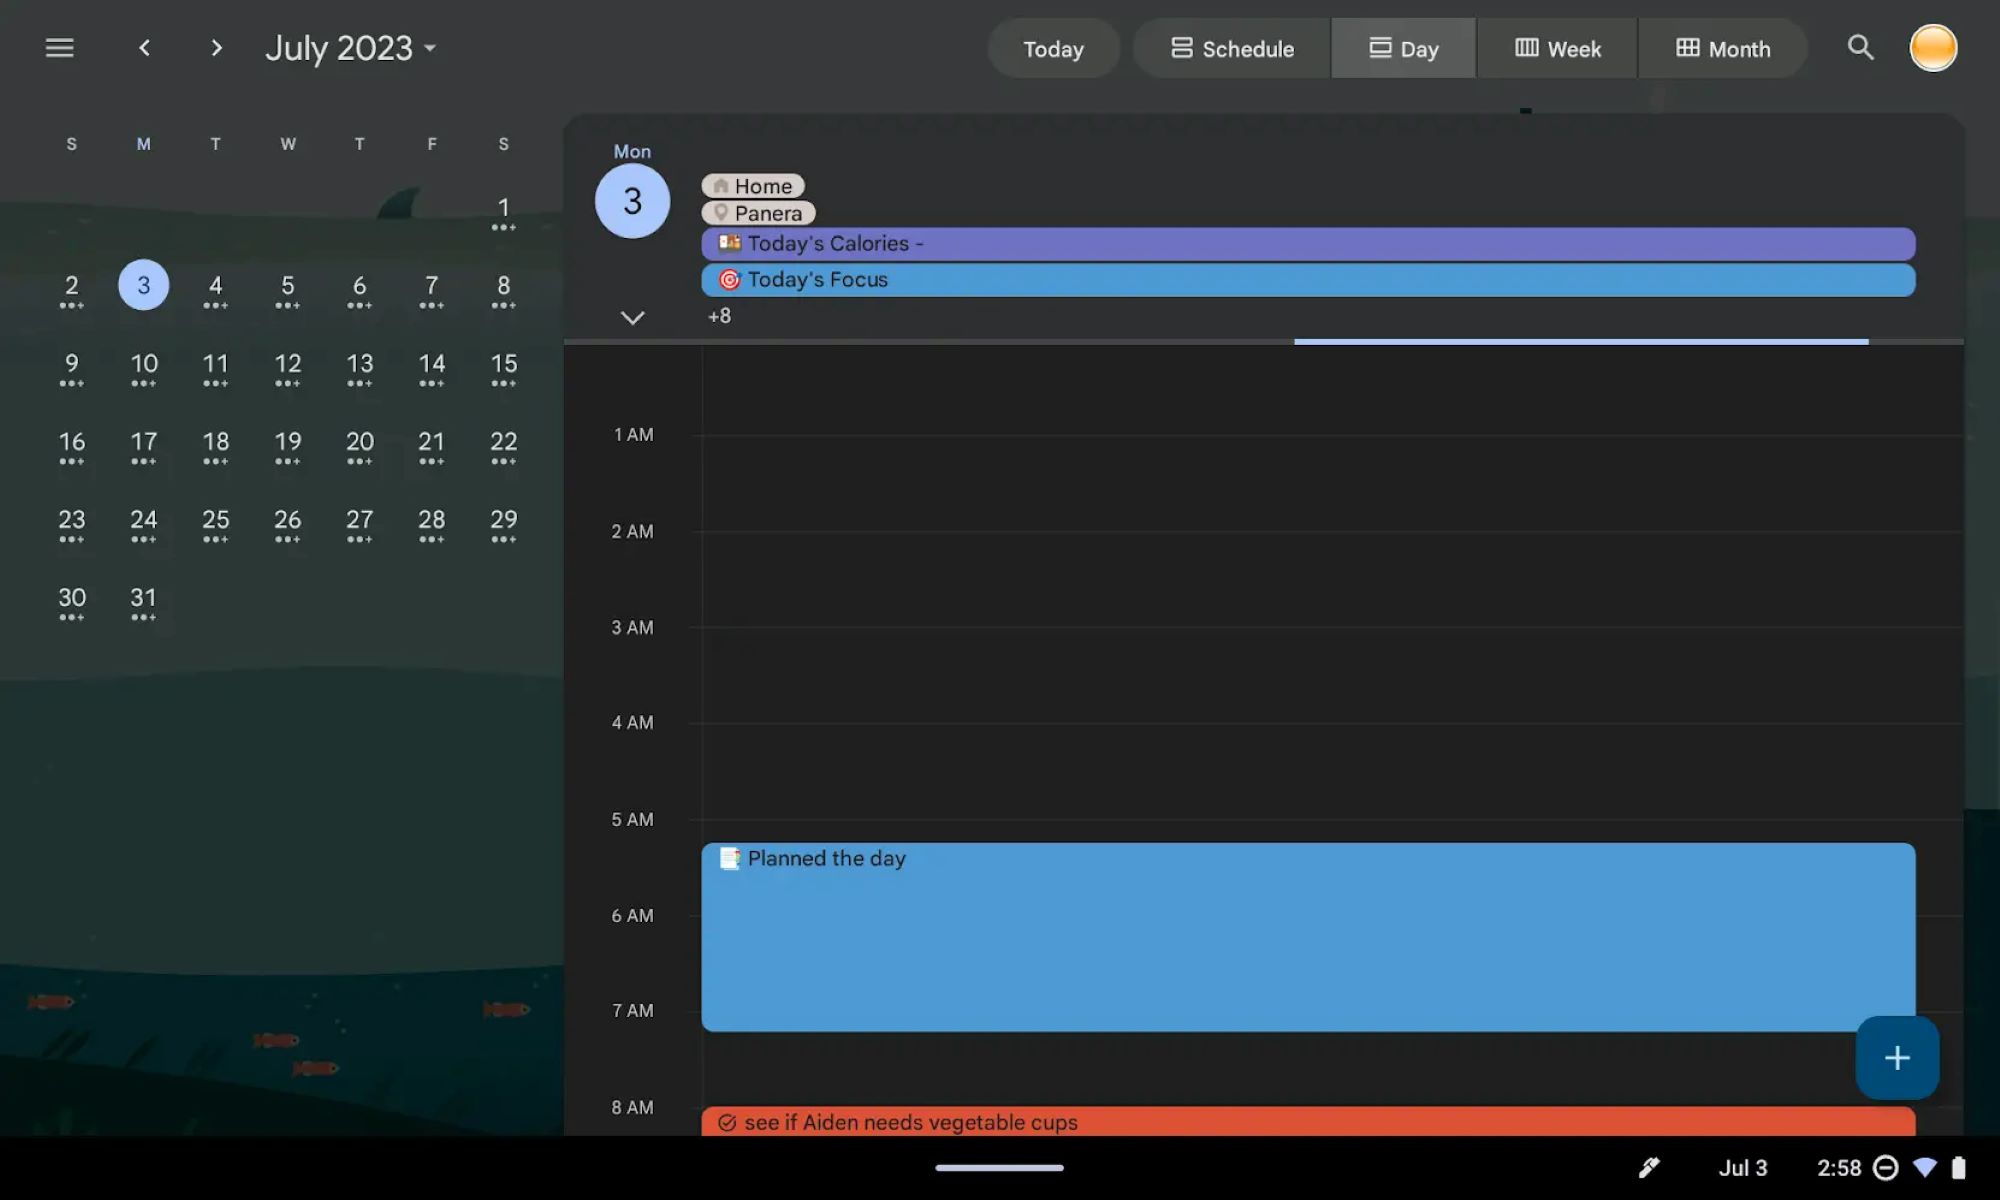
- Once you’re signed in, you’ll see your calendar interface with the current month’s view. Take a moment to familiarize yourself with the layout and various features.
Google Calendar provides different viewing options, such as day, week, month, and agenda. You can choose the view that best suits your needs by clicking on the corresponding tabs located at the top-right corner of the screen.
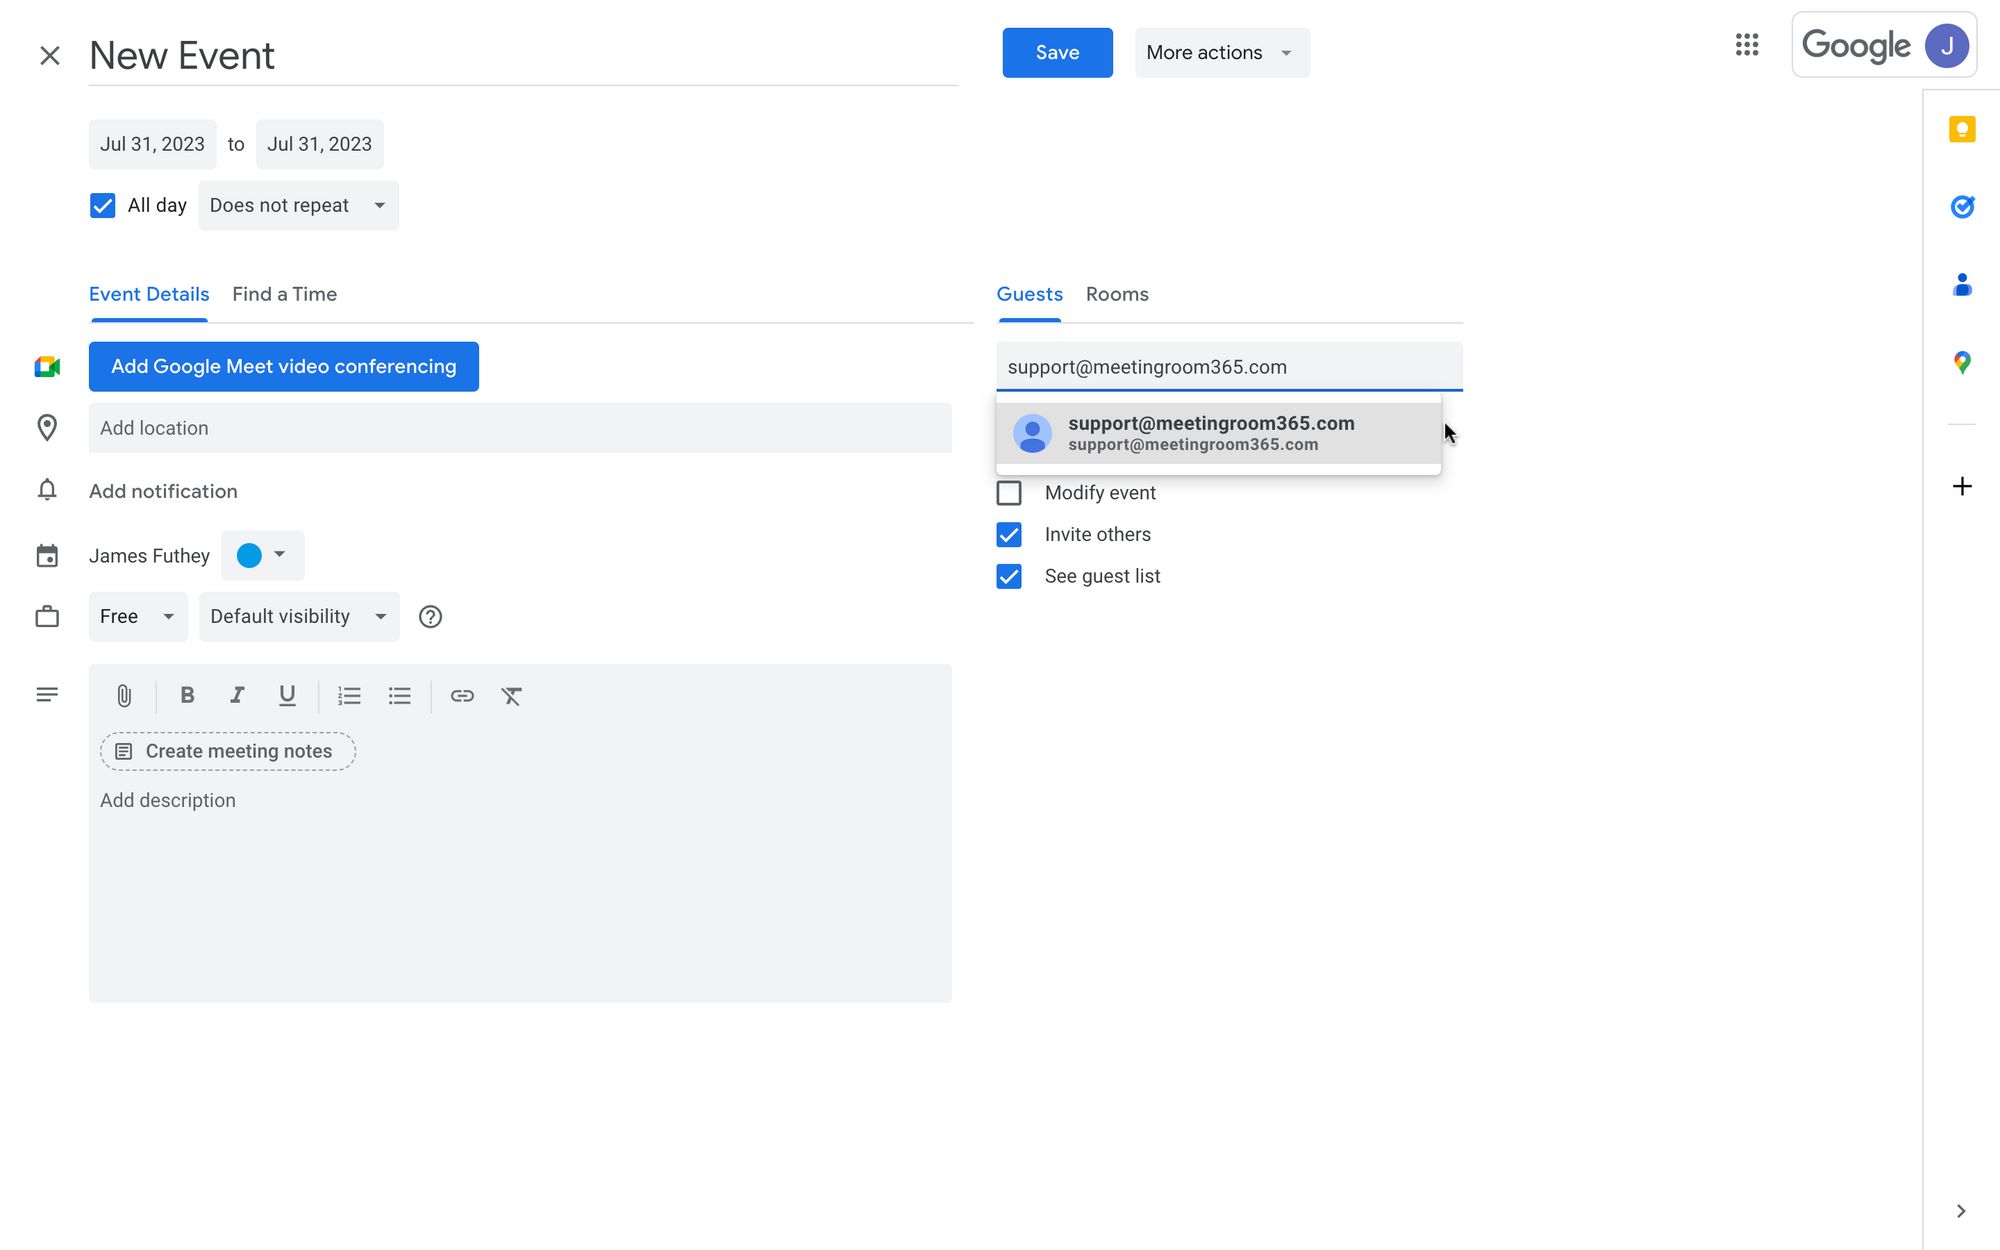
In addition to the default calendar view, you can also create multiple calendars for different purposes, such as personal, work, or specific projects. To switch between calendars, simply click on the drop-down menu located in the top-left corner of the screen and select the desired calendar from the list.
Now that you’ve successfully accessed your Google Calendar and familiarized yourself with the interface, you’re ready to move on to the next step. In the following section, we’ll discuss how to customize your calendar view to ensure the information you want to print is displayed accurately.
Step 2: Customizing Your Calendar View
Once you’ve accessed your Google Calendar, it’s time to customize the view to ensure that the events and details you want to print are displayed correctly. Follow these steps to customize your calendar view:
- On the top-right corner of the screen, you’ll find several icons for different customization options. Click on the “Settings” icon, which looks like a gear.
- A drop-down menu will appear. Select “Settings” from the menu.
- In the Settings window, you’ll see a sidebar on the left side of the screen with various options. Click on “View options” to expand the section.
- Within the “View options” section, you can customize several aspects of your calendar. You can choose to show or hide weekends, change the default time zone, and select the time format, among other options. Adjust the settings according to your preferences.
- Scroll down further to the “Custom view” section. Here, you can choose the number of days you want to display in the printed calendar. Select the appropriate number based on your needs.
- Once you’ve finished customizing the view options, scroll up to the top of the Settings window and click on the “Save” button to apply the changes.
By customizing your calendar view, you can optimize it to display the desired time range and settings relevant to your printing needs. This step ensures that your printed calendar will include the specific events and details you require.
Now that you’ve customized your calendar view, you’re ready to move on to the next step—printing your Google Calendar. In the upcoming section, we’ll discuss the different options and settings available to ensure that your printed calendar meets your requirements.
Step 3: Printing Your Calendar
Now that you’ve customized your Google Calendar view, it’s time to proceed with printing. Follow these steps to print your calendar:
- Click on the three vertical dots located at the top-right corner of the screen. This will open a drop-down menu.
- From the drop-down menu, select the “Print” option.
- A print preview window will appear, allowing you to see how your calendar will look when printed. Take a moment to review the layout and ensure that all the desired events and details are displayed correctly.
- If necessary, you can use the “Zoom” option to adjust the size of the printout.
- Once you’re satisfied with the print preview, click on the “Print” button to proceed.
Depending on your browser and printer settings, you may be prompted to further customize the print settings or choose specific printer options. Make the appropriate adjustments based on your preferences and requirements.
Keep in mind that your printer’s capabilities may vary, affecting the quality and options available for printing. If you want to achieve the best possible results, ensure that your printer is properly configured and up to date.
By following these steps, you’ll be able to print your customized Google Calendar and have a physical copy of your schedule at your fingertips. Whether you need it for personal use, to share with colleagues, or as a backup, printing your Google Calendar can be a valuable solution.
Once you’ve successfully printed your calendar, it’s always a good idea to double-check the output to ensure that all the information and formatting are accurate. In the next step, we’ll discuss how you can review and confirm the printout.
Step 4: Adjusting Print Settings
Before finalizing your Google Calendar printout, it is important to review and adjust the print settings to ensure that the output meets your requirements. Follow these steps to make any necessary adjustments:
- After clicking the “Print” button, you will be presented with the print preview window.
- Take a moment to review the preview and check for any discrepancies or areas that require modification.
- If you notice any issues, such as overlapping events or cut-off text, you can adjust the print settings to address these problems.
- Click on the “More settings” option. This will bring up additional print options.
- In the “More settings” dialog box, you can make changes to various print settings, including the paper size, orientation (portrait or landscape), margins, and scale. Modify these settings as necessary to ensure the best possible printout.
- As you make changes to the print settings, the preview window will update in real-time, allowing you to see the impact of your adjustments.
- If you’re unsure about the optimal settings for your printout, you can experiment with different configurations until you’re satisfied with the result.
- Once you’re satisfied with the print settings, click on the “Print” button to finalize the process.
By adjusting the print settings, you can optimize the output of your Google Calendar printout to match your specific preferences and requirements. This step allows you to address any formatting issues or visual discrepancies that may arise during the print preview.
After adjusting the print settings, move on to the next step to review and confirm the printout for a final check.
Step 5: Reviewing and Confirming Print
Once you have adjusted the print settings, it’s important to review the final printout and confirm that it meets your expectations. Follow these steps to review and confirm your Google Calendar print:
- After initiating the print process and adjusting the settings, your calendar printout will begin.
- Once the printout is complete, carefully examine the printed document for any errors or discrepancies.
- Check for the accuracy of the events, the readability of text, and the overall layout.
- If you notice any issues, such as cut-off events or illegible text, you may need to revisit the print settings and make additional adjustments before printing again.
- If you’re satisfied with the printout, store it in a safe place or distribute it as necessary.
Remember that your printer’s capabilities and the print settings can affect the overall quality of the printout. It’s always a good practice to test your print settings and make adjustments as needed to achieve the desired result.
By reviewing and confirming the print, you can ensure that your Google Calendar printout accurately reflects your schedule and provides a reliable reference for your daily activities. Whether you’re using it for personal use, sharing it with colleagues, or simply creating a backup, a well-reviewed printout can be a valuable tool.
With the completion of the final step, you have successfully printed and reviewed your Google Calendar. Congratulations! You now have a physical copy of your schedule that you can refer to and rely on as needed.
While this guide has covered the process of printing your Google Calendar, it’s worth exploring other features and customizations offered by Google Calendar to further enhance your scheduling and productivity. Take the time to explore and familiarize yourself with the various options available, and make the most of this powerful tool.
Conclusion
Printing your Google Calendar can provide a tangible and convenient way to access and share your schedule. By following the step-by-step process outlined in this guide, you can easily print your customized Google Calendar with accuracy and precision.
Throughout this guide, we discussed the importance of accessing your Google Calendar and customizing the view to ensure that the events and details you want to print are displayed correctly. We then explored the steps involved in printing your calendar and adjusting the print settings to optimize the output.
After printing your calendar, it’s crucial to review the printout and confirm that it meets your expectations. This final step allows you to identify any errors or formatting issues and make necessary adjustments for future prints.
Remember, Google Calendar offers a range of customization options that allow you to tailor the printed output to your specific needs. Experiment with different settings, such as time ranges, view options, and print settings, to achieve the best results.
Whether you’re printing your Google Calendar for personal use, sharing it with colleagues, or creating a backup, having a physical copy can be highly beneficial. It gives you the flexibility to access your schedule offline, refer to it easily, and stay organized in your daily activities.
We hope this guide has been helpful in assisting you with the process of printing your Google Calendar. Make the most of this powerful tool, and enjoy the convenience and accessibility it brings to your scheduling and productivity.
Now it’s time to print your Google Calendar and reap the benefits of having a tangible copy of your schedule. Happy printing!