Introduction
Welcome to the exciting world of monitor overclocking! In this guide, we will explore the concept of overclocking a monitor, its benefits, and the risks involved. If you’re looking to enhance your gaming or multimedia experience by pushing your monitor beyond its factory specifications, then this article is for you.
So, what exactly is monitor overclocking? In simple terms, it refers to increasing the refresh rate of your monitor beyond its default setting. The refresh rate indicates how many times the display updates per second. Most monitors come with a standard refresh rate of 60Hz, meaning they refresh the image on the screen 60 times per second. By overclocking your monitor, you can increase this refresh rate to achieve smoother motion and reduce motion blur.
There are several benefits to monitor overclocking. First and foremost, it can greatly enhance your gaming experience. A higher refresh rate allows for more fluid and responsive gameplay, providing a competitive edge in fast-paced games. Additionally, it can improve the clarity of motion in videos, making them appear more lifelike and immersive.
However, it’s important to note that monitor overclocking does come with its fair share of risks and drawbacks. Overclocking can put additional stress on your monitor, potentially leading to increased heat generation and reduced lifespan. In some cases, it may also void your warranty. Therefore, caution should be exercised, and the process should only be attempted if you fully understand the implications.
In the next sections, we will guide you through the process of overclocking your monitor, step by step. We will cover everything from checking if your monitor is capable of overclocking to troubleshooting common issues. Additionally, we will provide tips and tricks to ensure optimal performance and stability.
So, if you’re ready to take your monitor to the next level and unlock its full potential, let’s dive into the fascinating world of monitor overclocking!
What is monitor overclocking?
Monitor overclocking is the process of increasing the refresh rate of your monitor beyond its default settings. The refresh rate refers to how many times the display updates per second. Most monitors come with a standard refresh rate of 60Hz, meaning they refresh the image on the screen 60 times per second. However, some monitors have higher default refresh rates, such as 144Hz or even 240Hz.
By overclocking your monitor, you can push its refresh rate beyond the factory specifications. This results in a higher number of refreshes per second, which in turn leads to smoother motion and reduced motion blur. The increased refresh rate provides a more fluid and responsive experience, particularly noticeable in fast-paced games and action-packed videos.
To overclock a monitor, you typically need to create a custom resolution and adjust the refresh rate settings. This can be done through specialized software provided by the manufacturer or third-party applications. By experimenting with different refresh rate settings, you can find the optimal balance between smoothness and stability for your monitor.
It’s important to note that not all monitors can be overclocked, and the level of overclocking achievable may vary. The ability to overclock depends on the hardware capabilities of your specific monitor model. High-quality monitors with premium components tend to have better overclocking potential, but it’s always necessary to check the manufacturer’s specifications or user manual.
Overclocking your monitor is a way to push the limits of its performance, but it’s essential to approach it with caution. Excessive overclocking can potentially damage your monitor or lead to instability. Therefore, you should always monitor the temperatures and stability of your monitor while overclocking and revert to the default settings if you encounter any issues.
In the next sections, we will guide you through the process of preparing and overclocking your monitor, step by step. We will also discuss the risks and drawbacks associated with monitor overclocking and provide tips and tricks for optimal performance. So, let’s proceed with the exciting journey of unlocking the full potential of your monitor!
Benefits of monitor overclocking
Monitor overclocking offers several benefits that can greatly improve your visual experience, especially in gaming and multimedia applications. Let’s explore some of the key advantages of pushing your monitor beyond its factory specifications:
- Smoother gameplay: One of the most significant advantages of overclocking your monitor is achieving a higher refresh rate. A higher refresh rate results in smoother gameplay, reducing motion blur and providing a more responsive gaming experience. Actions and movements appear more fluid, giving you a competitive edge in fast-paced games where every millisecond counts.
- Reduced input lag: Overclocking your monitor can help reduce input lag, which is the delay between executing a command and seeing it visually displayed on your screen. By increasing the refresh rate, you can minimize input lag, allowing for quicker reactions and smoother gameplay.
- Enhanced motion clarity: With a higher refresh rate, fast-moving objects and scenes become much clearer and sharper. Monitor overclocking can improve motion clarity, making action sequences in movies or games appear more lifelike and immersive. You’ll be able to appreciate the intricate details of every frame with smoother transitions between images.
- Improved visual quality: Overclocking your monitor can enhance the visual quality of your content. Whether you’re watching high-definition movies, browsing websites, or editing photos or videos, a higher refresh rate can make everything look more vibrant and visually appealing. Colors appear more vivid, and images seem more detailed, resulting in a more enjoyable viewing experience.
- Compatibility with high-performance hardware: If you’ve invested in a powerful gaming rig with a high-end graphics card capable of rendering games at high frame rates, overclocking your monitor can fully utilize the potential of your hardware. By matching the refresh rate of your monitor to the output from your graphics card, you’ll experience a seamless and immersive gaming experience without any visual bottleneck.
It’s important to note that the benefits of monitor overclocking may vary depending on your specific hardware configuration and the demands of the applications you’re using. Not all users may notice a significant difference in performance, especially if their current monitor already has a high refresh rate.
With the potential benefits in mind, it’s time to take a closer look at how you can prepare to overclock your monitor. Let’s move on to the next section, where we’ll discuss the necessary steps and tools you’ll need for a successful overclocking process.
Risks and drawbacks of monitor overclocking
While monitor overclocking can bring numerous benefits to your visual experience, it also comes with some risks and drawbacks that need to be considered. Let’s take a closer look at the potential downsides of pushing your monitor beyond its factory specifications:
- Reduced monitor lifespan: Overclocking your monitor increases the stress on its components, particularly the display panel. This can lead to increased heat generation and potentially reduce the overall lifespan of your monitor. Extended periods of overclocking could result in permanent damage, causing pixels to burn out or the monitor to fail prematurely.
- Increased power consumption: Overclocking often requires your monitor to work at higher frequencies, which can result in increased power consumption. This could indirectly impact your electricity bill over time. However, the difference in power consumption may not be significant, depending on the specific monitor and the extent of overclocking.
- Potential for instability: Overclocking your monitor may introduce instability in certain situations. You may experience screen flickering, artifacting, or other visual anomalies if your monitor is pushed beyond its limits. It’s important to thoroughly test your monitor after any overclocking attempt to ensure stability and check for any irregularities in the display.
- Limited warranty coverage: Overclocking your monitor could potentially void its warranty. Manufacturers typically do not support or endorse overclocking, as it is considered an unofficial modification. Therefore, it’s crucial to understand that any issues that arise from overclocking may not be covered under warranty, and you may be solely responsible for repair or replacement costs.
- Compatibility and functionality issues: Not all monitors are capable of overclocking, and the level of overclocking achievable varies between models. Older or lower-end monitors may not support overclocking at all, while some may have limitations on the maximum refresh rate increase. It’s essential to check the monitor’s specifications and user manual for information on overclocking compatibility.
It’s important to approach monitor overclocking with caution and make informed decisions. Monitoring the temperatures of your monitor during overclocking is crucial to prevent overheating and potential damage. If you encounter any issues or notice instability, it’s recommended to revert to the default settings or adjust the overclocking parameters accordingly.
Now that we’ve explored the potential risks and drawbacks, let’s move on to the next section, where we’ll guide you through the process of preparing your monitor for overclocking. We’ll cover the steps you need to take and the tools you’ll require to ensure a successful and safe overclocking experience.
Preparing to overclock your monitor
Before you jump into overclocking your monitor, it’s important to take a few preparatory steps to ensure a smooth and successful process. Here are the key things you need to do before attempting to overclock your monitor:
- Check if your monitor is capable of overclocking: Not all monitors support overclocking. The ability to overclock depends on the specific model and manufacturer. Consult your monitor’s user manual or visit the manufacturer’s website to verify if your monitor is overclockable.
- Gather the necessary tools and software: To overclock your monitor, you’ll need specific software provided by the monitor manufacturer or third-party applications. Check the manufacturer’s website for any available overclocking tools or software. Research the best software options that are compatible with your monitor model, ensuring a seamless overclocking experience.
- Understand monitor refresh rates: Refresh rate plays a crucial role in overclocking your monitor. Familiarize yourself with the concept of refresh rates and how they affect the visual experience. It’s important to understand that pushing the refresh rate too high can cause instability or potentially damage your monitor. Finding the optimal balance between a higher refresh rate and stability is key.
- Ensure your monitor is properly calibrated: Calibrating your monitor before overclocking is essential to get the most accurate and consistent color representation. Use calibration tools or built-in monitor settings to adjust brightness, contrast, gamma, and color accuracy. This step will ensure that your visuals are not compromised during the overclocking process.
- Backup important settings and profiles: It’s always a good idea to backup any important settings or profiles on your monitor. This includes color profiles, picture presets, and any custom configurations you may have. In case something goes wrong during the overclocking process, you can easily revert to your previous settings and profiles.
Taking these preparatory steps will help you be better equipped and prepared for the overclocking process. It’s crucial to gather all the necessary information and software to avoid any potential issues or complications during the actual overclocking process.
In the next section, we will guide you step-by-step through the process of overclocking your monitor. We’ll cover creating a custom resolution and adjusting the refresh rate settings to achieve the desired overclock. Stay tuned for a detailed walkthrough of the overclocking process!
Checking if your monitor is capable of overclocking
Before attempting to overclock your monitor, it’s important to determine whether your specific monitor model has overclocking capabilities. While some monitors are designed with overclocking in mind, others may not support this feature. Here are a few steps to check if your monitor is capable of overclocking:
- Consult the user manual: Check the user manual that came with your monitor. Look for any information regarding overclocking capabilities or recommended software for overclocking. The manual should provide specific instructions or indications if overclocking is supported.
- Visit the manufacturer’s website: Go to the official website of your monitor’s manufacturer and search for your specific model. Look for the product specifications or technical information section. There, you should find details about the supported refresh rates and any mention of overclocking compatibility.
- Search for online resources: Look for forums, online communities, or websites dedicated to monitor overclocking. These platforms often have discussions and user experiences regarding overclocking specific monitor models. You may find valuable information on whether others have successfully overclocked your monitor type.
- Use specialized overclocking software: Certain monitor manufacturers provide their own software for overclocking their monitors. Check if your monitor manufacturer offers any dedicated overclocking software and download it from their official website. This software may have built-in checks to detect whether your monitor supports overclocking.
- Experiment cautiously: If you cannot find explicit information about your monitor’s overclocking capabilities, you can still attempt to overclock it cautiously. Use third-party software designed for monitor overclocking and start with small increments in the refresh rate. Monitor the display for any irregularities or instability during the test. If you encounter issues, it’s likely that your monitor does not support overclocking.
Remember, not all monitors are capable of being overclocked, and even if your monitor supports overclocking, there may be limitations on how much you can push the refresh rate. It’s crucial to gather as much information as possible about your specific monitor model, as attempting to overclock an unsupported monitor can lead to display issues or potential damage.
Once you have determined that your monitor is capable of overclocking, you can proceed to the next steps of preparing and overclocking your monitor. Stay tuned for the upcoming sections where we will guide you through the necessary tools and steps for successful overclocking!
Gathering the necessary tools and software
Before you can start overclocking your monitor, it’s essential to gather the necessary tools and software. These tools will help you adjust the refresh rate settings and achieve the desired overclock. Here are the key items you’ll need:
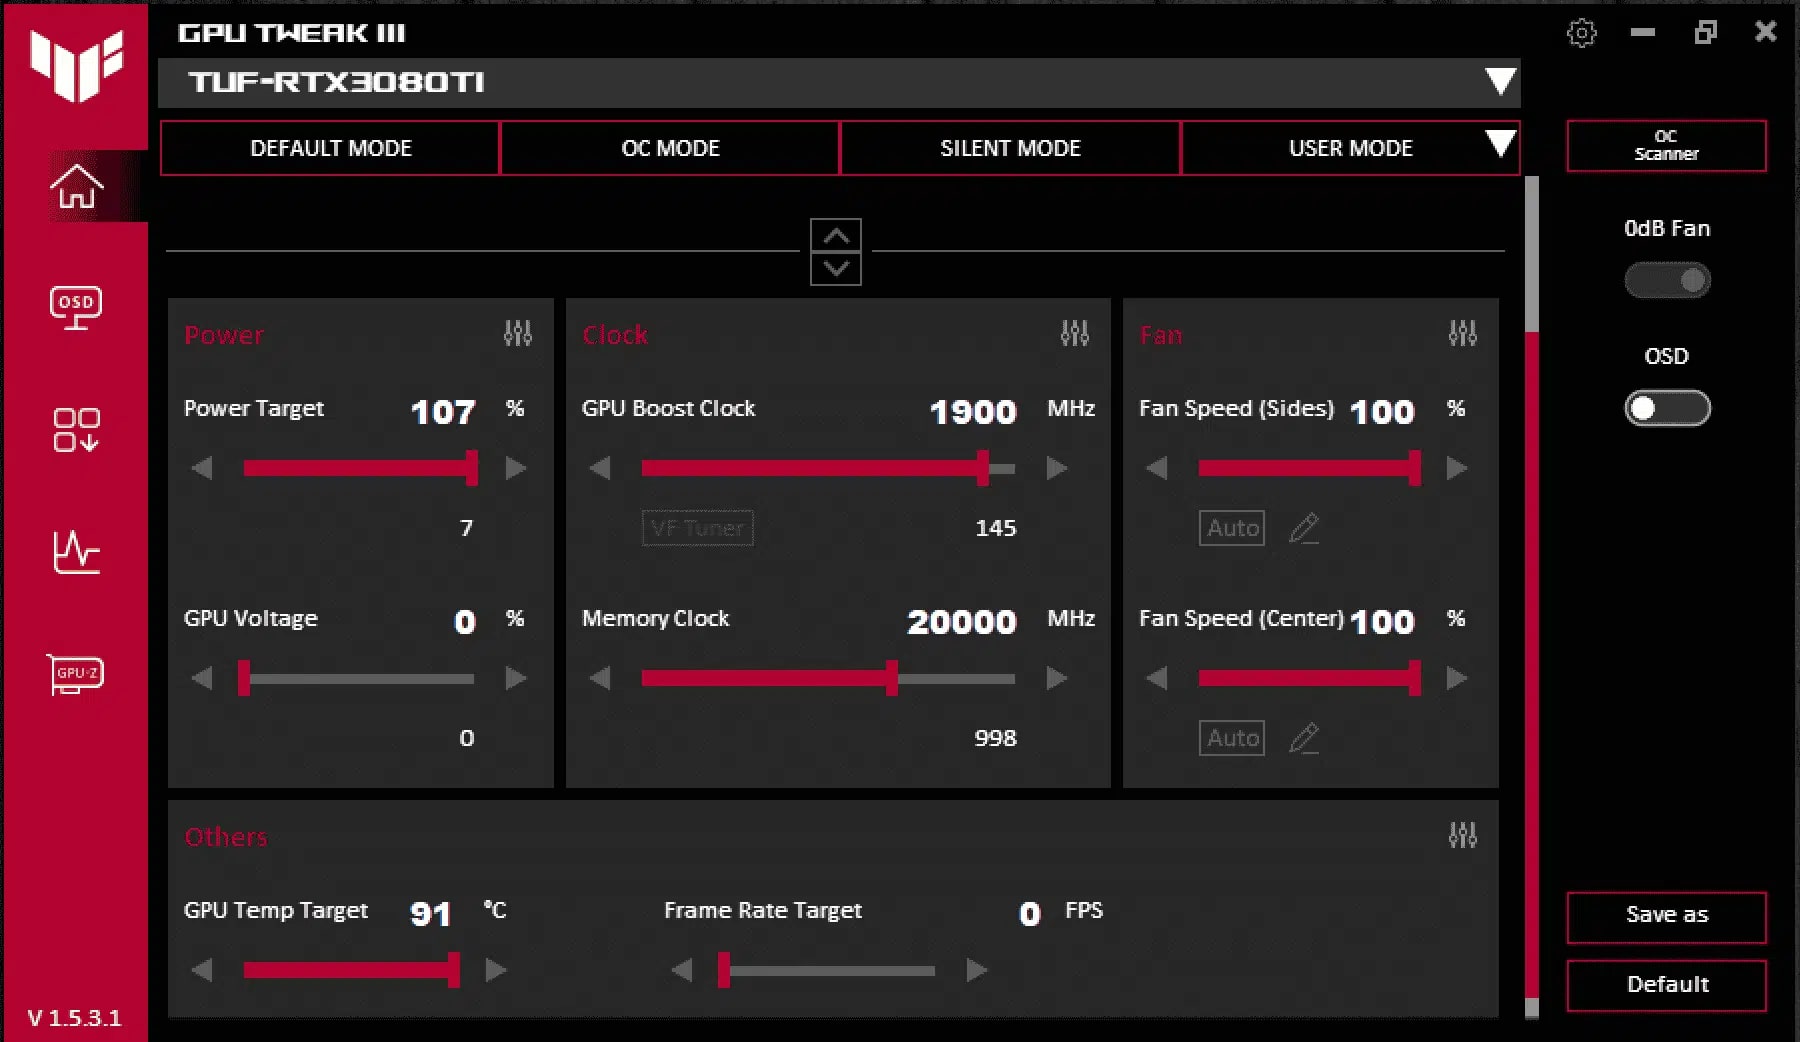
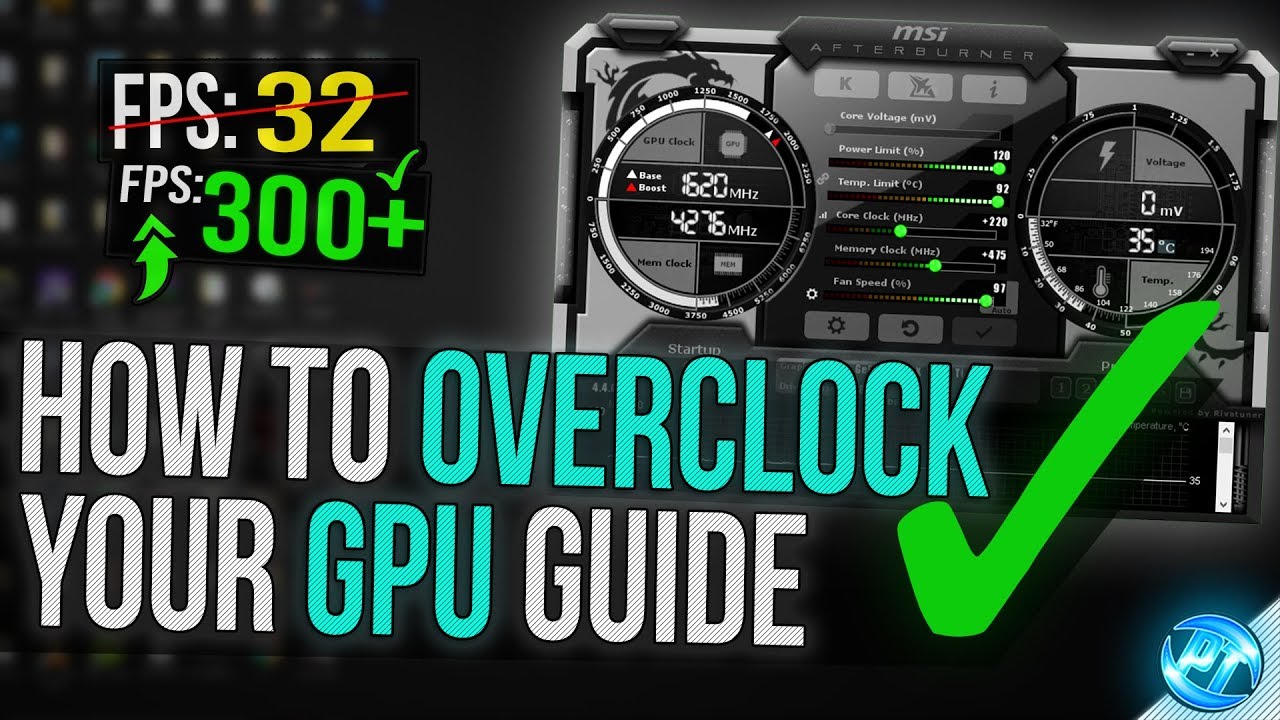
- Monitor overclocking software: Depending on your monitor’s brand and model, you may need specialized software provided by the manufacturer. Check the manufacturer’s website or support page for any available software specifically designed for monitor overclocking. Alternatively, there are third-party software options available that offer overclocking functionality for a wide range of monitor brands and models.
- Graphics card software: Some monitor overclocking software may require you to have compatible graphics card software installed. This software allows you to control the display settings and adjust the refresh rate. Ensure that you have the latest graphics card drivers installed, as they often come with additional software that can help you overclock your monitor.
- Custom resolution software: To overclock your monitor, you’ll typically need to create a custom resolution. Custom resolution software allows you to define a resolution and refresh rate that exceeds the default settings. Some monitor overclocking software may include this feature, or you can use standalone custom resolution tools.
- Benchmarking software: Benchmarking software is not essential for overclocking your monitor, but it can be helpful for testing the stability and performance of your overclocked monitor. These programs allow you to stress-test your monitor and check for any display anomalies or issues that may arise from the overclocking process.
- Backup software: While not directly related to the overclocking process, having backup software on hand is always a good idea. This software allows you to create backups of your monitor settings, color profiles, or any other configurations. In case anything goes wrong during the overclocking process, you can easily revert back to your previous settings.
When choosing monitor overclocking software, make sure to research and choose a reputable option that is compatible with your monitor model. Read user reviews and forums to get insights into the software’s reliability and ease of use.
Gathering these tools and software will equip you with everything you need to take control of your monitor’s refresh rate and achieve the desired overclock. Once you have everything prepared, you can proceed to the next steps of adjusting the refresh rate settings and testing your overclocked monitor. Stay tuned for the upcoming sections where we will guide you through the step-by-step process of overclocking your monitor!
Understanding monitor refresh rates
Before diving into the process of overclocking your monitor, it’s crucial to have a solid understanding of refresh rates and their significance. The refresh rate of a monitor refers to the number of times per second that the display updates with new image data. It is measured in Hertz (Hz). Here are some key points to help you grasp the concept:
Default refresh rate: Most monitors come with a default refresh rate of 60Hz, which means the display updates 60 times per second. This is the standard for many monitors and is considered adequate for general use, such as web browsing and office tasks.
Higher refresh rates: In recent years, monitors with higher refresh rates have become more popular, especially among gamers and multimedia enthusiasts. Higher refresh rates, such as 144Hz or 240Hz, offer smoother motion, reduced motion blur, and more responsive visuals. These higher refresh rates are particularly beneficial in fast-paced gaming where quick reactions are essential.
Overclocking basics: Overclocking a monitor involves increasing the refresh rate beyond its default settings. By adjusting the refresh rate, you can achieve even smoother motion and more responsive visuals. However, not all monitors can be overclocked, and the maximum achievable refresh rate may vary depending on the monitor’s capabilities.
Cautionary considerations: It is crucial to exercise caution when overclocking your monitor. Pushing the refresh rate too high can result in instability, visual artifacts, or even damage to your monitor. It is essential to find the optimal balance between a higher refresh rate and stability. Keep in mind that each monitor has its limits, and what one monitor can handle may vary from another.
Monitor and graphics card compatibility: When overclocking your monitor, ensure that your graphics card can support the desired refresh rate. The output capabilities of your graphics card should match or exceed the targeted refresh rate. Mismatched refresh rates between the graphics card and monitor can lead to syncing issues and visual inconsistencies.
Testing and monitoring: After overclocking your monitor, it’s important to test and monitor its performance. Use benchmarking software or specific monitor testing tools to evaluate the stability and visual quality of your overclocked monitor. Keep an eye out for any abnormalities, such as flickering, artifacting, or screen tearing.
By understanding monitor refresh rates and their implications, you will gain a solid foundation to begin the process of overclocking your monitor. In the next sections, we will walk you through the step-by-step process of creating a custom resolution, adjusting the refresh rate, and testing your overclocked monitor. So, stay tuned and get ready to unleash the full potential of your monitor!
Step-by-step guide to overclocking your monitor
Now that you are familiar with the basics of monitor overclocking and have gathered the necessary tools, let’s dive into the step-by-step process of overclocking your monitor. Follow these instructions carefully to achieve a successful overclock:
- Step 1: Creating a custom resolution: Open the monitor overclocking software you obtained earlier. Look for the option to create a custom resolution. Input the desired resolution and refresh rate. Start with a moderate increase in the refresh rate, such as 65Hz or 70Hz, to test stability initially. Apply the custom resolution.
- Step 2: Adjusting refresh rate settings: Once the custom resolution is applied, navigate to your computer’s display settings. Open the advanced display settings and select the custom resolution you created. Look for the option to change the refresh rate and adjust it to match the desired overclocked refresh rate. Apply the changes.
- Step 3: Testing the overclocked monitor: It’s important to thoroughly test the overclocked monitor to verify its stability and visual quality. Use benchmarking software or specialized monitor testing tools to stress-test the monitor and check for any irregularities or visual artifacts. Monitor the display for flickering, screen tearing, or other abnormalities that may indicate instability or compatibility issues.
- Step 4: Troubleshooting common issues: If you encounter any issues during the testing phase, consider adjusting the refresh rate to a lower value to see if stability improves. It may take some trial and error to find the optimal overclocked refresh rate that provides both stability and improved visual performance. Ensure you monitor the temperatures of your monitor during testing to prevent overheating.
Remember to proceed with caution and take breaks during the testing phase. Continuous extended use of an overclocked monitor may cause increased heat generation and potential damage, especially if the temperatures rise too high. If you experience any major issues or feel uncomfortable with the overclocked settings, it’s advisable to revert to the default settings and consult the manufacturer for assistance.
By following this step-by-step guide, you can successfully overclock your monitor and unlock its full potential. However, it’s important to keep in mind that results may vary depending on your specific monitor model and hardware. In the next section, we will provide you with tips and tricks to ensure optimal performance and stability when overclocking your monitor.
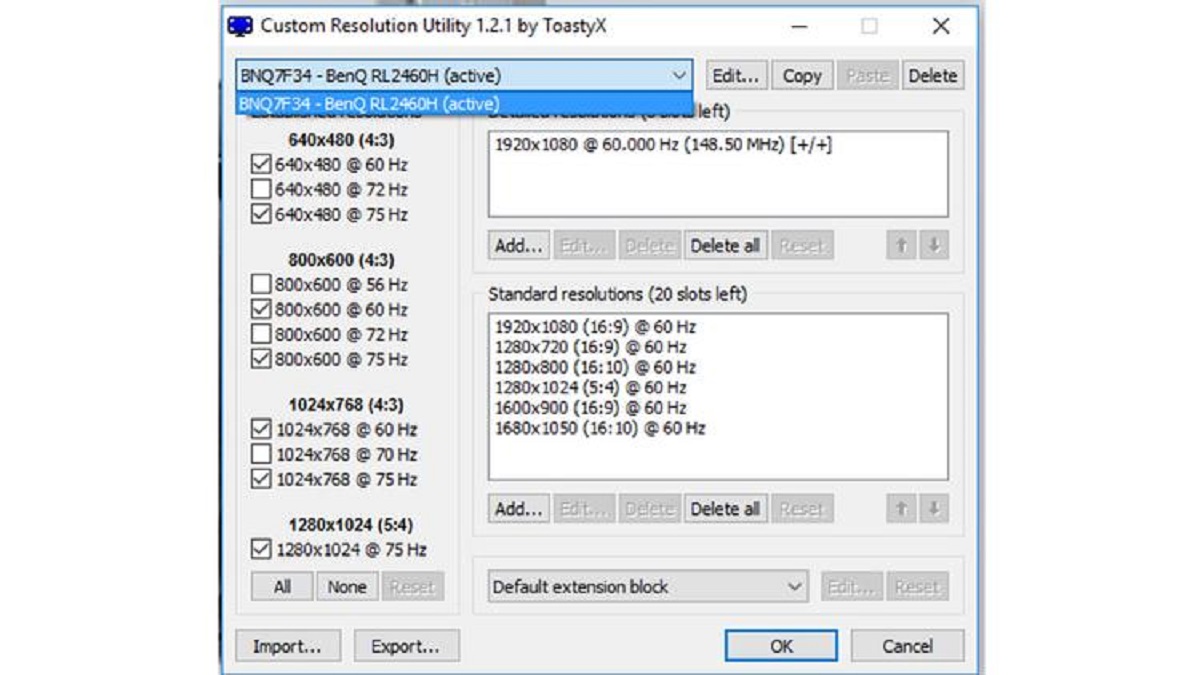
Step 1: Creating a custom resolution
The first step in overclocking your monitor is creating a custom resolution. This process allows you to define a resolution and refresh rate that goes beyond the default settings of your monitor. Follow these steps to create a custom resolution:
- Open the monitor overclocking software: Launch the monitor overclocking software that you have installed on your computer. The software should provide you with options and settings to customize your monitor’s refresh rate.
- Locate the custom resolution settings: Within the software, look for the section or option specifically dedicated to creating a custom resolution. The location and terminology may vary depending on the software you are using, but it is typically labeled as “Custom Resolution” or “Create Custom Profile.”
- Input the desired resolution and refresh rate: In the custom resolution settings, enter the resolution you desire. This can be the same as your monitor’s native resolution or a slightly lower resolution if you prefer. Next, specify the refresh rate you want the monitor to run at. Start conservatively with a small increase from the default refresh rate to ensure stability.
- Apply the custom resolution: After entering the desired resolution and refresh rate, apply the changes. The software will save the custom resolution and make it available for selection in your computer’s display settings.
- Restart the computer: In some cases, a system restart may be necessary for the custom resolution to take effect. Close any open programs and reboot your computer to ensure the changes are applied.
By creating a custom resolution, you are setting the foundation for overclocking your monitor. This customized resolution and refresh rate will allow you to push your monitor beyond its default specifications. However, it’s important to note that the capabilities of your monitor and the maximum achievable overclock will vary, so be cautious when experimenting with higher refresh rates.
In the next step, we will guide you through adjusting the refresh rate settings to match your custom resolution. Stay tuned as we continue with the step-by-step guide to overclocking your monitor!
Step 2: Adjusting refresh rate settings
After creating a custom resolution, the next step in overclocking your monitor is to adjust the refresh rate settings. Follow these steps to ensure your monitor is running at the desired overclocked refresh rate:
- Open display settings: Right-click on your desktop and select “Display settings.” This will open the display settings panel on your computer.
- Access advanced display settings: Look for the option labeled “Advanced display settings” or “Display adapter properties.” Click on it to access additional display settings and configurations.
- Select the custom resolution: In the advanced display settings, find the section where you can choose the resolution and refresh rate. Locate the custom resolution you created in the previous step from the drop-down menu or list of available resolutions. Select the custom resolution to apply it to your monitor.
- Adjust the refresh rate: Once the custom resolution is selected, you will see the option to change the refresh rate. Modify the refresh rate to match the desired overclocked refresh rate you set previously. It’s crucial to select a refresh rate that your monitor can handle without experiencing stability issues. Experiment with small increments initially to find the optimal balance between performance and stability.
- Apply the changes: After adjusting the refresh rate, click on “Apply” or “OK” to save the changes. Your monitor will now run at the customized refresh rate you specified.
- Test the new refresh rate: To ensure the changes are working correctly, test your monitor with the new refresh rate. Check for any abnormalities or visual issues, such as flickering, screen tearing, or artifacts. If you experience any problems, revert back to the default refresh rate or try adjusting the refresh rate to a slightly lower value.
By adjusting the refresh rate settings, you are aligning your monitor’s refresh rate with the custom resolution you created in the previous step. This step is crucial in ensuring that your monitor is running at the desired overclocked refresh rate.
In the next step, we will discuss how to thoroughly test your overclocked monitor for stability and performance. Stay tuned for the upcoming section where we guide you through the testing process!
Step 3: Testing the overclocked monitor
Once you have adjusted the refresh rate settings to match your desired overclocked rate, the next step is to thoroughly test your monitor for stability and performance. Testing is crucial to ensure that your monitor can handle the overclocked settings without any issues. Follow these steps to test your overclocked monitor:
- Use benchmarking software: Install and run benchmarking software designed for testing monitors. These programs often include specific tests to assess stability, image quality, and motion handling. They can help identify any anomalies or issues that may arise from overclocking.
- Check for visual abnormalities: During the testing process, keep an eye out for any visual abnormalities, such as flickering, artifacts, or screen tearing. These issues may indicate instability or compatibility problems with the overclocked settings. If you encounter any problems, consider lowering the refresh rate slightly to improve stability.
- Monitor temperatures: Pay attention to the temperatures of your monitor during testing, especially if you are pushing it beyond its default specifications. Monitor overclocking can generate additional heat, and excessive heat can potentially damage your monitor. Use monitoring software or tools to keep track of the temperature and ensure it remains within safe limits.
- Perform long-term stability tests: Run stability tests for extended periods to simulate real-world usage. This can help identify any intermittent issues or instabilities that may only occur after prolonged use. Monitor the display closely for any signs of degradation or visual inconsistencies over extended testing periods.
- Adjust settings if necessary: If you encounter any significant issues or are not satisfied with the performance of your overclocked monitor, consider adjusting the refresh rate to a lower value. Finding the right balance between performance and stability is crucial to ensure a smooth and reliable experience.
Thoroughly testing your overclocked monitor will help you determine if the settings are stable and suitable for your needs. It’s important to remember that every monitor is different, and the results may vary depending on your specific model and hardware configuration.
Once you are satisfied with the stability and performance of your overclocked monitor, you can proceed with using it in your daily activities. However, it’s recommended to periodically check for any changes in stability or visual quality as you continue to use the overclocked settings.
In the next step, we will provide you with troubleshooting tips to address common issues that may arise during the overclocking process. Stay tuned for the upcoming section!
Step 4: Troubleshooting common issues
During the process of overclocking your monitor, you may encounter common issues that can affect stability or performance. It’s essential to be prepared to troubleshoot these issues effectively. Here are some common problems and potential solutions to help you resolve them:
- Flickering or screen tearing: If you experience flickering or screen tearing, try adjusting the refresh rate to a slightly lower value. This can help improve stability and eliminate visual issues caused by an overly aggressive overclock. Additionally, check that your graphics card drivers are up to date, as outdated drivers can sometimes cause display issues.
- Visual artifacts or distortion: Artifacts or distortion in the display could indicate that the overclocked settings are too aggressive for your monitor. Try lowering the refresh rate further to achieve a more stable configuration. If the artifacts persist, consider reverting to the default refresh rate.
- Monitor instability or crashes: If your monitor exhibits instability or crashes when overclocked, it may be running at a refresh rate that it cannot handle reliably. Lower the refresh rate gradually until stability is restored. Remember to monitor the temperatures of your monitor as excessive heat can also contribute to instability.
- Compatibility issues with applications or games: Some applications or games may not be compatible with an overclocked monitor. If you encounter compatibility issues, consider running those applications or games at the default refresh rate or adjusting the refresh rate specifically for those applications using software that allows per-application settings.
- Reverting to default settings: If you encounter persistent issues or are not satisfied with the overclocked performance, it’s always an option to revert to the default refresh rate. This will restore your monitor to its original settings and ensure stability.
Keep in mind that troubleshooting is a process of trial and error. It may take several attempts to find the optimal overclocked settings that provide both performance and stability. Be patient and open to adjusting the settings as necessary.
If you continue to experience issues or are unsure about the changes made to your monitor, it’s wise to consult the manufacturer’s support resources or community forums for further assistance. They can provide specific guidance based on your monitor model and offer additional troubleshooting tips.
With troubleshooting strategies at your disposal, you can address any common issues that arise during the overclocking process. Stay vigilant and adjust the settings as needed to achieve a stable and optimal overclocked experience with your monitor.
In the next section, we will share some tips and tricks to help you maintain stability, find the maximum achievable refresh rates, and calibrate your monitor settings for optimal visual performance. So, stay tuned for the upcoming section!
Tips and tricks for optimal monitor overclocking
To ensure optimal performance and stability when overclocking your monitor, consider the following tips and tricks:
- Maintaining stability and monitoring temperatures: Pay close attention to the temperatures of your monitor during overclocking. Excessive heat can lead to instability or even damage to your monitor. Monitor temperatures using specialized monitoring software and ensure they remain within safe limits. Adequate cooling and ventilation can help maintain stability during overclocking.
- Finding the maximum achievable refresh rate: Experiment gradually with increasing the refresh rate to find the maximum stable overclock for your monitor. Start with small increments and thoroughly test after each adjustment. Keep in mind that not all monitors can achieve significant increases in refresh rate, and the maximum stable overclock varies from monitor to monitor.
- Calibrating your monitor settings: Overclocking your monitor may impact color accuracy or other visual settings. Consider calibrating your monitor after overclocking to ensure optimal image quality. Use calibration tools or built-in monitor settings to adjust brightness, contrast, gamma, and color accuracy. This step will help achieve accurate and pleasing visuals.
- Experimenting with different refresh rates: While higher refresh rates can provide smoother motion, it’s worth trying different refresh rates to find the sweet spot that balances performance and stability for your specific needs. Sometimes a slightly lower refresh rate can still provide a noticeable improvement without sacrificing stability.
- Regularly checking for driver updates: Keep your graphics card drivers up to date. New driver releases often include optimizations and bug fixes that can enhance stability and performance during monitor overclocking. Check the graphics card manufacturer’s website regularly for driver updates and install them as needed.
- Backing up settings and profiles: Before making any changes to your monitor’s settings, it’s wise to create backups of your current settings and profiles. This allows you to easily revert back to your preferred configuration if any issues arise during the overclocking process. Backing up settings helps safeguard against accidental changes or instability.
Implementing these tips and tricks will help you achieve optimal results while overclocking your monitor. Remember that stability, safety, and visual quality should be priorities throughout the process. Focusing on these aspects will ensure a positive overclocking experience and help you get the most out of your monitor.
With these recommendations in mind, you are ready to embark on the journey of overclocking your monitor. Be patient, take the time to test and adjust the settings, and enjoy the enhanced visual experience that overclocking can bring!
Maintaining stability and avoiding damage
When overclocking your monitor, it’s crucial to prioritize stability and take steps to avoid potential damage. Here are some important guidelines to maintain stability and protect your monitor during the overclocking process:
- Monitor temperatures: Monitor the temperatures of your monitor throughout the overclocking process. High temperatures can lead to instability or even permanent damage. Use monitoring software to keep track of the temperature and ensure it remains within safe limits. Adequate cooling, proper ventilation, and avoiding overclocking to extreme levels can help prevent overheating.
- Incremental adjustments: When increasing the refresh rate, make incremental adjustments to find the optimal overclock for your monitor. Start with small increments, test for stability, and gradually increase until stability is compromised. Pushing the refresh rate too high can introduce instability, flickering, or other visual issues. Find the balance between performance gain and stability.
- Monitor for visual abnormalities: Watch for any visual abnormalities, such as flickering, screen tearing, or artifacts during testing. If you notice these issues, lower the refresh rate slightly to improve stability. Visual abnormalities can occur if the overclocked settings exceed the capabilities of your monitor or if your graphics card is struggling to keep up.
- Revert to default settings if needed: If you encounter persistent stability issues or are not satisfied with the overclocked performance, consider reverting back to the default settings. This will ensure stability and minimize the risk of damage to your monitor. It’s always better to have a stable monitor than to push it beyond its limits at the expense of reliability.
- Backup your original settings: Prior to overclocking, it’s advisable to backup your original monitor settings. This includes color profiles, picture presets, and any other custom configurations. This allows you to easily revert to your preferred settings if needed, preventing the loss of your preferred configurations and providing a fallback option in case of instability.
- Avoid prolonged stress: Overclocking your monitor puts additional stress on its components. Extended periods of overclocking, particularly with inadequate cooling, can result in long-term damage. Avoid continuously running your monitor at maximum overclocked settings for extended periods and take breaks to allow your monitor to cool down.
By following these guidelines, you can maintain stability and protect your monitor from potential damage during the overclocking process. Remember, stability is paramount, and it’s important to find a balance between performance enhancement and the limitations of your specific monitor model.
In the next section, we will provide additional tips for finding the maximum achievable refresh rate and calibrating your monitor settings to optimize visual performance. Stay tuned for the upcoming section!
Finding the maximum achievable refresh rate
When overclocking your monitor, one of the primary goals is to find the maximum achievable refresh rate that your monitor can handle reliably. This maximum refresh rate will vary depending on the specific model and hardware configuration. Here are some tips to help you find the maximum achievable refresh rate:
- Incremental adjustments: Start by making small incremental adjustments to the refresh rate. Begin with a slight increase, such as 5Hz or 10Hz, above the default refresh rate. Test for stability after each adjustment to determine if your monitor can handle the increased rate without causing any issues.
- Stress testing: Use benchmarking software or specialized monitor testing tools to stress test your monitor at each new refresh rate setting. These tests evaluate the stability and performance of your monitor under heavy load. Monitor the display closely for any visual abnormalities, artifacts, or flickering that may occur during stress testing.
- Monitor temperatures: During stress testing, keep a close eye on the temperatures of your monitor. Overclocking can increase heat generation, potentially leading to instability or damage. Make sure your monitor remains within safe temperature ranges. If necessary, adjust your cooling setup or reduce the refresh rate to keep temperatures under control.
- Balancing stability and performance: As you incrementally increase the refresh rate, be mindful of maintaining stability. If you encounter any instability or visual abnormalities, it’s a sign that the current refresh rate is too high for your monitor to handle reliably. Consider lowering the refresh rate slightly to find the optimal balance between performance gain and stability.
- Trial and error: Finding the maximum achievable refresh rate may require some trial and error. It’s possible that your monitor may have a lower limit or may not be capable of achieving significant overclocking gains. Be patient and adjust the refresh rate gradually, testing and monitoring at each step until you reach a stable and satisfactory overclocked refresh rate.
Remember that the maximum achievable refresh rate will vary from monitor to monitor. Factors such as the quality of the panel, the internal capabilities of the hardware, and cooling efficiency can all affect the potential overclock. Thus, it’s important to understand the specifications and limitations of your specific monitor model.
By following these tips and finding the maximum achievable refresh rate, you can push your monitor to its limits while maintaining stability and avoiding potential damage. In the next section, we will discuss the process of calibrating your monitor settings to optimize the visual performance and color accuracy. Stay tuned for the upcoming section!
Calibrating your monitor settings
After overclocking your monitor, it’s important to calibrate its settings to optimize visual performance and color accuracy. Calibrating your monitor ensures that the colors and properties of the displayed content are accurate and consistent. Here are some steps to help you calibrate your monitor settings:
- Adjust brightness and contrast: Start by adjusting the brightness and contrast settings on your monitor. These settings affect overall luminance and the ratio between dark and light tones. Use calibration tools or built-in monitor settings to achieve a balance that is comfortable for your eyes and suitable for your viewing environment.
- Set gamma levels: Gamma represents the relationship between input signal levels and the brightness of your monitor’s display. It helps maintain accurate representation of mid-tones. Adjust the gamma settings to achieve a proper balance and ensure that the gradient from dark to light shades is correctly reproduced.
- Color temperature adjustment: Color temperature determines the warmth or coolness of your screen’s whites. Adjusting the color temperature can significantly impact the appearance of colors on your monitor. Use calibration tools or built-in monitor settings to achieve a color temperature that suits your preferences or the requirements of your work.
- Color accuracy and saturation: Use calibration tools or test patterns to verify the color accuracy and saturation of your monitor. Adjust the color settings, such as hue, saturation, and color balance, to achieve accurate and vibrant colors. It’s important to strike a balance between vibrancy and accuracy, ensuring that colors are pleasing and true to the intended representation.
- Test with reference images: Utilize reference images or test patterns designed for monitor calibration. These images often include color gradients, skin tones, and other elements that help you evaluate the accuracy of your monitor’s color display. Compare the displayed colors to the reference images and make adjustments as needed.
- Consider software calibration tools: Software calibration tools can provide a more precise and comprehensive calibration process. They allow you to adjust advanced settings, generate ICC profiles, and fine-tune color accuracy. Research and utilize software tools that are compatible with your specific monitor and offer a high level of customization.
Calibrating your monitor settings ensures that the visuals are accurate, consistent, and pleasing to the eye. It enhances your experience by providing true representation of colors and optimizing the overall image quality delivered by your monitor.
Keep in mind that calibration is subjective and dependent on personal preferences, the lighting conditions in your environment, and the nature of your work. Experiment with different settings and reference images to find the calibration that best suits your needs.
With your monitor settings properly calibrated, you can fully enjoy the benefits of overclocking while ensuring accurate and vibrant visuals. In the next section, we will provide some additional tips to help you maximize the performance and longevity of your overclocked monitor. Stay tuned!
Conclusion
Congratulations! You have now learned the ins and outs of overclocking your monitor. By increasing the refresh rate beyond its default settings, you can achieve smoother motion, reduced motion blur, and an enhanced visual experience. However, it’s important to approach monitor overclocking with caution and prioritize stability and safety throughout the process.
To successfully overclock your monitor, remember to take the following steps:
- Check if your monitor is capable of overclocking.
- Gather the necessary tools and software for the overclocking process.
- Create a custom resolution and adjust the refresh rate settings.
- Thoroughly test the overclocked monitor for stability and performance.
- Troubleshoot common issues that may arise during overclocking.
- Maintain stability, monitor temperatures, and avoid prolonged stress on your monitor.
- Find the maximum achievable refresh rate for your specific monitor.
- Calibrate your monitor settings to optimize visual performance and color accuracy.
Remember, the process of overclocking your monitor may differ slightly depending on your specific hardware and software. Be sure to consult the user manual, manufacturer’s website, and community forums for any specific guidelines or troubleshooting steps tailored to your monitor model.
By following the tips and tricks provided in this guide, you can maximize the performance and longevity of your overclocked monitor. Remember to regularly check for driver updates, backup your settings, and periodically reassess the stability and visual quality of your overclocked settings.
Overclocking your monitor can be a thrilling and rewarding endeavor, offering a smoother and more immersive visual experience. However, it’s crucial to balance performance gains with the limitations and capabilities of your specific monitor. Take your time, experiment gradually, and prioritize stability to ensure a successful and enjoyable overclocking experience for your monitor.
Now, armed with this knowledge, go ahead and unlock the full potential of your monitor. Happy overclocking!